
As you explore all the various biomes in Minecraft, you might be on the lookout for a village, which is indicated by a close-knit group of small house-like buildings. Knowing how to find one is an incredibly important tip for new players, just like learning how to make a portal or how to use the console commands. There's a lot of things you can do with a village, including breeding its villagers, but if you need to know how to find them and what you can expect when you arrive, we'll help fill in your map.

What is a village?
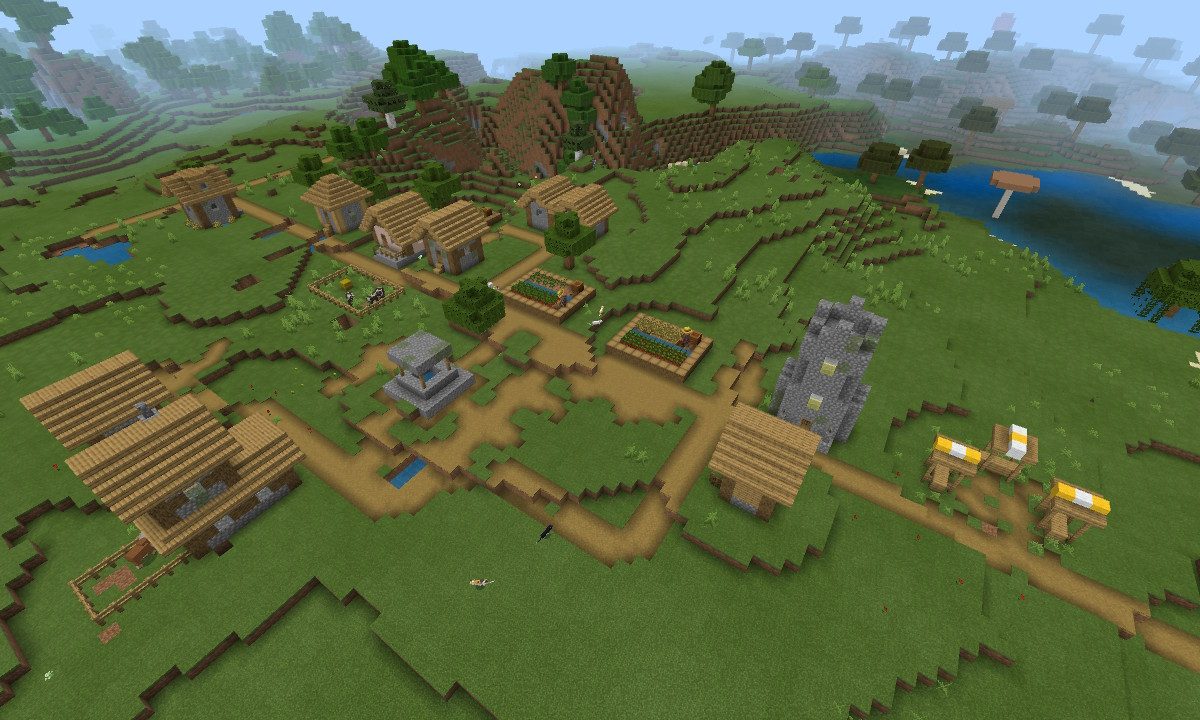
A village is a small cluster of buildings that contain inhabitants like traders, as well as animals such as sheep and cats. You can think of them as small neighborhoods, communities, or towns that include useful items for you to find. Villages are randomly generated, just like the rest of the game, so finding one isn’t as simple as heading to a predetermined location. Exploring can get lonely at times, making villages feel novel when you stumble upon one. Aside from that, they usually contain loot and other goodies to make use of, so it’s a good idea to pay one a visit, whether you’re in Survival or Creative mode. The hardest part is finding them.

How to find a village
Villages spawn randomly throughout the world, and as far as we can tell, at least one will always spawn in each world. It’s possible that more than one village can spawn, as well. While there isn’t a precise, full-proof method to find a village (other than using console commands, which we’ll get to shortly), there are things you can do to make them easier to track down.
For starters, these are the biomes that typically contain villages:
- Dessert
- Plains
- Sunflower plains (Bedrock Edition only)
- Savanna
- Taiga
- Taiga hills (Bedrock Edition only)
- Snowy taiga (Bedrock Edition only)
- Snowy taiga hills (Bedrock Edition only)
- Snowy tundra
We also discovered that villages tend to spawn near water, so be on the lookout for bays and beaches. It’s recommended to skip searching the mountaintops, jungles, and areas with thick, heavy forests. Villages are small, but they still need some room to spawn, which is why it’s best to avoid looking for them in areas that are crammed.
In Survival mode, the best way to find a village is to visit a high point and look off into the distance. In Creative mode, the same concept applies, but you can fly up to the clouds to get a better look. With that being said, a good rule of thumb is to jump into the Settings, then head to Video, and go down to Render Distance. Here, you should increase it to its maximum, which will improve the game’s draw distance, making it easier to see areas from far away. Your experience with this feature will vary depending on the machine you’re on. High-end PCs will be able to render much more at any given time than a Nintendo Switch or mobile device.
The other way to easily find a village is by typing in the following console command: /locate Village
Doing so will show you the nearest village’s coordinates on-screen, which you can follow to the exact location of it. Again, this will be different for each world. If you’re having trouble finding a village, regardless of which mode you’re in, you can create a new world or type in a preferred seed to generate a specific world you enjoy.

What you get for finding a village
When you finally get to a village, keep in mind that they will look different depending on the territory they’re in. For example, a village in the Taiga biome will feature buildings with spruce log roofs, while one in the dessert will appear to be made completely of sand.
Villages contain lots of goodies, which are, again, randomized. This means you could end up with anything from rare to common items, but you’ll always get something. Villages are home to traders, who you’ll definitely want to visit and complete their requests. In the village we found, we stumbled upon a brewing stand and blacksmith. Just make sure you visit each of the houses to see what you can find. Chests are abundant in villages, as well as beds, which you can use to set your spawn point. Possible loot found in villages includes beef, wheat, emerald, coal, paper, maps, and a slew of other items.
You can also impact your popularity at a village, depending on your actions. For example, killing villagers will lower your popularity rating, while trading with a villager will increase your rating. Below is a specific popularity chart, courtesy of the Minecraft wiki:
- Hero of the Village - +10
- Upgrading a Villager to Expert/Master - +4
- Upgrading a Villager to Journeyman - +3
- Upgrading a Villager to Apprentice - +2
- Trading with a villager for the last offer slot on their list - +1
- Attacking a villager - -1
- Killing a villager - -2
- Attacking a villager child - -3
- Killing a villager child - -5
- Killing a village’s iron golem - -10
Villages have a small chance of spawning as Zombie Villages, in which you’ll find zombies instead of the regular inhabitants. There are no doors or lights in Zombie Villages, and the overall vibe is spooky. In the Java Edition, there is a 2% chance of these spawning, but in the Bedrock Edition, it’s “about” 30%, according to the Minecraft Wiki.
Events can occur at a village, too, such as Raids or Zombie sieges. A Raid occurs when you kill a Raid Captain, which will trigger the Bad Omen status. Upon entering a village with this status, the raid will begin. Zombie sieges have a 10% chance of occurring after midnight or during thunderstorms, as long as the village has 20 beds. A Zombie siege, as the name suggests, involves zombies infiltrating the village, whereby you’ll need to defend it and protect the villagers.
As you can see, a village is much more than just a cluster of houses. Depending on your luck, they can vary in size and can feature incredibly rare loot for you to take advantage of.


