
Where to find all Great Fairies in Zelda: Tears of the Kingdom

The Great Fairies have been in most Zelda titles since the very beginning, so it should come as no surprise that they once again appear in The Legend of Zelda: Tears of the Kingdom. These friendly spirits have offered many different types of aid to the hero of time in his adventures, such as teaching him new magic, upgrading his equipment, and unlocking new abilities. With the world of Hyrule now bigger than ever, the Great Fairies are more difficult to find than ever.

If you need help tracking down all the Great Fairies in Tears of the Kingdom and want to know what they do, we’ve got you covered.

What Great Fairies do

A great fairy leans over a small man.
Image used with permission by copyright holder

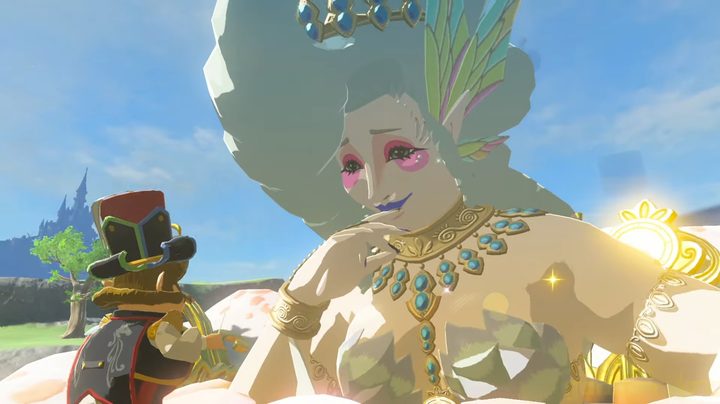
Just like in The Legend of Zelda:Breath of the Wild, each Great Fairy will allow you to upgrade a piece of armor. Every individual piece you have will come with an associated cost of both raw materials and Rupees. If you want to upgrade your armor more than once, not only will the costs go up, but you will need to visit a different Fairy to do it. So, if you want to bring any of your armor sets to max level, you will need to locate all four of them. The upside is that, again like the prior game, what order you visit the Fairies in doesn’t matter.

Where to find all Great Fairies

Finding a Great Fairy is only the first step in taking advantage of their services. Before you can access them, you will need to complete some sidequests, starting with “Potential Princess Sightings!”

Great Fairy Tera

A map to the Lucky Clover Gazzette.
Image used with permission by copyright holder

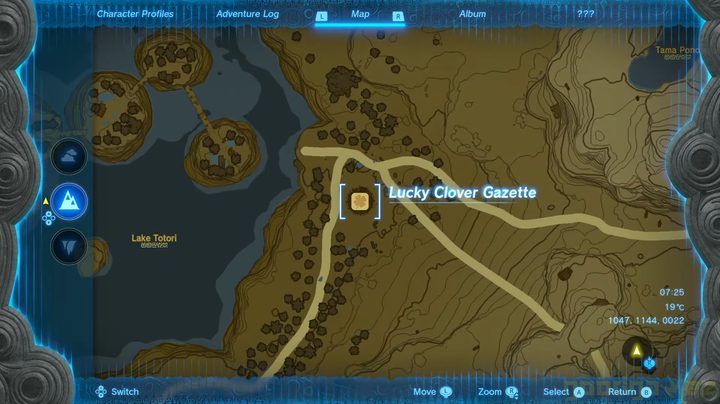
Head to the Lucky Clover Gazette located east of Lake Totori at coordinates -3251, 1772, 0118 and talk to Traysi under the stables. After chatting and getting the quest, you now need to go to the Woodland Stables at 1046, 1145, 0022 and speak to Penn to officially begin the “Serenade to a Great Fairy” quest.

Your first task of fixing the carriage is simple enough: just use your Ultrahand to attach some nearby wheels and call it a day. Next, you will need to get a horse and harness to attach to the carriage, which will require two Pony Points to get from the stable. When the carriage is all set, ride it along the path, taking the first two left turns directly to the Great Fairy’s flower-pod thing and let the musicians call her out with their music.

Great Fairy Kaysa

A map showing the great fairy location.
Image used with permission by copyright holder

Kaysa is located at the Outskirt Stable at coordinates 1404, -1266, 0032. This time, you need to find the flutist named Pyper. Cutting to the chase, she’s southeast of Lake Hylia at coordinates 0519, -3423, 0047, and she needs 10 Sunset Fireflies from you. Hand them over and then go to Haite at night to lead her back to the now glowing tree.

Once again, you need to help bring the entire band to the fairy. The road is blocked, so you need to build up a large cart to carry the wagon on and drive over the obstacle to the Great Fairy.

Great Fairy Cotera

A map showing the great fairy location.
Image used with permission by copyright holder

For Cotera, we’re heading down southwest of Necluda at the Dueling Peaks Stable, with the coordinates of 1757, -1957, 0010. From here, head south of Kakariko to find your musician friends once again, who are now looking for their drummer, Beetz. This will kick off the “Serenade to Cotera” quest.

To cut your search short, Beetz is located at the coordinates 2166, -1382, 0108 next to Lake Siela. Beetz is trying to make honey crepes, but lacks Courser Bee Honey to make them, leaving it to you to collect some. If you have some, hand it over, otherwise you will need to collect three honeycombs from around the map.

Now that he’s reunited with his band, your next task is to build a boat to take them across the river. Use the conveniently placed materials to make a raft large enough to carry them and their wagon, put a fan on it, and place everything aboard. Successfully ford the river to the island to the north to get another performance that summons Cotera from the flower.

Great Fairy Mija

A map showing the great fairy location.
Image used with permission by copyright holder

Our last Great Fairy is in the chilly Snowfield Stable at coordinates -1630, 2587, 0234. This time, the musicians are looking for their horn player named Eustus. As usual, you can find him at -3658, 0760, 0117 deep in a hole.

Find him stuck inside and use your Ultrahand to help carry Eustus and his wagon up and out and meet up with the band back at the stables. You need to use a horse and harness once again to pull the carriage ahead, but make sure to add a roof to it first to keep the snow off them. Navigate to the final fountain to meet Mija.

Editors' Recommendations

Jesse Lennox
Jesse Lennox loves writing, games, and complaining about not having time to write and play games. He knows the names of more…
Where to find the Black Marketeer in Palworld
The black marketeer in Palworld.

Guns aren't the only darker subject matter Palworld takes on that may surprise those who see it as just a Pokemon clone. Beyond collecting Pals and resources like Ancient Civilization parts to craft buildings, you will also be able to procure some rather dubious items, such as people. While you can put them to work for you, there is an entire network of black market sales that you can participate in that can be very lucrative if you don't mind doing some morally grey business deals. If you're ready to participate in the dark underbelly that is Palworld, here is where you can find all the Black Marketeers to buy and sell rare items.
All Black Marketeer locations
There are five different Black Marketeers to find hidden in the wilds of Palworld. They are all well-hidden, and some you won't be able to reach until later in the game, but thankfully all seem to buy and sell the same stock at the same prices. Note that they do have a limited stock of items for sale, but will refresh if you leave and come back after some time.
Abandoned Mineshaft

From the Desolate Church fast travel point, head west to find the Abandoned Mineshaft location. Venture into the mine and you will run into the first Black Marketeer dead ahead.
PIDF Tower Entrance

Read more
All Ancestor Skill locations in Avatar: Frontiers of Pandora
An Ikran flies towards a ship in Avatar: Frontiers of Pandora.

After being raised by humans up until the start of Avatar: Frontiers of Pandora, your Na'vi has a lot to learn about where they come from and their lost heritage. Part of that is learning how to actually survive and navigate Pandora, but another major aspect is learning new skills. You have your standard five skill trees to invest points into, as well as a set of 12 Ancestor Skills that you can't get by normal means. These skills are far more meaningful when it comes to adding new gameplay options, and can only be obtained by hunting down specific plants to connect with on the map. It's a big world out there, Na'vi, so call your ikran (a dragon-like creature) and we'll guide you through the wilds to the location of every Ancestor Skill.
Where to find all Ancestor Skills
You will get the first Ancestor Skill early on in the game as part of the main story, which unlocks a short double-jump ability. The remaining 11 are completely optional as to whether or not you go out of your way to find them. We recommend waiting until you get your ikran before going after any skills other than the first as the ability to fly will not only make the process infinitely easier, but some skills can't be reached without it.

1. Eject
Eject makes short work of those dangerous RDA soldiers piloting power armor suits by letting you rip them right out of the cockpit. You do have to get close enough to do it, though, so be careful.
2. Drop Impact
Melee attacks are already strong considering you're a giant Na'vi, but you can make them downright deadly with this skill. Any jumping attack you do gets a damage multiplier, up to a maximum of 3, depending on how fast you're running when you melee in the air. As a nice little cherry on top, any nearby enemies also get staggered when you pull off this move.
3. Deeper Connection
Get in touch with your ikran and strengthen your bond, which gives it more stamina for whatever reason.
4. Soft Landing
Falling to your death is a real concern on Pandora. You're constantly climbing trees, mountains, and even floating islands. While it won't save you from a fall from the latter, Soft Landing lets you slide after a long fall to avoid breaking a leg.

Read more
Where to find the Ghost Medal in Super Mario RPG
Mario sleeping in a bed.

One of the best aspects of Super Mario RPG is how beginner-friendly it is as an RPG. You don't have a ton of stats to manage, and your weapons and equipment are mostly linear upgrades outside of some secrets. Accessories are the most interesting ways you can customize your party, allowing you to add unique attributes. The Ghost Medal is one of the strongest of these. but it's tucked away in a hidden corner of the game. It's no time for a nap, so let's go over how to get the Ghost Medal in Super Mario RPG.
How to get the Ghost Medal

The Ghost Medal can be found only after you've reached Monstro Town, which is a good way into the game. Once here, enter the house directly to the right of the Item Shop, turn off the mushroom light, and rest in the bed. While sleeping, the Three Musty Fears will appear around Mario and tell him clues as to where their flags are. By collecting them all, you will earn this accessory. Here's where to find them:

Read more