
With improved noise cancellation and sound quality, the second-generation Apple AirPods Pro are one of the best sets of earbuds on the market. From Personalized Spatial Audio and world-class active noise cancellation (ANC) to the smaller things like extra-small eartips and case customization, the AirPods Pro 2 have a lot to offer. With so many features to experiment with, it's possible you're missing out on a little-known feature or two. But not anymore!
We have rounded up all the best AirPods Pro 2 tips and tricks so you can make the most out of your new earbuds.
Improve noise cancellation with better-fitting eartips
The AirPods Pro 2 already offer excellent active noise cancellation, but you can get even better results by choosing the best-fitting eartip size. The pack comes with four sizes: extra small, small, medium, and large. Choosing the best fit among these is important to ensure the earbuds create a tight seal in your ear and no background noise seeps in.
Fortunately, this is fairly easy to do with the Ear Tip Fit Test. We already have an in-depth tutorial on how to perform the Ear Tip Fit Test, and here are the steps in short.
Step 1: Connect your AirPods Pro to your iPhone.

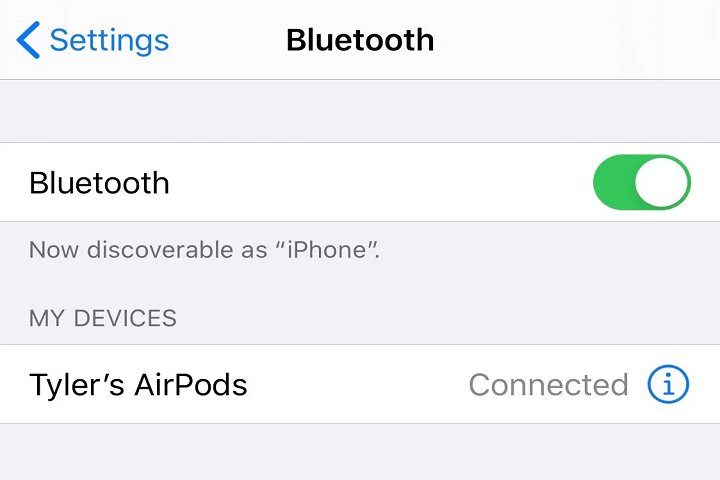
Step 2: Wear your earbuds. Then, go to your iPhone's Settings and turn on Bluetooth.
Step 3: Select the "i" icon next to your AirPods Pro 2.
Step 4: Select the Ear Tip Fit Test option and click on the Blue start button to begin. The program will take it from here.
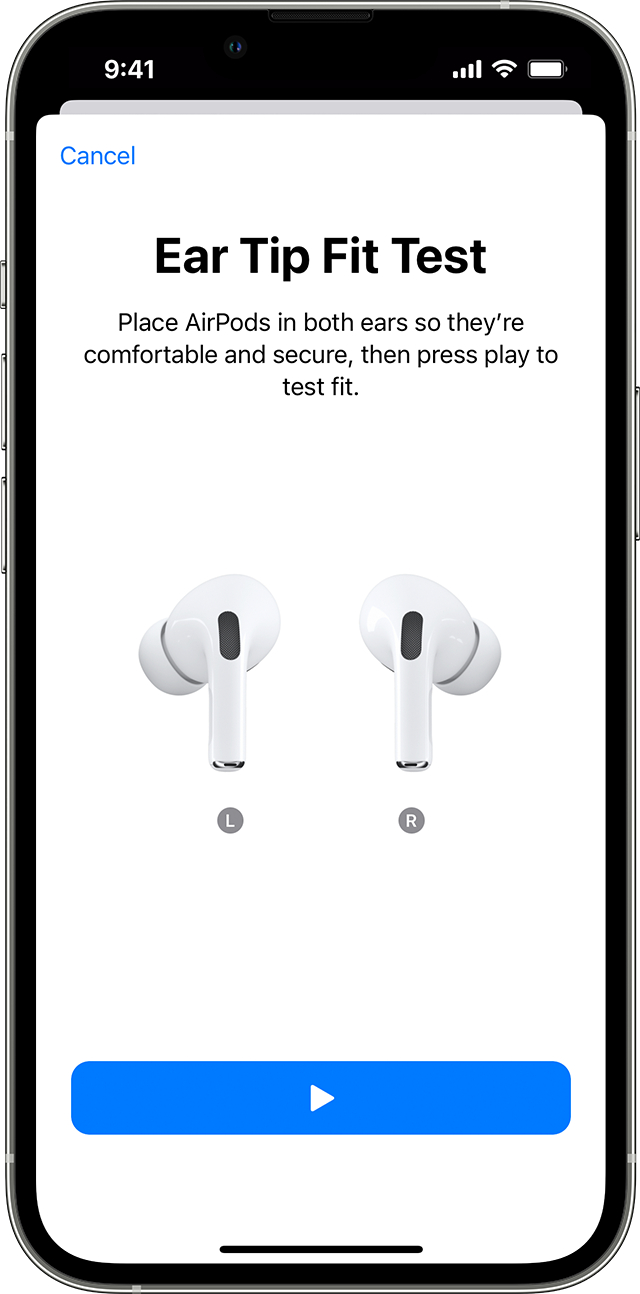
Step 5: If the results say "good seal," you have found the perfect tip size for you, and you can continue using it. If the results say "Adjust," you may want to repeat the process after adjusting the earbud position or working with different eartip sizes.

Learn the touch controls and gestures
If you're using AirPods for the first time, it can help to familiarize yourself with all the available touch controls and gestures. These will make it easy for you to adjust music, take calls, and switch noise-control modes on the go.
Step 1: Swipe up and down the stem to increase and decrease the volume.

Step 2: Press the Touch control on the stem once to play and pause the song. The same action can also be used to answer an incoming call.
Step 3: Press the Touch control on the stem twice to skip the song or send the call to voicemail.
Step 4: Press the earbud three times to play the previous song.
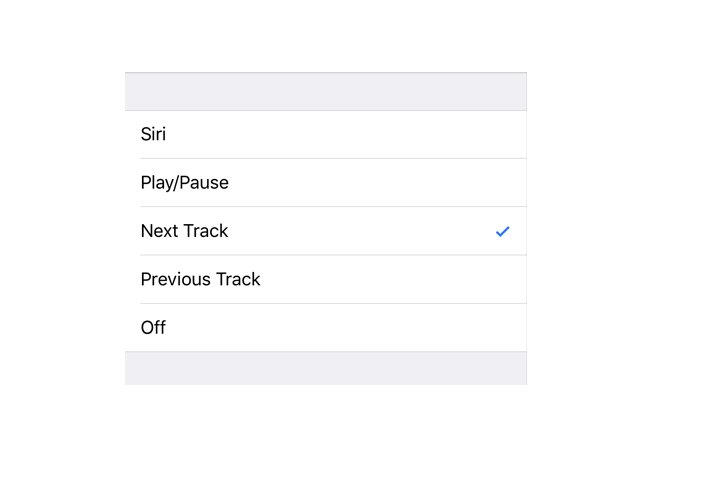
Step 5: You can also set up custom controls by going to Settings > [Name of your AirPods[ > Left and Right earbud control options.

Step 6: Now you can assign any action to be activated by tapping either the left or right earbud stem. You can set up Siri (more on that below), play/pause the song, and skip songs, depending on which features you use most often.
Use Siri for hands-free control
If you're riding a bike, eating a meal, or working with your hands, you can control your AirPods Pro 2 by giving voice commands to Siri. There are many ways to activate the voice assistant.
Step 1: Make sure the earbuds are connected to your iPhone and say, "Hey Siri." Now, you can give any control commands like, "Siri, turn down the volume."
Step 2: Another way to activate Siri is to press and hold the Indent on the stem. When you hear a chime, give any command.
Use Adaptive Transparency Mode to pay attention to your surroundings
Active noise cancellation can create an optimal immersive listening experience, but it's not always safe to use this feature when you're walking down the street. That's where the AirPods Pro 2's Adaptive Transparency Mode can help. It offers some noise cancellation while letting you pay attention to your surroundings when needed. Here's how to turn it on.
Step 1: Connect your AirPods Pro 2 to your iPhone.
Step 2: Go to Settings and tap the [Name of your AirPods].

Step 3: Look for the Noise control tab and select the Transparency option.
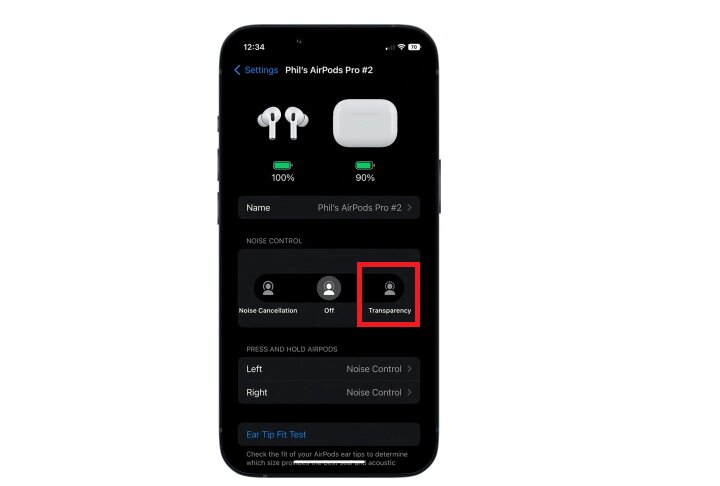
Step 4: You'll see a toggle option called Adaptive transparency. Turn it on (make it green).
This will reduce extra loud sounds like construction work and noisy vehicles in the background while still letting you hear people talking and smaller vehicles moving around you.

Switch off noise cancellation to save battery
If you ever find yourself on a long, boring journey with only your earbuds for entertainment, you'll want to make the battery last for as long as possible. A lot of features like ANC and the aforementioned Adaptive Transparency Mode consume more battery power to function, so turning them off can give you a longer runtime.
Step 1: Wear your earbuds, go to the iPhone Settings, and tap the [Name of your AirPods Pro].
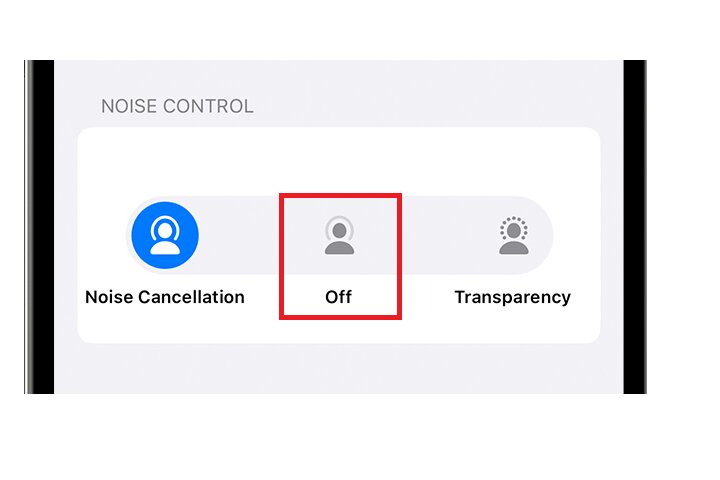
Step 2: Under the Noise control tab, you will see three options: Noise cancellation, Off, and Transparency. Select the Off option to switch off noise cancellation and reduce the battery drain.
Step 3: When you're able to charge your AirPods again, you can just switch it back on by repeating these steps.
Find lost earbuds with the Find My feature
Thankfully, Apple has extended the Find My feature to the second-generation AirPods Pro, so you can track lost earbuds or the case anytime, anywhere. Here's how to use it.
Step 1: Download and open the Find My app on your iPhone.
Step 2: Open the Devices tab and choose the [Name of your AirPods Pro 2].
Step 3: Now you can choose to play a sound to manually find the AirPods Pro 2.

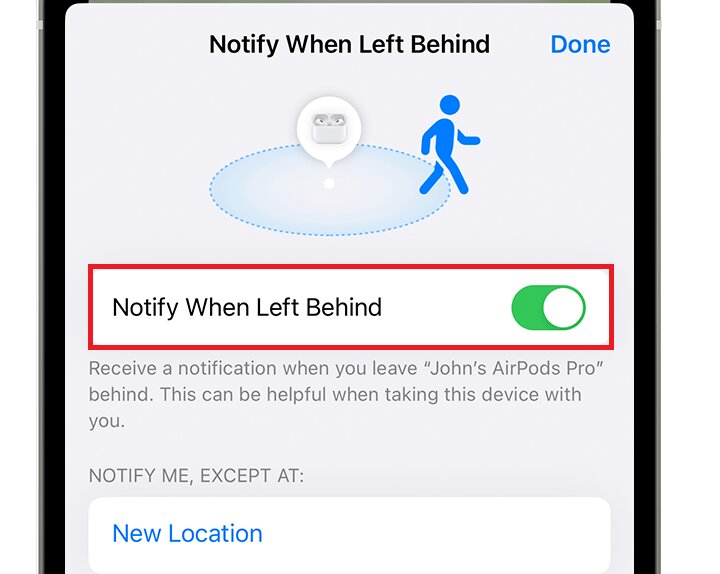
Step 4: You can also choose to get an alert if you drop your earbuds or accidentally leave them behind. Go to the Devices tab, choose your AirPods, and turn on the Notify when left behind toggle.
Set up Personalized Spatial Audio for an enhanced listening experience
One of the best features offered by the second-gen AirPods Pro is Personalized Spatial Audio for an enhanced listening experience. With this, your iPhone captures your unique head and ear shape, and the earbuds customize the audio to match it. Love it or hate it, the feature is at least worth a try. Here's how to set it up.
Step 1: Connect your earbuds to your iPhone and open Settings.
Step 2: Tap the [Name of your AirPods Pro 2] and look for the Spatial audio section.

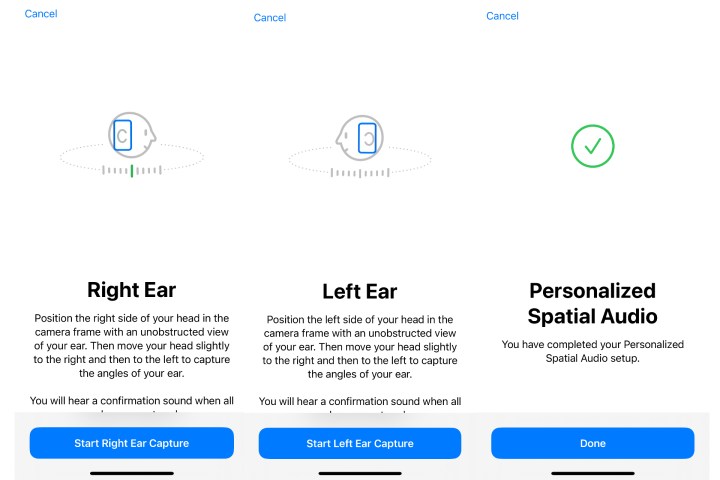
Step 3: Click on Personalize spatial audio to start the scanning process.
The camera will scan your head and both ears, so we recommend tying your hair back and removing any obscuring accessories to get the most accurate results.
Step 4: After the scanning process is complete, your profile data will be saved and synced to other Apple devices via iCloud, so you won't have to go through the same steps for every new device you pair the AirPods with.


