
Dual-booting Windows editions is a tradition that goes quite far back. It lets you experience new Windows versions and old Windows versions together on the same hard drive of a PC or laptop.
Dual booting is a fun way to try Windows 11 without deleting Windows 10. You do need a separate license and account for both Windows operating systems to dual-boot legally without violating Microsoft’s terms of service.
Here’s how to dual boot Windows 10 and Windows 11 at the same time.
How to dual boot Windows 10 and Windows 11
If you’ve been impressed by Windows 11’s strong reviews, you can dual boot it with Windows 10 with just a couple of things. Again, you’ll have to hold a valid Windows 10 license and a valid Windows 11 license. Each license can only be used once. It’s likely that Windows 10 will pull an original equipment manufacturer (OEM) license from your PC, and Windows 11 will ask you for a product key on setup.
Additionally, since Windows 11 now mandates you use a Microsoft Account as part of the setup in the Home Edition (you can set up a local Windows 11 account with limited functionality), you’ll need to have a separate Microsoft account for both operating systems. You can try using the same one, but separate accounts would be the best option. This helps avoid confusion with any potential app downloads and other app licenses tied to your accounts. You can always create a second Microsoft Account for free, just to try Windows 11, and then remove it later after you set things up.
As part of dual booting, you’ll also need to be comfortable using disk management tools, as well as have a USB drive that’s at least 16 GB in size and an internet connection to download Windows 11. You’ll also have to meet the requirements for Windows 11. If your PC isn’t compatible, then you can’t dual boot without registry hacks.
Step 1: Download Windows 11
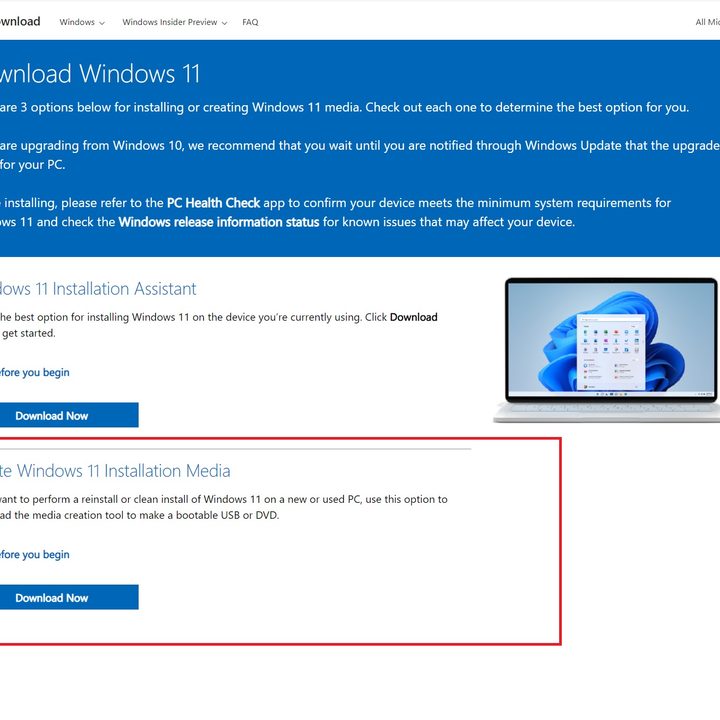
To get started, you’ll need to download Windows 11 for Microsoft. Choose the Create Windows 11 Installation Media option and download the tool. Launch it and choose to Use the recommended options for this PC. Then, choose USB flash drive and click Next. Make sure your USB drive is plugged in. Choose your drive from the list, and click Next. Your PC will create a bootable Windows 11 drive.
Step 2: Prepare to partition your main Windows 10 hard drive
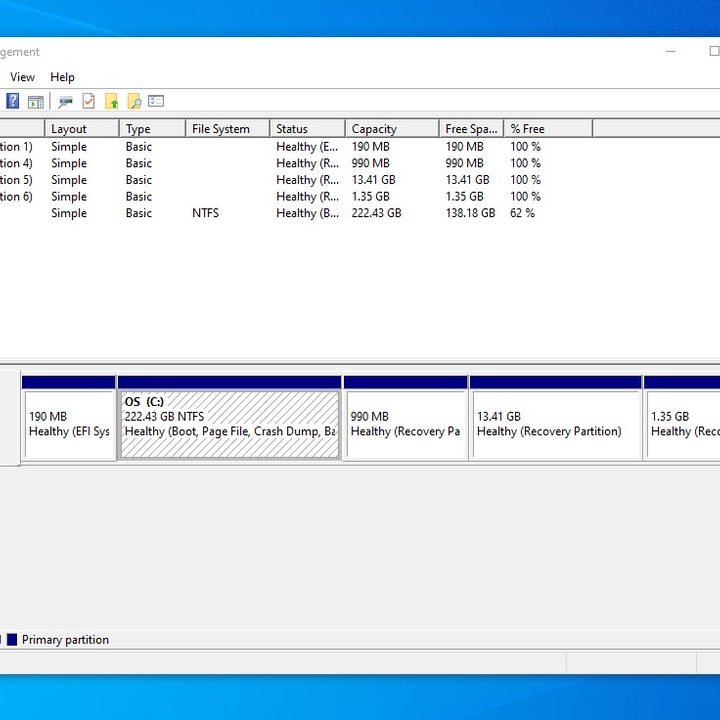
In this second step, you’ll have to head into Disk Management in Windows 10. Search for it and open it using the Start Menu. The option you want will be Create and format hard disk partitions. Once you find it, open it up and look for the OS: C drive. You should know this is your OS drive since it is partitioned as NTFS. Right-click on the drive, and choose Shrink Volume.
Step 3: Shrink your Windows volume
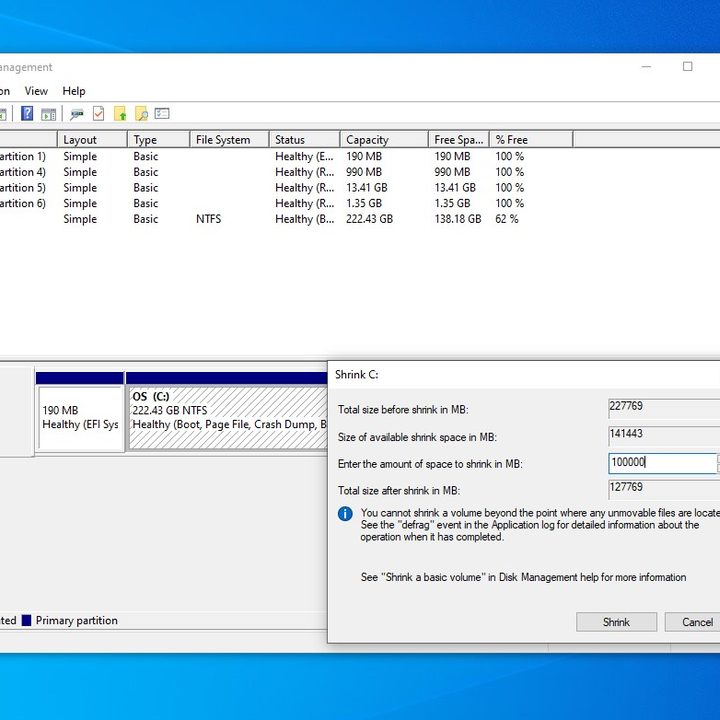
After you click Shrink Volume, wait for Windows to query your disk. You’ll then be able to shrink the drive down in MB.
Keep in mind that 1 GB is equal to 1,000 MB. So Windows 11 needs 64,000 MB minimum. We suggest shrinking your drive close to that amount. In our example, we shrink to 100,000 MB. Accept the shrink with the Shrink button.
Step 4: Create a new volume
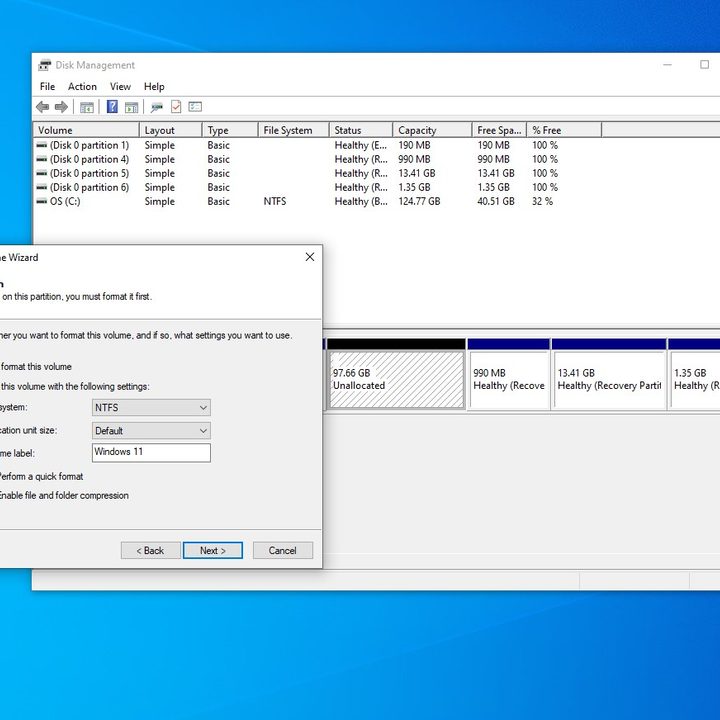
Shrinking your volume will take a while and it might look like your PC has frozen, but don’t worry. You’ll know when it’s done when you see a new gray-colored space that says Unallocated. Once you see this, right-click the empty space and choose New Simple Volume.
Click Next and assign it a new drive letter (we’re using D). You also can label the volume. We chose to name ours Windows 11. Leave everything as is and be sure it looks like it does in our photo above. Click Finish.
Step 5: Turn off fast startup and Bitlocker encryption
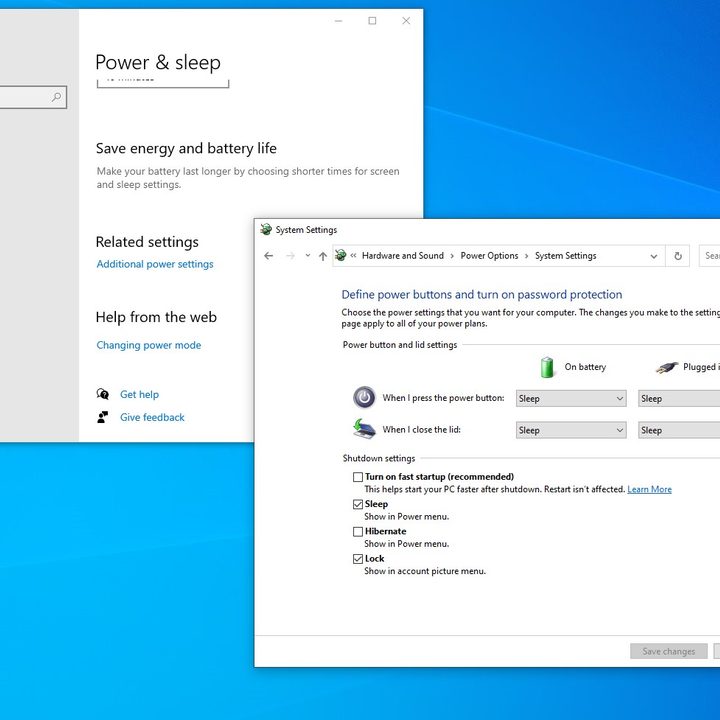
After you create a new volume, you’ll need to turn off both Fast Startup and Bitlocker encryption in Windows 10. This lets you get into your PC’s BIOS and lets your PC boot up between the two different operating systems.
To do this, search Power in the Windows 10 Start Menu, and choose Power and Sleep Settings. Then, scroll down to Additional Power Settings. Pick the choose what the power button does option. Then, you’ll have to click Change settings that are currently unavailable and toggle the checkbox for Fast startup to off. End by clicking Save changes.
For Bitlocker, search for Bitlocker in the Start Menu and then choose Manage Bitlocker. In Windows 10 Home, you’ll need to turn off device encryption.
Step 6: Boot your PC from your Windows 11 Bootable drive
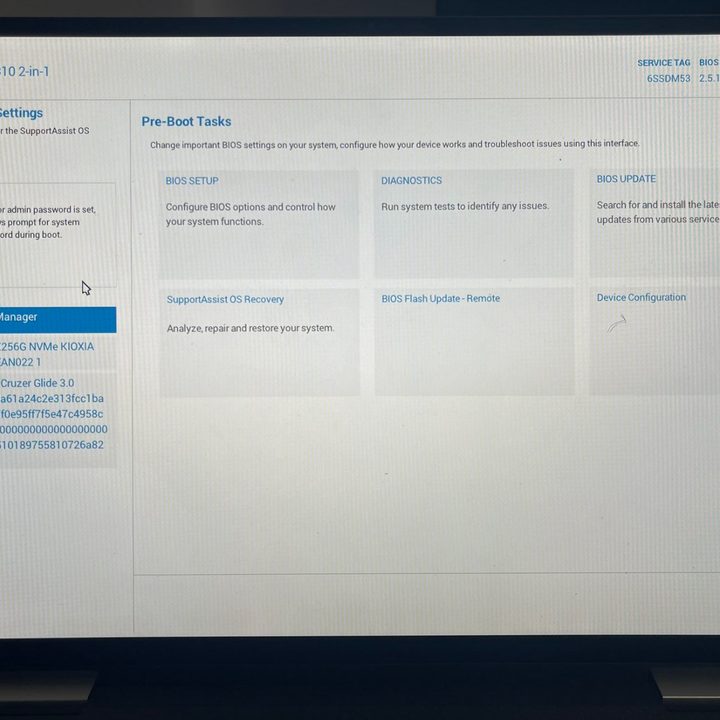
Next, you’ll need to boot your PC from the bootable drive you just created. Usually, you can do this by pressing the F12 key on your laptop or keyboard once you turn the power on and choosing the name of your USB drive from the list of available options. Specific directions vary based on laptop makers. Here are some specific instructions from HP and Lenovo.
Step 7: Install Windows 11
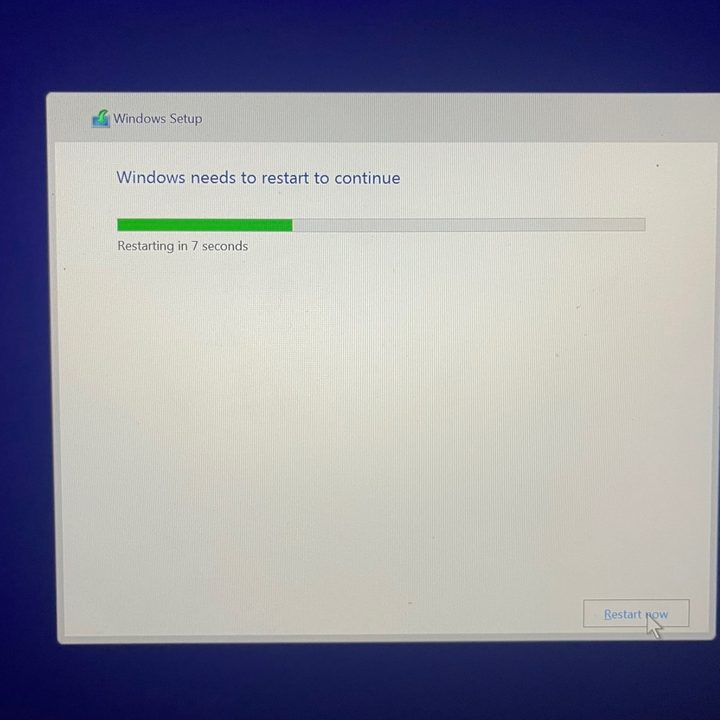
Once you boot into the Windows 11 installer, click Next, and then Install Now. Setup will Start, and you should choose the Custom option. If you’re not seeing any drives, head into your PC’s BIOS and set the SATA controller to compatibility/IDE/Standard Mode for the drives to appear. Once that checks out, choose the partition that you’ve previously sized and labeled as Windows 11 and click Next. Windows will then install.
If you get stuck, refer to our Windows 11 installation guide.
Step 8: Dual boot!

Once everything is done installing, Windows will now prompt you to choose an operating system. Choose either Windows 10 or Windows 11 from the list each time you want to boot your PC. You also can change date and time settings here, too.
Make sure that you activate Windows 11 with a new product key first, however. Do this by searching for Activation Settings and then Change Product Key. Enter in a new product key, so that Windows is linked to a key, rather than your Microsoft Account.
And make sure that you disable Fast Startup, too. Just search for Edit Power Plan and then choose Power Options, just as you did in Windows 10 in Step 5.
This ensures your Windows 10 install doesn’t get deactivated. Otherwise, your experience might be limited. At any time, on the dual boot menu, you can choose your operating system.
Now you’re getting a flavor for the operating system, install some of the best Windows 11 apps.


