Before jumping in, there are a few important things to remember. This software is a developer preview, which means that it will have more than a few bugs that could spoil your day. If that sounds annoying, then it may not be for you. However, if you want to live life on the cutting edge with Android M, that’s the price you’ll have to pay. The good news is that if you want to revert back to Android 5.0 Lollipop, you can do so quite easily.
Also, the process may erase all the data stored on your Nexus device, so make sure you have everything that is important to you backed up. This is because it must have an unlocked bootloader to install Android M, and that requires a factory reset, hence the data wipe. However, if the bootloader is already unlocked, your data will remain on the device. To be on the safe side, regardless of what method you use, we still recommend that you backup your data, just in case of disaster.
It might seem like a daunting task to flash a new OS on your phone or tablet, and while there are other guides online, they assume you already know what you’re doing, exasperating the situation. We decided to offer something more comprehensive that will especially help the newbies.
Installing ADB and Fastboot
In order to flash a system image, you must have ADB and Fastboot installed. ADB stands for Android Debug Bridge and it allows you to send commands to your
There are two methods to getting ADB and Fastboot on your computer. The first is to download and install the Android SDK, but it includes a lot more than what you really need. This method will work for both Windows and Mac machines. If you’re a Windows user, and assuming you don’t plan on developing apps, you can download and install Minimal ADB and Fastboot instead, which will give you just the necessary files.
If you decide to go down the route of installing the full SDK, ADB and Fastboot will be in the C:program files (x86)androidandroid-sdkplatform-tools folder in Windows. If you use Minimal ADB and Fastboot, you can choose the directory you want.
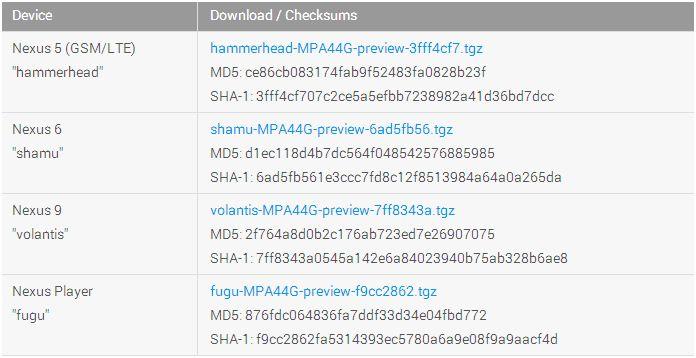
Download the Android M Developer Preview system image
Now it’s time to grab Android M Developer Preview, and it’s available through Google’s Android Developers site. Just make sure to select the version that matches your device. This is very important, because you must flash the Nexus 5 image on a Nexus 5. A Nexus 6 image won’t work on a Nexus 5.
Having made sure, scroll down to the Hardware System Images section, accept the Terms and Conditions, and the download will begin.
Extracting the contents of the system image
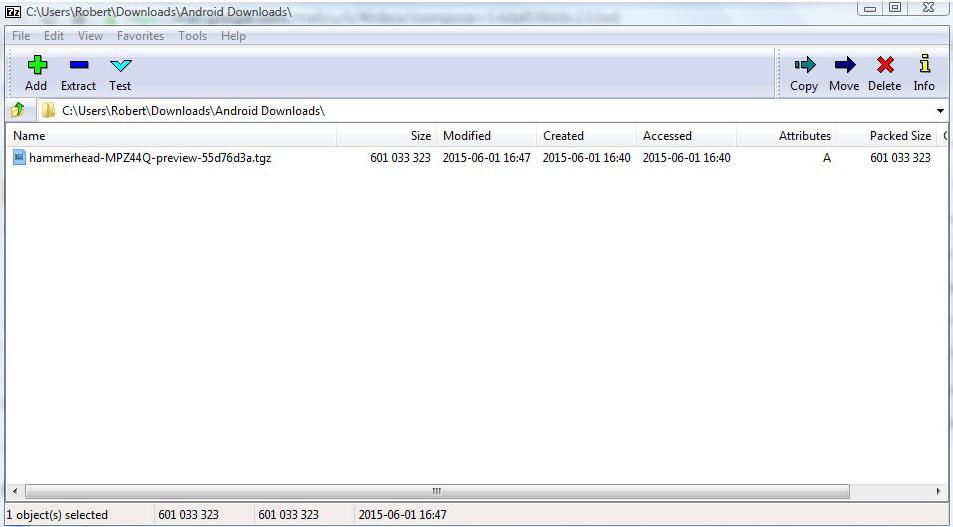
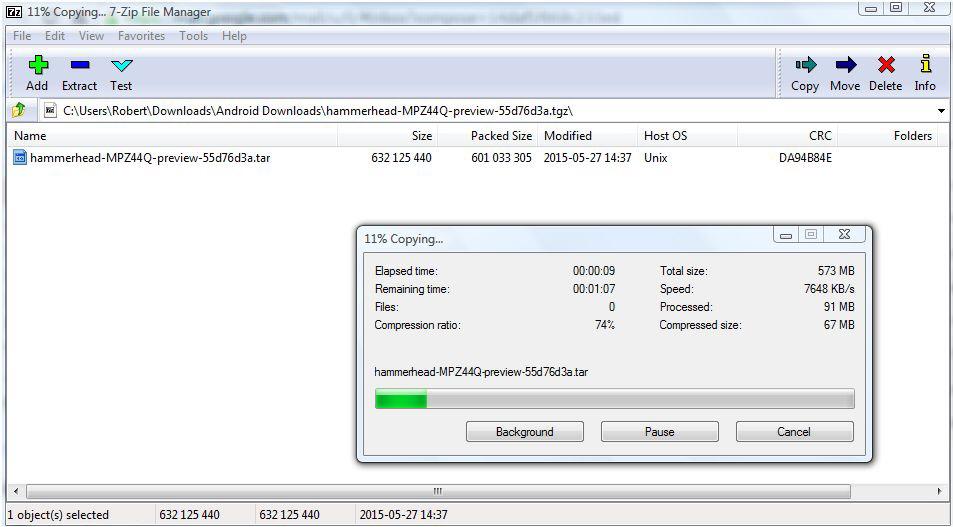
The downloaded file should have .tgz as its extension and you need to extract the contents before going further. The best thing to do is download and install 7 Zip. There is an unofficial version for Macs as well. Once 7 Zip is installed on your machine, follow these steps:
- Open the 7 Zip File Manager and navigate to the folder that you saved the .tgz file in.
- Double click on the .tgz file.
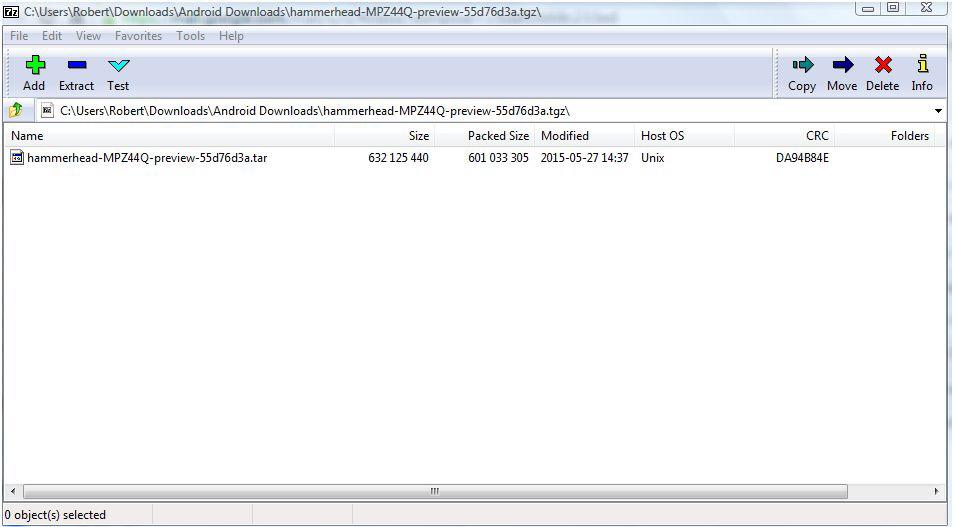
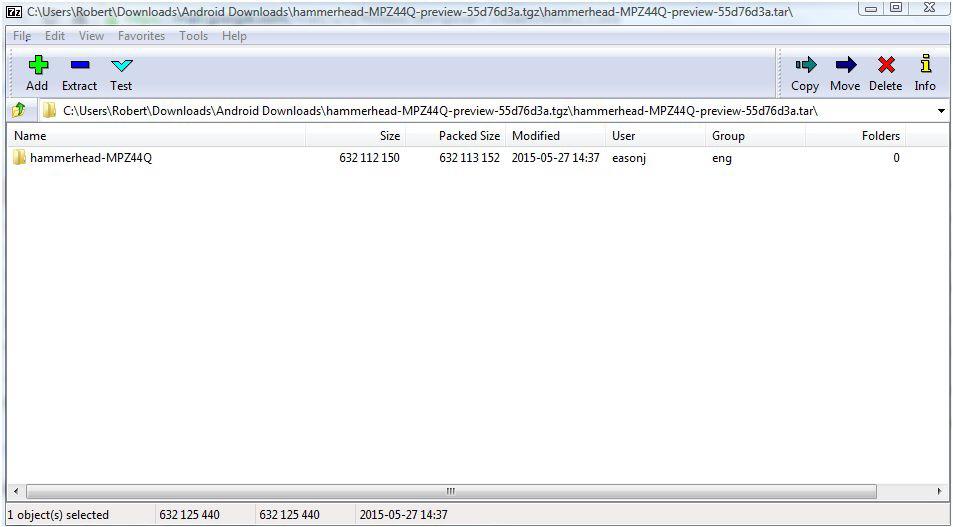
- You will now see a file with a .tar extension.
- Double click on this file to show the contents (this will take about a minute or more).
- After it has opened, you should have a folder with the codename of your device as part of the title (ex. hammerhead for Nexus 5), Double click on it.
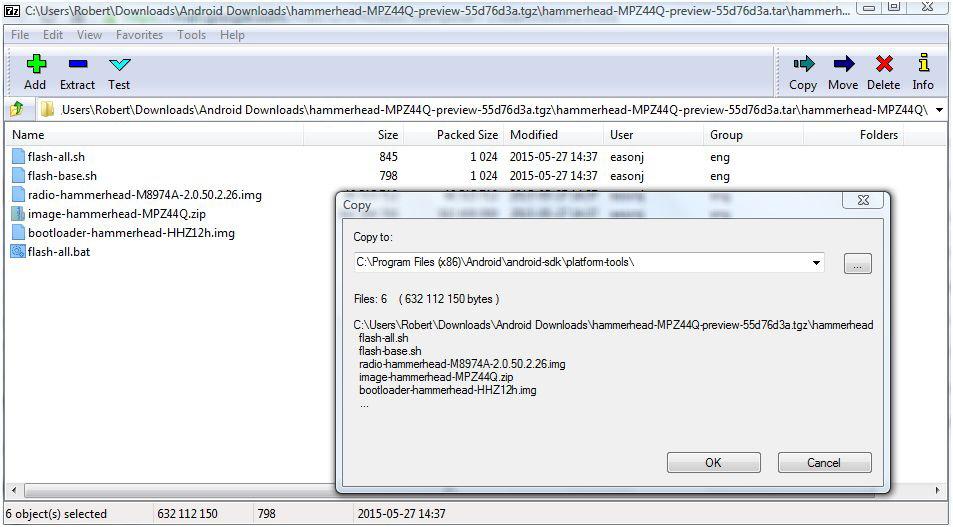
- You should now see a collection of files. Select all of them and click on Extract to extract all the contents. Type in the destination C:program files (x86)androidandroid-sdkplatform-tools (if you installed the full SDK) or whatever directory ADB and Fastboot are installed in.
Enable USB debugging and connecting your Nexus device via USB to your desktop
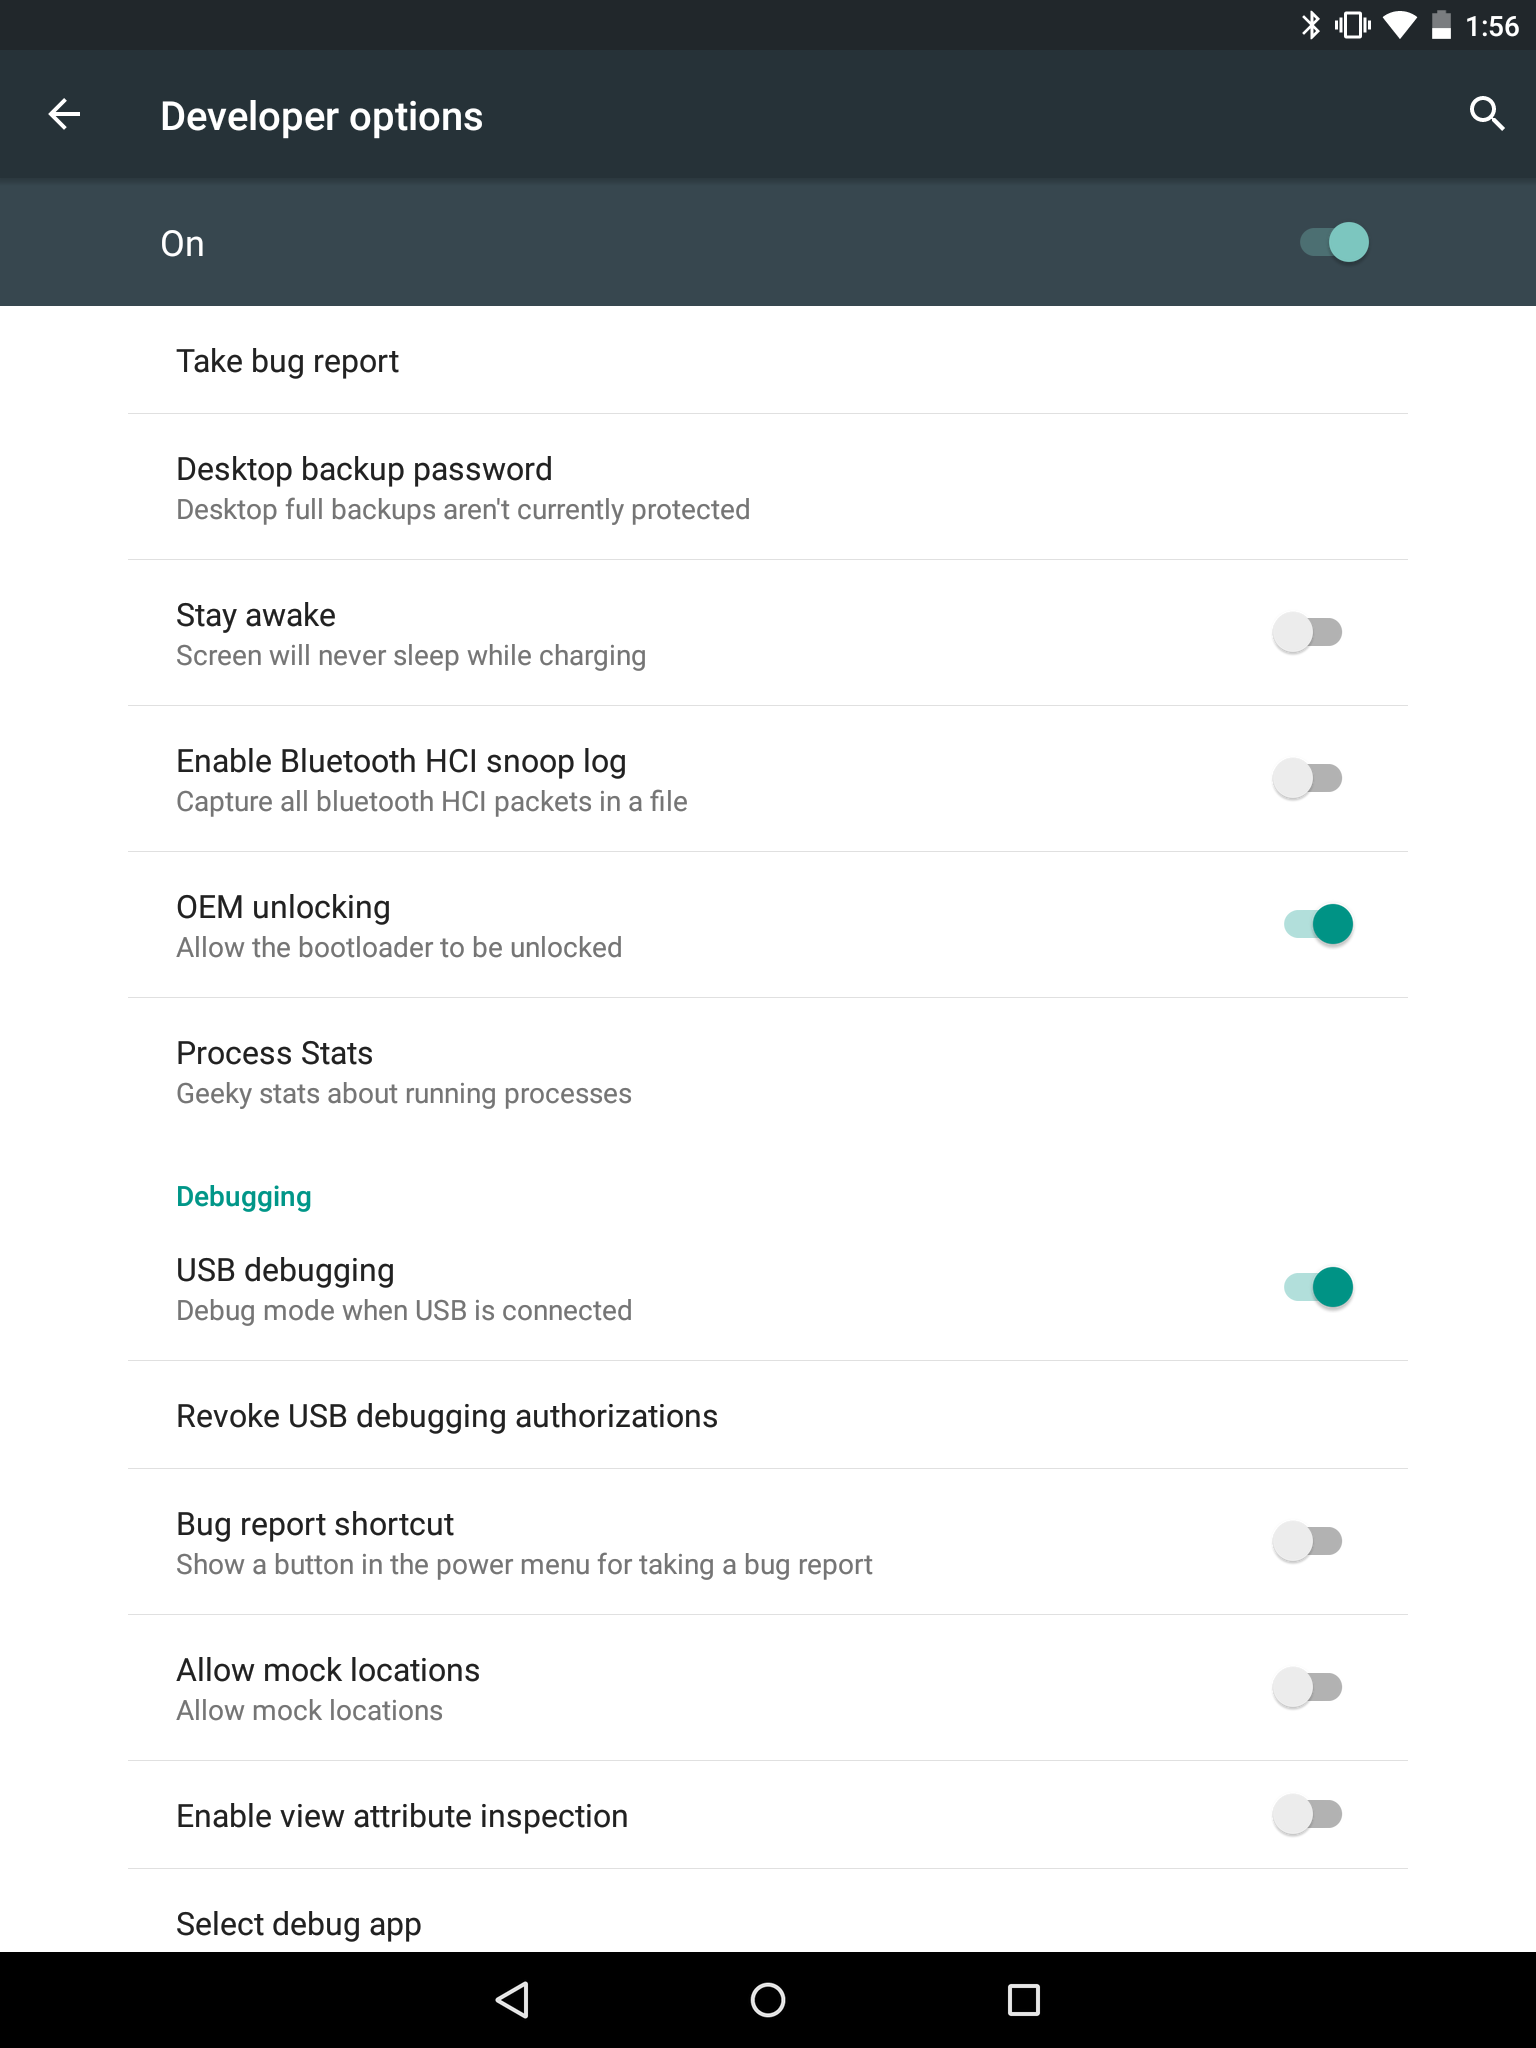
Now you need to make sure USB debugging is enabled on your Nexus device. Open Settings on your Nexus device. If you do not see Developer Options towards the bottom of the Settings screen on your device, follow these steps to activate them. Careful, they’re a little complicated.
- Tap on About Phone and find the Build Number.
- Tap on the Build Number seven times and the Developer Options will appear on the main page of the Settings.
- Tap on the Back key to see the Developer Options.
- Tap on Developer Options.
- Check to enable USB Debugging.
- If you’re Nexus device does not have an unlocked bootloader, then you also need to turn on OEM Unlocking, which can be found a little above the USB Debugging option.
Before you connect your device to the USB port on your computer, you want to make sure you have the appropriate drivers installed. You can grab them here. Since you’re working with a Nexus device, you specifically want the Google USB Drivers.
Now connect your device via a USB cable and you are ready to flash the Zip file that you extracted earlier. If you’re connecting your Nexus device to your computer for the first time, you will get a pop up box on your Nexus device stating what the computer’s RSA Key is. Just check Always Allow From This Computer and tap on OK.

If your computer does not recognize your Nexus device, then open the notification panel and select USB For Charging Only and change the mode to Transfer Photos (PTP).

If your computer still doesn’t recognize your Nexus device, see the USB connectivity issues section for further instructions.
Flashing the Android M Developer Preview
If you’re device doesn’t have an unlocked bootloader, follow the instructions below.
This process will require a factory reset so make sure you have your important data backed up.
- Open the Command Prompt in Windows or Terminal on a Mac and navigate to the folder that ADB and Fastboot are installed in. Again, if you installed the full SDK, it’s in the C:program files (x86)androidandroid-sdkplatform-tools folder. Just type cdprogram files (x86)androidandroid-sdkplatform-tools at the prompt in Windows. If ADB and Fastboot are somewhere else, just navigate to it. To make things easier so you don’t have to type out long directories, you can also paste it by pressing ALT and the Space Bar, then choose Edit, followed by Paste.
If you’re using a Mac, you need to add the platform tools directory to your $PATH. In terminal, type sudo nano/etc/paths. Now enter your password and go to the bottom of the file and enter the full path of the “platform tools” directory. Hit control-x to quit and enter Y to save.
The following ADB commands are for Windows machines. If you’re using a Mac, just add ./ before each command, for example: ./adb reboot bootloader.
- Assuming you device is already connected to your computer via USB and USB Debugging is enabled, you need to re-start it in fastboot mode. Follow one of the two methods below. Option A may be preferable as it will know right away if your computer doesn’t recognize your Nexus device.
A) Type adb reboot bootloader
B) Turn your device off, then turn it back on while holding down the relevant key combinations for your device. For many devices it’s Volume Up + Volume Down + Power. You can see what your device’s key combinations are here.
- Type fastboot oem unlock to unlock you device. As a final warning, this step will erase everything on your device.
- Type flash-all to install the bootloader, baseband firmware(s), and operating system. If you get a missing system.img error, then scroll down to bottom of this page for further instructions.
- This process could take several minutes so it’s important not to power off or disconnect the device. Once it’s finished, your device will reboot and the Android M Developer Preview will be installed.
- You can opt to re-lock the bootloader if you wish, but assuming you will do this again with a future update, you might want to leave it unlocked so you don’t have to perform a factory reset again. If you do want to re-lock, just follow Step 2 above and change Step 3 to fastboot oem lock. That’s it.
If your device already has an unlocked bootloader and you don’t want to do a factory reset and lose your data, follow the instructions below.
- Open the Command Prompt in Windows and navigate to the folder that ADB and Fastboot are installed in. Again, if you installed the full SDK, it’s in the C:program files (x86)androidandroid-sdkplatform-tools folder. Just type cdprogram files (x86)androidandroid-sdkplatform-tools. If it’s somewhere else, just navigate to it. To make things easier so you don’t have to type out long directories, you can also paste it by pressing ALT and the Space Bar, then choose Edit, followed by Paste.
If you’re using a Mac, you need to add the platform tools directory to your $PATH. In terminal, type sudo nano/etc/paths. Now enter your password and go to the bottom of the file and enter the full path of the “platform tools” directory. Hit control-x to quit and enter Y to save.
Note: The following ADB commands are for Windows machines. If using a Mac, just add ./ before each command, for example: ./adb reboot bootloader
- Assuming the device is already connected to your computer via USB and USB Debugging is enabled, you need to start it in fastboot mode. Follow one of the two methods below.
A) Type adb reboot bootloader
B) Turn your device off, then turn it back on while holding down the relevant key combinations for your device. For many devices it’s Volume Up + Volume Down + Power. You can see what your device’s key combinations are here.
- You will need to edit the flash-all.bat file that you extracted from the factory image, which should be in the same directory as ADB and Fastboot. Just open it with any simple text editor such as WordPad. You will see a line that starts with “fastboot -w update……..” Just remove the -w from this line. The -w flag wipes your data, so removing it will obviously stop that from happening.
- Type flash-all to install the bootloader, baseband firmware(s), and operating system. If you get a missing system.img error, then scroll down to bottom of this page for further instructions.
- This process could take several minutes so it’s important not to power off or disconnect the device. Once it’s finished, your device will reboot and the Android M Developer Preview will be installed.
If you get a missing system.img error in Step 4 of either method, then follow these instructions
Extract all the files from the .zip file which happens to be one of the files extracted from the original .tgz you downloaded from Google. The Zip file name probably begins with “image.” There should be various .img files within this Zip file. On top of this, you already have bootloader and radio .img files in the same directory. Just make sure all the .img files (from Zip file) and the ones that were already extracted are in the same directory as ADB and fastboot. Now you are going to flash each .img file separately.
If you don’t have either one of the bootloader or radio .img files, don’t worry, not all devices need them. It’s also important to follow this exact order. At the CMD prompt and in the C:program files (x86)androidandroid-sdkplatform-tools directory (if you installed the full SDK) or wherever ADB and fastboot reside. Remember, add ./ before each command if you’re using a Mac.
- type fastboot flash bootloader [name of your file].img
- type fastboot flash radio [name of your file].img
- type fastboot reboot-bootloader
- type fastboot flash recovery recovery.img
- type fastboot flash boot boot.img
- type fastboot flash system system.img
If your device is a Nexus 9, then also issue this command – fastboot flash vendor vendor.img
Lastly, if you want, you can wipe the cache with this command – fastboot flash cache cache.img
That’s it, enjoy the newly installed Android M Developer Preview.
USB connectivity issues
If your computer doesn’t recognize your device via USB, you do not have the appropriate drivers installed. Make sure that you installed the Google USB Drivers found here, and if you still have an issue, follow these steps.
- On your Windows desktop, Go to your Control Panel then Device Manager.
- You should see Android Phone under Other Devices with a Yellow ! mark on it.
- Right click on it and choose update driver
- Choose browse my computer, then Let me pick from a list.
- Select Android ADB Interface.