Struggling with the wrong time showing up on your Windows computer? Maybe the time keeps on switching to incorrect information, and it’s driving you crazy. Maybe you’re moving or on an important trip and want your computer to show the accurate local time. Or maybe you want to adjust to a specific time for other reasons. Whatever your purpose, we’re going over just how to adjust the time in Windows 10, and what customization options you have for showing time and date.
Also, we can help if you want to enable dark mode for different visuals, or if you want to get rid of notifications and clean up your desktop space.
Step 1: Head to the Date and Time section
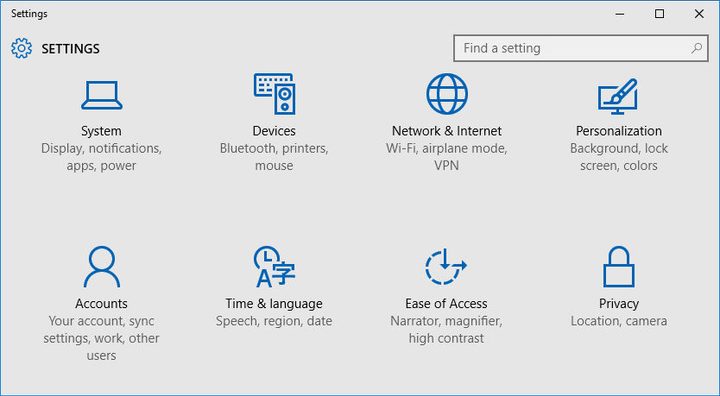
Once you are logged into Windows 10, head down to the search bar in the bottom left corner. Here, type in Settings. Look at the top of the window of results that this brings up, and you should see an option to go directly to this Settings section.
Once the Settings window opens, look for the Time & Language setting, which should be somewhere in the middle of your icons. Select to open a new window.

The Time & Language window will have several options, including Date & time, Region & language, and Speech. It should, however, open directly into the Date & time section, which is the one that you really want. If it doesn’t, choose Date & time from the side menu.
Step 2: Choose your automatic settings
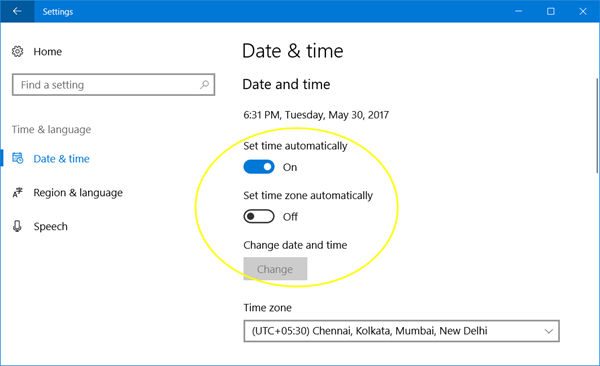
The first two options in Date & time that you see are will be Set time automatically and Set time zone automatically. You will have to deal with these first when customizing your time settings.
Setting the time automatically is usually turned on, which means Windows is choosing the time for you based on other location data that you have selected. If you are trying to change the time from default settings or a mistaken time zone, you can probably leave this automatic option one. Then simply make sure that Set time zone automatically is turned off, and you can select your proper time zone and let Windows do the rest of the work.
However, if you want to customize your time more directly, then you will need to make sure that both automatic options are switched off.
Step 3: Change the time directly
With the automatic settings off, you should be able to select the button that says Change, under Change date and time.
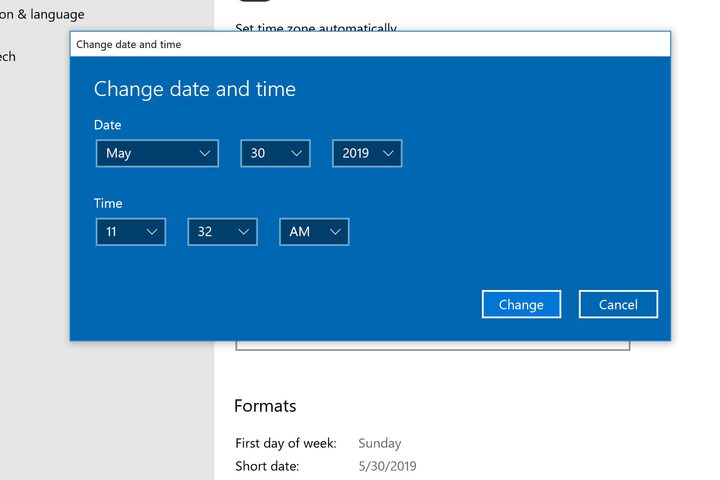
This will open a new window that clearly lists the month, day, and year, followed by the hour, minute, and AM/PM. You can make any adjustments to these numbers that you want by select them and picking the desired numbers from the list. Once you are finished, select Change to implement your new time.
Step 4: Explore your other options, too
In the Date & time section, you’ll also see a few other options for controlling how you view the time. Some of these may be useful, depending on your needs. Here’s a quick list of what you can find and what they do:
Adjust for daylight savings time automatically: Some locations use daylight savings time, and some don’t. It’s starting to fall out of favor. If you live or travel in a place that doesn’t use daylight savings time, this option is best turned off.
Show additional calendars in the taskbar: This simply gives the option to show Chinese lunar calendars in your taskbar. A very specific feature meant for those who might travel to China often or do business there with international partners.
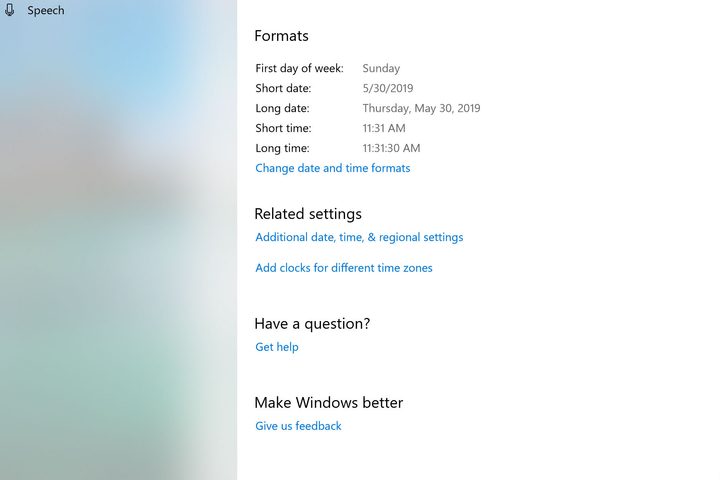
Change date and time formats: This allows you to change things like when the first day of the week starts, how the date and time are displayed, and how much time info Windows 10 will show you at a glance.
Additional date, time & regional settings: This will take you to a series of links where you can see options to edit both time and region. It’s helpful if you want to edit some regional information while you are here, but otherwise you don’t have to worry about it.
Add clocks for different time zones: You can add up to two additional clocks for different time zones. You get to set the time zone you want for each clock. Obviously there are many reasons for keeping an eye on different time zones, from keeping an eye on a loved one’s time to making stock trading decisions.