The process of downloading and installing a fresh copy of Windows 10 is pretty straightforward. But did you know that you also can run Windows right from a USB flash drive? Now it does sound like a great way of securing personal files, especially if you have to share a PC with your family members or office colleagues.
However, you do need to keep in mind that booting Windows from a USB drive means that it will run slow, as flash drives are not as fast as traditional internal solid-state drives (SSDs) or hard drives.
If you are interested in trying it out, here is a quick and easy guide that can help you download, install, and run Windows 10 or Windows 11 from a USB drive.
Downloading the ISO from Microsoft
You can get the official Windows 10 and Windows 11 ISO files from Microsoft:
Step 1: On the appropriate Windows ISO download web page, look for the header that says "Create Windows installation media" and click on the Download now button.

Step 2: A dialogue box should appear asking whether you want to save the installation file MediaCreationTool22H2.exe (Windows 10) or mediacreationtool (Windows 11). The Media Creation tool basically allows you to download the Windows ISO file and can also be used to convert a USB drive into a bootable Windows 10 or 11 installation disk.
Click on Yes or Save file and download it to your computer.
Step 3: Once the file is downloaded, open it and wait for the utility to load.
Step 4: Click on the Accept button to agree with the terms and conditions.

Step 5: On the next page, select Create installation media (USB flash drive, DVD, or ISO file) for another PC and then click Next.

Step 6: Select the language, architecture, and edition of Windows that you want to use (for example, Windows 11 Home or Windows 11 Pro). If you are not sure about this, just check the box that says Use the recommended options for this PC and then click Next when you’re ready.

Step 7: The tool will now ask whether you want to create a Windows installation disk or download the ISO. Since we want to run Windows from a USB drive, select the second option that says ISO and then click on Next.

Step 8: A pop-up should appear asking you to select a location on your hard drive to store the Windows ISO file. Once you have done that, click Save. The tool should now automatically download the Windows 10 ISO file. Once the process reaches 100%, click Finish.

Installing Windows on USB drive
We now have the Windows ISO file on our PC. The next step is to install Windows 10 or Windows 11 onto the USB drive so that we can boot the operating system from it.
Step 1: Download Rufus, which is a simple tool that can be used to format and create bootable USB drives. Click on Rufus 4.6p.exe under the Download section to get the portable version of the tool onto your PC. You can also opt for the installation file in case you want to install Rufus as any other regular software.
Step 2: Plug in your USB drive and launch Rufus. Under the Drive properties section, select your USB drive in the Device field.
Step 3: Click the Select button next to the Boot selection field, and select the Windows ISO file that you downloaded using the Microsoft Media Creation tool.
Step 4: Make sure you select Windows To Go under the Image option field. This is important, as the tool will install Windows rather than create an installation media.

Step 5: If you are planning to run Windows on an older computer with a legacy BIOS, select MBR under the Partition scheme field. If you have a newer PC with UEFI mode enabled, change it to GPT, and then click Start.
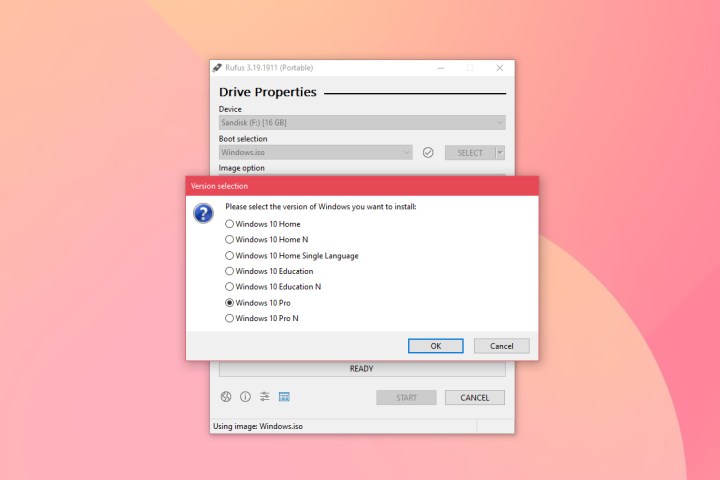
Step 6: The tool will now ask you to select the version of Windows you want to install on the USB drive. After selecting the correct version, click on OK. This will be followed by a warning message that all data on the USB drive will be destroyed. Click OK once again to continue.

Step 7: Depending on the speed of your USB drive, the process will take a few minutes. Once it is done, select Close. You have now successfully installed Windows on the USB drive.
Booting Windows from USB drive
We can now proceed to boot Windows from the USB drive.
Step 1: Plug the USB drive with Windows 10 or Windows 11 OS that we just created.
Step 2: Reboot the PC and press the appropriate key, depending on the make and model of your PC, to enter the boot menu.
Step 3: Next, select the USB drive to boot Windows from it. The first instance should run the Windows setup process, where you need to follow the steps, create/log in to a user account, and activate Windows with a license key.
If you're running Windows 11 from USB to try it for the first time, make sure you know about these Windows 11 tips and tricks.


