You'd think that changing the screen resolution with macOS would be an easy task, but Apple made it a bit more complicated than expected. The main reason for this is that your options change based on whether you're connected to an external computer monitor – and there's also a menu you might have to deal with, one that's a bit off the beaten path and not readily available to all users.
If you've been running into trouble, here's a look at how to change your Mac's screen resolution in macOS Ventura. Follow these steps closely, and you'll have no issue tweaking the resolution of your screen. Here's a closer look at everything you need to know.
Note: The latest macOS isn't Ventura – it's macOS Sonoma. Thankfully the process is virtually unchanged between the two, so if you're trying to change the resolution on macOS Sonoma, these same steps should apply.
How to change your Mac's screen resolution with an external monitor
If you have an external monitor connected, regardless of whether it's a laptop like the MacBook Pro or a desktop like the Mac Mini M2, you can easily adjust your screen resolution.
Step 1: First of all, open the System Settings app from your Mac’s Dock. If it’s not there, click the Apple logo in the top-left corner, then System Settings.
Step 2: In the System Settings sidebar, click Displays. Here, you should see a list of resolution options, with your monitor’s default resolution selected. Just click one of the other options in the list and your Mac’s resolution will change right away.

Step 3: If the resolution you are looking for is not in the list, click Show all resolutions. Note that these extra resolutions might look odd because they will not necessarily scale properly to your monitor’s dimensions.

Step 4: Sometimes, your external monitor will not have its resolution options listed, and will instead show a series of thumbnails, including Larger Text to More Space. If that’s the case, right-click or Control-click a thumbnail and click the Show list menu. This should reveal the full list of resolutions, where you can just click an option to change your display’s resolution.
Change your resolution with your MacBook’s built-in monitor
Unfortunately, things aren’t so straightforward if you’re using an Apple laptop with a built-in display, as for some reason, Apple greatly limits your options here. You will only have a few choices labeled as “text sizes.” If your MacBook is connected to an external display, that display will have a full list of resolutions, but your MacBook will not.
Step 1: As before, open System Settings and click Displays in the sidebar.
Step 2: Here, you will see a few options at the top of the window, from Larger Text to More Space. The former will lower the resolution, while the latter will increase it.
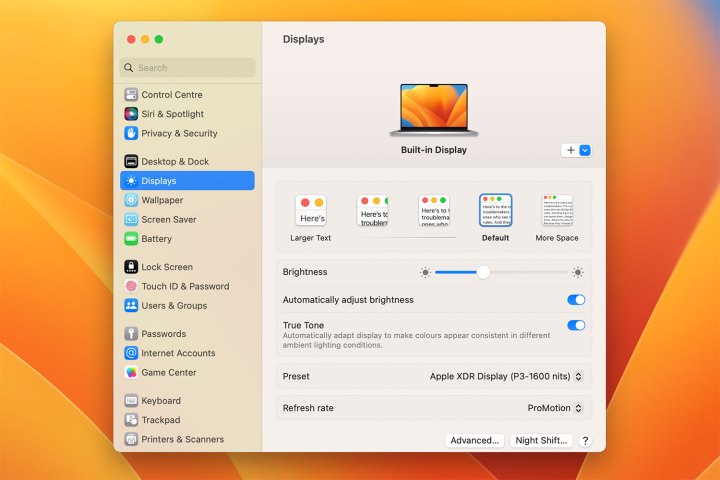
Step 3: Click one of the on-screen options and your Mac’s resolution will change accordingly. To put it back to how it was, just click the option you were previously using.
We aren’t sure why macOS Ventura only allows you to properly adjust screen resolutions using an external monitor and limits your choices with built-in displays. There are different resolution options for MacBooks, but macOS Ventura doesn’t say exactly what those resolutions are, which can be annoying.
If you are getting different options from what we have shown above, or your System Settings app looks different from the one in this guide, make sure you have updated your Mac to the latest version of macOS.