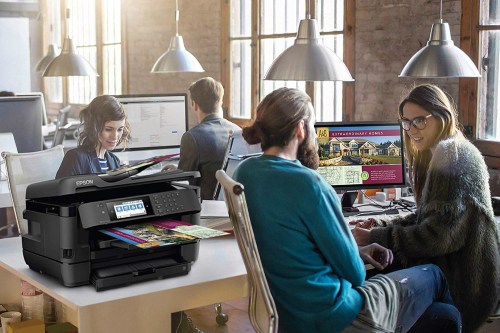
A new printer can inspire creative projects and is a great way to share moments with friends and family. You can also share the printer itself. It doesn't even need to be a wireless printer since Windows can provide a Wi-Fi connection to a USB-only or ethernet-only printer.
With a few helpful tips and screenshots showing how to set up printer sharing, you can print from any computer on your Wi-Fi network, including Windows and Mac machines.

Set up the primary PC
The first step in network printer sharing is setting up the primary Windows PC to allow this connection. You might expect these options in printer settings, but Microsoft buried Advanced sharing settings several layers deep and in another section.
Step 1: Hit Windows-I to open the Settings app, select Network & internet in the left sidebar, then Advanced network settings at the bottom.
Step 2: In Advanced network settings, choose Advanced sharing settings, drilling down another layer.
Step 3: Finally, you'll see the toggle switch under Private networks for File and printer sharing. If you're interested in learning more about file sharing, we have a guide devoted to transferring files PC to PC.
Step 4: In the left sidebar, choose Bluetooth & devices, then select Printers & Scanners on the right.
Step 5: Select the printer you'd like to share, then choose Printer properties to open a new window with more options.
Step 6: In the properties window, select the Sharing tab, check the box labeled Share this printer, then choose OK to proceed.
Switch this on to allow other computers on your local Wi-Fi network to see and connect to this Windows PC to access public folders and printers. If it doesn't work, see our troubleshooting guide to solve Wi-Fi problems.
How to connect to a shared printer
Once you've got the primary computer setup, connecting another Windows PC to that shared network printer is relatively easy. You have to have Private networks sharing enabled on the secondary PC as well. See the steps above to set that up. Everything else happens in the File Explorer.
Step 1: In File Explorer, scroll down in the left sidebar and choose Network. It might take a moment for Windows to connect and show the primary computer. When you see the name of the computer that's connected to the printer, double-click to open it.
Step 2: You'll see shared printers and shared folders. Right-click the printer and choose Connect from the pop-up menu.
Step 3: You might be asked to enter a username and password that has access to the primary Windows computer depending on how the network is configured.
Afterward, the shared printer will be available in the print options window, like any other printer.
Connect a Mac to a Windows shared printer
A Mac computer or MacBook can also access a shared printer connected to a Windows PC. This works through a system Apple calls Bonjour.
Step 1: Open the Apple menu in the top right of the screen and choose System Settings.
Step 2: Scroll down the left sidebar of System Settings and select Printers & Scanners. Choose Add Printer, Scanner, or Fax to get started.
Step 3: A list of current printers will be shown in the first tab. Select the third tab to connect to a Windows PC and use its printers.
Step 4: Pick the Windows PC that you want to connect to. You might need to select Workgroup first. In this example, my Windows computer is named greenie.
Step 5: If prompted to log in, enter a username and password for an account that has access to the Windows computer.
Step 6: A list of shared printers will be shown, so you can select the one you want. If your Mac doesn't already have a compatible driver, pick Select Software from the Choose a Driver menu.
Step 7: Search or scroll down the list to find and choose the best match. In this case, Apple didn't show an ideal match, but the driver for a similar model should work for printing. If you need an exact match, you can install the driver from the manufacturer's website.
If the shared printer is the best, the fastest, or the most cost-effective, you might want to make it the default printer on Windows and Mac.
Many of the best new printers have wireless capabilities, making it easy to share with any computer. There are some sturdy, older models and low-cost printers that do a great job, but they could lack wireless printing. In that case, you can connect via USB or Ethernet to your PC, then share to Windows and Mac computers over your local Wi-Fi network.
Editors' Recommendations
- The latest Windows update is breaking VPN connections
- No, you shouldn’t just buy whatever Brother printer is cheapest
- How to delete or hide chats in Microsoft Teams
- You’re going to hate the latest change to Windows 11
- Windows 11 Home usually costs $139 — but it’s only $30 today
