In The Legend of Zelda: Breath of the Wild, Link can travel anywhere on the map (if equipped with the right tools). There is no shortage of terrain to explore, from the depths of the deepest lakes to the peaks of the highest mountains. Focusing on those mountain peaks, Link will need a specific set of gear to scale their steep sides effectively. This will require you to find all the pieces to the climbing gear set. This guide will walk you through where those pieces are located around the vast world of Breath of the Wild.
Keep in mind that the climbing gear is broken up into three pieces: Climber’s Bandanna, Climbing Gear (Torso), and Climbing Boots. These three pieces will be found at three different shrines around Hyrule. Each shrine will have Link battling enemies and solving puzzles. That being said, here’s how to progress through each shrine to find its climbing gear piece.
See more
- Everything we know about Breath of the Wild 2
- Hyrule Warriors: Age of Calamity tips and tricks
- The best armor in BOTW, and where to find it
Ree Dahee Shrine and The Climber’s Bandanna
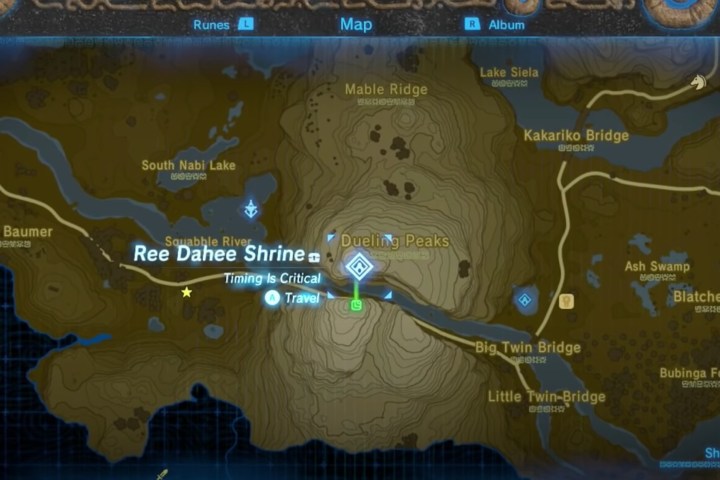
This shrine is located in Dueling Peaks, specifically under the ‘ue’ in the word Dueling. You’ll find Dueling Peaks in the south of West Necluda. Enter the shrine to begin the puzzle.
Solving the puzzle
The object of this puzzle is quite simple. All you have to do is get the ball from point A to point B by stepping on a series of buttons. However, clued in by the shrines subheading, “Timing is Everything,” Link will have to be keen on getting off the buttons as well. Each time you solve a stage of the puzzle, a platform will carry Link to the next stage. Don’t worry if you mess any of these puzzles up. The ball will reset from the stage you’re on.
Ball #1: Step on the button. The ball will roll down the slope and land in the circle.
Ball #2: Step on the button to cause the platform to lean to the right. Get off the button once the ball is halfway so that it falls to the level below and continues to the left.
Ball #3: Step on the button to get the ball rolling. When it’s almost at the end, about a quarter way from it, get off the button to raise the platform and effectively throw the ball where it needs to go.
Ride the platform and use your magnet rune to grab hold of a barrel to your lower-right side. Head back to that third button, and use the barrel to hold it down. Ride the platform back, and run up to a chest on the left.
Chaas Qeta Shrine and The Climbing Gear (torso)
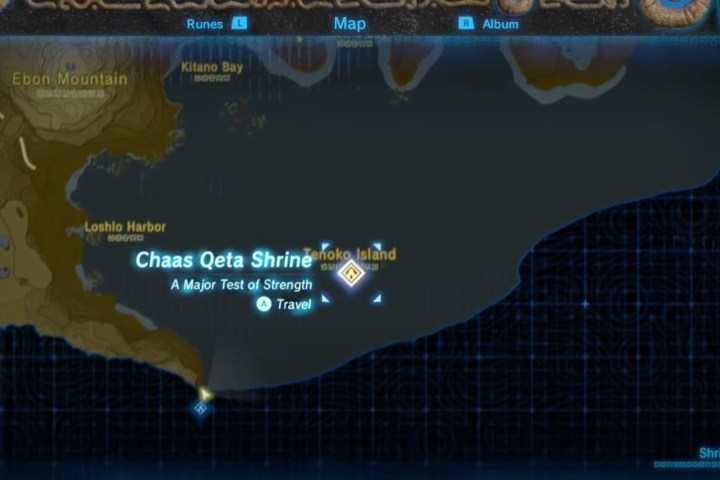
This shrine will be located on Tenoko Island in the Necluda Sea. You’ll want to make your way to the southern peninsula. This will be the southernmost point of the map below Mount Lanayru. Activate the shrine on the cliff and then glide from the cliffside to the island below. Land on the island and enter the shrine.
There will be no puzzle associated with this shrine. Instead, you’ll be faced with a Guardian Mini-Boss to defeat. This mini-boss fight is by no means difficult. It may take a few minutes to learn its moves and weapons, but it can be dispatched like any other Guardian. Once you’ve beaten the Guardian, head down the hallway and open the chest to find the Climbing Gear (torso).
Tahno O’Ah Shrine and The Climbing Boots
This shrine can be found by teleporting to the Hateno Ancient Tech Lab. You should already have this location unlocked as long as you’ve progressed in the story far enough. It is a major part of the main quest storyline. It is imperative for this final shrine that you equip cold-resistant gear or have some cold-resistant food at your disposal.
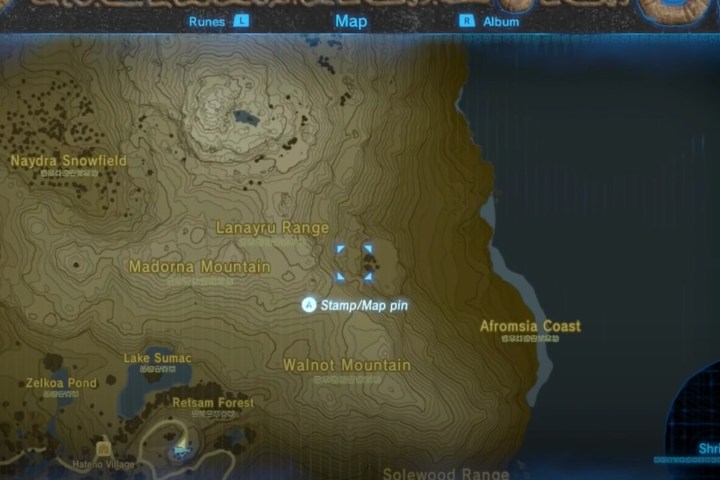
You’ll be heading to an area southeast of Lanayru Range. On the world map, they’ll look to be a cluster of rocks to the left of an otherwise open area. Once you’ve arrived, use a remote bomb to destroy a breakable rock wall and find Tahno O’Ah Shrine.
This is the easiest shrine you’ll have to do, as there are no enemies or puzzles to solve. Perhaps the challenge was finding the shrine in the first place. Walk inside, open the chest, and claim the Climbing Boots as your own.