
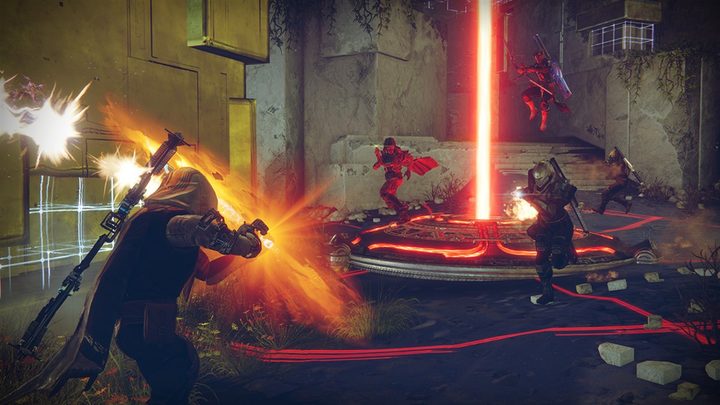
Destiny 2 is well into its third expansion, Beyond Light, and already has significant plans for the future in 2021. With each new expansion comes new weapons, events, and storylines that keep players engaged with the PvE side of the game. The Crucible, Destiny‘s challenging PvP mode, is a robust competitive multiplayer option that you shouldn’t ignore. Packed with several different modes, a great selection of maps, and an array of powerful gear, it’s well worth your time. But how do you deal with the growing pains of the mode and actually become a force to be reckoned with? Find everything you need to know here in our Destiny 2 Crucible beginner’s guide.
Further reading
- Destiny 2: Beyond Light’s stasis abilities get major changes after fan outcry
- Destiny 2: Beyond Light review — Icy expansion brings cool changes
- Destiny 2 Hawkmoon guide: How to get the Exotic hand cannon
The basics
You can’t access it right away
We know you’re excited to blast other players and capture strategic points in Crucible, but when you first load up Destiny 2, you won’t be able to access it. The introductory mission for Destiny 2‘s New Light update will lead you through an area called the Cosmodrome, where you’ll learn the game’s basic mechanics before you’re transported to The Tower. This is the main hub of Destiny 2, where you can pick up new quests, buy weapons, and do all sorts of other housekeeping between missions. Once you arrive at The Tower, you can actually jump into PvP right away, by opening your menu and navigating to the Destinations tab, then selecting Crucible.
It’s fine to dive in for a match or two right now if you really can’t wait, but it’s a much better idea to follow the New Light questline that you’ll have started automatically. It should take you less than an hour of PvE activity to unlock PvP bounties and quests, which you’ll need to progress your character. Following this quest will also give you a chance to get some better equipment so that you’re not entering the competition with the worst gear in the game. It will also set you down the path toward earning your first Exotic weapon, a powerful gun with perks that outclass what’s available on standard firearms.
The modes
All of Destiny 2‘s Crucible modes are unlocked from the start, but some are much tougher than others, particularly for beginners. Each week, a different selection of modes will be available to choose from, and it’s worth giving each one a shot so you’re familiar with everything on offer for any given week. The modes are as follows:
- Clash: Kill enemy team members to earn points
- Team Scorched: Kill the enemy team using only Scorch Cannons — rocket launchers with infinite ammo
- Mayhem: Kill enemy team members to score points with faster respawn times, more Power Ammo, and quickly refilling Super and ability energy
- Rumble: Kill enemies to earn points in free-for-all
- Control: Capture marked zones and get kills while holding zones to earn points
- Momentum Control: Capture marked zones and get kills while holding them to earn points, with faster capture times and more points for kills
- Lockdown: Capture and hold at least two zones to earn points
- Countdown: Defend/detonate a bomb or eliminate the enemy team to win each round
- Breakthrough: Fight to capture a single “Breaker” zone, then attack the enemy’s base with it or defend against it to win the round
- Supremacy: Collect crests dropped from defeated enemies to earn points
- Elimination: Defeat the entire enemy team at once to win the round. Players don’t respawn but can be revived by teammates
- Showdown: Defeat the enemy team as many times as possible before time runs out
- Survival: Deplete the enemy team’s reserve of lives to win each round
- Survival Freelance: Kill all enemies to win each round
How to start a private match
If you do not want to play with random players and have a fireteam big enough to staff two teams, you can also create a private match beginning with the game’s 1.2 update. Head to the Crucible on the destinations screen and select the icon in the bottom left. From here, you can choose any of Destiny 2‘s game modes and maps, as well as the time limit, the match score limit, and the respawn time.
Freelance
The Freelance playlist is a relatively small addition to Destiny‘s Crucible, but one that can make an impact on solo players. The Freelance playlist will queue players together that are playing in a solo fireteam. This is meant to prevent one team compiled of random players from going up against an established six-player squad. New with the Beyond Light DLC is the edition of the Freelance mechanic to the Iron Banner Tournament (more on that later). Players looking for a more casual Crucible experience will enjoy the Freelance playlist.
Understanding your Crucible rank

Update 1.2 introduced a ranking system for the Crucible that completely changed how you acquire gear. It added two new statistics to keep track of — “Valor” and “Glory” — which were tied to quick play and competitive play, respectively. With the recent removal of those playlists in New Light, Glory is now awarded only for playing in the competitive Survival mode, while Valor is awarded for all other Crucible modes.
Winning matches in non-Survival modes will automatically earn you Valor points, which will subsequently increase your rank when you reach a certain milestone. Your Valor rank will not go down if you lose games.
Glory, on the other hand, is affected by your wins and loses. The number will go up and down as you win and lose competitive matches, so you have to be playing at your absolute best to make it count.
With each new Valor and Glory rank you unlock, Lord Shaxx will give you access to new gear. Once you hit the maximum Valor rank, you can also reset your rank and start the climb all over again. There’s no downside to resetting, and doing so will earn you even more new gear, so you should reset every time you max out, even if it means giving up that impressive rank for a while.
Tips for winning in the Crucible
Stick with your team
Destiny 2 multiplayer is comparable to Halo in its long “time to death” stage, or the length of time one can typically expect to live before being killed. Guardians have a shield and quite a bit more health than you see in a game like Call of Duty: Modern Warfare or Tom Clancy’s Rainbow Six Siege, so you’ll very rarely take out an opponent without them being able to react and fire back. Because of this, it’s crucial that you stick with at least one teammate to take down targets together, preferably those who have split off from the rest of their group. Even the most skilled Destiny 2 player is going to have a hard time dealing with two enemies attacking at once, and it will be much harder for the other team to ambush you if you have a teammate with you.
Teaming up is particularly important in objective-based modes like “Control” and “Countdown,” which see Guardians battling in a few specific areas of the map. Taking and keeping a Control point as a solo player is possible if you’re a skilled player, but beginners will likely quit in frustration if they attempt it early on. Instead, split your team into at least two groups, with each going after a different objective. This will force the enemy team to split up as well, and you’ll ideally be able to pick off some stragglers who haven’t found a buddy. If you manage to capture two or three zones and have a pretty decisive lead, getting your whole team together to roam the map getting easy kills can be a viable strategy, but be ready to break off as soon as the enemy team wises up and starts taking zones back.
Power Level doesn’t matter, but your gear still does
Just as in the original Destiny, the Power Level that governs your offense and defense in PvE doesn’t do anything in Destiny 2’s standard multiplayer modes. This ensures that veteran players won’t have an unfair advantage over newcomers, so maxing out on high-level gear won’t really give you an advantage.
However, your gear is still extremely important for Crucible matches, because while Power level doesn’t count in PvP, stats still do. Bungie has majorly overhauled the stats on weapons and armor in Destiny 2 since the game launched, making them more granular and offering new ways to affect them. Each new expansion comes with its fair share of weapons as well. If you want to perform your absolute best in Crucible, you’ll want to find gear with the best innate stats possible and further enhance your loadout using mods. Currently, the armor stats in Destiny 2 are:
- Recovery: Increases health regeneration speed
- Resilience: Increases defense against damage
- Mobility: Increases movement speed and jump height
- Intellect: Decreases Super ability cooldown
- Strength: Decreases melee ability cooldown
- Discipline: Decreases grenade cooldown
Every stat is important in its own way, and it’s a good idea to tune your build to your own particular playstyle. If you don’t want to go that in-depth on making a custom build, there are some pretty universally agreed-upon priorities when it comes to choosing gear for Crucible.
Generally, Recovery is the most important stat for PvP, and you’ll want to get it as high as possible. That’s because Destiny 2‘s long time to kill makes it fairly easy to escape firefights, and high Recovery will get you back in the action sooner.
After Recovery, it’s a good idea to focus on Mobility, which will give you the speed you need to chase down enemies and escape when needed. Resilience is far less important than Recovery, but you’ll still want to get enough to avoid being taken out in one shot by more powerful weapons. If you find you’re dying before even having the chance to react, trying putting more points into Resilience. The cooldown stats — Intellect, Strength, and Discipline — are far more subjective, and you should focus on increasing the one that targets the ability you want to use most.
Bring the right tools for the job
Just like armor, weapons in Destiny 2 all have their own stats, and they will affect how you perform in PvP. Since Power Levels are disabled in the Crucible, if you find yourself getting absolutely melted by opponents while your guns don’t seem to even scratch their armor, you may need to take stock of your loadout. Destiny 2‘s weapon stats are:
- Impact: How much damage you do with each shot
- Range: How far your shot can travel before dealing reduced damage and losing accuracy
- Stability: How much recoil the weapon has while firing
- Handling: How quickly you can draw and aim the weapon
- Reload Speed: How quickly you can reload the weapon
Compared to armor, choosing the best weapon stats for Crucible is far more subjective. Each weapon type will have considerably different stats, and your own playstyle can also have a big impact on what’s most important. That being said, Range and Handling are both extremely important stats for PvP, since they govern how quickly you can aim at and bring down a target at a distance — and once your opponent is up close, the fight is already pretty much over.
Make sure you’re taking the latest weapons into account as well. The Release of the Beyond Light DLC introduced a slew of new high-powered weapons into the game. Each of these new weapons comes with its own new mechanics, some never before seen in Destiny.
There are also perks to keep in mind, which are (often randomly rolled) benefits applied to weapons. These can do anything from buff your damage after you get a kill to automatically reload a portion of your magazine. Some weapons will always drop with specific perks, but there’s a huge pool of possibilities that can appear on most weapons. Because of that, chasing down specific perks can be frustrating, and there’s no one-size-fits-all best choice. They’re an extremely important part of your kit, though, so if you find that you can just get those kills in Crucible, consider swapping your current weapon for one with a perk that works better with how you play.
Beyond stats, there’s another consideration when it comes to your weapons in Crucible. Each type of weapon excels at a different kind of combat encounter, so you’ll want to pick the right guns for the conditions you’re likely to run into on your current map. The icy “Vostok” map, for instance, features several confined spaces, so submachine guns, pistols, and assault rifles are going to perform better. On a map with longer lanes like “Midtown,” scout and pulse rifles will fare better, as will sniper rifles. It can help to have both a short-range and long-range option in case a target charges forward or tries to run away, but don’t feel obligated to do so on every map.
Don’t forget about your melee attack
Remember the “commando” perk in Call of Duty: Modern Warfare 2? It essentially turned your knife into a human magnet, sending you flying at an enemy for an instant kill. In Destiny 2, your knife isn’t quite that powerful, but it’s still a crucial part of your arsenal. Pressing the melee button near an enemy will cause you to lunge a short distance and strike them once, which can often take down their shield during a firefight. Another melee blow will earn you a kill, and in close quarters, it’s often quicker than trying to hit them with your gun. Once you’ve leveled up your Guardian enough, you’ll even earn some extra buffs when you get a melee kill, including a quicker follow-up attack.
Depending on which class you choose, you also have access to a souped-up melee ability. These abilities take time to recharge, but when they’re ready, you’ll automatically execute one instead of your standard melee attack. These attacks vary widely, and picking which one to use can be one of the most important parts of building your subclass. Titans get access to an absolutely devastating shoulder charge, for instance, while Warlocks can replace their melee attack with a long-range zap of lightning. These abilities will obviously benefit vastly different playstyles, so it’s worth exploring all of your options until you find one that fits.
But don’t get overconfident in your melee abilities. If a target is firing a longer-range weapon at you — or even if they’re more than a few yards away — you’re likely to get killed when you bring a knife to a gunfight. If you have a grenade, you can also try to throw that first and kill your enemy with a melee attack as they attempt to avoid the explosion.
When in doubt, get the hell out

You might fancy yourself a sharpshooting Crucible master, but there are some battles that you just aren’t going to win. Instead of getting yourself killed and waiting several seconds to respawn — not to mention giving points to the opposing team — it often makes more sense to turn in the other direction and use some evasive maneuvers. With fairly small multiplayer maps, you can often trick enemies into chasing you right into your own team, turning the tables on them. This is particularly important in modes like “Survival,” which limit the number of lives your team has each round. Killing an enemy is satisfying, but staying alive is more important.
Your slide can also be crucial for quickly completing objectives. “Supremacy” mode is Destiny 2’s take on the Call of Duty “Kill Confirmed” mode, with Guardians dropping small crests when they die. You have to grab an enemy’s crest to earn a point, but you can also grab your own teammates’ crests to deny the enemy team points. Your slide is crucial for doing this in intense fights, as you can quickly snatch the crest and take cover before you’re killed.
Go “Super,” but don’t waste it
Each Guardian has a special “Super” ability that corresponds to their class and subclass. Hunters, for instance, initially have the “Arcstrider” subclass, which uses a powerful melee weapon, and they can later unlock the “Gunslinger,” which allows them to kill enemies with one shot for a brief period of time. You’ll only be able to use these Super abilities once they’ve finished a lengthy recharging period, so make sure you don’t waste them. If you’re at the end of a multiplayer round in a multi-round mode, don’t use your Super ability needlessly, as you’ll still have it charged when the next round begins.
It’s also crucial to only use your Super when you have a chance to really make it count. The Hunter’s Arc Staff isn’t going to do you any good if the other team is all the way across the map, but against a group of tightly packed enemies, you have a chance to rack up some serious kills. Any time you see an enemy use their Super, consider whether it’s the right time to use yours as well. A Warlock unleashing their Nova Bomb at the right time can stop a rampaging Fist of Havoc Titan, but popping Daybreak just as a Hunter unleashes their one-shot killer Golden Gun is just a waste of a Super. If you’re not sure your Super is enough to stop the enemy’s, the best strategy is often just to take evasive maneuvers and hope you can draw them into wasting their Super chasing you down rather than killing unsuspecting members of your team.
Iron Banner: The Crucible’s big event
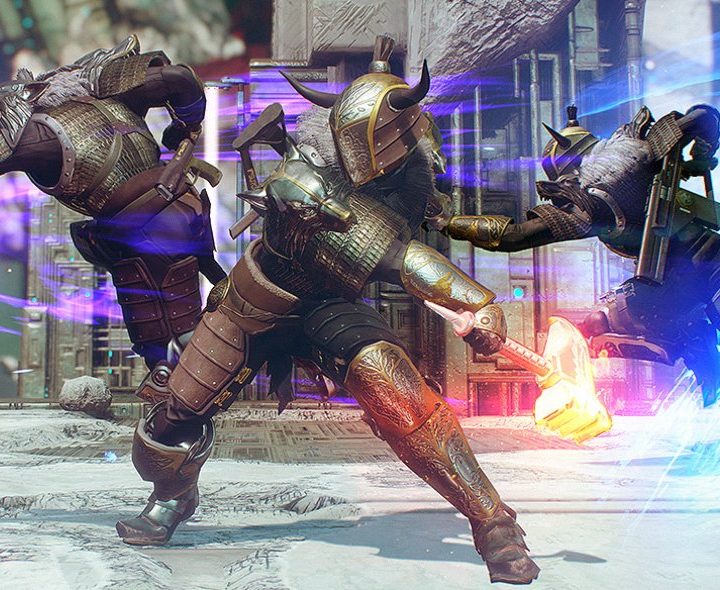
One of the best events to come out of the original Destiny was the Iron Banner, an occasional Crucible event that upped the stakes by activating the stat boosts connected to your gear, and dishing out great rewards to those who could come up on top in unbalanced play. In Destiny 2, the Iron Banner is back. Iron Banner is around for one week out of every month, and it’s one of the recurring highlights of the game for PvP players.
The new form of Iron Banner requires more of an investment of time to get the best stuff out of it, but does away with many of the requirements from the original. You no longer need to fight through the end game and finish the raid to be competitive. Anybody can compete in Iron Banner and earn its rewards, but you’ll need to spend a lot of time playing it to get all the good stuff. You’ll also need to complete an Iron Banner-specific quest before you can start raking in the best rewards. Here’s everything you need to know about Destiny 2’s Iron Banner, and a few tips on how to be the best competitor you can be in Lord Saladin’s tournament.
Power Level matters
The biggest difference between normal Crucible and Iron Banner in Destiny 2 is that Iron Banner recognizes your Power Level when you join a match. That means if you bring a more powerful character, you have a significant advantage over less powerful ones. In Iron Banner, high-level players do more damage to, and take less damage from, low-level players. That makes the Iron Banner a good event for players near the top of the game’s Power Level curve, but it’s a bit tougher for everyone else. That doesn’t mean that you shouldn’t compete in Iron Banner if you’re not at max Power Level. You can still absolutely be competitive, but you’ll be in for a much harder climb to the top.
Aside from that major change, Iron Banner should feel extremely familiar if you’ve already played Control in the Crucible. It features the exact same zone-control mechanics, but puts a stronger emphasis on capturing and keeping zones to win a match. Capturing all three zones in Iron Banner will also initiate a “hunt”: a short period where the enemy team is unable to capture zones and your team gets three points per kill.
Prepare for a lot of matches
Iron Banner works like just about every other event in Destiny 2. As you win matches, there’s a chance you’ll be rewarded with gear like in the regular Crucible, and you’ll also get tokens you can turn in to earn Iron Banner Reputation. Each time you rank up your Iron Banner Reputation, you’ll earn an engram containing a piece of gear specific to the event. Like with other Reputation vendors in Destiny 2, gear that comes from Lord Saladin will only increase your Power Level until you hit the game’s “soft cap,” which increases with each subsequent expansion. (We’ve got all the ins and outs of how to level your character up fast in Destiny 2 in our power-leveling guide.)
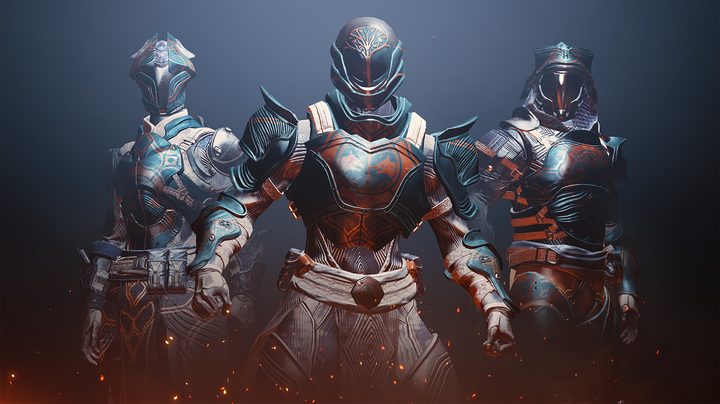
In addition to finding engrams and turning in tokens, you can also buy items directly from Lord Saladin. You can only buy the best gear from Lord Saladin at higher Reputation levels, so you’ll need to play quite a few matches before you’re pulling down the best equipment Iron Banner has to offer. On the plus side, Iron Banner armor tends to look great across the board, so you won’t have to be embarrassed to be seen in low-end gear as you work your way up the ranks. If you don’t get enough wins to score the gear you really want this time, you can hold onto your tokens and save them for the next month.
Like other Destiny 2 game modes, Iron Banner also features its own bounties as another way to earn rewards. Make sure you grab as many bounties from Lord Saladin as you can hold before heading into a match, and you’ll be earning bonus gear in no time just for playing the game. If you have a bounty to use a weapon you’re not great with, though, you might want to reconsider whether chasing after it is worth it, as competition in Iron Banner can be stiff.
Unlike in Destiny, Iron Banner in Destiny 2 isn’t a reliable way to boost your character’s level in the end game. What the Iron Banner is good for, on the other hand, is getting some of the coolest-looking armor in the game right now, along with some great weapons — but you’ll have to infuse them with other gear to bring up their levels. Not to mention that it’s just a whole lot of fun.
Don’t go it alone
As with the other big multiplayer event, Trials of the Nine, Iron Banner is really all about teamwork. If you intend to win matches — which is useful for earning additional tokens more quickly, since you get five for a win and two for a loss — you’ll need to work together with teammates. This is true as well is regular Crucible, but the more hardcore nature of Iron Banner makes it imperative here. Since wins count for so much more, it’s in your best interest as well as that of your team to stick together and keep your eyes on the objective at all times. Most battles in Destiny 2 come down to coordinated, concentrated fire from multiple players — so stay with your team, and help them as much as you can.
Choose your gear wisely

Keep in mind that since Power Level matters in Iron Banner, you’ll want to bring high-end weapons and armor with you. Still, a high Power Level alone isn’t going to win the match, so you’ll need to put just as much thought into stats and perks as you would in regular Crucible.
If you’re wondering what guns you might want to start with, there are a few weapons that have become Crucible favorites in Destiny 2. Some of the most popular guns in Crucible right now — particularly for less experienced players — are actually auto rifles, which may be surprising if you’re privy to the game’s up-and-down balancing that’s more often than not left them underpowered. In the case of the SUROS Regime and Hard Light, however, the overall category’s unreliability is balanced out by some great perks. The SUROS Regime’s quick reload and Hard Light’s large magazine mean you’re less likely to be caught in a long reload. Hard Light also has the fun addition of ricocheting rounds that over-penetrate their target, meaning you can hit enemies behind and around the one you’re aiming for, making it great for dealing with groups.
One of Beyond Light’s newest weapons is No Time to Explain. This pulse rifle should jog the memory of Destiny players, as it was a featured weapon in the original game. Now, new and improved with the Beyond Light DLC, No Time to Explain features the Rewind Again perk. After 10 stacks, No Time to Explain will begin firing ammo from a different dimension instead of its clip. This makes it a viable weapon for defending zones from multiple enemies and not being killed when trying to reload.
Remember to pick your guns not only for what will make you an effective killing machine, but with team support in mind. If your teammates are mostly rocking long-range guns like sniper rifles and scout rifles but the opposing team keeps getting the jump on them, consider putting a close-range weapon like a shotgun in one of your gear slot — assuming, of course, you know how to use it.
Because after all, the best thing you can do is pick weapons you’re comfortable and effective with. Even the devastating Felwinter’s Lie shotgun isn’t going to do you any good if you choke at close range. Stick with your teammates and help each other out for the best possible Iron Banner experience — and to get all that shiny, knight-inspired gear more quickly.


