
How to beat the Nightweaver in Remnant 2

Remnant 2 has a smorgasbord of unique and punishing boss encounters to push through if you want to see everything in its Soulslike world, but few are as frenetic and occasionally jarring as the Nightweaver. The showdown against this nightmarish foe caps off a long and unsettling trek through Losomn’s creepy Sanatorium. If you’ve come across her and find yourself struggling with her rapid movement and constant barrage of attacks, we’ll offer some tips here that might help you make it through the fight alive.

How to beat the Nightweaver in Remnant 2

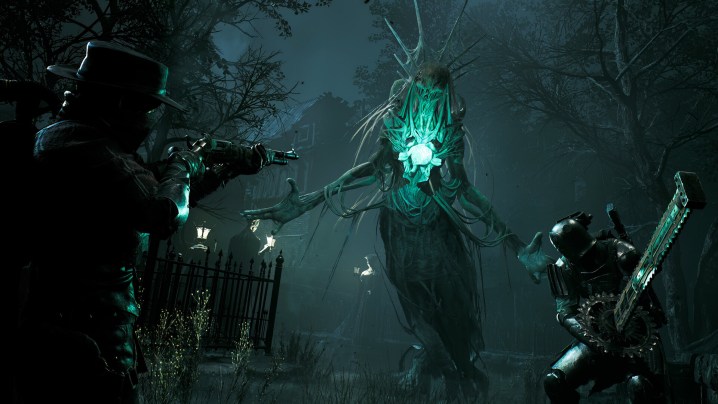
The Nightweaver is located in Losomn within The Tormented Asylum. She’s one of Remnant 2‘s most challenging bosses due to how fast and erratically she moves around the battlefield. It doesn’t help that she has multiple phases throughout different areas of the Sanatorium, eventually making for a very claustrophobic fight once you reach the interior.

At the beginning of the fight, you’ll be outside the Sanatorium facing down the Nightweaver as she flies around in various directions, which can make her difficult to hit. During this first phase, the biggest things to look out for are her Spectral Lunge and Icy Spikes attacks. The former is telegraphed by her ascending into the air and beginning to dive, at which point she’ll begin swiping viciously in your direction until she reaches you – but careful timing can help you dodge right through her attack to survive the onslaught. The latter is a ranged homing attack, meaning you’ll have to either strafe left or right to avoid them or dive out of their way.

Keep shooting the Nightweaver while dodging these attacks to find that she eventually uses an ability wherein she holds up her heart and summons minions. During this part of the fight, it’s imperative that you focus fire on the heart to dish out as much damage as possible.

  • Note that if you manage to destroy the Nightweaver’s heart during her summoning phase, you’ll earn Nightweaver’s Finger, which can be taken to McCabe in Ward 13 to craft a melee weapon called Nightshade. There are some ways this can be ruined for you, though, so read on for more info.

After a while, the Nightweaver will collapse to the ground, at which point you can approach her. Unfortunately, she’s not yet dead, and the game will quickly thrust you into her second phase, which takes place entirely within the interior of the Sanatorium. This phase is significantly harder than her first due to the limited space and the fact that she can crawl at you very quickly to dish out a lot of damage very quickly.

A gunslinger shooting a glowing wraith.
Gearbox / Gunfire Games

The most difficult part of this second phase is simply finding and damaging the Nightweaver, as she can now disappear and reappear through the walls of the Sanatorium. You should personally aim to stay away from the walls altogether, though, because she’s able to reach through them and grab you for what is highly likely to be an instant kill, at which point you’ll have to start the fight all the way over from the beginning.

Luckily, most of her melee attacks during this phase are heavily telegraphed, meaning that you usually have time to just dodge out of the way. However, you need to be on the lookout for her grabs, such as when she ascends and begins to glow blue. When this happens, wait for a moment and roll directly into her right before she strikes to avoid the attack. If you get grabbed by this attack, she’ll steal your heart as her own, which will reset your progress toward the aforementioned Nightweaver’s Finger alternate drop.

You may need to wander around the Sanatorium some to find her during this phase, and it’s probably a good idea that you use your heaviest firepower every chance you see her, as she won’t stay visible for long in most cases. But after enough damage is done to her, she’ll finally fall for good, granting you the Cursed Dream Silks, which you can take to McCabe in Ward 13 to exchange for the Nightfall gun.

Editors' Recommendations

Billy Givens
Billy Givens is a freelance writer with over a decade of experience writing gaming, film, and tech content. His work can be…
Resident Evil 4 Separate Ways DLC: How to solve the shield wall puzzle in Chapter 4
A wall of shields

As you progress through Resident Evil 4's Separate Ways DLC, you'll eventually need to help Luis score some ingredients for a fresh batch of medicine to aid in fending off the infection ailing both Leon and Ada. As you begin your quest to find the ingredients, you'll first have to solve a lithograph puzzle to open a door leading into a room filled with shields on the wall. In this room, you'll have to shoot specific shields in a specific order to open a cabinet revealing your first ingredient: red ink. Here's how to solve the shield wall puzzle.
How to solve the shield wall puzzle in Chapter 4
After solving the lithograph puzzle and opening the door, you'll enter an area where you can interact with a printing machine to get a piece of paper that hints at interacting with (shooting) the shields hanging all along the walls of the room. The problem is that, well, there are a lot of shields in this room. To find the correct shields, turn around from the printing machine and look at the fireplace along the wall behind you. To the left of this fireplace are the five shields from the picture that you printed.

You need to shoot three of these shields in the following order:

Read more
Resident Evil 4 Separate Ways DLC: how to solve the lithograph puzzle in Chapter 4
A wall with lithographs

Part of the way through Chapter 4 of Resident Evil 4's Separate Ways DLC, you'll find yourself needing to track down some ingredients to make some new medicine. One of the first things you'll encounter while doing so is a wall of lithographs that must be placed in a specific order to open a hidden door leading to a shield wall puzzle, which itself yields one of the necessary ingredients you're seeking. Here's how to solve the lithograph puzzle.
How to solve the lithograph puzzle in Chapter 4
When you first set off to find the ingredients, you'll probably come across the wall with two lithographs set in it alongside two empty slots. This means you'll first need to find the other two stone tablets – both of which are nearby and require minimal effort to round up. One tablet is easily found in the same room as the lithograph puzzle, while the other is on a desk in a room further down the main hallway.

When you've obtained both lithographs, return to the puzzle and place the tablets into the empty slots. Notice next to each slot is a symbol (two of which are partially scrubbed off) that corresponds to one of the symbols on each of the lithographs. In order to solve this puzzle, you'll need to not only match the appropriate symbol, but you'll also need to select and flip the lithographs to the correct colors, too.

Read more
Resident Evil 4 Separate Ways DLC: How to open the door in Chapter 2
Ada Wong holds a gun in Resident Evil 4.

Resident Evil 4's Separate Ways DLC tells a parallel story that shows what Ada Wong was up to during Leon's adventure. And although her grappling hook provides some fun new mobility mechanics that can help her reach new heights, she'll still need to solve some puzzles to proceed through certain barriers. The first real puzzle to pop up in the Separate Ways journey is in Chapter 2, when your progress is impeded by a door that can only be unlocked by pressing specific symbols on a mechanism beside it. We'll tell you the correct symbols to press below so that you can get through the door and continue Ada's expedition.
How to open the door in Chapter 2
When you arrive at the door with the mechanism to its left, you'll find that you can only press down three symbols before the puzzle resets. As such, you'll need to press the correct symbols all in one go for the door to unlock. And while you can turn around and scan the area for some clues if you'd like, we've actually got the correct order ready for you to go below. Even better, you don't have to press any of the symbols first or last, so just follow the image below in any order you'd like.

When you've pressed the correct symbols on the mechanism, you'll find that the door opens for you and allows you to continue through Chapter 2. Don't get too comfortable, though – there are some much trickier puzzles coming later in the game.

Read more