Call of Duty: Warzone currently sits in its rightful place as a top-tier Battle Royal. Now almost a full-year-old, Warzone has undergone a series of phases and updates. One thing, though — an element unique to Warzone that took a while to change — The Gulag. Black Ops Cold War’s integration did away with the old prison Gulag and introduced two new ones — Nuketown and Rebirth Island. Here’s how players can put their best 1v1 foot forward to win the Gulag in Call of Duty: Warzone.
A hefty portion of this article will be tailored to Verdansk’s Nuketown Gulag. Most of the same strategies below will apply to surviving Rebirth Island’s Gulag; however, players will only be dragged there during Rebirth Island LTMs.
- Warzone: Tips and tricks to conquer Rebirth Island
- The best M16 loadouts in Call of Duty: Warzone
- How to level up your weapons fast in Call of Duty: Warzone
COD Warzone: How to survive the Nuketown Gulag
There have been so many iterations of Nuketown through the Call of Duty franchise that we’ve lost count. The most recent one came as Nuketown 84′ in Black Ops Cold War. Subsequently, Warzone’s original Gulag was replaced with a knockoff-Nuketown that resembles more of a training area, if anything.
The Gulag has always been about pure gun skill. You can execute the best slide-cancels in the world, but ultimately, you’ll have to land your shots. Before we dig into the tips below, know that the most important tip of all is to hit your shots.
Master movement
You’ll want to master the ‘slide cancel’ to reach cover quickly as well as the ‘bunny hop’ to move across the central area of the Gulag. Keyboard and mouse players can execute these moves flawlessly.
Players using a controller will have to play around with a few different button layouts to find one they’re comfortable using. Ideally, controller players should use ‘Bumper Jumper Tactical,’ which hotkeys their left bumper as jump and R3 as crouch/slide. Not all players can get accustomed to this, especially if they’ve been holding a controller a particular way their entire life.
Changing to the ‘Tactical’ configuration will improve their quality of life in those diamond-tier lobbies. This button layout will only set R3 to crouch/slide. It’s also imperative that players have ‘Auto-Tac Sprint’ enabled. This will help them retreat from fire, both in Verdansk and in the Gulag.
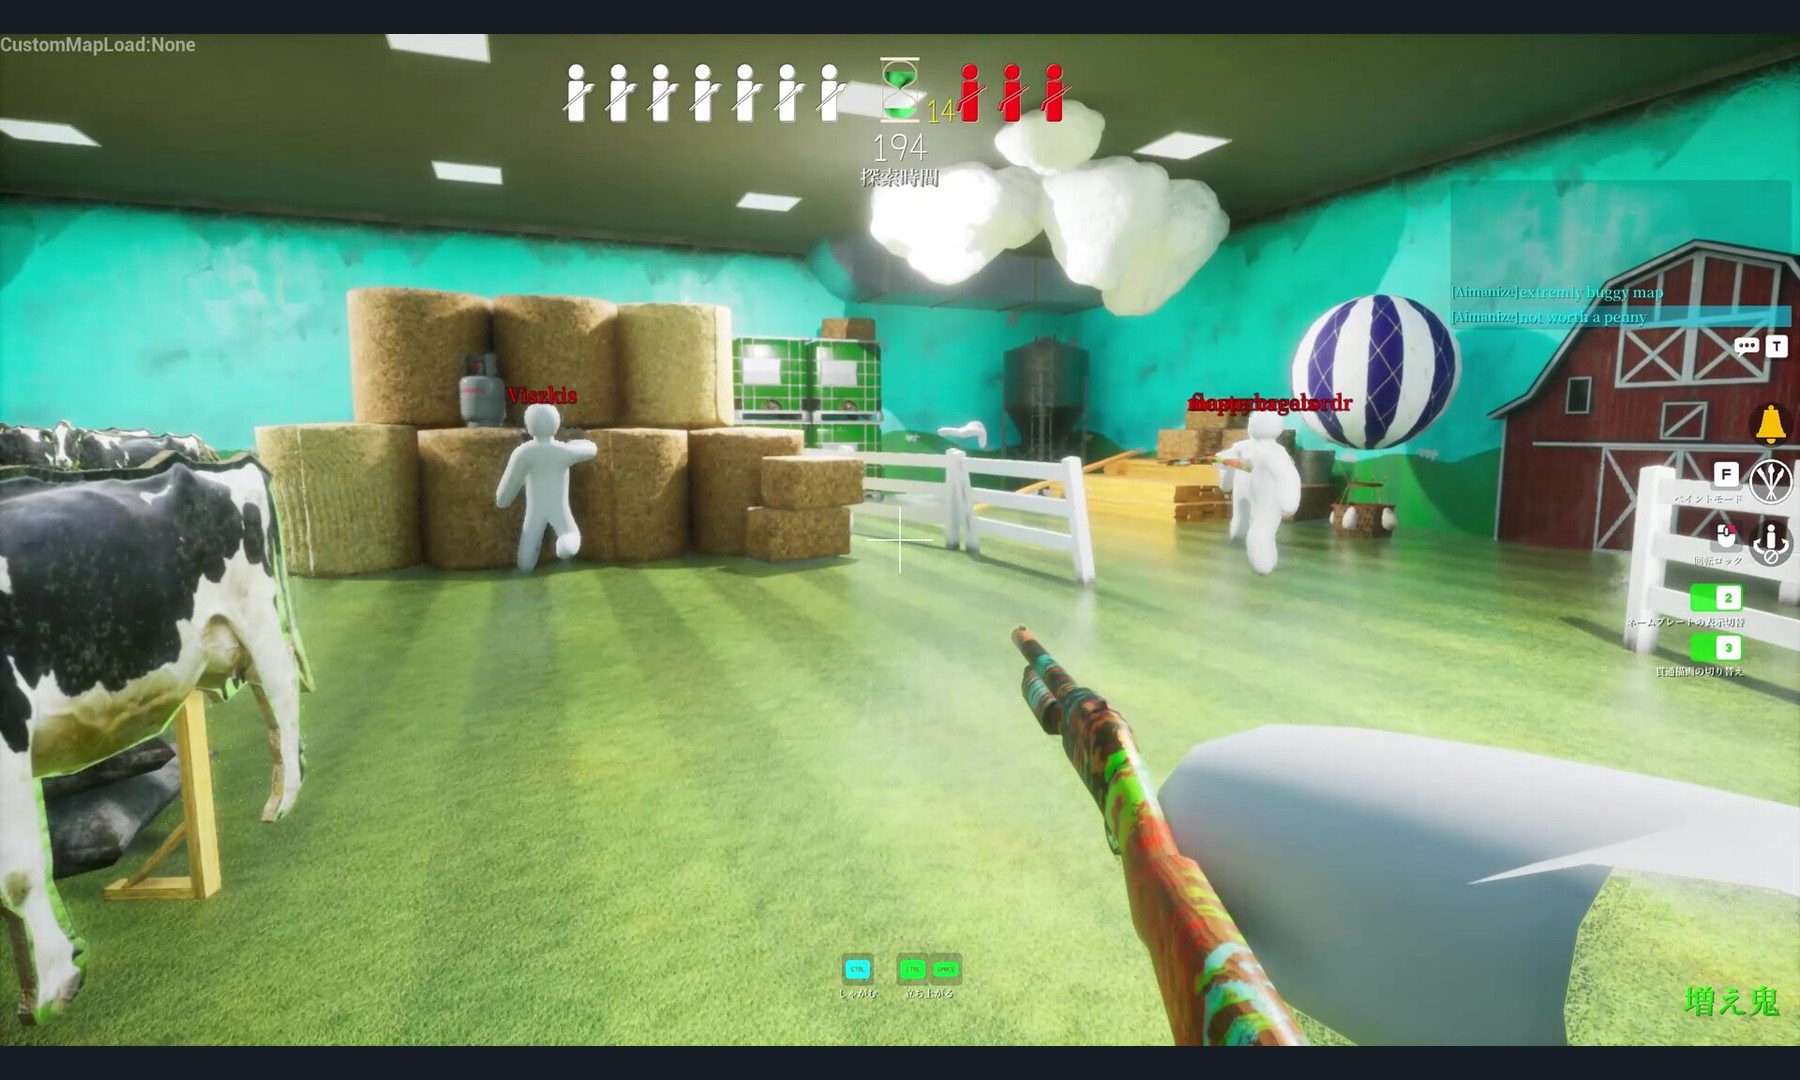
The Nuketown Gulag isn’t a fair fight
Many players have complained that the Nuketown Gulag is unfair. Whoever spawns behind the ‘Welcome to Nuketown’ sign will automatically have an advantage over their opponent. Not only do they get the cover of the sign, but they also get the destroyed car to hide behind. Spawning on the other side leaves you completely vulnerable, with no cover to crouch behind or safely move to.
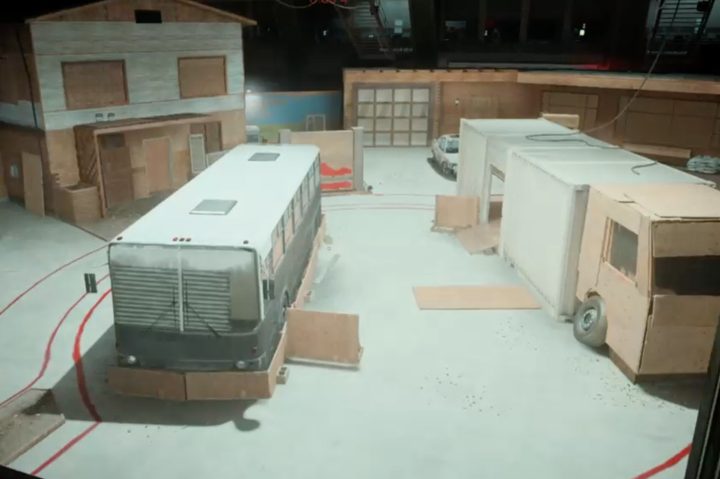
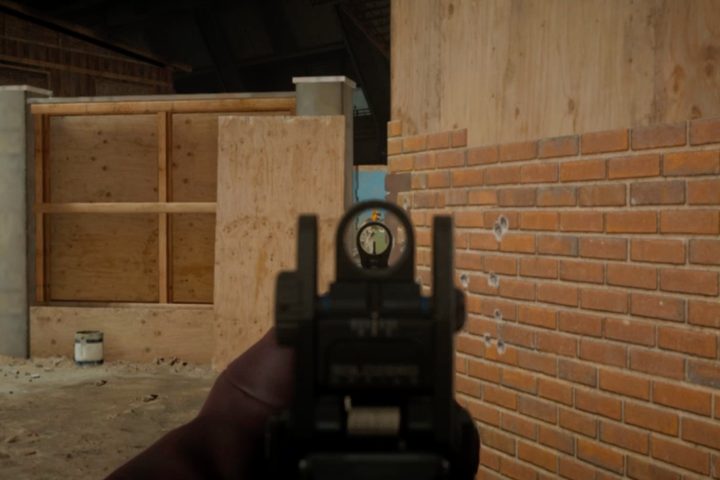
If you’re so lucky, you’ll be concealed by the ‘Welcome to Nuketown’ sign when you spawn. To the right of this sign is a tiny gap between it and the bus. You’ll be able to see your opponent run across to their left (your right). This tiny gap, as insignificant as it may seem, can make or break your Gulag. Here’s how to use it.
Aim down sight (ADS) at the gap when the match starts. If you see your opponent dart across, you know they’re heading to your right. ADS down the right alley and wait for them to inevitably bunny-hop around the corner. Occasionally, you’ll spawn with a sniper rifle. A well-timed shot through this gap will kill your enemy 100% of the time.
Now, if you don’t see anybody dart across the gap after a second, you know they’re heading around to their right (your left). This is a split-second decision. You do not want to be caught running for the car as your opponent comes around the other corner. They’ll be able to look through the hollow truck bed and see you moving. As soon as you decide they’ve gone left, move out and ADS at the gap in the truck bed. If you see them dart across, you know they’re about to slide around the corner. Don’t leave this side of the map if you spawn in it. There’s ample cover making it easier to wait for your opponent to come to you.
What happens if you don’t spawn behind the sign?
This is why players find this Gulag to be unfair. It’s not a mirror image of itself. However, there is another spot you can use. Climb up on the awning to the right of spawn to get a clear view of the map while maintaining cover. It’s a great way to counter anybody running for the car. Climbing up there will conceal darker operators in shadow. Just make sure you land that first shot before giving yourself away.
Hug the right side of the Truck and slide up to the wooden barricade. Your opponent won’t be able to see you through the Nuketown sign gap. You’ll be able to catch them running for the car. Spawning on this side of the Gulag has already put you at a disadvantage, and you’ll have to rely on a little bit of luck to get out of there alive.
Know your loadouts
You must know exactly what you’re working with to win the Gulag. The loadouts cycle through variations every few games. You’ll notice yourself getting similar ones today and different ones tomorrow. The most important part of the Gulag loadout is the piece of tactical equipment it comes with. These will vary between Stun, Flash, Snapshot, Smoke, and Decoy Grenades.
Stuns and Flashes
These are going to be your best friend and worst enemy. It’s all about who hits first. Using the Nuketown gap method, predict where your opponent is running and wait for your tactical equipment to gain the advantage. Throw your flash/stun to the right, or try and get it over the vehicle to your left.
Snapshots
Snapshots grenades come down to who throws it first. Players throwing them at the same time will cancel each other out. However, if you manage to get yours off first, put it in the dead center for the most practical use. You’ll have a small window of time to get the drop on your opponent before they inevitably throw their Snapshot. If they don’t show up on the Snapshot grenade, don’t worry. Now you know exactly where they aren’t.
Decoy and Smoke grenades
These are going to hurt you as much as they hurt your opponents. They’re nothing but a wasted button input. Every precious millisecond counts in late-game Gulags, and you shouldn’t be wasting time throwing these at your opponent. Decoy and smoke grenades can last until the next round if they’re thrown late, and you might end up hurting your teammate who’s up next.
Lethal equipment
Your lethal equipment is going to vary between C4, frag grenades, Molotovs, and claymores. C4 is best used in two different situations. Either throw it as soon as you see your opponent or wait until the flag spawns and booby trap it. Remember to double tape ‘reload’ to blow C4 without pulling out the detonator.
Molotov Cocktails are more for area control. If you want to counter your opponent using the destroyed car as cover, light it on fire. Unless you land a direct hit, Molotovs aren’t going to be a reliable way to kill your opponent.
Learn how to cook if you want the most use out of those frag grenades. Blindly throwing one isn’t going to do much, and your opponent will easily run away from it. Throwing frags is an excellent way to force your opponent out of cover. Make sure you’ve got a clear shot once they leave.
Claymores are considered wasted inputs. The time you spend trying to hide it is time you should have spent trying to locate your opponent. The number of times it works is nothing compared to the number of times it doesn’t. Furthermore, spectators can blow up your claymore with a well-placed stone and potentially kill you with it.
Fist-fights
Players will inevitably get a fist-fight in the Gulag. They’ll spawn with bare-knuckles, a stun grenade, and either a throwing knife or frag grenade. All of the above advice, except for frag grenade cooking, goes out the window with this loadout. Sprint out and challenge your opponent head-on. You’ll look like a crazy person charging in and possibly catch them on the run. They may panic and throw an un-cooked frag at you. Pick it up and throw it back. Be aware of the throwing knife, and make sure you don’t throw yours first unless you have a 100% guaranteed kill-shot. There’s no trick to winning a fist-fight; these Gulags are a coin-flip.
Go for the flag
Far too often, players are too scared to capture the flag during over-time. Don’t be that player. Once the over-time flag pops up, cautiously make your way towards it. Once on the flag, jump around like a mad-man. Your opponent may come charging in, but you’ll have already half-captured the flag. It’s better to go down swinging than letting your opponent capture the flag without challenging them. The worst thing that can happen is neither player captures the flag, and both are sent back to spectate their teammates.
Early Gulag vs. late Gulag
Outside of ‘buyback’ game modes, players will be sent to the Gulag upon their first death in Verdansk. There are two very different points in the game where players will go to the Gulag.
Early Gulag
Early Gulag is considered to be anytime before the second circle closes in. There are a handful of players left in the lobby, and odds are you’ll be matched up with someone of a lesser skill level. This is especially true for players that are killed upon dropping in. These ‘off-the-jump’ Gulags will be the easiest ones you’ll get all game. Of course, there’s always the chance that some 2.3 KD players got killed at Superstore and will be squaring off against you. Chock that one up to the Warzone RNG’s (Random Number Generator).
Squads with a member or two sent to the Gulag before the first circle closes still have plenty of time to earn enough money to buy them back and get a loadout. However, once the map shrinks to half its original size, buybacks and loadouts are going to scream away your team’s position. The ideal time to be sent to the Gulag (if there ever was one) is before the free loadout falls or while the free loadout is still available. Otherwise, your team will be severely handicapped.
Late Gulag
Heading to the Gulag any time after the second circle closes will match you up with equally skilled players (if not better than you are). They survived that long for a reason. These late Gulags are going to require more patience, if anything. Dying now can seal your fate for the rest of the game without a little bit of luck.
There is one situation where you can use the late Gulag to your advantage. Imagine your squad has to push a wide-open area, and you know for a fact there’s a team gate-keeping on the other side. Players that are in the Gulag when it closes will be spat right out. So if you need to make a foolish play in the late-game, do so with 20 seconds left on the Gulag clock. You’ll most likely sit in a cell for a few seconds before your entire team is spat out. Now you can wait for the next loadout to fall, or everyone can drop on a building in the middle of the zone. Either way, you’re in a better position than you were thirty seconds ago.
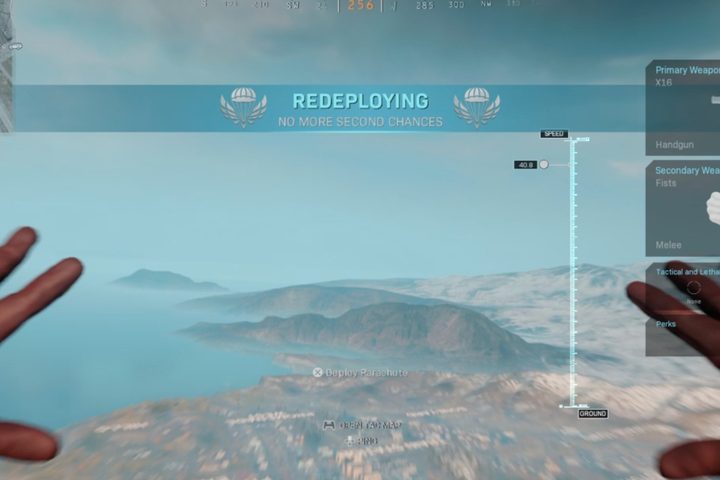
Post-Gulag loadout

What good is surviving your Gulag, especially late-game, if you end up dying as soon as you hit the ground? Now that you’ve made it out, it’s time to get back in the fight. Unfortunately, you’ve got no guns, no ammo, and no perks. Ideally, you’re dropping down on your gear if your team survived the gunfight. However, if you find yourself coming back from a late-game Gulag, and your second free loadout is available (and safe), you’ll want a post-Gulag loadout ready to go with the following components:
Primary weapon
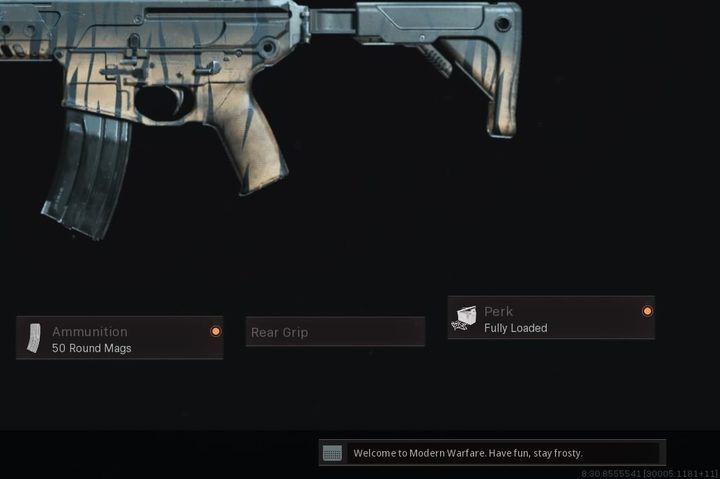
Pick your favorite weapon, and then decide which attachment you can live without. Replace that attachment with the ‘Fully Loaded’ perk to give yourself a full cache of ammo. Alternatively, equip an SMG with a large clip to this loadout. Your reserve pistol ammo will provide you with bonus clips.
Secondary weapon
Something light and mobile will help in getting away from your loadout drop. Pistols and melee weapons work, melee weapons being preferred. You won’t be picking up overkill with this class, especially if you’re the last one alive in your squad. There’s also no need to carry around a rocket launcher with a single shot.
Perks
Blue – Double Time or E.O.D. You might be running for your life once you grab this loadout. Survivability is key.
Red – Ghost or High Alert. Ghost is self-explanatory. Hight Alert is gaining some momentum in the Warzone community. However, if you’re relying on it to save your life while grabbing this late-game loadout, you’re probably dead in the sights of a full squad. We’re playing this post-Gulag scenario cautiously.
Yellow – Amped. There is no other Yellow perk worth using in Warzone.
Equipment
Tactical – Smoke Grenade. If you’re getting shot at while grabbing your loadout, the smoke is going to save your life. Equip that melee weapon and book it.
Lethal – Player preference. There’s no go-to piece of post-Gulag lethal equipment.
If you’re coming back from the Gulag and dropping down on your first free loadout, go ahead and pick up your regular Ghost class. Your teammates will have to share some ammo. Win your first gunfight and get right back in the game.
Don’t force the game
This tip is for players that want to grind out every single game, regardless of how it’s going. You will never win every single game of Warzone. It takes 20-25 minutes to make it into the final circles. Most casual players will only get four or five games in before they call it a night. If the drop doesn’t go your team’s way, and the free loadout is lost in the gas, there’s no shame in backing out and trying again. Nobody wants to sit there and watch their friend camp for the next 15 minutes.
The least you can do is pick up a Most Wanted contract. In either case, three minutes is the longest your team will have to wait to play again. You either get killed and start a new game, or you complete the contract and bring all your teammates back. Maybe you’ll get lucky with a Jailbreak, but it’s not worth betting a night of gaming on.
Rebirth Island Gulag

Rebirth Island will feature game modes like Mini-Royal that don’t play off the small map’s respawn mechanic. Instead, players are taken to a tight Gulag comprised of two narrow hallways and a close-quarters middle area where the flag spawns. This Gulag is only as common as Rebirth’s LTMs, but there is still some merit in understanding the layout to ensure a win.
From spawn, head left, and bunny-hop around the corner. If your opponent ran straight ahead, you’ll catch them by surprise and break their camera before they ever get a shot off. If nobody’s there, look back towards your spawn and throw your tactical around the right corner. If you don’t get a hit-marker, you know your opponent is somewhere in the center. If you do, charge in and kill them while they’re stunned.
Other than the ‘Nuketown Gap,’ all of the tips mentioned above will help you win the Rebirth Gulag. You’ll want to be sliding and jumping around this Gulag’s tight corners. Be ready to hip fire if the fight brings both players to the center of the map.