Call of Duty: Warzone‘s Rebirth Island was implemented in December 2020 as part of the Black Ops Cold War integration. This additional map is a lot smaller than Verdansk or Caldera and plays differently, with more fast-paced action that often results in riskier playstyles. Matches last around 10 to 20 minutes, and things get hectic as soon as you touch the ground.
One of its main differences, aside from the size of the map, is that you’re able to respawn as long as at least one of your team members is alive. There’s a lot of nuance to how this works, and it forces you to be strategic when approaching certain situations. Now, as of the Season 5 Reloaded update, the small-scale map has undergone a substantial number of changes.
Since it’s such a vastly different experience from what you might be used to, you can’t approach combat in the same way you would on Caldera. Whether you’re new to Rebirth Island or are just looking for some extra pointers, this guide is sure to help you out.
Here’s our list of Warzone Rebirth Island tips that will help you bring home more victories during Season 5 Reloaded.
See more
- The best MP5 loadouts in Call of Duty: Black Ops Cold War
- Call of Duty: Warzone guide with tips and tricks to win the war
- The most common PS5 problems, and how to fix them
What is Rebirth Island?
Rebirth Island is a different way to play Call of Duty: Warzone. Around 40 players drop on Rebirth Island, a map slightly bigger than Docks in Caldera. Players operate as they normally would, completing contracts, looting, and finding money. However, Rebirth Island has one essential mechanic that you’ll need to adapt to.
Respawning is huge on Rebirth Island as there is no Gulag (normally). If you die, you’ll have to wait for an allotted amount of time (anywhere from 15 to 45 seconds) until you drop back in. However, one of your teammates must stay alive to respawn. If the entire team dies, that’s it — game over.
The surviving teammate can help in decreasing the respawn time by getting kills, opening chests, or completing contracts. They can also buy back teammates in an emergency; however, buybacks aren’t totally viable on Rebirth. Once the final circle closes, you won’t be able to respawn, similar to when the Gulag closes in Caldera. Your teammate is able to buy you back at this point, but it’s a serious gamble, especially since the final circle is often claustrophobic. Buying a teammate back will reveal your location via a signal flare, so it’s a risk — but sometimes, it’s worth it.
Lastly, Rebirth Island’s final “eclipsing” circle gets super hectic and chaotic. Your position is key in the end. Forcing players to run toward you is almost an instant win. That’s the basic layout of Rebirth Island, and as you can see, it’s a major departure from the standard battle royale mode.
As part of the Season 5 Reloaded update, player health was increased to 300, up from 250, allowing players more time to react. That additional 50 health might not sound like much, but it lengthens the time to kill (TTK) enough to offer some wiggle room. Even though Rebirth Island allows you to respawn, it can still be frustrating to get eliminated in literally half a second by someone who just so happened to sneak up on you. The additional health is an excellent step in the right direction.
The Drop — start on the right foot

Dropping onto the island is like jumping off a tall building in downtown Verdansk. It’s nothing compared to the drop you might be accustomed to, and you’ll be on the ground (or on a rooftop) faster than you can say, “I’m being shot out of the sky!” Thankfully, being killed before you hit the ground is a rarity on Rebirth Island. However, it’s much more likely you’ll get taken out as soon as you land, especially if you land at busy areas like Prison Block, Control Center, or the Stronghold area.
Rebirth Island is about starting fast. You want to be the first team on the ground with weapons or the last team to jump from the helicopter, with an emphasis on catching an enemy squad off guard. Jumping mid-flight will be pure chaos as most of the lobby heads for Prison Block and its surrounding buildings. However, this might not always be feasible depending on where other teams land, along with the location of the first circle.
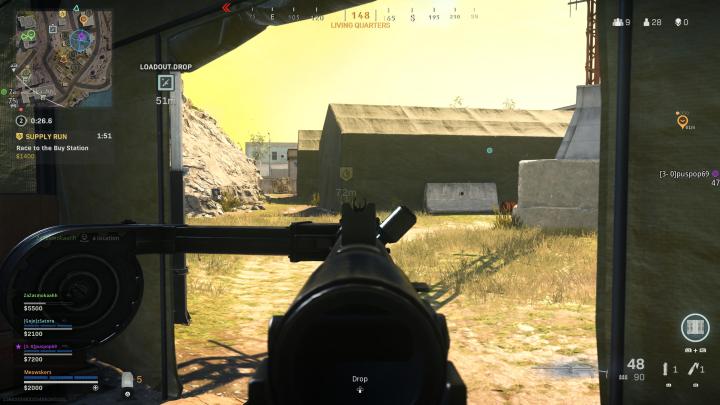
Ideally, you should land close to a Buy Station so you can quickly purchase a Loadout Drop (more on that below). There are numerous strategies for landing. Some players land in the same spot each time no matter what, while others tend to gravitate toward contracts to rack up money fast. Where you land could be determined by the position of the first circle as well. Land closer to the center to secure a position within the circle, but beware of other teams looking to do the same. Or, land far away from the action to get set up much easier.
In general, you can certainly experiment, but you should always land close to a Buy Station if possible. If you see a ton of players heading to the same spot, quickly communicate with your team to reassess your drop point. You may need to pull back and adjust if a particular spot is too hot. The nice thing about recent updates is that you can actually find a portable Buy Station as floor loot or from chests, so you can sometimes get away with landing far from the action, away from a traditional Buy Station.
Either way, it’s imperative that your team lands together in an area you’re accustomed to, as this leads nicely into the next tip.
Wipe the squad you land with
More often than not, you’re going to land with another squad — possibly more. Rebirth Island is only a fraction of the size of Caldera. Contracts and loot are spread evenly around the island, with a handful of Buy Stations in between. This is why it is imperative that your team lands in a building/area you’re used to. You’ll learn where other players like to land as well as where you should drop to grab weapons and gear immediately.
Sometimes this won’t go your way, and your team may end up getting sent back to the main menu right away. However, if you stick with your team and communicate effectively, it should work out most of the time. It’s important to wipe the squad you land with because the worst thing you can do is end up in a five-minute respawn loop as your squad and another t ake turns eliminating each other. Neither team is going to benefit, and the gas is going to be closing in quickly. Play aggressively on the landing, grab an automatic weapon, and be aware of the one-second pings that appear on the map when you eliminate a player. Once that first circle closes, half the lobby is already gone. Be in the other half.
As you land, you might see different pieces of loot spread out on rooftops. Try to make a beeline for a decent weapon right away, even if it’s not something you’d typically use. Grabbing a weapon first can be the difference between winning and losing a gunfight. This is especially true since melee attacks were nerfed as of Season 3 Reloaded, so you’re even better off with a weapon than before. It’s also smart to listen to see if other squads are joining you at your landing destination. As soon as you’re aware a team is landing with you, make a call out so your entire squad is aware.
Buy your own loadout (ASAP)

This is probably the most important tip on this list. If you haven’t already discovered, Loadout Drops only cost $7,500 on Rebirth Island. That money should be easy to come by, and your squad should aim to get a Loadout Drop before anyone else. There is still a free Loadout that will fall as the first circle is almost closed (about 10 seconds remaining). However, these Loadouts are incredibly dangerous and should not be the team’s priority since every other team in the lobby can see them. Plus, you should leave a free Loadout Drop untouched just in case you die; that way, you can try to head toward it (if it’s safe to do so) after you come back.
If you’re respawning or your team wasn’t able to scrounge up enough cash for a Loadout, it’s worth trying to hit the free one, but don’t expect to always get out of there safely. There’s a chance nobody is watching the crate, but it’s slim. It’s rare to get an isolated Loadout Drop on Rebirth Island. If you do, you should drop everything and buy a lottery ticket. With this in mind, try to float above the free Loadout Drop to see if there are any enemy players nearby before dropping down.
The other thing to consider is the loadout itself. You’ll want to deck out your builds and Perks in a way that works well on Rebirth. It doesn’t do a lot of good to bring only long-range weapons with you since many of your firefights will occur at close to medium range. Your Perks are also important, which we’ll cover in more detail below.
Overkill, Ghost, or something else?

You can get away with gravitating toward the Overkill Perk more so than Ghost while playing on Rebirth Island. This is because the map is so condensed that enemy players can pretty much assume at least one team is at every main point of interest. Even if a team manages to throw up a UAV, your chances of getting eliminated aren’t as high, simply due to the layout of the map.
However, as the end of the game approaches, having Ghost can give you a major leg up, especially when facing off against other teams that are spawning back in. Remember, when you die and come back, you lose all of your Perks and must acquire a new loadout to regain them.
So when it comes to Overkill versus Ghost, there’s a strategy you could use. Start off with Overkill (if you’re comfortable) to be well-equipped to outlast the competition during the first half of that match. Then, after multiple teams die off, you can grab a second loadout to switch to Ghost, which will help you through the rest of the match.
The thing is, you can easily grab an enemy player’s primary weapon to replace your secondary, though it’s a gamble regarding what you’ll end up with. When we play on Rebirth, we typically start off with Ghost — or something other than Overkill — since there’s such a high chance of coming across a usable primary weapon, so ultimately it’s up to you. Some of the floor loot weapons are great as well, like the Armaguerra 43.
Now that Ghost has been nerfed, it’s actually advised to utilize either Tempered or Restock instead. Earlier in 2022, the Ghost Perk was made less effective since you have to be moving for it to activate, meaning far fewer players are using it. Tempered is a great option since it allows you to reach full armor with only two plates instead of three, while Restock allows you to replenish equipment every 25 seconds.
Some skilled players like to use High Alert, as well. This Perk causes your screen to pulsate when an enemy looks at you. Your screen will pulsate in the direction the enemy is, giving you a clear indication of their location. This is risky, but if you’re confident in your gun skill, it can be a lifesaver.
Another new addition gives you the ability to collect Perks from chests (or as ground loot). You’re able to loot nearly every Perk in the game, so be on the lookout for them as you pick up items during a match. These Perks activate regardless of whether you have your Loadout and even stack with the Perks you might already have equipped.
Don’t get stuck in the respawn loop

The respawn loop happens when two teams can’t wipe one another and players keep spawning, getting one kill and then dying again. This is especially harmful when it happens just after landing. Your squad and another will end up preoccupied with one another for the entirety of the first circle. This can be bad because it leaves you wide open for an attack from a third team that might already have their loadout.
Even if you manage to wipe the other team, you’ve got no ammo, no money, no loadout, and the gas is coming. Admit defeat if two of your teammates get killed. The remaining players should hide long enough to allow their teammates to respawn and move to a different building. This is something many players overlook, as their egos can sometimes get the better of them. Live to fight another day and move onto a different area — hopefully a secluded spot. Be sure to pay attention when selecting a new area to move toward.
Remember, enemies will be getting the “enemy soldier incoming!” notification, so there’s no sense in trying to surprise anybody, especially when all you have is a handgun. The exception to this rule is if you know an enemy player is low on health or if they have a bad weapon. You might be able to get the drop on them.
Try to land by a contract so you can earn some cash to buy a Loadout to get back in the game.
Contracts
Rebirth Island’s contracts work exactly how they do on Caldera, only the map’s size will often alter how quickly you can complete them. Here, you’ll find Most Wanted, Bounty, Big Game Bounty, Supply Run, Supply Drop, Top Secret, and Scavenger contracts, and it pays to be familiar with how they work.
Many players tend to overlook Most Wanted contracts since they do give away your position, just like on Caldera. However, you have a much higher chance of completing a Most Wanted contract at the beginning of a match since other teams will likely still be in the process of collecting cash and loot. Completing a Most Wanted contract earns you lots of cash and revives your dead teammates, so they can come in handy.
Bounties are also worth grabbing, though if you aren’t an aggressive player, they might not be as useful. Still, other people usually play more aggressively on Rebirth, meaning your bounty could — at the very least — get poached, which still nets you some cash. Other times, it could be a great way to simply know where an enemy team is, which is useful information.
The Big Game Bounty contract works like a regular Bounty, but instead, targets the player with the most kills in the match. Upon defeating this enemy, you’ll earn an Advanced UAV that will activate immediately (as long as the player wasn’t poached).
Supply Run contracts are similar to recons, in that you must visit a certain nearby location, specifically a Buy Station. These are often riskier to attempt since Buy Stations are frequently visited, but it’s usually not too difficult to quickly pass by to complete the contract. Plus, you get a discount on one item from the store after it’s finished.
Supply Drop contracts send you to a random location to open a crate full of loot and cash. The catch is that other enemies can see this Supply Drop as well and can even steal it from you, just like a care package from the multiplayer modes.
Top Secret contracts are great because they give you a random contract to complete but reward you with an Advanced UAV after completing them. You also gain more cash for completing one, and following the Season 2 Reloaded update, you no longer have to worry about getting stuck with a Most Wanted contract as your Top Secret mission.
Finally, finishing a Scavenger contract is the safest way to make quick cash. To complete a Scavenger contract, you must open three consecutive chests that spawn in random locations around the map. They always spawn nearby one another so the risk is relatively low, provided that you and your team are on the same page. In short, complete contracts to earn loot and cash to get ahead in the match.
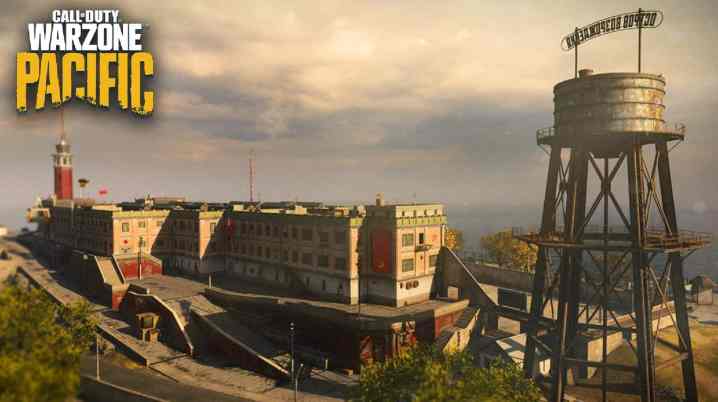
Get the high ground

While this tip is an obvious one to any seasoned Warzone player, it couldn’t be more important on Rebirth Island. The Prison Block roof in the center of the island is the most coveted location on the map. While there are many ways up top, your team should have a relatively easy time defending it, so long as you communicate effectively. Place claymores at the rappels on the sides, and don’t forget about the ladder that can be climbed on the western portion of the building, close to the Control Center.
From the Prison Block roof, your team can jump to any location to reposition as the gas is moving. The end game comes fast on Rebirth Island. Keep track of how many enemy teams are remaining and hold the roof or position yourself so that enemies will have to push in your direction. Be ready for a fight at all times, as Rebirth Island’s high points are highly sought after.
If you can’t manage to take the roof for whatever reason, do keep in mind there are two high spots on either end. There’s the water tower on the north side and the tall watchtower to the south. Both of these spots overlook the Prison Block roof, so you can climb up to get a better vantage point and hopefully use your position to overtake the large roof in the center.
Learn alternate routes
Nearly every major point of interest has multiple access points. For instance, the Prison Block rooftop has a handful of rappels that can be used to reach the top, along with two sets of stairs, a ladder, a scaffold, and even a gondola. Other buildings have ledges and windows you can climb through, so it’s good to be aware of the locations. The point is that you should always try to infiltrate a building from one of the lesser-known entry points to catch your opponents by surprise. It won’t do you any good to walk in through the front door, right into their line of sight.
It’s also a good idea to use helicopters to access certain areas. If you’re sure an enemy team is located in the big green house of Living Quarters (known colloquially as “Green House”), you’ll have an easier time catching them by surprise if you execute an aerial maneuver to infiltrate through a window instead of predictably coming up the steps. Check out our video below to see what we mean.
How's this for an entrance? #Warzone pic.twitter.com/0XddHeFcaU
— Joseph Yaden (@JosephYaden) May 3, 2021
There are tons of similar strategies you can use to overtake your enemies, even if you aren’t the most accurate player. Sometimes, pulling off one of these moves can allow you to wipe an entire squad that you might have trouble taking on otherwise. Look up at the windows for alternate routes or other means to access buildings that will allow you to drop in on your foes.
Learn how and when to use killstreaks
This is more of an advanced technique, but one you should be aware of regardless of skill level. You should learn how and when to use killstreaks to maximize effectiveness, not only on Rebirth Island but on Caldera as well. Though, on Rebirth, killstreaks can be much more deadly due to the close proximity of enemy teams. Ideally, you should hold your aerial killstreaks, such as a Precision Airstrike or Cluster Strike, for when you need them. Many players will often just fire away a killstreak at a nearby building in hopes that it will down an enemy player through the roof. While this can sometimes work, you’re far less likely to even secure an elimination since killstreaks are easy to avoid (and players get revived so often).
There are two main strategies when it comes to using killstreaks effectively. One is to wait until you or your teammates down a player from afar. As soon as this happens, place a Cluster or Precision right on top of the downed player to increase your likelihood of securing the elimination. If you’re lucky, you might wipe out multiple players, as one might be attempting to revive the person who got downed in the first place.
The second useful tactic when utilizing killstreaks is to save one until the end of the match and place it right along the path an enemy must take to reach safety. For instance, if you know an enemy team is on top of Prison Block roof and the final circle is to the north by Shore, you should wait until the last minute, and then place the airstrike right in front of the opponents so they run into the killstreak as they attempt to reach the safe zone. This is tougher to execute properly as timing is crucial, but is something you can learn more about as you play.
Reduce your teammates’ respawn time

We cannot stress enough how important it is to complete tasks to reduce your teammates’ respawn timers. Securing eliminations will reduce the timer by the most, while completing contracts, destroying enemy equipment, and opening chests will also get your teammates back into the action faster. If you are the last alive and you’re near chests or contract objectives, use your best judgment to make decisions that will reduce your squads’ spawn timers. The faster your teammates can join you, the higher chance you have of surviving.
Features you should be aware of
Redeploy balloons
Season 2 Reloaded marked the biggest update to Rebirth Island since its launch in December 2020. It included Redeploy Balloons, which had been in Caldera for a while up until that point. Pay $500 to utilize them, launching you into the air to make your escape. Use them to reposition or outrun the gas. You also have access to Portable Redeploy Balloons, which can be placed in any location. We recommend saving them until the end of a match to reposition yourself for victory.
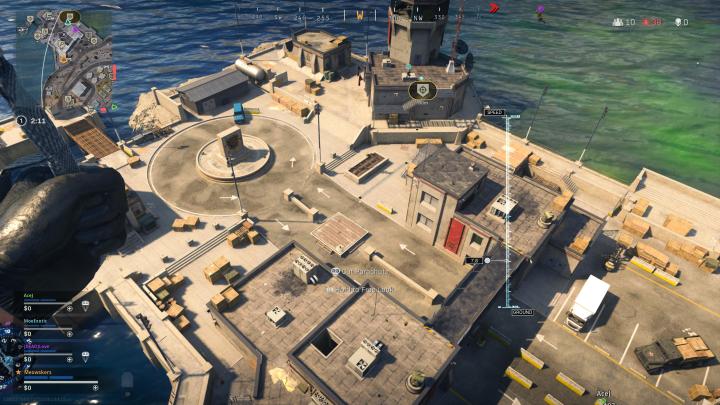
Ships

On either side of Rebirth Island at Nova 6 and across from Control Center are two large ships. If you visit the ship’s main floor where the large wheel is located, you can sound the horn. Sounding it five times will spawn a Supply Drop on the ship containing plenty of goodies like cash, killstreaks, gas masks, and weapons. Though, do so at your own risk, as sounding the horn can give away your position.
Deployable Buy Stations
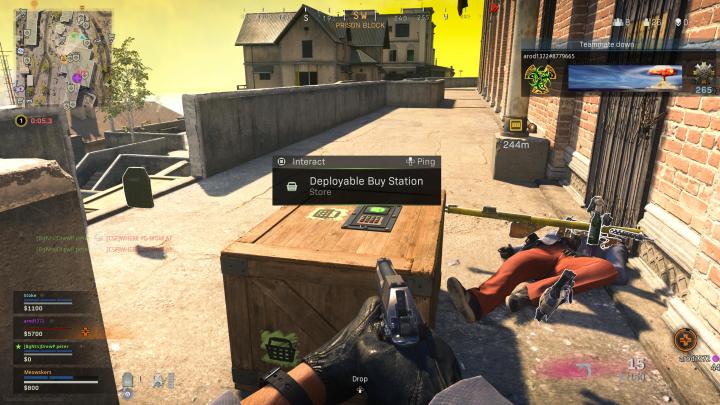
Sometimes, Buy Stations are in dangerous areas, while other times, there’s no Buy Station nearby at all. Season 2 Reloaded introduced Deployable Buy Stations, which can be thrown down wherever you’d like. They only stick around for a limited time, but having one on hand can greatly improve your odds of winning. Just be aware that enemies can see your Deployable Buy Station on the map, so approach with caution.
New areas
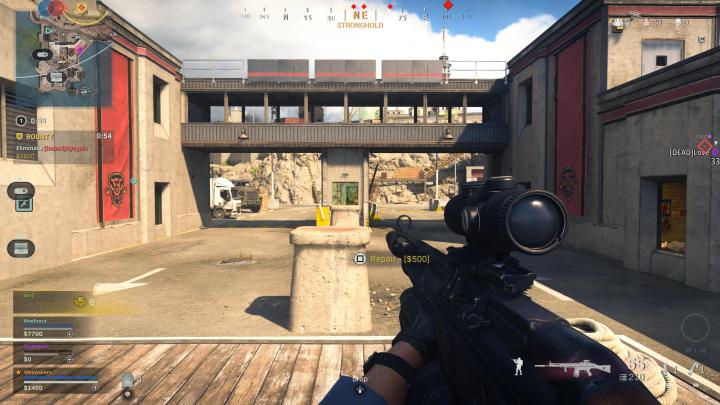
There are several new areas on Rebirth Island such as the aforementioned ships, a new water tower to the north of Prison Block, and even a revamped section on the south side called Stronghold. Take note of these new locations and learn their layouts to get a leg up. Beyond that, more subtle changes have been made to building placements, as well as more cover on the west side of Prison Block. Small details like these are easy to overlook but could save your life if you’re familiar with them.
Key cards

One of the more notable changes during Season 2 Reloaded is the inclusion of key cards, which are hidden around Rebirth Island.
There are three in total:
- Vikhor’s: Found inside the now-opened vault in the large building within Headquarters.
- The Forgotten: Use the shower in the basement of Bioweapon Labs to get this key card to spawn.
- Perseus: Found on a bookshelf on the southern side of the large building to the south of Nova 6.
Taking any of these key cards to the new building with the satellite on the roof in Stronghold will reward you with goodies like an Advance UAV, a Specialist Bonus, or cash. Take them to the small vault room with the lockers and use the correct key card to reap the rewards.
Lootable Perks

Keep your eyes peeled for lootable Perks alongside Season 3 Reloaded. These apply to your character regardless of whether you have your Loadout equipped. They disappear upon death, just like standard Perks do, and even stack with other Perks!
Radar Jammer Field Upgrade
Radar Jammers are new during Season 3 Reloaded. These Field Upgrades can be placed on the ground, obstructing the minimap of your opponents within a 125-meter radius. It lasts for 45 seconds and even negates your opponents’ ability to use killstreaks. The Field Jammer can be hacked by players using the Engineer Perk. Place this when firing unsuppressed so your enemies don’t know where you are.
Increased health (300)
The most groundbreaking change of Season 3 Reloaded is the implementation of 300 total HP, up from 250. That means your base health will now be 150, with each plate remaining at 50 a piece. Caldera has featured the 300 health pool for a while now, but it’s nice to see it come to Rebirth Island. This will require you to land more shots on your opponents to secure eliminations, but also give you more time to react when under enemy fire.
New “Occupation Scan” Public Event
A new in-game event known as “Operation Scan” has been added as part of Season 3 Reloaded. During this public event, you’ll be instructed to go prone, and if you don’t, you’ll be revealed on the minimap. This happens randomly but will likely keep you and the rest of the player base on their toes. Make sure you find a secure location when this event occurs or you’ll run the risk of being flushed out.
Revamped floor loot

Since Season 5 Reloaded is the final major update for Warzone, Activision is leaving Rebirth on a high note, as shown by the floor loot. Now, you’ll find high-tier weapons from all three Call of Duty games including Modern Warfare, Black Ops Cold War, and Vanguard. With that in mind, try to be as familiar with the floor loot as much as possible so you know what to pick up.
Editors' Recommendations
- Call of Duty: Warzone is finally coming to mobile in March
- The best Call of Duty games, ranked
- Activision teases Call of Duty: Modern Warfare III’s biggest improvements
- The best Warzone Carrack .300 loadout
- Call of Duty: Modern Warfare III is official and it’s coming this November