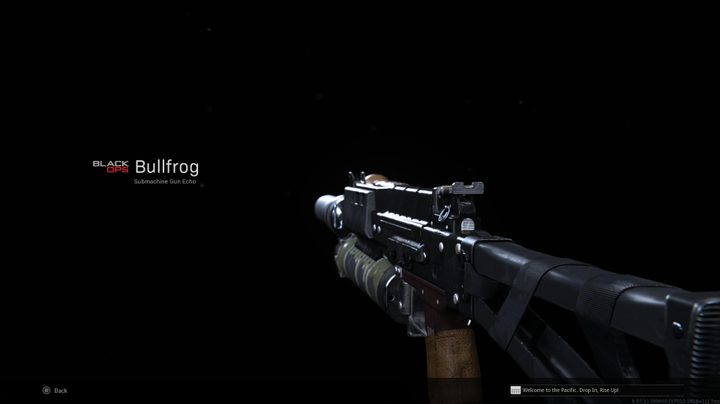
Ever since the Bullfrog SMG launched alongside the Cold War integration in Warzone, it has been at the top of its class, competing alongside the best options in the game. It was never the absolute best in terms of stats, but it excelled as an all-around choice due in part to its large magazine size, lightweight mobility, and clean iron sights. Now that the Bullfrog has been around for a while and has settled into the meta, it’s clear how and when it should be used. But which attachments work best with it?
Here, we’ll dive into the best Bullfrog loadouts in Call of Duty: Warzone as of Season 3 Reloaded.
See more
- The best weapons in Call of Duty: Warzone for season 3
- Call of Duty: Warzone review: Plundering the competition
- Call of Duty workers vote to unionize in industry first
Bullfrog overview
While most SMGs excel at close range (within 10 meters or so), the Bullfrog is actually best used at mid-range (between 15 and 20 meters), according to TrueGameData. Thanks to its large ammo pool and easy-to-control recoil, you’ll find it most effective from afar, especially once you get past the first or second damage dropoff of other weapons. For instance, the Owen Gun, which is considered the best close-range SMG in the game right now, does significantly less damage at around 21 meters, allowing the Bullfrog to pick up and outclass it in terms of time to kill (TTK). With this in mind, the Bullfrog actually works well as a sniper support weapon, giving you the ability to cover your bases up close and at mid-range. The other great thing about the Bullfrog is that its default magazine size is 50, meaning you can preserve a precious attachment slot instead of adding a larger magazine size.
Aggressive closeup
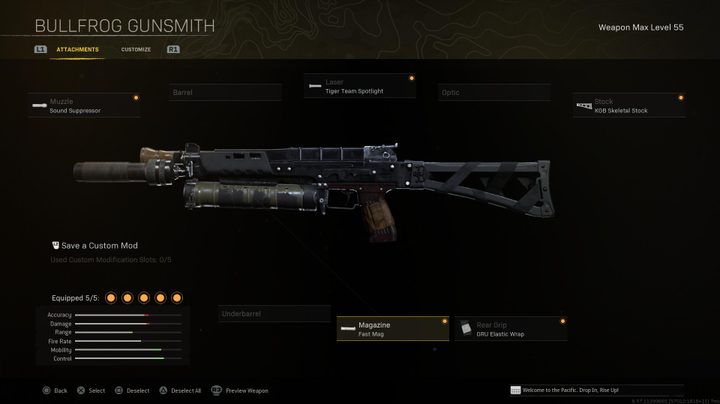
Recommended loadout:
| Muzzle | Sound Suppressor |
| Laser | Tiger Team Spotlight |
| Stock | KGB Skeletal Stock |
| Magazine | Fast Mag |
| Rear Grip | GRU Elastic Wrap |
Before jumping into the mid-range build, let’s first touch on the best close-quarters loadout, which excels at mobility and fast aim down sights (ADS) times. Normally, you’d want to equip the last Muzzle when building most weapons, but in this case, you should swap over to the standard Sound Suppressor, keeping you off the minimap when firing, while also improving ADS speeds, bullet velocity, and sprint to fire speed. The GRU Suppressor actually hurts your ADS speeds a lot, so we recommend sticking with the standard Sound Suppressor to ensure your close-range battles go as smoothly as possible.
From there, skip over a Barrel and equip the Tiger Team Spotlight Laser, granting you additional movement speed and aim walking movement speed. This will, once again, serve you well up close. You don’t need an Optic with this build, but we do recommend using the KGB Skeletal Stock for improved ADS firing move speed, aim walking movement speed, and faster sprint to fire times.
Next up, we advise utilizing the Fast Mag type, which allows you to reload faster. It doesn’t have any other downsides, and since it’s common to get caught during reloads, there’s no reason not to use this attachment, especially since the rest of the build pretty much has everything it needs to excel up close.
Finally, we recommend the GRU Elastic Wrap Rear Grip for improved ADS times, better flinch resistance, and aiming stability, which will all help you perform better up close. Keep in mind, this does come with some downsides, particularly with its sprint to fire speed, so if you’re struggling with this, we recommend swapping over to the Bruiser Grip Underbarrel instead. We like the GRU Elastic Wrap because of its excellent ADS times, but your performance might vary.
Perks
| Perk 1 | Quick Fix |
| Perk 2 | Tempered |
| Perk 3 | Battle Hardened |
When it comes to Perks, it’s hard to pass up using Quick Fix, which immediately starts health regeneration as soon as you insert an armor plate or secure an elimination. This allows you to take on multiple enemies at once, and when combined with Tempered, you’ll be able to restore shields and health quickly, giving you the ability to re-challenge enemies safely. Jump behind cover, restore a shield, and you’ll have more health than your enemy expects. Finally, it’s best to use Battle Hardened, which reduces the strength of enemy equipment and completely negates the effects of Snapshot Grenades. The recent Season 3 Reloaded update nerfed stims, so many players will likely begin using Restock and Snapshot grenades, and you’ll want to come prepared to counter that.
Equipment
| Lethal | Throwing Knife |
| Tactical | Snapshot Grenade |
In many cases, the Throwing Knife is an all-around ideal piece of Lethal equipment, as it allows you to quickly eliminate a downed player without wasting ammo. Now that Rebirth Island features a total of 300 HP rather than 250, Throwing Knives are far more essential since ammo is precious. Finally, equip Snapshot Grenades to highlight any nearby enemies. If you find that too many players are running Battle Hardened to counter Snapshots, go with Stuns or Flashes.
Mid-range sniper support
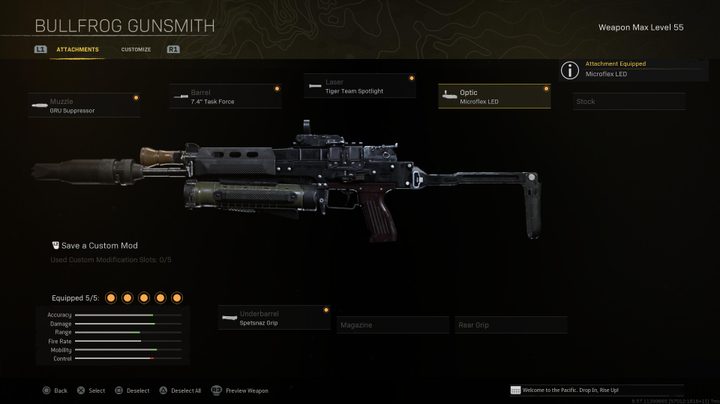
Recommended loadout:
| Muzzle | GRU Suppressor |
| Barrel | 7.4″ Task Force |
| Laser | Tiger Team Spotlight |
| Optic | Microflex LED |
| Underbarrel | Spetsnaz Grip |
While the close-quarters Bullfrog build works decently, the best way to use this weapon is at mid-range, emphasizing recoil control, bullet velocity, and accuracy. For that, we advise starting with the GRU Suppressor Muzzle, which removes you from the minimap when firing, while boosting your recoil control. This will hurt your ADS times, but at mid-range that won’t matter as much.
Follow that up with the 7.4-inch Task Force Barrel for improved damage range, bullet velocity, and strafe speed. You can also utilize the Liberator Barrel, but it hurts your mobility quite a bit, so it’s best to stick with the Task Force. Speaking of mobility, make sure you use the Tiger Team Spotlight Laser from the previous build, giving you better movement speed and aim walking movement speed. This will balance out some of the heaviness of the other attachments.
To increase your likelihood of landing your shots at mid-range, we highly recommend using a clean Optic with little zoom — so as to not penalize your ADS times — such as the Microflex LED. If you find this unnecessary, feel free to swap this for a Rear Grip or extended magazine. Finalize the build with the Spetsnaz Grip Underbarrel, which boosts your horizontal and vertical recoil control.
Perks
| Perk 1 | Cold-Blooded |
| Perk 2 | Restock |
| Perk 3 | Battle Hardened |
Start by swapping over to Cold-Blooded with this build, making you undetectable by thermal optics, while countering High Alert and Combat Scout. We also recommend implementing the tactic we described above, using Restock as your second perk to continuously replenish your Equipment. Finally, continue using Battle Hardened to negate the effects of Snapshot Grenades.
Equipment
| Lethal | Semtex |
| Tactical | Snapshot Grenade |
Semtex Grenades received a noticeable buff during Season 3 Reloaded, so now’s a great time to run them. Thanks to Restock, you’ll basically have an unlimited supply, so make sure you keep that in mind when playing. Finally, we advise sticking with Snapshot Grenades to constantly be aware of your enemy’s position.