

After dealing with the Hyenas, True Sons, and Outcasts, your job as a Division agent isn’t quite over in Washington D.C. A fourth faction, the Black Tusks, sets up shop across the map. The nefarious and technologically savvy group doesn’t exactly welcome you into The Division 2‘s endgame.
By far the smartest and most imposing faction in the game, the Black Tusks pose a formidable challenge. To continue to better your build and reach World Tier 5, you’ll have to bring the fight to them. Here’s everything you need to know about progressing through The Division 2‘s endgame.
For all the Division agent tips you need to know, check out our beginner’s guide, leveling guide, and skills and perks guide.
Invaded missions
Right when the endgame starts, you’ll see that about half of the missions you already completed have turned red. These icons now represent Invaded missions. The Black Tusks now stand in place of the Hyenas, Outcasts, and True Sons in six different mainline missions across D.C.
- Jefferson Trade Center
- Grand Washington Hotel
- Air & Space Museum
- Space Administration HQ
- Potomac Event Center
- Federal Emergency Bunker
The missions don’t play out exactly the same way as they did before, though you will be clearing the same rooms and areas.
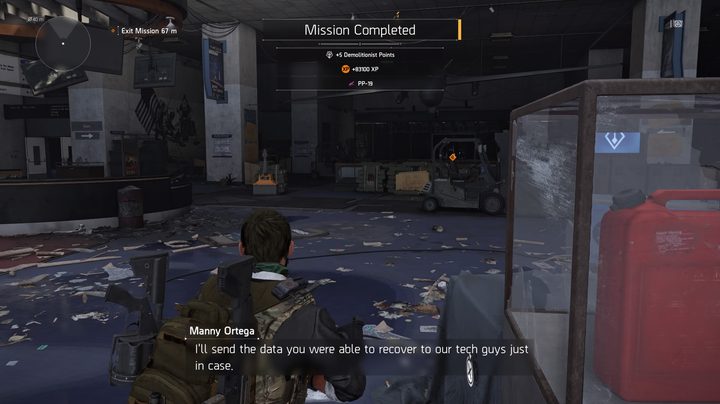
Some of the missions task you with downloading files from computers and protecting the data download for prolonged durations. Others ask you to destroy EMP jammers in addition to disposing of enemies in the room.
The additional objectives don’t necessarily make Invaded missions longer than their regular counterparts. But expect to fight more enemies than you did the first time around. Each Invaded mission has one powerful boss waiting for you at the end, usually one of the brutish dudes with devastating miniguns.
You can technically complete these missions in any order, but we recommend doing them in the order listed above. Like the main game, Jefferson Trade Center is much easier than the Federal Emergency Bunker.
Black Tusk Strongholds
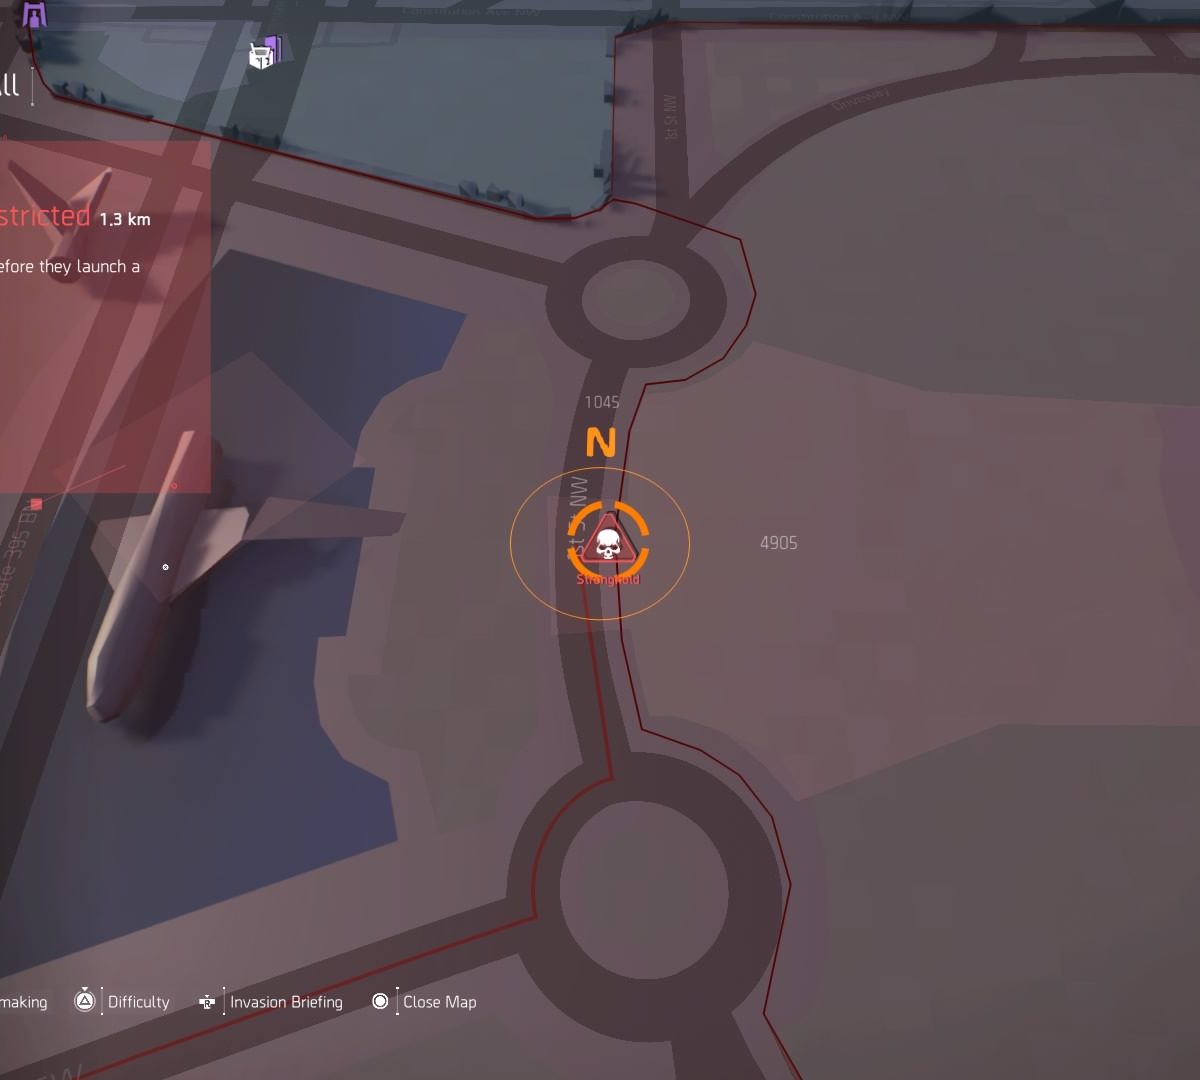
In addition to the standard Invaded Missions, there are four Strongholds. Like the three you completed in the main storyline, Stronghold missions take longer and feature multiple bosses. Three Black Tusk bosses will be waiting for you near the end of each Stronghold.
You cannot enter the Strongholds right away, though. You need to complete certain Invaded missions to unlock each Stronghold, as well as have a high enough Gear Score. In World Tier 1, you need to have a 275+ Gear Score to enter the first Stronghold. World Tier 2 requires 325+ and World Tier 3 calls for a 375+ Gear Score. The first three Strongholds don’t have a set order, but we recommend taking them on in the following order:
- District Union Arena: Complete Grand Washington Hotel and Jefferson Trade Center.
- Capitol Building: Complete Air & Space Museum and Space Administration.
- Roosevelt Island: Complete Potomac Event Center and Federal Emergency Bunker.
- Tidal Basin: Complete District Union Arena, Capitol Building, and Roosevelt Island strongholds. Must have 425+ Gear Score. Tidal Basin hasn’t unlocked yet, despite appearing on the map. So if you arrive here soon, you might not be able to play it.
World Tiers and Gear Caps
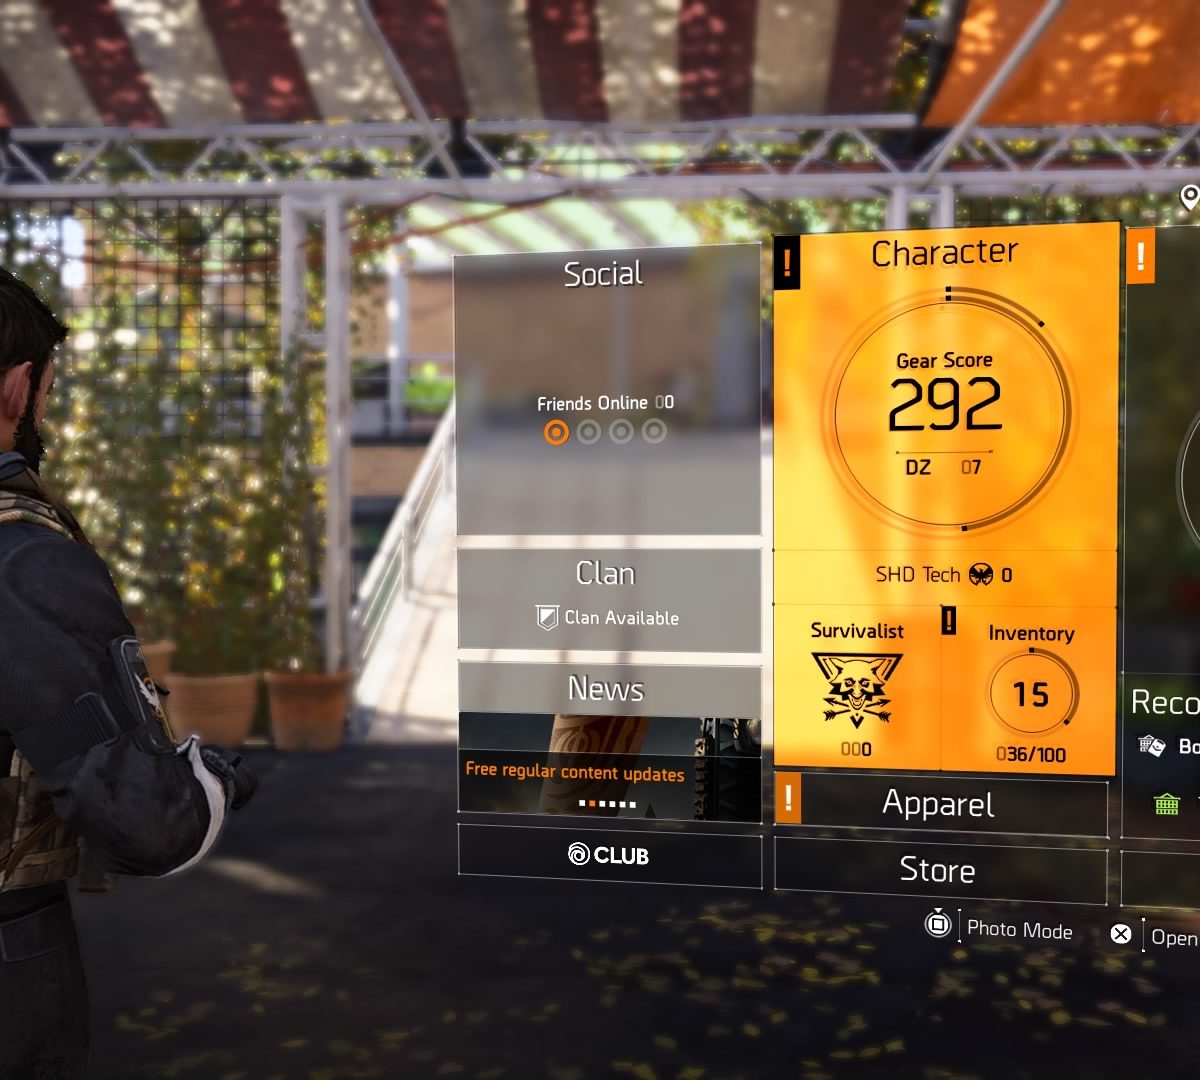
In the endgame, you no longer level up. 30 is the cap and that’s replaced by your Gear Score once you complete the main campaign. This can actually be somewhat confusing when looking at missions on the map. Invaded missions will show “level 31” right when you enter the endgame. The way this works is that your new “level” is essentially 30 plus whatever World Tier you’re in.
You start out in World Tier 1. Completing a stronghold will advance you to the next World Tier, with the Tidal Basin stronghold bringing you to World Tier 5 (“level 35”), the highest current tier.
World Tiers also directly correlate with the Gear Score limit. When you enter the endgame, you’ll probably have a Gear Score anywhere from 200 to 250. The cap appears to be right around 300 in World Tier 1. We found a few pieces of gear a couple of points higher than 300 in World Tier 1 but not enough to bump our average above 300.
Here are the level caps for the World Tiers:
- World Tier 1: 300 (275 required to take on stronghold and advance to next tier)
- World Tier 2: 350 (325 required to take on stronghold and advance to next tier)
- World Tier 3: 400 (375 required to take on stronghold and advance to next tier)
- World Tier 4: 450 (425 required to take on stronghold and advance to next tier)
- World Tier 5: 500 (unavailable as of yet)
Due to the level caps, we suggest completing two Invaded missions then the corresponding stronghold. After completing the stronghold, you’ll advance to the next World Tier and start finding better and better loot. You’re limiting yourself to sub-300 loot for a longer duration if you try to tackle all Invaded missions before visiting a stronghold.
While advancing through World Tiers, you’ll still earn experience points. When you fill the bar, however, you won’t become more powerful. Instead, you’ll earn a Field Proficiency Cache holding two to three pieces of gear and Specialization points.
Use Specializations
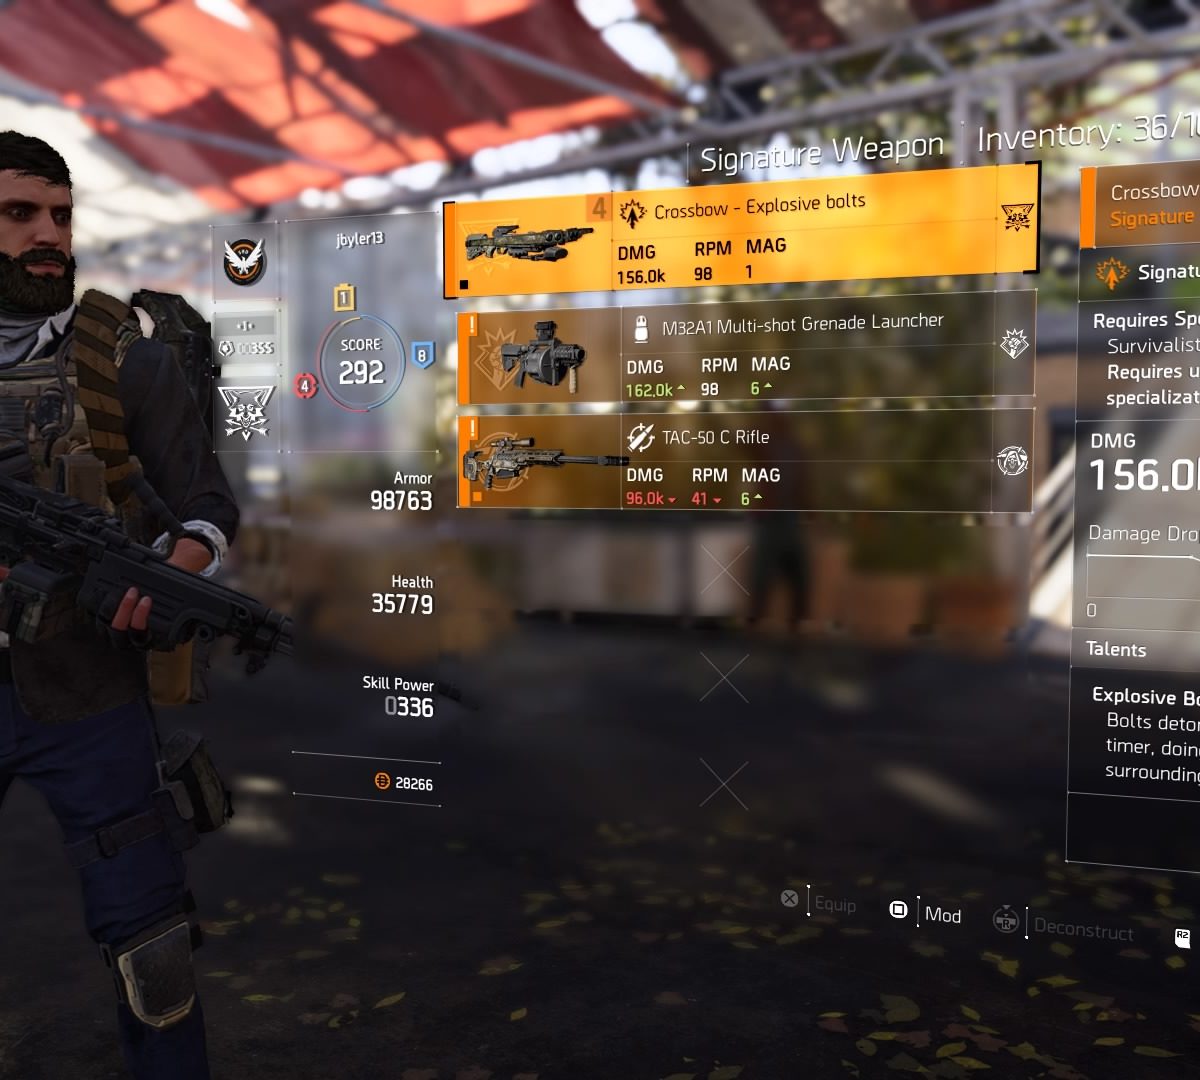
You’ll have a new toy to use in the endgame thanks to Specializations. At the start of the endgame, you’ll be able to choose from three paths at the Quartermaster in the White House: Demolitionist, Survivalist, or Sharpshooter.
You’ll soon be able to unlock all three Specializations, though, so it’s not a restrictive choice. However, you can only have one designated Specialization at a time. Demolitionists get the M32A1 Multi-shot Grenade Launcher, Survivalists get a crossbow with an explosive tip, and Sharpshooters get the TAC-50 C Rifle.
The Specialization weapons are equipped in addition to your two primary weapons and sidearm. They have finite and rare special ammo, though. As such, these weapons are incredibly powerful. Don’t forget to use them against the Black Tusk faction throughout Invaded missions and strongholds.
To swap between Specializations, you’ll have to return to the Quartermaster. You cannot do it during a mission, so make sure you’re settled on your build before diving in.
Each Specialization has a skill tree as well to unlock new skill variants, perks, and other goodies. You’ll earn points to spend on the skill trees by completing missions and activities and by “leveling up” through experience points.
Black Tusk combat tactics
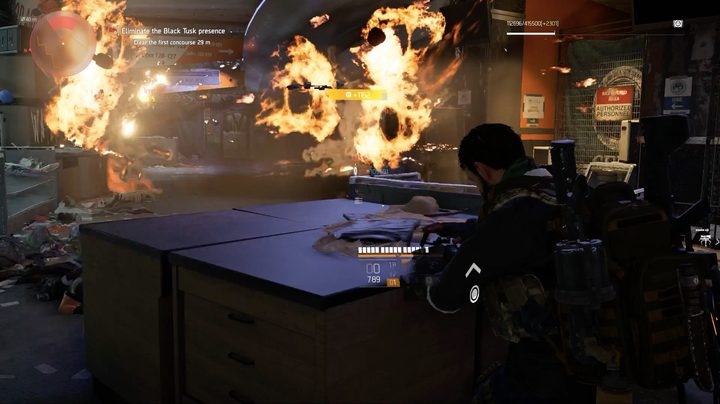
The Black Tusks are easily the most organized and calculating of the four Division 2 factions. Their militarized style, developed from their fascination with SHD Tech, makes them tough to beat.
The first thing you’ll notice is the Boston Dynamics-style robot dogs. Called Warhounds, these robot dogs are slightly creepy. They’re also quite powerful. They shoot piercing bullets that can rip through your armor almost instantaneously. And they’re heavily armored. Aim for their legs, as that’s their weak point. If you shoot their guns or their mainframe, it will take much longer to eliminate them.
The next tactic you’ll notice is the use of drones. Almost every encounter with the Black Tusks includes a few enemies with drone-making capabilities. The drones, when first built, appear as bright, floating lights. Shoot them as quickly as possible because they blow up when they get close to you, knocking you out of cover in the process.
The Black Tusk members who make drones often stay out of sight in cover, which makes them hard to kill. One great way to kill them, though, is to shoot the drones right as they enter the sky. The blast will hit them, dealing a ton of damage, often fatal.
Finally, you need to know that Black Tusk enemies are just smarter in general. They flank better, they switch styles on the fly, and they will make sure that you are on your A game. Both red bar common enemies and armored enemies will act aggressively one moment and controlled the next. When you have an opening to take one out, it’s critical that you do so.
It’s hard to contend with the robot dogs and drones as well as the other enemies, but you cannot ignore openings. You should play cautiously, but don’t be afraid to be the aggressor, switching your style up and becoming as unpredictable as the enemy themselves.
Black Tusk controlled areas
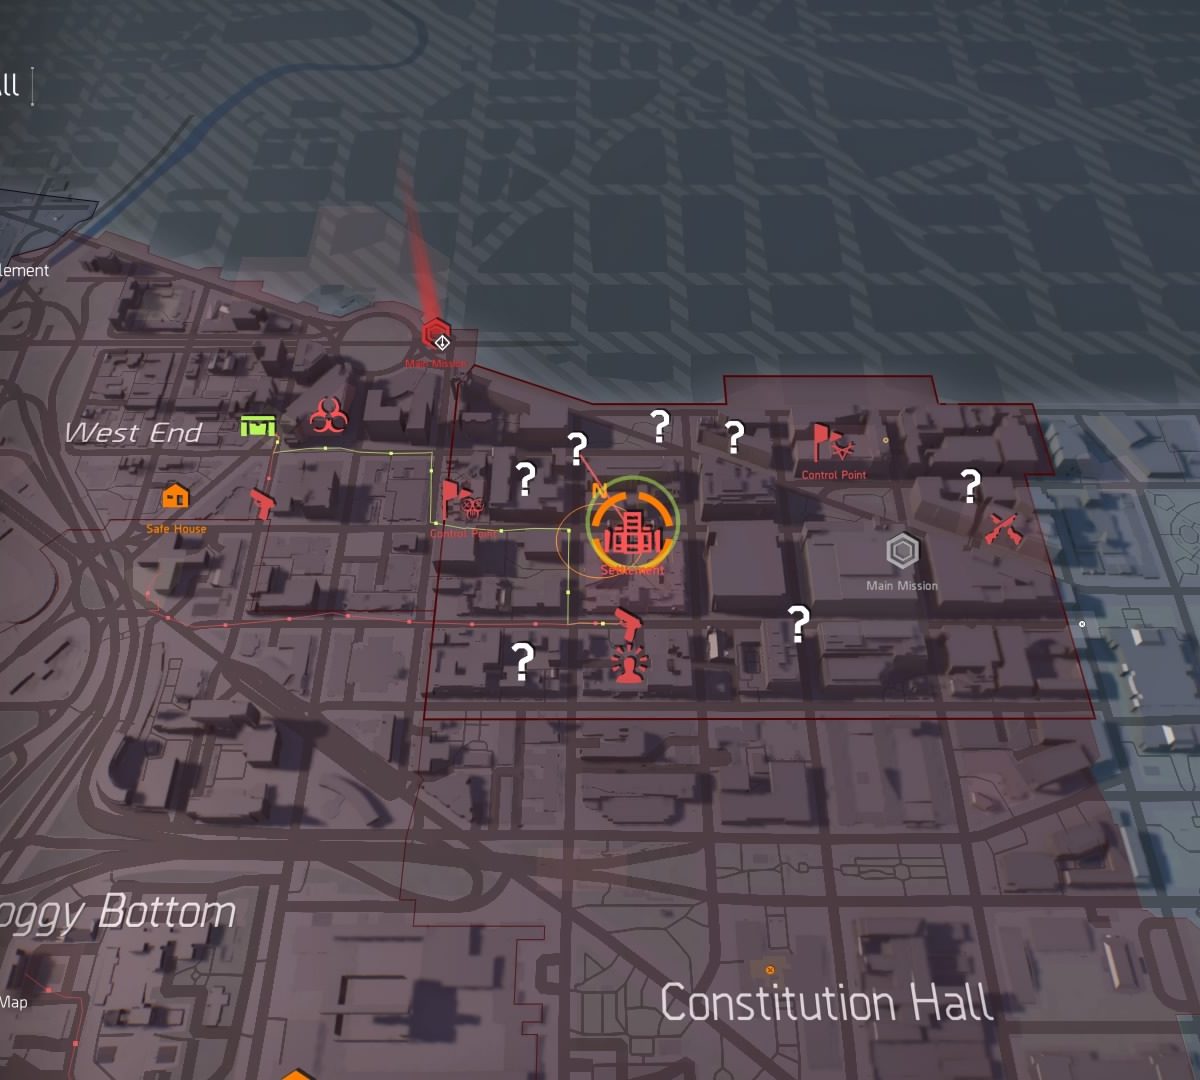
When you first enter the endgame, you’ll notice that the Campus settlement is now red on the map. The region has been taken over by the Black Tusks.
To push the Black Tusks out of the area and reopen the settlement, you have to complete the ? mark activity pointed to by the red line shown in the image above. Perhaps the Black Tusks will periodically takeover other settlements, though we haven’t seen that occur yet.
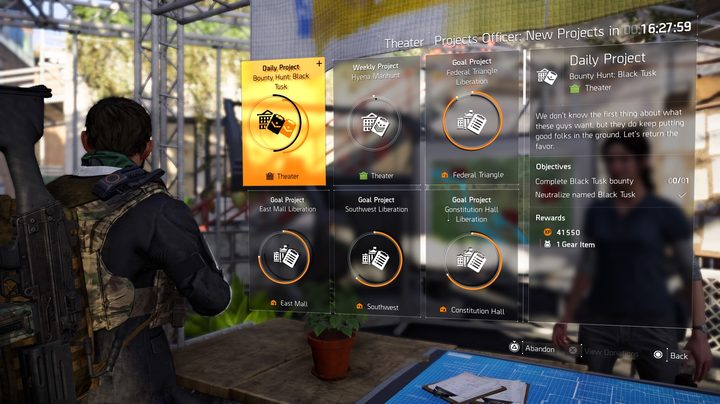
Daily Projects and activities
In addition to Invaded missions and strongholds, you’ll notice Black Tusk open world activities similar to those you dealt with in the main game with the other three factions. Some captured Control Points will also be retaken by the enemy. Clearing them again regrants access to the supply room with new loot.
In settlements, you can check out the Daily Projects, which typically include bounties and other activities. Completing them nets you experience points. All of these endgame activities will help improve your Gear Score through the acquisition of new loot.
There will likely be times where you don’t have the required Gear Score to enter a stronghold. Working your way through some activities, or even replaying old missions on hard difficulty, will help you get there.


