If you’re looking for a nice way to view your Google Photos, you can create a slideshow. This lets you see the photos in an album or pictures in your library one at a time in full-screen mode. Sit back and watch or click to move through each photo in the show.
While you can’t currently add music or a background, it’s still a terrific way to view a collection of photos and relive those memories. Here’s how to make a slideshow with Google Photos.
Create a slideshow from an album
You can make a slideshow on the Google Photos website in little time. Head to Google Photos and sign in with your Google account.
Step 1: In the navigation on the left, select Albums to see your albums on the right side. Or, expand the Albums section to view the albums within it.
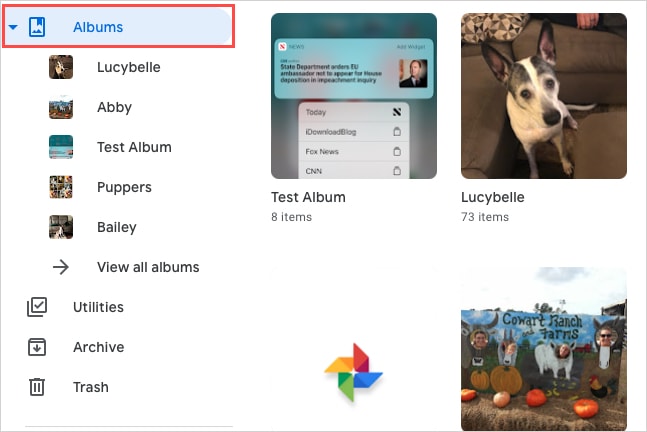
Step 2: Choose an album to create the slideshow.
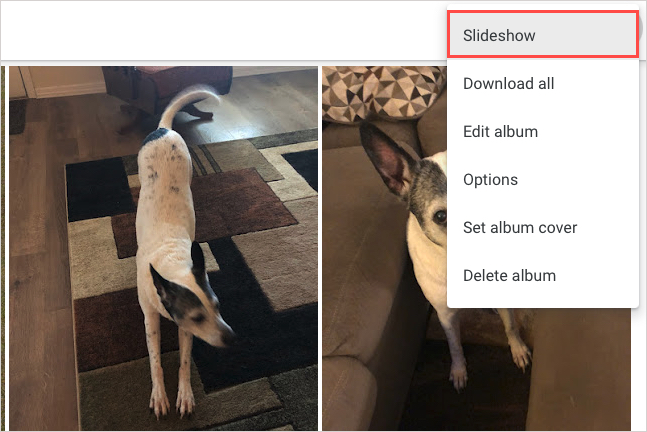
Step 3: Select the Three dots on the top right for More options and pick Slideshow.
Step 4: You’ll see your screen transform into full-screen mode and the slideshow begin. You can see each photo as it displays for a few seconds and moves onto the next.
Select the Pause button on the bottom left to stop on a particular photo and Play to resume. You can also use the Arrows on the bottom left of the screen to manually move forward or backward through the pictures in the album.

Step 5: When you finish, select the Exit icon on the bottom left, to the right of the arrows.
You’ll then return to the album in Google Photos.
Create a slideshow from your photos
If you simply want to view the pictures in the main Photos section as a slideshow, you can do this as well.
Step 1: On the left, select Photos.
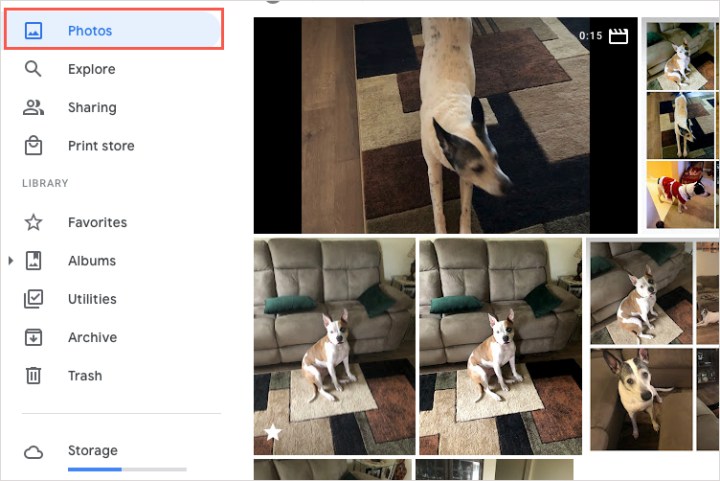
Step 2: On the right, choose the photo you’d like to start the slideshow with to open it.
Step 3: Select the Three dots on the top right for More options and pick Slideshow.
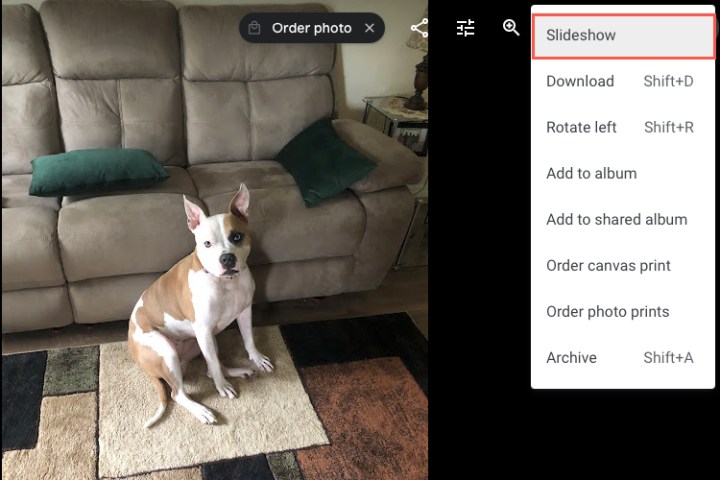
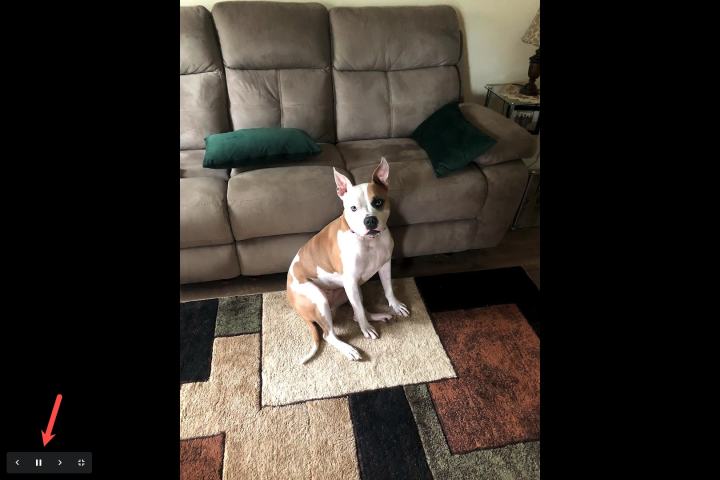
Step 4: You can then view the slideshow in full-screen mode starting with your selected photo.
Use the Pause button to stop, Play to resume, the Arrows to move forward or back manually, and the Exit button when you finish.
Create a slideshow on your Android phone
You can create a slideshow on your Android phone in the Google Photos app from either all your photos or a particular album.
Step 1: To view all photos in a slideshow, select the Photos tab and pick a photo.
To view an album, select the Library tab, pick the album, and choose a photo in the album to start the show.
Step 2: Tap the Three dots on the top right of the photo and select Slideshow in the menu that displays.
Step 3: You’ll see your slideshow begin automatically with your photos in full-screen mode. You can also move through the photos manually by swiping left or right.
To stop the slideshow, tap a photo, and to exit, tap the Arrow on the top left.
Frequently asked questions
Can I make a slideshow with music in Google Photos?
At this time, there is no option to add music to your slideshow. However, you can use a music streaming service in another tab to play whatever music you want.
How do I loop a slideshow in Google Photos?
Slideshows in Google Photos automatically loop. Once you get to the end of the pictures in your album, the first picture will show again.
Making a slideshow with Google Photos is a great way to see pictures from a vacation, special occasion, or celebration. For more, look at how to use Google Photos to back up your pictures.


