There's a lot to love about Mac, but one of its quirkier features is how easy it is to change icons for files and folders. By default, a file is depicted by a piece of paper, while folders are -- well, depicted by a folder. You'll also find zip files with zippers, along with other standard iconography.
But if you want to customize the look of your files and folders, Apple gives you a simple way to change icons on macOS without much effort.
Here's a look at how to change icons for files and folders on Mac, including tips on how to use different images or change the folder icon color.
Use a different icon image
You can use a picture as the icon for either a file or folder on Mac. This is handy for spotting what you need quickly, and applies to standard and password-protected folders on your Mac.
Step 1: Copy the image you want to use for the icon one of these ways:
- Open it in Preview and select Edit > Copy from the menu bar.
- Select the image and pick Edit > Copy from the Finder menu bar.
- Right-click the image and select Copy.
- Select the image and use the keyboard shortcut Command + C.
You’ll then have the image copied to your clipboard.

Step 2: Whether a file or a folder, you’ll open the properties for it to access its icon. Select the file or folder and pick File > Get Info from the menu bar or right-click and choose Get Info.
This opens a window full of details about the item. You’ll see the icon on the top left of that window.
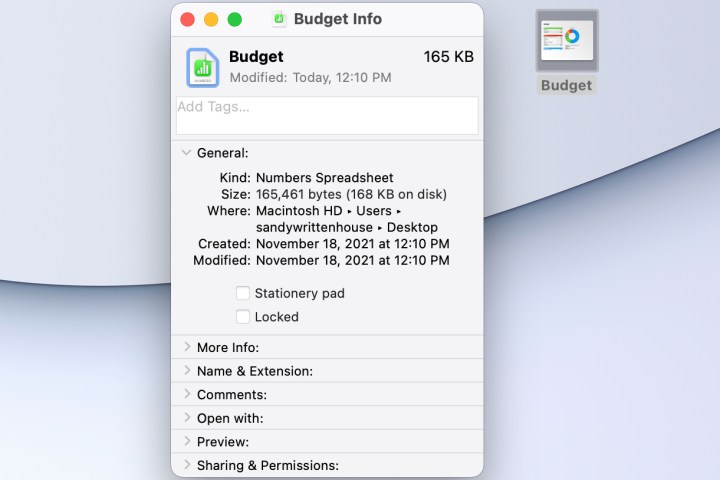
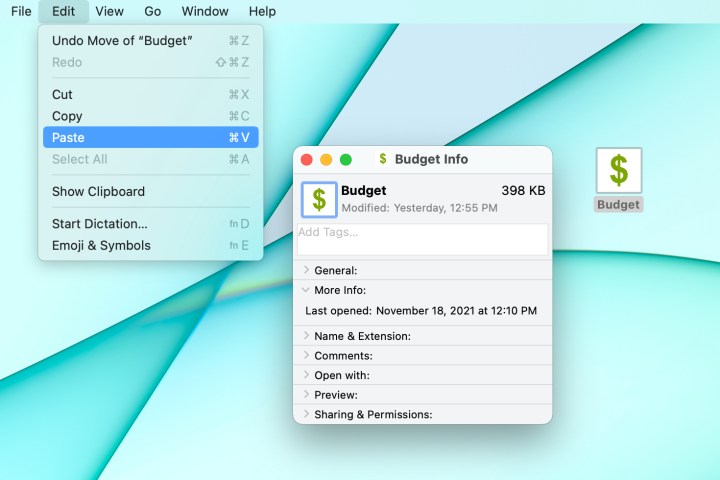
Step 3: Select the icon in the Get Info window to highlight it. Then paste the image by selecting Edit > Paste from the menu bar or using the keyboard shortcut Command + V.
You should see the image you copied replace the default icon for the file or folder. You can then close the Get Info window.
Change the folder icon color
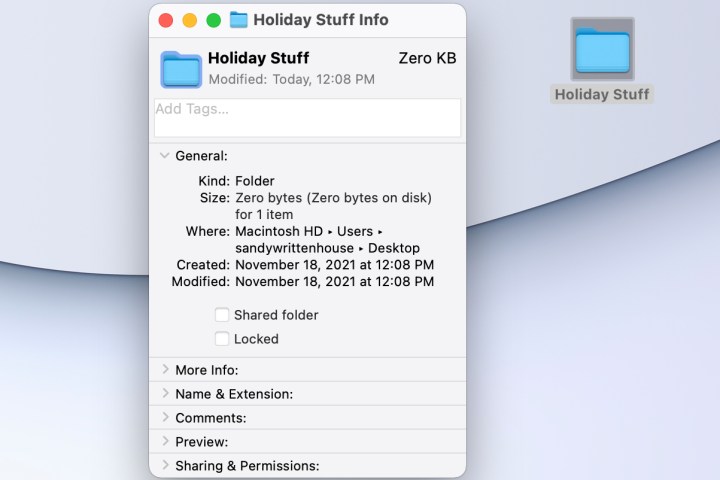
If you simply want to change the color of a folder icon on Mac, you can do this using Preview. Open the Get Info window for the folder as described above.
Step 1: Select the icon on the top left of the detail window to highlight it. Now, copy the icon by selecting Edit > Copy from the menu bar or using the keyboard shortcut Command + C.
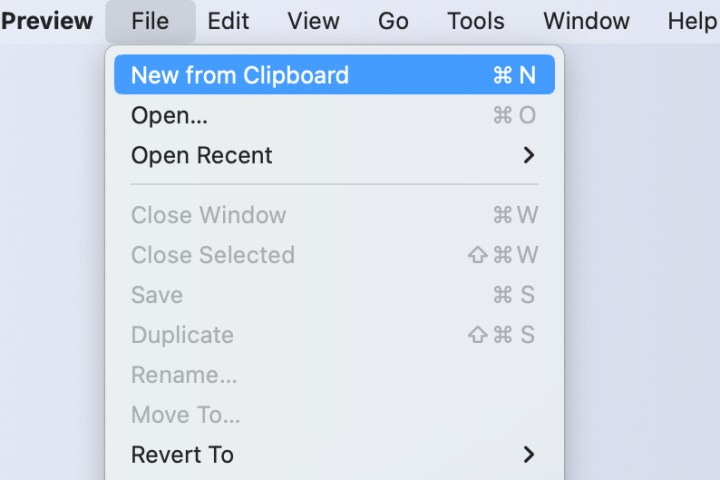
Step 2: Open the Preview app on your Mac and select File > New From Clipboard in the menu bar. You should see the folder icon display for you to edit.
Step 3: At the top of the Preview app, select the Markup button in the toolbar. Then, pick the Adjust Color button and use the Tint slider to choose the color you want for the icon.
Optionally, you can use the other color adjustment tools if you like.
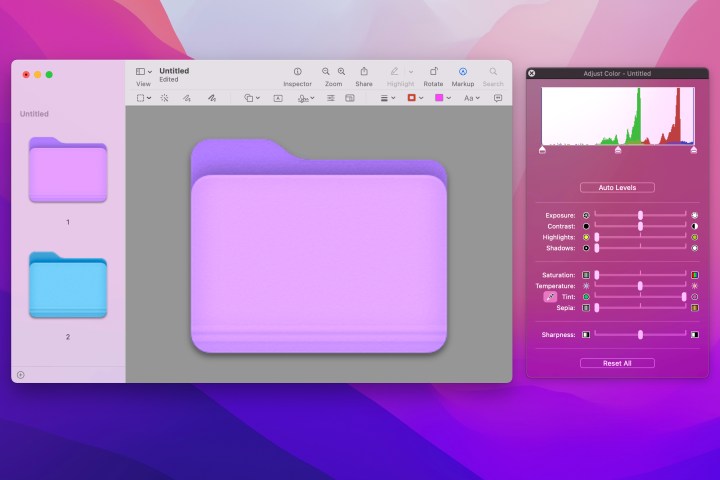
Step 4: Once you have the icon colored the way you want, you just need to copy it and paste it back into the folder details window.
Pick Edit > Select All and then Edit > Copy from the menu bar to copy the icon. You can also use the selection tool in Preview to outline the icon and then pick Edit > Copy.

Step 5: Head back to the Get Info window you opened for the folder. Select the icon on the top left once more to highlight it. Then, paste the new icon by picking Edit > Paste in the menu bar or using the keyboard shortcut Command + V.

Whether you use a photo or a logo for a file icon or decide simply to change the color of a folder icon, you have options to make items stand out on MacOS.
For other customizations, check out how to change the background on Mac.


