The newest MacBooks have some excellent features, including Apple’s own M1 chips (and now M2 chips with the latest models), compatibility for Universal Control, better keyboards, and much more. But the recent MacBook Pro and Air models also have something that users aren’t big fans of: the notch.
The notch, which highlights the MacBook cam, is a black rectangle that intrudes on the laptop’s display in a very obvious (and, for many, distracting) way. It’s a little baffling why this design choice came about, but all is not lost for those with newer MacBooks. While the notch is hardware, there are ways that you can effectively hide it so it’s less of an eyesore. Here are the best ways.
How to hide the notch on Macbooks
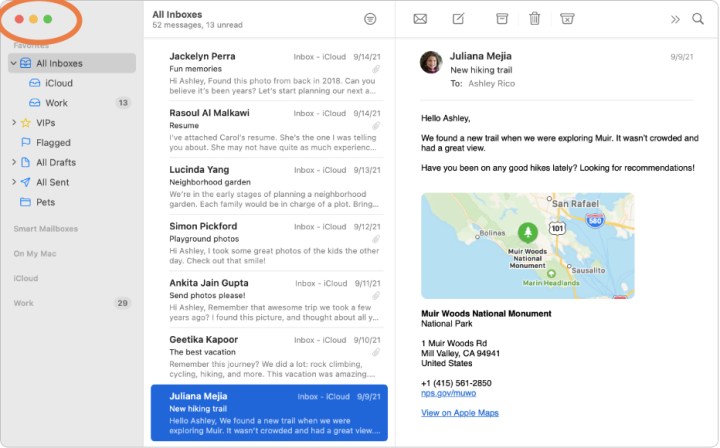
Step 1: Switch to full-screen mode when using apps. That may sound like a strange fix, but it frequently works. Look in the upper-left corner of the app window to find Apple’s window-control buttons. The right-most button is a green circle with small arrows pointing outward. Select it to move the app to its full-screen version. This should automatically replace the notch with the larger app window.
When you are finished using the app, hover in the upper-left corner to unveil the buttons again and exit full screen mode, or use the Control + Command + F shortcut on your keyboard.
The catch is that this method primarily works with Apple’s own native apps. If you’re using a third-party app on your MacBook Air or Pro, there’s no guarantee that it will have the notch-replacing gimmick.

Step 2: If the notch is actively hiding a part of the app you want to use or generally making an app look bad, there is a step you can take that won’t hide the notch but will help fix your problem. Go into Finder, then your Applications, and find the app either alphabetically or by searching for it.
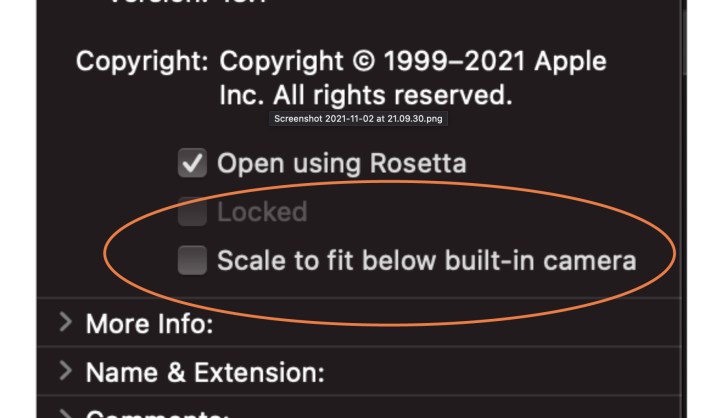
Right-click on the app and choose the Get info option. This will open a window of options. Look for the option that says Scale to fit below the built-in camera box. Make sure that this is selected. Close the Get info window and open your app, which should now sit just below the notch.

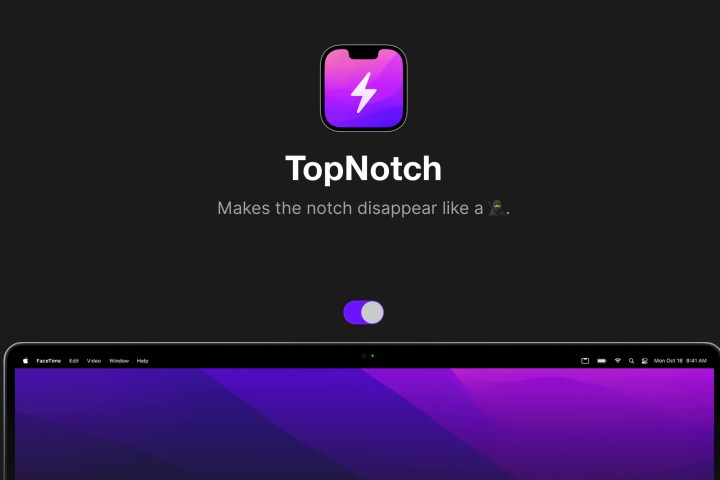
Step 3: If the notch is constantly bugging you, you can take a more drastic step: Download the app TopNotch. TopNotch is one of the dedicated apps made to hide the notch and is the best option if you want full protection against the notch.
Download the app for free right here. It will require MacOS 11.0 or newer, but this shouldn’t be a problem. Open and enable it, and the app will place a black bar across the top of your display, effectively hiding the notch. You will still be able to see and use all your menu items at the top of the screen. It doesn’t matter if you are using an app or not, TopNotch works in the background all the same. It also supports Dynamic Desktop wallpapers so you don’t lose those features.
You even have the option to enable rounded corners if you prefer that aesthetic. Oh, and if you’re sharing your display with an external monitor, TopNotch will work with that too, so you never have to see the dreaded notch again.

Now that you’ve solved your notch problem, maybe it’s time to make your MacBook the best it can be. Check out our guide to the best MacBook Pro accessories to learn more, or hop over to our list of the best cases and covers for the MacBook Air.


