
How to use Big Sur’s Notification Center widgets


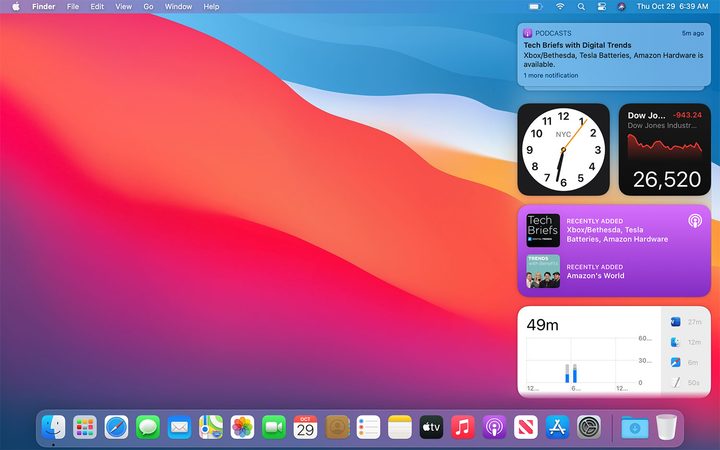
In Apple’s MacOS Big Sur, the Notification Center is the place where all your widgets and (unsurprisingly) notifications are housed. Normally hidden off-screen, it provides a quick and convenient way to catch up on any alerts you have received over the course of the day, as well as useful widgets like weather forecasts, your calendar, and more.

Recommended Videos

Notification Center has existed on Macs since 2012, but it has seen a big update with MacOS Big Sur. Now, your alerts and widgets are grouped together, simplifying the experience. That new layout means it all works a bit differently from previous years, but with our guide in hand, you will be up to speed in no time.

Step 1: Getting started with Notification Center

Notification Center in MacOS Big Sur
Image used with permission by copyright holder

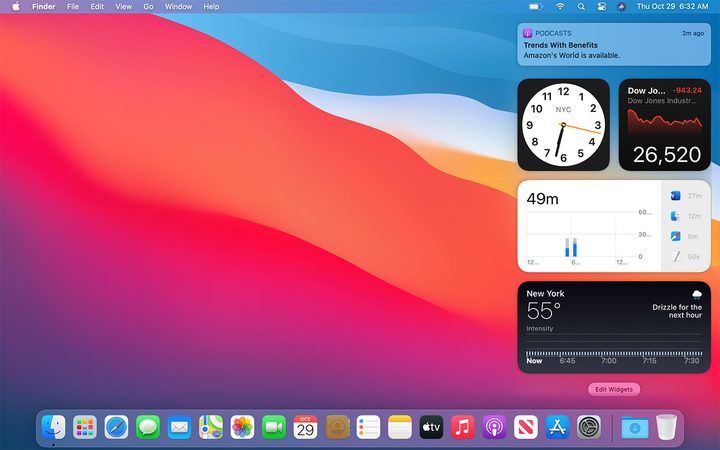
To begin, click the date and time in the top-right corner of your screen. Notification Center will slide onto your display from the right-hand side. Scroll down to the bottom of the list of widgets and click Edit Widgets to start customizing.

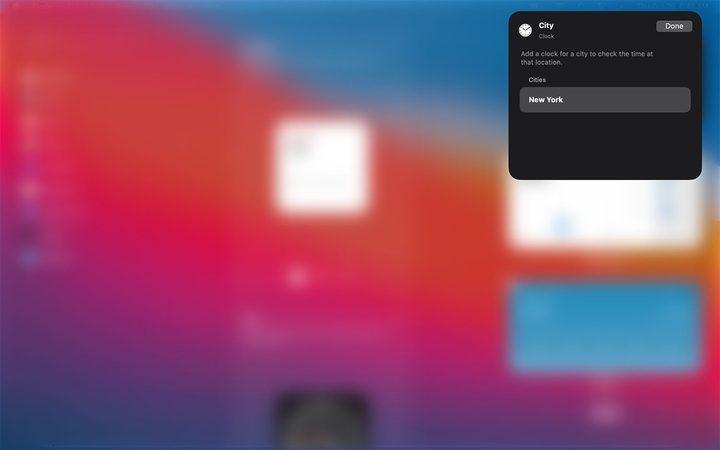
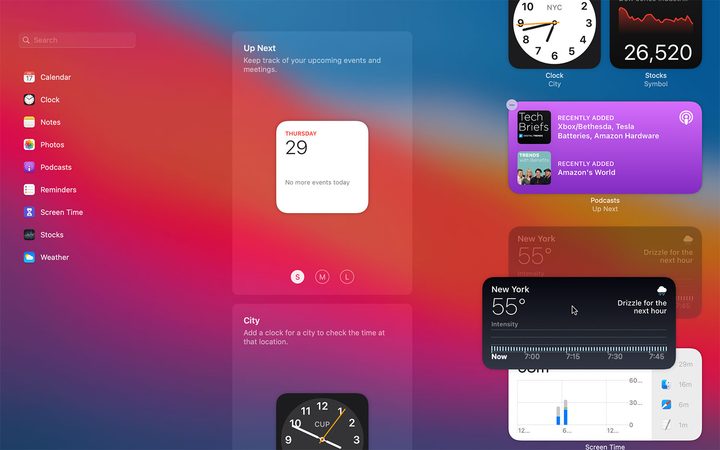
Step 2: Edit existing widgets

Notification Center in MacOS Big Sur
Image used with permission by copyright holder

When you click Edit Widgets, the Notification Center customization screen will take over. It is divided into three columns: A search bar and list of available app widgets on the left, a preview of each widget in the center, and a view of your current Notification Center layout on the right.

Hover over existing widgets in Notification Center and Edit Widget will appear under some of them. Click the widget and you can make changes like the set location of the weather or clock apps, for example.

Step 3: Choose a widget size

Notification Center in MacOS Big Sur
Image used with permission by copyright holder

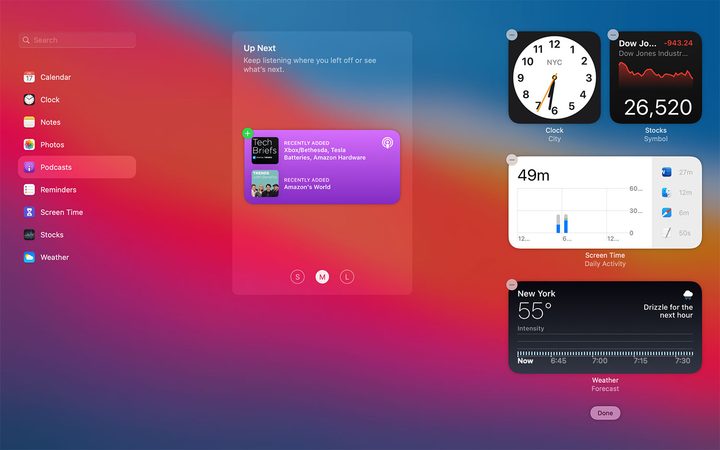
Click an app on the left and you can see what each widget has to offer. Alternatively, you can find a specific app by using the search box in the top-left corner.

Like in iOS 14, some widgets have various sizes to choose from. The Podcasts app, for example, offers small, medium, and large widgets, each of which shows different amounts of information. When you click the S, M, or L buttons below each widget, you get a preview of what that size looks like.

Step 4: Add your chosen widget to Notification Center

Notification Center in MacOS Big Sur
Image used with permission by copyright holder

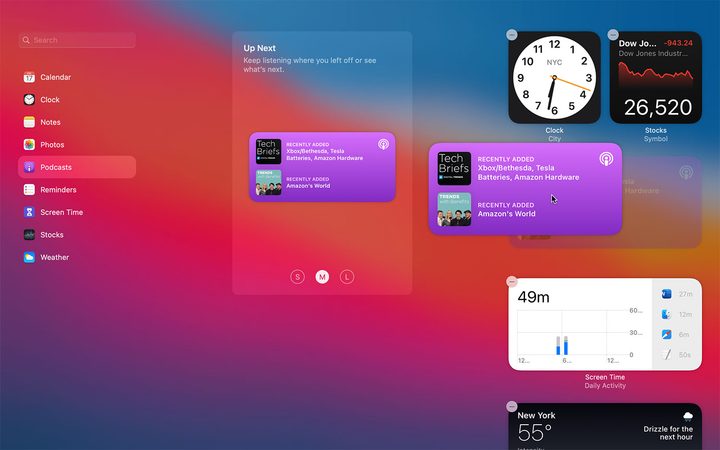
Once you have settled on a widget, hover over it and you will see a green “+” symbol appear. Click this and the widget is added to the bottom of the list of widgets in Notification Center. Alternatively, you can drag and drop the widget to any position in Notification Center.

Step 5: Rearrange your widgets

Notification Center in MacOS Big Sur
Image used with permission by copyright holder

Drag and drop is not just limited to adding new widgets — you can rearrange the widgets that are already in Notification Center by clicking and dragging them to a new position. As you do so, other widgets will move out of the way, giving you a clear idea of how the final layout will look. Notification Center will also show a translucent outline of the widget you are currently moving, showing you where it will “land” when you drop it into place.

Step 6: Finish up

Notification Center in MacOS Big Sur
Image used with permission by copyright holder

When you are happy with the new arrangement, click Done at the bottom of the right-hand column, or simply click on any area of empty space. This will take you back to your desktop, with Notification Center active on the right. Click anywhere else on screen or do a two-finger rightward swipe on Notification Center to dismiss it.

Alex Blake
Alex Blake has been working with Digital Trends since 2019, where he spends most of his time writing about Mac computers…
The best data recovery software for your Mac or MacBook
A rose gold MacBook Air has Disk Utility open with a red warning symbol and an external drive connected.

Apple designed your computer to be reliable and user-friendly, but even the best and newest MacBook hardware can experience glitches. When something goes wrong with your storage, data recovery software can help you restore missing and damaged files.

Another reason for data loss is the sort of embarrassing mistake that happens sometimes. If you've ever accidentally thrown away a file you needed on macOS, then emptied the trash, it's possible to get that file back with a data recovery app.
Time Machine
Best built-in solution

Read more
MacOS 15 will completely change how you use your iPhone
The iPhone Mirroring feature from macOS Sequoia being demonstrated at the Worldwide Developers Conference (WWDC) 2024.

Apple just announced macOS 15 at WWDC 2024. Called macOS Sequoia, the updated operating system brings a suite of new features to Macs this fall. The key change, however, is a new Continuity feature that allows you to mirror your iPhone on your Mac, from the MacBook Air to the Mac Studio.

Although iPhone mirroring takes center stage, there are a ton of new features in MacOS 15. Here are all of them.
iPhone mirroring

Read more
The Mac just became a true ‘AI PC’
Disney Plus on a MacBook Pro.

Apple has unveiled a significant overhaul of its macOS operating system at its Worldwide Developers Conference (WWDC). The move -- long an expected topic for WWDC -- infuses the Mac with artificial intelligence (AI) across multiple apps, tools, and systems, revamping almost the entire Mac experience in the process. Put together, it has the potential to transform the Mac into an AI PC of the highest order.

Dubbed Apple Intelligence, the new system works across a host of apps -- including third-party ones -- to take them up a level. For example, Apple unveiled tools that can summarize or rewrite text in apps, such as rephrasing an email response for a new context. Apple also showcased some generative AI capabilities similar to those found in rival products like like Midjourney. Apple's spin, though, is that its system has more contextual knowledge. You can ask it to create an image of a friend for their birthday and it will take a photo of them that you have tagged and redesign it in one of several styles. In this case, Apple Intelligence knows who your friend is without you needing to specify a photo first.

Read more