Fire Emblem Warriors: Three Hopes: All document locations

In between hacking and slashing your way through wave upon wave of enemies in Fire Emblem Warriors: Three Hopes, there’s no shortage of things to do back at your base. Most of the time, you’ll be spending this downtime interacting with the other members of your chosen house, upgrading your facilities, or generally preparing for your next mission. While all of these are important, there are some optional tasks that you can do that may not give you a material reward but certainly help you better understand the world of Fire Emblem Warriors: Three Hopes.

Documents are a special collectible that is unique depending on which house you pick: Black Eagles, Blue Lions, or Golden Deer. There’s a set of three or four per house, and each of them gives you a deeper look into the lore of the game. For anyone who fell in love with the world and characters back in Fire Emblem: Three Houses, these documents will certainly be an interesting read. First, you need to find them, though, so here’s the location for each one in Fire Emblem Warriors: Three Hopes.

Further reading

All Black Eagles document locations

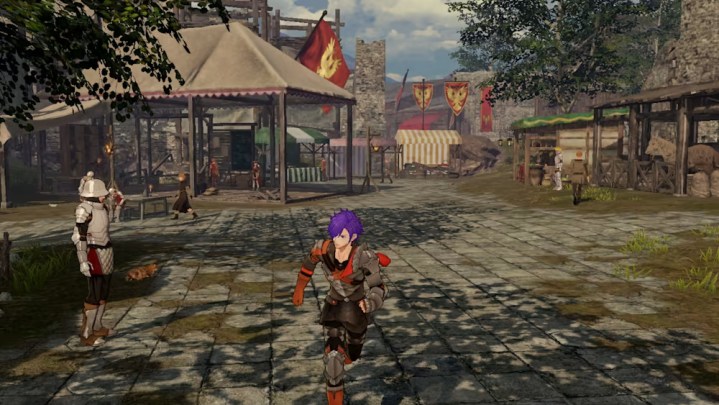
Shez runs around a hub in Fire Emblem Warriors: Three Hopes.

Empire Noble I

The first document you can find in the Black Eagles path can be picked up early in Fire Emblem Warriors: Three Hopes when you are given the task to go to the headquarters and talk to Edelgard. Right on the main dining table, you will spot the document glowing blue.

Imperial Territories of Adrestia: Book One

Once you’ve spoken to Edelgard after getting the last document, go over to the chapel in the north. The document is right on the main altar.

Report on Abyss

Our final Black Eagles document is near the shopkeeper located on the east side of the map. Just to the right of the shop itself, you can grab this report from atop some crates.

All Blue Lion document locations

Exquisite Old Letter

Our first Blue Lion document pops up while going through the Unrest in Fhirdiad mission. One part will give you the objective of going to speak with Dedue. Right behind him, on top of a nearby box, is the letter.

Kingdom Nobles

After progressing a bit further and talking to Dimitri, go into the main hall of the headquarters and look on the end of the long dining table. This one is in the same spot as it would be in the Black Eagles path.

Letter from an Abyss Resident

Right after the previous document, go straight over to the shopkeeper on the east side of the map. Again, this one is in the same spot as you’d find it in your Black Eagles path on some crates.

Royal Territories of Faerghus: Book One

The only path with a fourth document, we’re going back to the chapel to grab this book off the altar.

All Golden Deer document locations

Alliance Nobles

First up, we’re back in the headquarters while on the mission to check out the camp. Yet again, this one is waiting right on the big table.

Allied Territories of Leicester: Book One

Time to go back to the church where, once more, you can grab an easy document off the altar.

Letter from the Abysskeeper

Can you guess where this last document is? If you said, “On some crates next to the item shop on the east side of the map,” then you’re absolutely right. Snag it for your final piece of lore.

Editors' Recommendations

Jesse Lennox
Jesse Lennox loves writing, games, and complaining about not having time to write and play games. He knows the names of more…
Resident Evil 4: All Yellow Herb locations
Yellow herb in Resident Evil 4.

Despite being sent all the way to Europe to rescue the president's daughter, Leon arrives vastly underpowered for the job presented to him in the Resident Evil 4 remake. Not only was he sent in alone, but with just a single handgun (with 10 bullets) and a knife. If you want any hope of completing this mission, you will need to get every advantage you can. Aside from expanding and upgrading your arsenal, collecting as many of the game's Yellow Herbs will be your top priority. Of the three types of Herbs -- Green, Red, and Yellow -- these are the rarest of them all. In total, you can only grab 17 of them in a single playthrough. You will want as many of them as possible to give Leon a much-needed buff, so here's what Yellow Herbs do and where you can collect them all in the Resident Evil 4 remake.
What Yellow Herbs do

Each of the three Herb types in Resident Evil 4 serves a different function. Green Herbs are for healing, Red Herbs enhance the effect of whatever Herb they're combined with, and Yellow Herbs actually increase Leon's maximum health. That makes them by far the most valuable of the three since, with enough of them, you can essentially double the amount of damage you can take once you max out his health.

Read more
Resident Evil 4 locked drawers guide: all Small Key locations
Infected villager from Resident Evil 4 remake.

Keys and Resident Evil games are like peanut butter and jelly. If you're not fighting zombies, you're looking for a key to get you to the next room -- where you will fight more zombies. While there are plenty of mandatory keys in the Resident Evil 4 remake, there are also a set of extra keys that you can completely miss. These Small Keys are used to unlock locked drawers you come across, as opposed to doors, and hold some very valuable treasures. Considering how precious money is in this game, the more treasures you can find and sell to your Merchant friend, the better off you'll be. Small keys aren't in your direct path often, and once you leave an area, you can't go back to collect them later in most cases. We'll help you become the master of unlocking by showing you where to snag all the Small Keys in Resident Evil 4, as well as where to use them.
Where to find all Small Keys
Before getting into the locations of Small Keys, note that these keys are not exclusive to a single drawer. Any Small Key can be used to open any drawer, so feel free to spend them as soon as you find a drawer with a key in hand. However, once you leave an area in Resident Evil 4, there's no going back. That means if you left any keys or drawers behind, you won't be able to open them unless you start another playthrough or wait until you begin a new game. There are eight Small Keys to get, and they are all found within the first two zones of the game, but won't show up on your map. Locked drawers won't either by default, but if you buy the Treasure Map from the Merchant, the drawers will be put on your map. Here's how to track all the keys down, and where the nearest locked drawer is in the order you can first encounter them.

The first key you can get is in Chapter 2 in the Valley. After meeting the Merchant, you will be sent into the Valley to find a key to open the gate opposite the Merchant. After clearing out the enemies, drop down to the lowest level on the south end and enter the shack. Inside, take a right and look for a case on the shelf. Loot it, and pick up the first Small Key. The nearest locked drawer is back in the Factory past the Merchant. Go into the room where you retrieved Leon's equipment after it was taken from him and use the key on the desk drawer.

Read more
All Resident Evil 4 remake Wayshrines and how to open them
An open wayshrine with a bracelet inside.

In the opening chapters of the Resident Evil 4 remake, you will come across strange shrines erected by a cult. These can be interacted with, but prompt you to use an item. Unfortunately, you won't even have the chance to open the first couple you find since the item required to open them can't be picked up until a bit later -- and only if you know where to search for it. But it's ro say that the treasures you get from them make it worth your time to backtrack and grab all the goodies inside. Here's how you can open all the Wayshrines in the Resident Evil 4 remake, and what each one holds inside.
How to get the Wayshrine Key

Surprise surprise, but Wayshrines can only be opened once you grab the Wayshrine Key. It will feel like a long time, but you can't even access the key until you reach Chapter 4 and beat Del Lago. Once you can explore the lake, head south to the Mural Cave. Deep in the caves, you will find an ornate cabinet after solving the puzzle in the cave. You can get there by going down the path from the southern dock and through the section with the two large stone hands. Thankfully, unlike Small Keys, the Wayshrine Key is reusable and can open every Wayshrine in the game.
How to 0pen Wayshrines

Read more