What better way to start a new year than with a fresh set of Fortnite challenges? Week 4 of season 1 is live now, and there’s plenty more to do, with a ton of ways to earn XP. The week 4 challenges are mostly straightforward, with only a small selection that might trip you up. Either way, let’s dive into all the new quests for the week, with guides on how to complete each and every one of them.
- Season 1, week 4 quests
- Get Headshot Damage with a Pistol (75)
- Harvest Wood from The Joneses, Shifty Shafts, or Logjam Lumberyard (150)
- Detonate Gas Cans to Destroy Objects (2)
- Dance at Chonker’s Speedway, Rocky Reels, and Greasy Grove (3)
- Experience Guzzle Juice Effects for 15 Seconds (1)
- Deal Damage to Enemies with Rare or Better Shotguns (400)
- Hide in Stealth Grass for 10 Seconds (10)
Here are the chapter 3, season 1, week 4 quests, and how to finish them in Fortnite.
Recommended reading
- The best games like Fortnite
- The best places to land in Fortnite
- Fortnite vs. Warzone: Which battle royale should you play?
Season 1, week 4 quests
- Get Headshot Damage with a Pistol (75)
- Harvest Wood from The Joneses, Shifty Shafts, or Logjam Lumberyard (150)
- Detonate Gas Cans to Destroy Objects (2)
- Dance at Chonker’s Speedway, Rocky Reels, and Greasy Grove (3)
- Experience Guzzle Juice Effects for 15 Seconds (1)
- Deal Damage to Enemies with Rare or Better Shotguns (400)
- Hide in Stealth Grass for 10 Seconds (10)
Season 1, week 4 quest guide
Get Headshot Damage with a Pistol (75)

This one will probably come naturally, but if you want to get it finished quickly, we advise playing in any team-based mode. From there, down an enemy player with your weapon of choice and then finish them off with pistol headshots. It’s much easier to line up your shots on a downed player, rather than one who’s actively dodging your attacks.
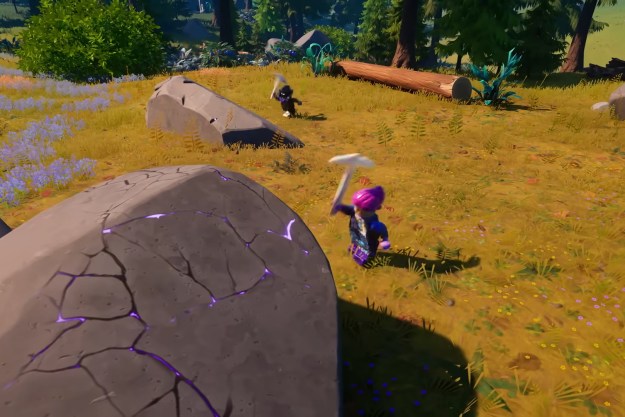
Harvest Wood from The Joneses, Shifty Shafts, or Logjam Lumberyard (150)

Next is another simple one: Simply visit The Joneses, Shifty Shafts, and/or Logjam Lumberyard and chop wood with your harvesting tool. Remember, progress carries over across all three areas and does not need to be done in the same match. As the name suggests, Logjam Lumberyard is an excellent source of wood but is also a highly contested area, so make sure to plan carefully when choosing your location.
Detonate Gas Cans to Destroy Objects (2)
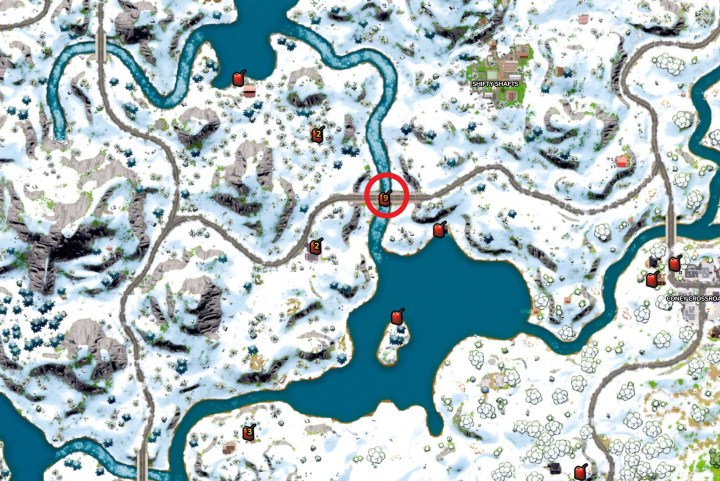
For this challenge, you don’t actually need to damage enemy players or structures with gas cans to earn credit. Instead, simply destroy gas cans to damage two objects around you to complete the challenge. There are lots of gas canisters around the map, but the best one is the bridge to the southwest of Shifty Shafts, as shown in the map above. This bridge has several canisters and if you shoot them, they’ll destroy whatever objects are around them, and since there are so many canisters here, you shouldn’t have any difficulties.
Dance at Chonker’s Speedway, Rocky Reels, and Greasy Grove (3)
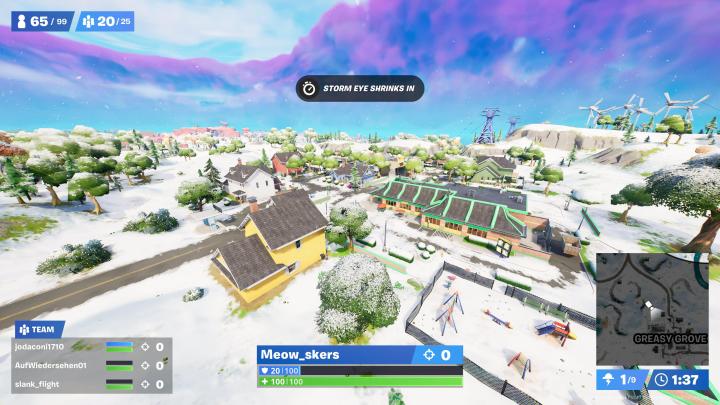
This quest is yet another one that requires you to visit multiple areas, but thankfully it’s not too challenging. We recommend landing at either Greasy Grove or Chonker’s Speedway since both of them are on the outer edges of the map, and then visiting Rocky Reels since it’s in the middle. Just remember to emote at each of the three locations — it doesn’t have to be a dance, despite the challenge description. Also, you don’t need to visit all three in the same match.
Experience Guzzle Juice Effects for 15 Seconds (1)

The toughest part of this quest is finding Guzzle Juice, which has a possibility of spawning from coolers around the map. Keep in mind, Guzzle Juice doesn’t have a 100% spawn rate from coolers, but it’s frequent enough. Use the map above (thanks, Fortnite.gg) to find all cooler locations. After you’ve found one, build a structure and jump from the top to take damage. The more damage you take, the more you’ll need to heal, which will cause the effects of Guzzle Juice to last longer. Thankfully, you don’t need to experience the effects for 15 seconds consecutively to complete this challenge.
Deal Damage to Enemies with Rare or Better Shotguns (400)

This quest can be a little tricky if you don’t typically use shotguns. Keep playing a match as you would normally and be on the lookout for rare shotguns (blue or better). From here, you can down a player and finish them off with your rare shotgun, or simply use it to take down opponents in close quarters. Once you’ve dealt 400 damage with the shotgun, you’ll complete the challenge.
Hide in Stealth Grass for 10 Seconds (10)
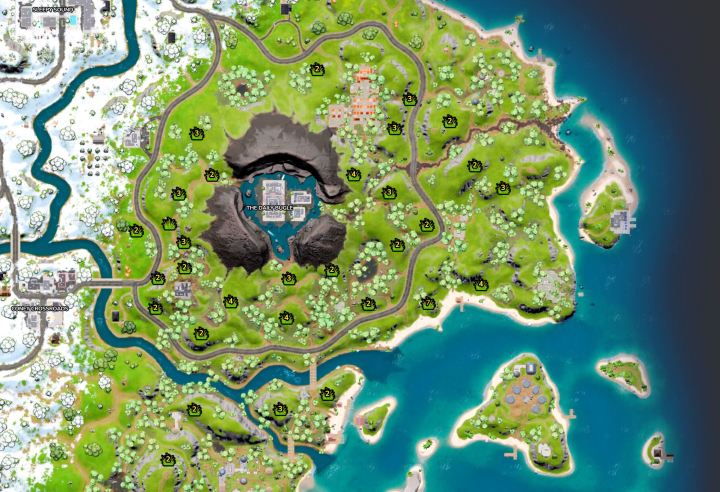
All around The Daily Bugle are patches of tall grass. The map above shows their locations. For this quest, simply crouch down and hide in any of these patches for 10 seconds and you’ll earn credit for completing it. You don’t need to hide for 10 consecutive seconds, but you should be able to do so with ease.
Editors' Recommendations
- Can you fix the Fortnite servers not responding error?
- Fortnite performance guide: best settings, fps boost, and more
- The best places to land in Fortnite (Chapter 5, Season 2)
- Rock Band 4 gets its final piece of DLC next week after over 8 years of support
- All Charms and Trinkets in Lego Fortnite