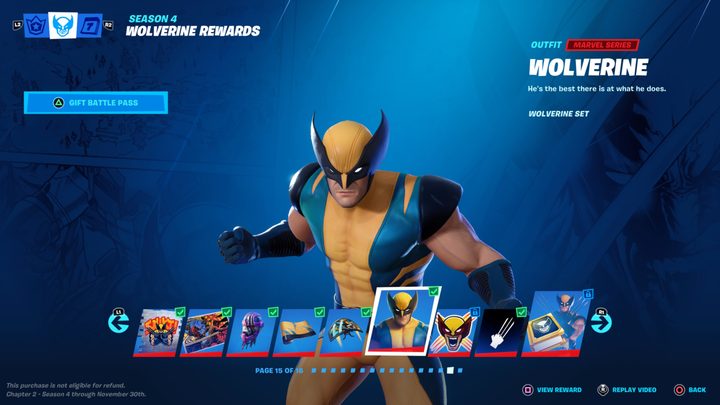
One of the highlights of Fortnite’s Marvel-themed season 4 is the ability to play as Wolverine. You might’ve seen other players running around with the classic yellow and blue Wolverine outfit — or even the brown and yellow variant. The game doesn’t make it entirely clear how to get your hands on the hero’s outfit, but that’s where we come in. Throughout this guide, we’ll detail all the steps you’ll need to take to acquire both of Wolverine’s outfits, along with an in-depth walkthrough of the challenges for each.
Here’s how to unlock Wolverine’s outfits in Fortnite.
Recommended reading:
- The best weapons in Fortnite
- Can you still unlock the Deadpool skin in Fortnite?
- The best Fortnite skins and how to get them
Battle pass and challenges
There are a few things you should know before getting started with this process. Most importantly is that you’ll need to purchase the season’s battle pass for 950 V-bucks. This is the only way to unlock the challenges needed to acquire Wolverine’s outfit (and his other cosmetics), so either shell out real cash (around $8) or use the currency you’ve earned from a previous season to get started with the battle pass. Once you’ve purchased it, you can visit Wolverine’s Challenges from the Battle Pass menu to see what you need to do.
Here, you’ll be able to see all the challenges for Wolverine this season. In short, you’ll need to complete the first six to unlock his outfits. Throughout the duration of this season, each week, a new challenge was made available. But now that all six challenges are live, you can complete them all right away instead of having to wait week to week like other players did. The nice thing is that you can complete them in any order — giving you some flexibility as you play. They do not need to be completed in the same match and can be attempted throughout the duration of the season (which ends on November 30, 2020). And each challenge you complete unlocks a cosmetic Wolverine-themed item for you to enjoy, so at the end of it all, you’ll have tons of goodies in your locker.
We’ve covered each challenge extensively as they were made available but will reiterate the steps to finish each one below. Click the links below to take you to a deep dive into how to complete each challenge (or continue reading).
- Week 1 — Investigate mysterious claw marks
- Week 2 — Find the Loading Screen picture at a Quinjet Patrol Site
- Week 3 — Find Wolverine’s Trophy in Dirty Docks
- Week 4 — Launch off all Sentinel hands without touching the ground
- Week 5 — Locate a Trask Transport Truck
- Week 6 — Defeat Wolverine
Now that you understand how to earn the Wolverine outfit let’s dive into the specific challenges you need to complete. Most of them are pretty straightforward, with the exception of the final challenge — which we’ll outline for you later on. Here’s how to complete all six of Wolverine’s challenges to unlock his outfits.
First challenge: Investigate mysterious claw marks
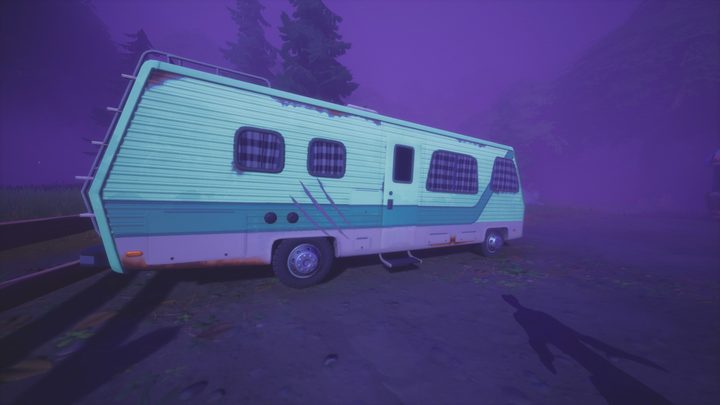
The first one requires you to investigate mysterious claw marks, and, as expected, the game doesn’t tell you where they’re located. There are many of them you can interact with, all of which are located in Weeping Woods. To complete the challenge, you only need to interact with three of them. Simply stand within a few feet of the marks, and the game will give you credit for “investigating” them. Here are the locations of three claw marks.
First claw marks: Side of RV
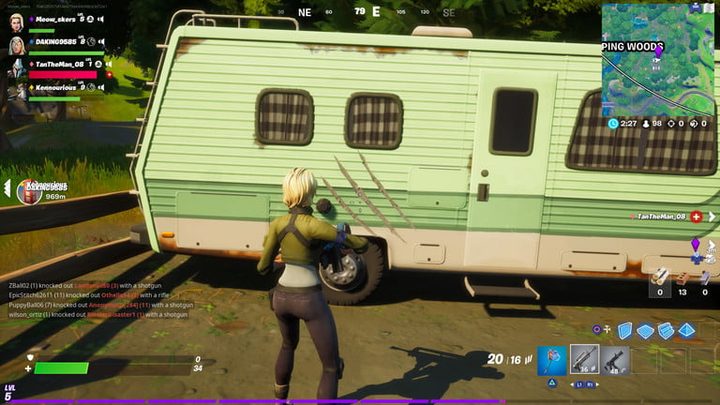
You can grab them in any order, but for the purposes of the guide, we’ll go south to north. The first set of claw marks is located on a green RV to the south of the cabins in the center of Weeping Woods. You’ll find multiple RVs here, but the claw marks are on the one toward the northeast of the trailer park in this section.
Second claw marks: Rock by the pond
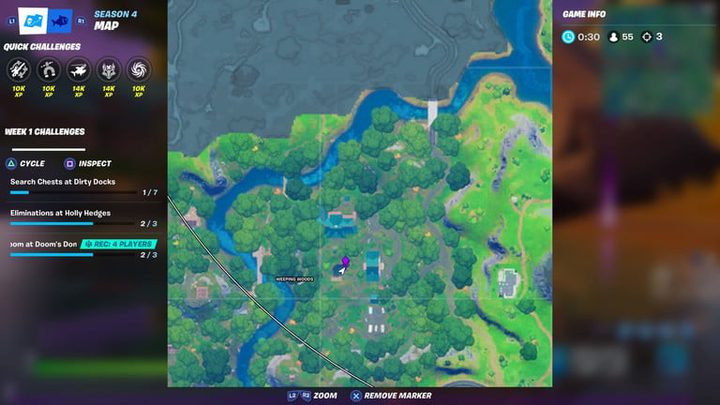
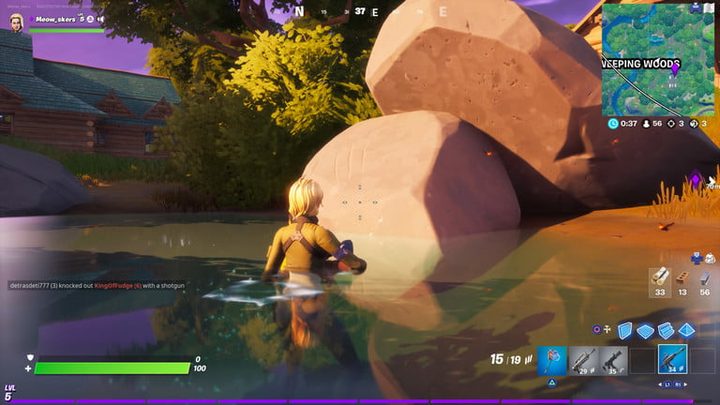
Next, head west toward the pond nearby. You’ll see several large rocks or boulders here. Go in the water and approach the boulders to get credit for the next set of claw marks.
Third claw marks: West side of the cabin
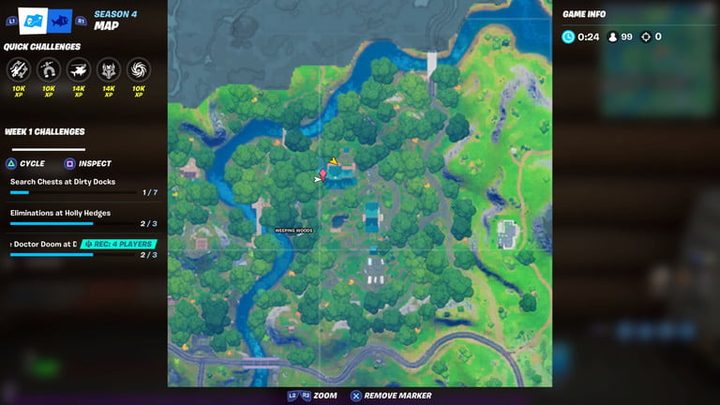
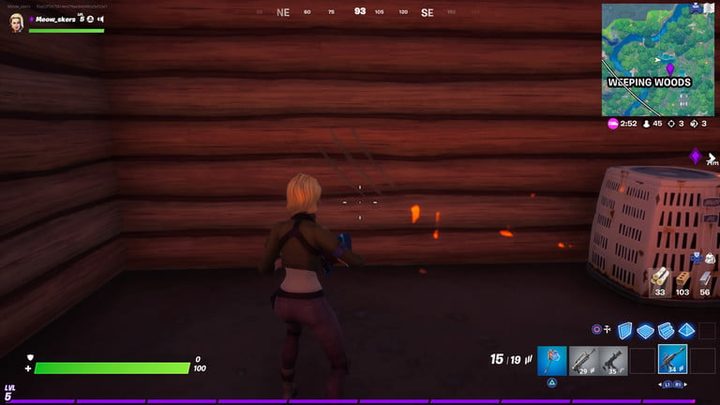
Finally, make your way to the largest cabin to the north. On the western side of the building, you’ll find an AC unit outside. Go here and walk up to the wall right beside the AC unit to earn credit for the last set. Keep in mind, there are actually more than three claw marks around this area, but these three are close enough together that you can investigate them quickly.
Second challenge: Find the Loading Screen picture at a Quinjet Patrol Site
For the following challenge, you need to find the Loading Screen picture at a Quinjet Patrol Site. In season 4, the Quinjet Patrol Sites were added, and you’ll need to know how to spot them. At the start of a match, while you’re in the Battle Bus, five Quinjets will zoom past and land at random locations across the map. Upon landing, you can enter the jets to collect loot and the Loading Screen picture you’re looking for. The jets are marked on the map and can be spotted by blue smoke that emits from them.
The Loading Screen picture you’re looking for is inside one of these Quinjets, so pick whichever one you’d like (preferably one that’s out of the way so there’s less chance of running into an enemy) and head toward it. Before you actually approach, you should know that they’re heavily guarded by Stark Robots, so you’ll want to stock up on a decent weapon ahead of time. Try to gather shields and a medium- to long-range weapon so you can easily take out the robots from afar. It’s possible to run past them and quickly head inside the Quinjet to grab the picture and complete the challenge, but you’ll have to get lucky.
Instead of relying on luck, take out the robots, and once they’re all down, walk inside the Quinjet. Simply approach the picture and interact with it, and you’ll earn credit for completing the challenge. You can now set your new Loading Screen picture from the main menu. It’s a pretty slick picture, featuring Wolverine in an action pose with lots of painterly brushstrokes across it.
Third challenge: Find Wolverine’s Trophy in Dirty Docks
Next up is the challenge for finding Wolverine’s Trophy in Dirty Docks. The Trophy is of a Sentinel’s head — which isn’t as morbid as it sounds since Sentinels are robots. Make your way to the southernmost section of Dirty Docks, where you’ll find a small building. The Trophy is located on the bottom floor of this building inside a broom closet. You’ll need to destroy the shelving unit at the back to uncover the Trophy. Once you do that, collect it, and you’ll earn credit for completing the challenge.
Now that it’s been a few weeks, you shouldn’t have to deal with many players around this area at all. To play it safe, though, you should grab a weapon nearby to defend yourself in case you do happen to come across someone. Since other main hubs are busier at the time of writing, it’s unlikely you’ll come across other players going for the Trophy, as well. After you’ve collected it, you can equip it as Backbling. Something about having a head on your back doesn’t sit well with us, but to each their own.
Fourth challenge: Launch off all Sentinel hands without touching the ground
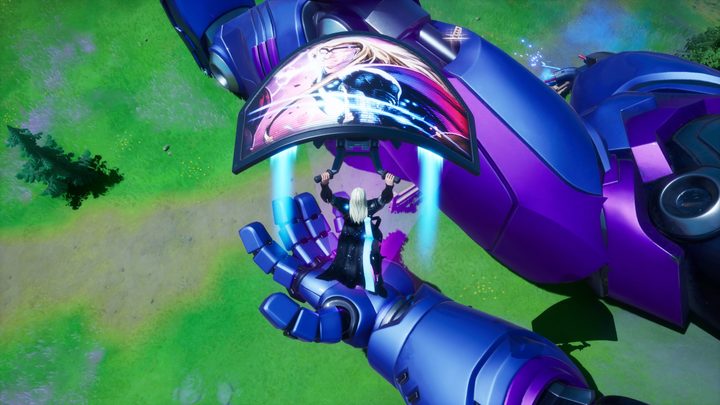
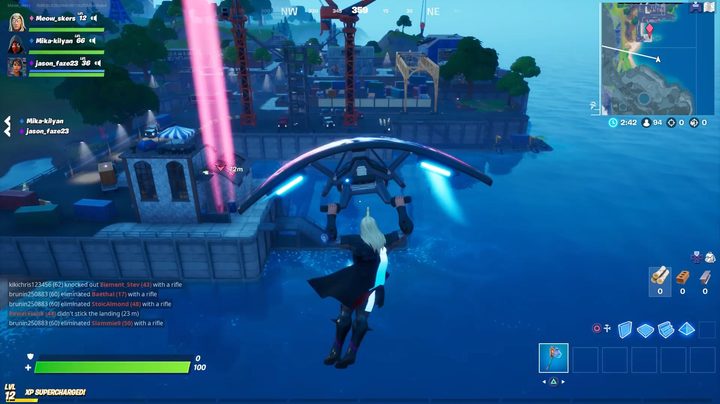
The following challenge requires you to launch off all Sentinel hands without touching the ground. The hardest part of this one is simply finding the Sentinel hands, which are located at Sentinel Graveyard in the middle of the map, just south of The Authority (for the Halloween event, The Authority has changed to The Ruins). If you pull up your map, you can actually see the downed Sentinels to the northwest of Lazy Lake.
What you want to do is land on the westernmost Sentinel’s hand and let the game do the rest. Don’t touch your controller, and you’ll continuously bounce from one to the other. Here’s a video of the full process in action.
In total, there are six hands to bounce from, so leave your controller alone for a few seconds while your character goes for a ride. After the sixth hand, you’ll gain credit for completing the challenge. Onto the next!
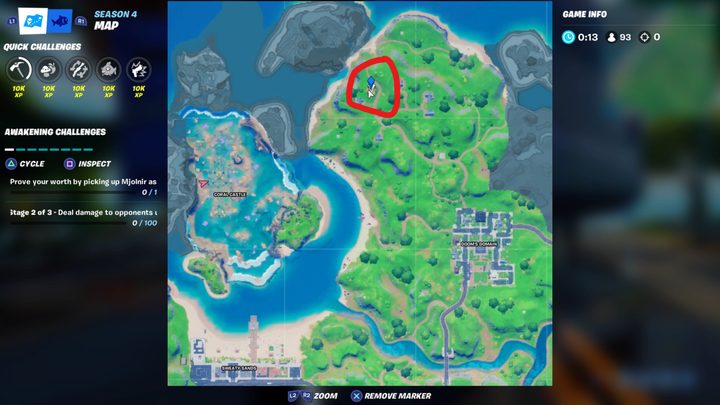
Fifth challenge: Locate a Trask Transport Truck
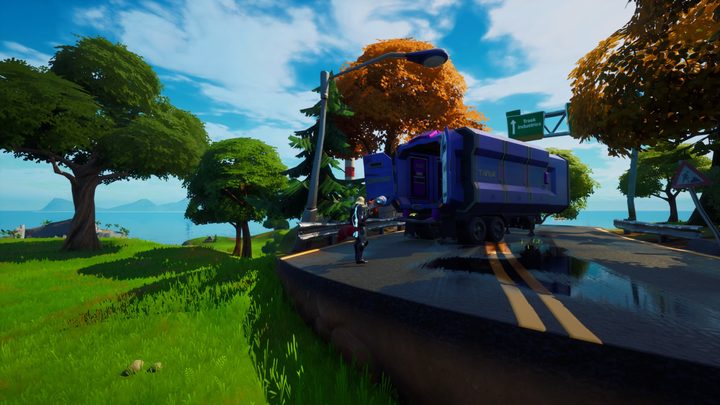
Next, you’ll need to visit a Trask Transport Truck, which is located to the northeast of Coral Castle. The truck is found on an elevated piece of land and features an opening at the back that you use to climb into. Here’s the location on the map.
Simply climb inside, and you’ll gain credit for this challenge. Nothing too difficult here — especially since enemy players are likely distracted with other challenges across the map.
Sixth challenge: Defeat Wolverine

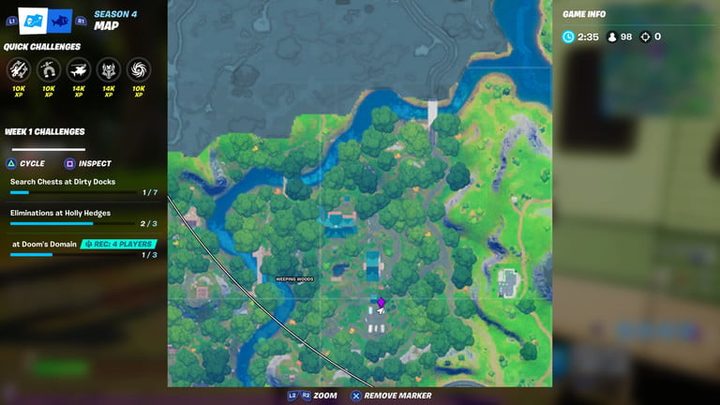
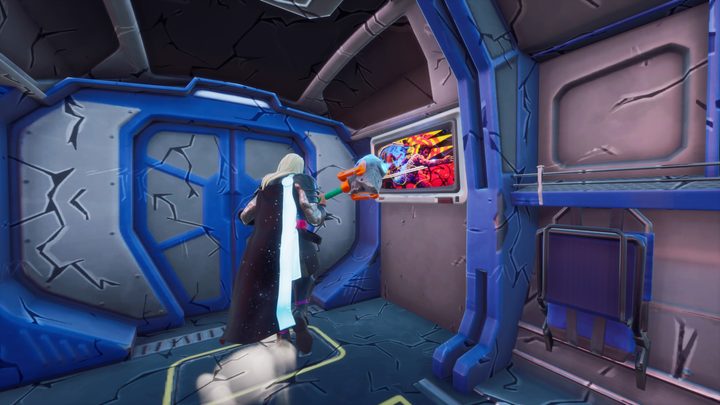
Finally, you’ll need to defeat Wolverine himself — a task that is much easier said than done. When the challenge went live, it was particularly troublesome due to the sheer amount of players going after him. Now that it’s been a couple of weeks, you might have an easier time. But even if you come across Wolverine, actually taking him out is no easy feat. He can be found somewhere between Weeping Woods and Slurpy Swamp at random spots. Check the map below for reference.
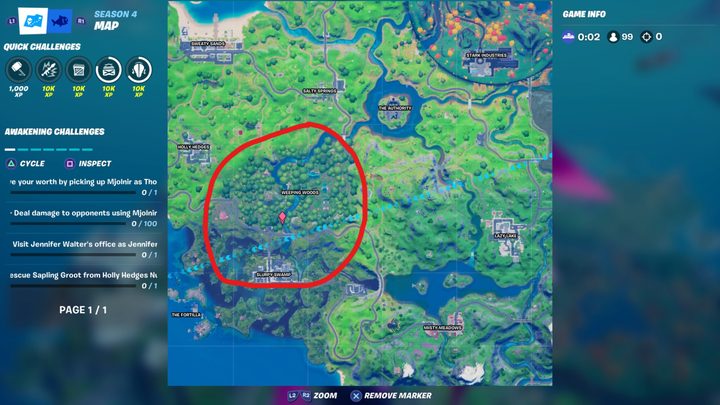
What we recommend for you to do is to first grab a chopper so you can easily survey the area for Wolverine. If you fly around the area shown in the map above, you should come across Wolverine in his classic blue and yellow outfit. Hopefully, no other enemies are trying to take him out as well. If they do eliminate Wolverine first, you won’t get credit for completing the challenge, so do your best to take out any nearby players so they don’t “steal” your kill.
We also highly advise that you stock up on medium- to long-range weapons beforehand. Wolverine is extremely deadly up close and will pretty much take you out instantly, so you’ll want to keep your distance as you fight him. Assault rifles and burst assault rifles are excellent choices for taking him out. Here’s a video of our team taking out Wolverine.
As you can see, even with a full team of players unloading on Wolverine, it still takes a while to defeat him. Our team stayed back and pretty much fired away from afar before he could even get an attack in. And to help out, we hacked a few Stark Robots at a nearby Quinjet Patrol Site. You can do this by downing a robot and interacting with them. Hacking them will cause them to become friendly, and they’ll shoot at any opponent — including NPCs like Wolverine.
If anyone on your team takes out Wolverine, the entire squad gains credit for it, so don’t worry about who secures the kill. The only thing you need to worry about is other players who might also be going for the challenge. Once you down Wolverine, be sure to finish him off, as you’ll only get credit after he’s fully eliminated. Upon defeat, the game will notify you that you’ve completed the challenge, and Wolverine will drop his famous claws for you to use for the duration of the match.
Equipping the outfit
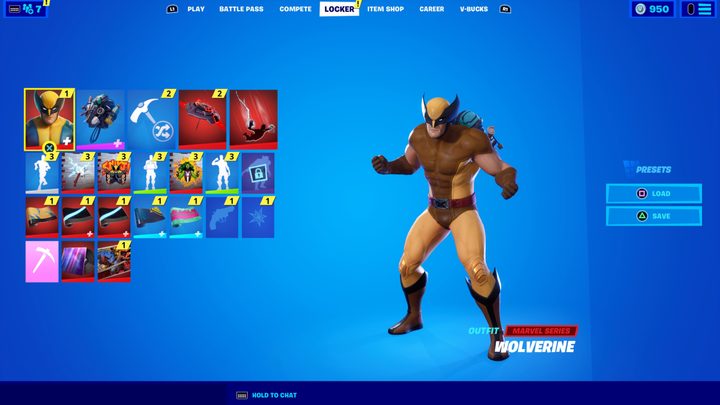
After you’ve completed all six challenges listed above, you’ll unlock both of Wolverine’s outfits — the blue and yellow one and the brown and yellow variant. To actually equip them, you’ll need to head to the Locker tab from the main menu and click on the first option, which contains your skins. Here, you’ll see all the outfits you have available, and if you press Edit Style on Wolverine, you’ll find both variants. Select whichever one you’d like and then press Save and Exit to confirm your changes. Now, when you boot up a match, you’ll be dressed as Wolverine. Enjoy! Keep in mind, the outfit will be unlocked for good, even after this season has ended.