
Where to find a Kinetic Boomerang in Fortnite

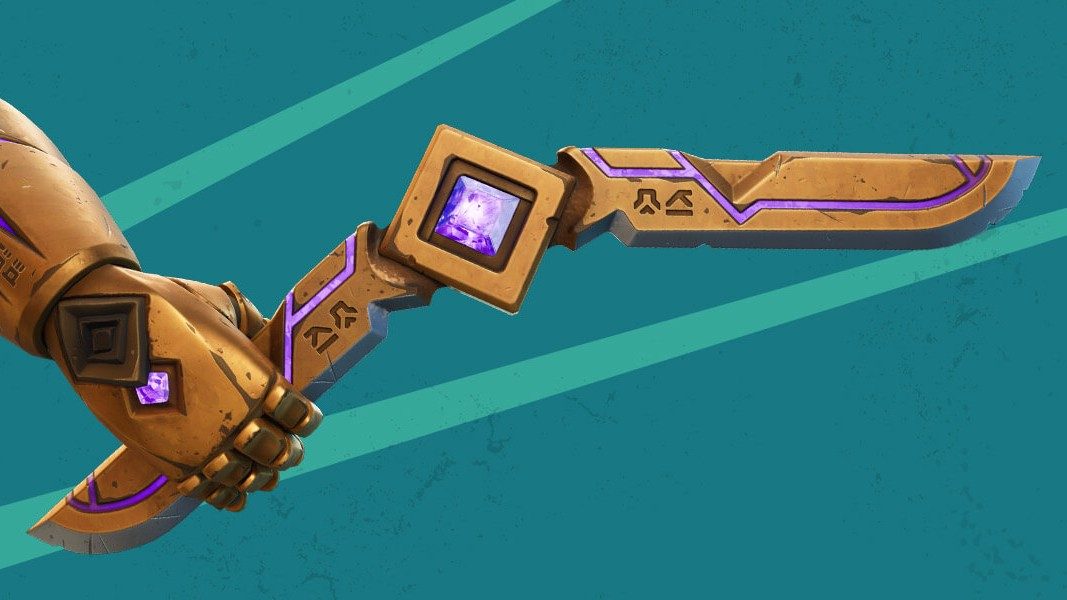
There are plenty of new weapons and items to get your hands on in Fortnite Chapter 4 Season 3, but the Kinetic Boomerang may be the most unique and satisfying of the bunch. Unlike the past few seasons’ Shockwave Hammer and Kinetic Blade items, the Kinetic Boomerang lacks any movement abilities attached to its use, instead offering some fairly solid damage and a thoroughly enjoyable throw-and-return mechanic. If you’d like to check out the Kinetic Boomerang for yourself, take a look below for information about where to find it and how to make the most out of it in battles.

Where to find a Kinetic Boomerang in Fortnite

A hand holding the new Kinetic Boomerang weapon in a Fortnite key art release.
Epic Games

The Kinetic Boomerang can be found lying on the ground just about anywhere, or you can find it on boomerang stands scattered around the Chapter 4 Season 3 map. While it’s an Epic rarity weapon, it’s not particularly uncommon, so you shouldn’t have too much trouble rounding one up as you explore areas in the battle royale mode. Once you’ve found one and picked it up, you can simply equip it and prepare for some boomeranging.

How does the Kinetic Boomerang work?

Character holding a Kinetic Boomerang
Epic Games

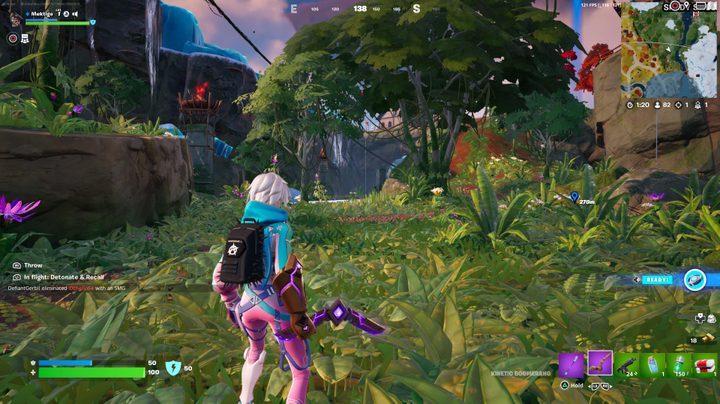
Using the Kinetic Boomerang is relatively straightforward because it works precisely how you’d expect a boomerang to function — simply throw it at an enemy to hit them for 60 damage and then wait for it to return to you. As it returns, it can hit the enemy again and deal another chunk of damage. However, you can also return it early, which can come in handy if you missed your initial throw.

Still, as fun as it can be to use the Kinetic Boomerang, it doesn’t dish out damage with enough speed to make it viable in most cases where your enemy is using firearms. In general, this unique weapon is actually best for finishing off particularly wiggly foes who try to escape or move around quickly, as it has a slight magnetism to it that will allow it to connect to someone even if you didn’t aim it perfectly. Similarly, you can simply swap to your boomerang after unloading a full magazine from your main weapon and deal out that last big hit on an enemy to wrap up a fight, or you can use it to check hiding spots like bushes and trees without using precious ammo. As you can see, it’s not best suited for every situation, but its versatility makes it a great choice to keep around.

Editors' Recommendations

Billy Givens
Billy Givens is a freelance writer with over a decade of experience writing gaming, film, and tech content. His work can be…
How to get the Abacus and see enemy health bars in Sea of Stars
A cave entrance in Sea of Stars

Combat in Sea of Stars is a thrilling mix of traditional turn-based mechanics and creative new ideas that help the game feel both familiar and fresh at the same time. However, one thing missing out of the gate is the ability to see enemy health bars during battle, making it a bit challenging at times to know which attacks are best used on which foe. However, you can rectify this early in the game by finding an Abacus accessory, and we'll tell you how below – though please note that the guide will mention some early-game spoilers, so continue at your own risk!
How to get the Abacus and see enemy health bars
Early in Sea of Stars, you'll find yourself resting at a campfire when Garl hops out of the bushes and rejoins your party. Soon after you team back up with this lovable pal, you'll encounter a save point next to a cave entrance directly to the north. Enter here and defeat the two enemies inside. Afterward, scale the wall in this room and wrap around to a chest that contains an Abacus.

Alternatively, you can buy an Abacus from a merchant at the Stonemason's Outpost just a little further into the game, so if you miss the initial opportunity to get this extremely useful accessory, you won't be completely out of luck.

Read more
How to change the difficulty in Sea of Stars
Zale and Valere from Sea of Stars

In many ways, Sea of Stars feels like a return to what put role-playing games on the map decades ago, thanks to its gorgeous 16-bit visuals and turn-based combat encounters that really capture one of gaming's most memorable eras. However, that doesn't mean it offers no modern conveniences, as it's actually a very accessible game with plenty of creative design choices that make it feel like it fits right into our current times, too. One of the ways in which it adds modern flair is via its unique difficulty system, which eschews the usual Easy/Medium/Hard selections for something more customizable. Here's how it works.
How to use Relics to change the difficulty
Similar to the ring system from Final Fantasy XVI, Sea of Stars allows you to customize the game's difficulty to your liking via various Relics with individual perks and boons that can be toggled on and off at any time. These can be found in the status menu by scrolling down to "Relics," and the game will give you two very early on, though it's important to keep an eye out for others you can pick up.

Those looking for an easier experience are likely to appreciate The Amulet of Storytelling, which you'll have access to at the beginning of the journey. This Relic doubles your overall HP and heals you automatically after combat, making many of the game's areas significantly easier. However, you'll also be able to pick up the Artful Gambit a little ways into your quest, which will reduce your HP by 95% and add additional bonuses for timing blocks and attacks properly, making the game much more difficult.

Read more
How to get a mount in Wayfinder
Three characters face-off against a larger enemy in Wayfinder,

The gameplay loop in Wayfinder may be largely focused on running dungeons and gearing up your various characters, but there's also a wide-open world out there to explore for some quests and loot. That may leave you wondering how to snag a trusty mount that you could use to ride around a bit faster, and we'd like to think that's a pretty reasonable thing to desire. However, you may be surprised that the process of getting a mount isn't entirely clear yet, and there's only one guaranteed way to score one right now. And even using that method requires you to exercise some patience. We'll explain it all below.
How to get a mount
If you're wanting to get your hands on a mount in Wayfinder anytime soon, you're out of luck. As of this writing, the only way to obtain a mount in the game is to purchase an Awakened or Exalted Founder's Pack, both of which come with the Highlands Strider Mount and Saddle among a treasure trove of other goodies. The former will run you $90, while the latter is the ultimate tier of Founder's Pack and costs a whopping $150.

The downside is that, even after purchasing one of these upper-tier Founder's Packs, you still won't have immediate access to the Highlands Strider mount. As of right now, mounts aren't active in the game, and we're not entirely sure when they'll go live. When we have more information, we'll be sure to update you here, though. In the meantime, it looks like you'll be legging it through Wayfinder!

Read more