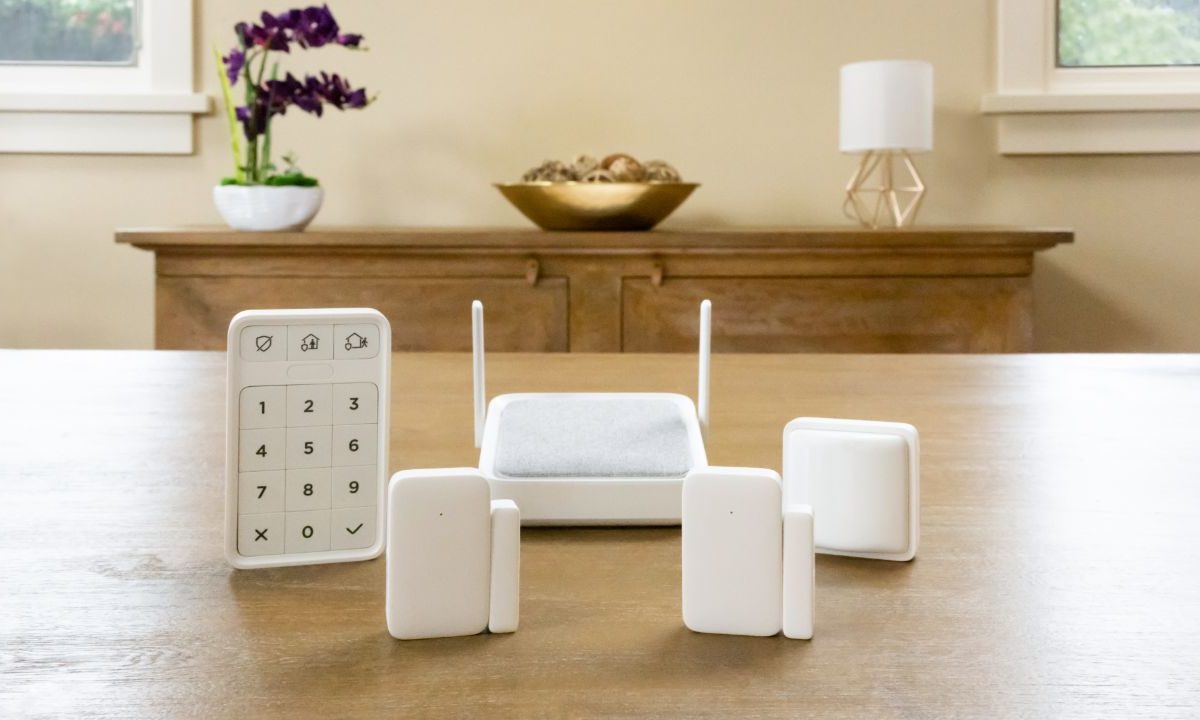
It may not be as well known as SimpliSafe or Ring, but the Roku Home Monitoring System SE is a great option for shoppers on a budget. The kit includes a variety of entry sensors and motion sensors, making it perfect for small homes or condos (especially when you factor in its $100 price tag).
If you’re new to home security systems, however, you might run into a few snags when setting up the system. Here’s everything you need to know about installing the Roku Home Monitoring System SE, including ideal Hub placement, Wi-Fi network requirements, and more.

How to set up Roku Home Monitoring System SE
Before you get around to installing your Roku Home Monitoring System, be sure to download the Roku Smart Home app on your smartphone or tablet. You’ll also want to verify you have access to a 2.4GHz Wi-Fi network. And while all the gear comes with adhesive strips for mounting, consider snagging a Phillips screwdriver if you want to screw the gadgets to the wall for a more reliable mount.
With that out of the way, you’re ready to start the installation process.
Step 1: First, you’ll want to determine where you’re placing all your security devices. The monitoring hub needs to be in a central location. Ideally, this is located close to all the motion sensors and entry sensors and in a room that’s frequently used. Consider placing it on a side table or somewhere in your kitchen. Your keypad, meanwhile, should be near an entry door, as this will allow you to quickly arm or disarm the system as you enter or exit your home. As for the motion sensor, consider mounting it as high as possible, which will give it a better view and lets it monitor more square footage.
Step 2: Next, clean the mounting areas with a bit of soap and water. This ensures there is no dust or debris that will impact the adhesive strips. After cleaning the mounting areas, ensure they’re dry before mounting your devices.
Step 3: Launch the Roku Smart Home app and create an account if needed.
Step 4: The first device you’ll set up is the monitoring hub. From the app, find the Monitoring menu then select Set up system.
Step 5: The app will then walk you through the process of syncing the rest of your gadgets with your monitoring hub (starting with the keypad and sensor). Continue following the instructions for each device to get it properly mounted and synced.
Step 6: The set up process ends with the option to modify your Home and Away modes, along with changing the delay timers for your alarms. Keep in mind that these can be changed later if you decide you don’t like the settings you choose during set up.
Step 7: With the installation process complete, you should now have three solid lights on your monitoring hub. If you have three rolling lights, your system is going through a firmware update. Two alternating lights indicate that it's still connecting to your network, while three lights blinking indicate that it’s trying to pair with one of the home monitoring gadgets.
Step 8: If you want to enhance the abilities of your home security system, Roku offers 24/7 professional monitoring for a monthly fee.