
Few malware attacks are as annoying or potentially costly as ransomware. Once your computer becomes infected, ransomware locks you out of valuable files and demands that you send payments in exchange for releasing them. Even major corporations have been attacked, with some actually making enormous payouts to get their digital property back.
Yep, that’s scary — but there are ways you can protect your devices. One of the newer, easier-to-enable options offered by Windows 10 is enabling its innate ransomware protection with controlled file access. Let’s walk through how to turn it on and what this means for your Windows 10 security going forward.
Step 1: Head to Windows Security
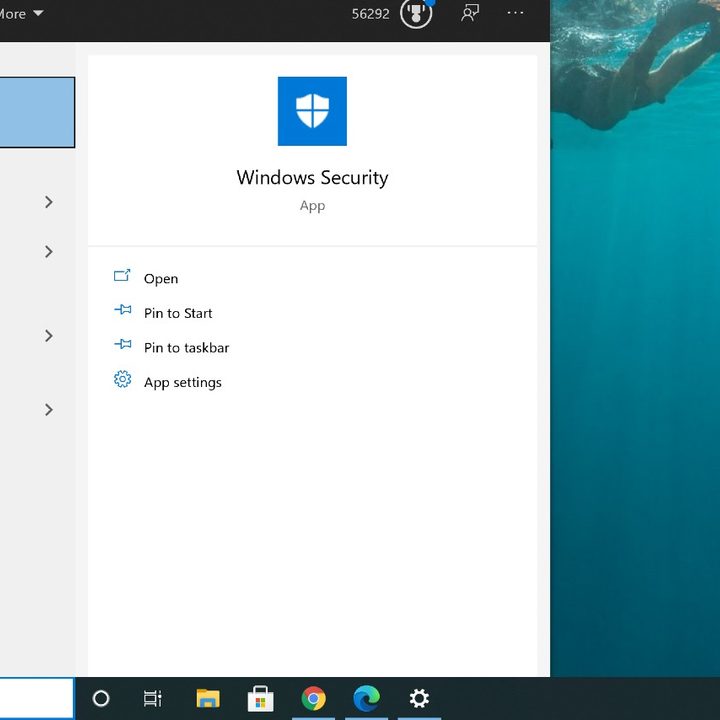
Once you have logged into Windows 10, head down to the search bar on the left side of the Windows 10 taskbar and type in Security.
Look at the results and choose the Windows Security App to begin.
Once Windows Security has opened, look to the left-side menu and select Virus & Threat Protection, which has a shield icon.
Step 2: Manage your ransomware protection
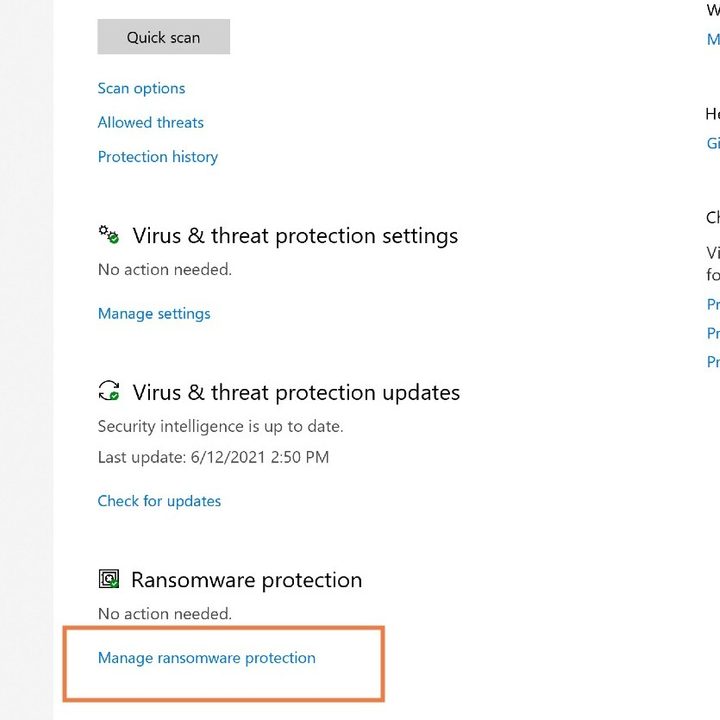
Once in Virus & Threat Protection, scroll down until you find the section called Ransomware Protection. This will list any important protection updates you might need, as well as give you an option to Manage Ransomware Protection. Select this to continue.
Step 3: Make sure Controlled Folder Access is enabled
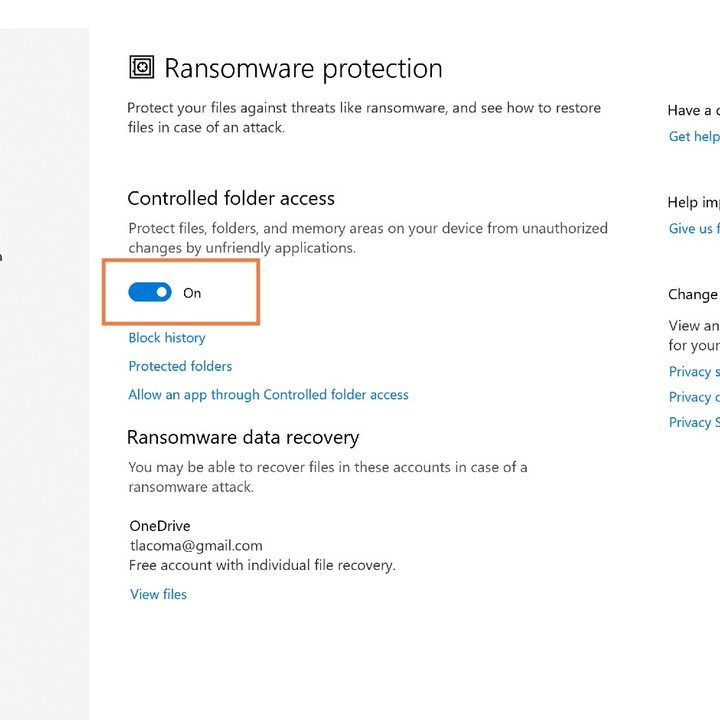
You will now open a window dedicated to Ransomware Protection. Here, look for the section that says Controlled Folder Access.
You should see a toggle to turn Controlled Folder Access On. Make sure it is toggled to On, and your ransomware protection will automatically begin, keeping any suspicious software from accessing and locking or messing with your files.
You may get a User Account Control window pop-up that asks if you are sure you want to enable this type of protection (for this and other steps here). Again, this is a native Windows option from Microsoft, so trusting it is not a problem. However, it may change the way that you manage files in some ways, so let’s take a look at managing app access.
Step 4: Let certain apps have access as needed
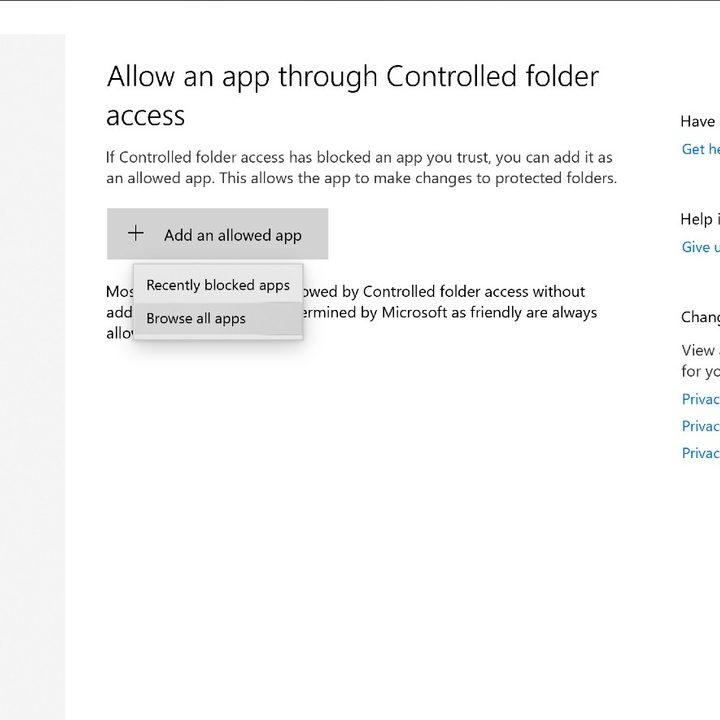
Look under Controlled Folder Access once you have enabled it, and you will see an option that says Allow an App Through Controlled Folder Access. On default settings, the Controlled Folder Access mode will block file access from any app it doesn’t recognize, which is likely to include most or all third-party apps you are using. That’s a problem if an app really does need access to one of your files (a PDF editing tool, for example). Choose this option to allow a specific app to use your files.
On the next screen, choose Add an Allowed App to begin. If you recently ran into a blocking problem, you can choose Recently Block Apps to quickly locate the program in question. Otherwise, choose Browse All Apps, and choose the app you know you want to allow through. You can manage this list over time as you get used to ransomware protection.
Step 5: Set up file recovery
Finally, if you haven’t set up Microsoft’s cloud solution OneDrive yet, the Ransomware Protection window will have a suggestion at the bottom to set up OneDrive. This will allow you to store important files in the OneDrive cloud as well as on your local hard drive. That means that even if Ransomware locks you out of local files, you can access those same files safely from OneDrive while wiping your computer (we highly recommend taking it into an expert, too) and getting rid of the malware.
OneDrive’s base service is free and does include individual file recovery, so this costs nothing to set up and is a good idea if you are worried about losing access to your files. If you have already set up OneDrive, you will instead see an option to View Files so you can make sure that your most important files are already in OneDrive.
While you’re at it, why not take a look at our top suggestions for free antivirus software that can keep your computer protected without adding annoying bloatware?


