If you’re looking to boost your productivity using your Mac and iPad, Universal Control is a feature that takes multitasking to the next level.
Universal Control lets you use your cursor and keyboard simultaneously between supported Macs or a Mac and iPad. Additionally, you can do things like drag an image from your iPad over to Mac or drag a file from Mac to your iPad.
Let’s take a look at what you need to enabled and use Universal Control in MacOS.

Universal Control requirements
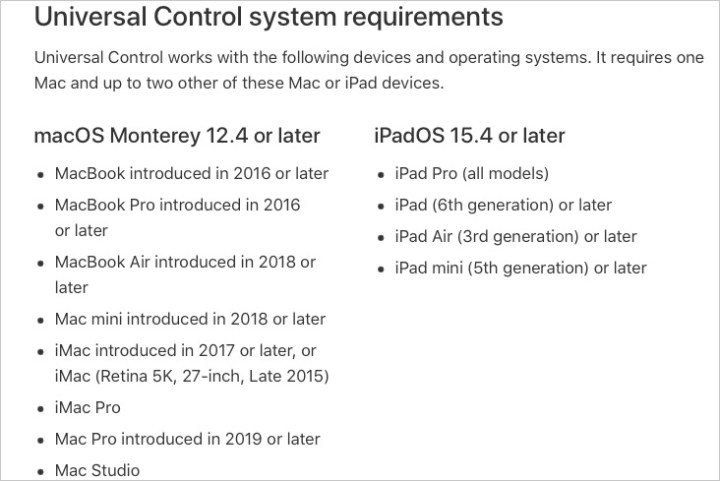
Before you try to use Universal Control, it’s important to note the requirements and devices you need.
- You must be signed in with the same Apple ID on both devices using two-factor authentication.
- Your devices should be within 30 feet (10 meters) of each other.
- Your devices must have Bluetooth, Wi-Fi, and Handoff turned on.
- You must not be sharing your iPhone’s cellular connection or your Mac’s internet connection.
- You should be running MacOS Monterey 12.4 or later or iPadOS 15.4 or later.
- You must use have at least one supported Mac and up to two other Mac or iPad devices.
For specific Macs and iPads that support Universal Control, visit the Apple Support site for the feature.

Enable Universal Control on Mac
Once you meet the above requirements, you’ll need to turn on Universal Control on your devices. Starting with MacOS, follow these steps.
Step 1: Open your System preferences using the Apple icon in the menu bar or the System preferences icon in your Dock.
Step 2: Select Displays.
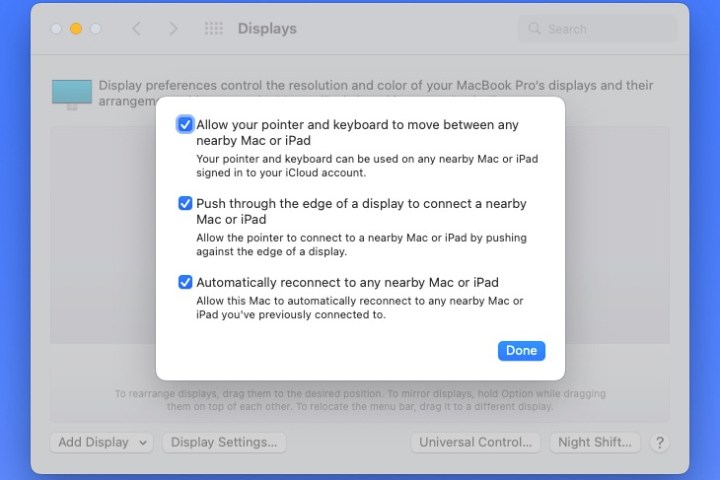
Step 3: Pick Universal control to display its settings.
Step 4: Check the first box to allow your pointer and keyboard to move between your devices, along with the second box to push through the edge of the display to connect.
Optionally, select the final checkbox to automatically reconnect the same devices in the future.
Step 5: Select Done.

Enable Universal Control on iPad
Turning on Universal Control on your iPad takes only a few taps.
Step 1: Open Settings and select General.
Step 2: Choose AirPlay and handoff.
Step 3: Turn on the toggle for Cursor and keyboard.

Connect your Mac and iPad
Whether you’re planning to use Universal Control between two Macs or one Mac and an iPad, you’ll need to link them to each other.
Step 1: Make sure both devices are awake, unlocked, and near each other.
Step 2: Use your mouse or trackpad to move your cursor from your Mac to the second device by sliding it to the furthest right of your screen.
Step 3: You should see the cursor on the second device on the left side of its screen. Continue moving the cursor to the right until it fully displays on the second device.

Use your cursor or keyboard on iPad
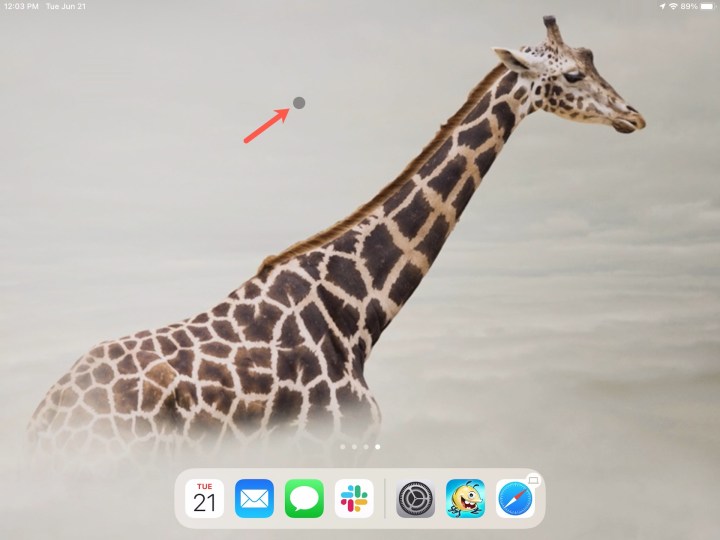
After you link your devices, you’ll see the cursor display on iPad as a small dot.
Step 1: Press your mouse button or trackpad on an item or app to open it the same as if you were to tap it. You can also press and hold the same way you would normally tap and hold on iPad to select and move items.
Step 2: In addition, here are several common tasks using your Mac’s mouse or keyboard on your iPad.
- Go to the home screen: While in an open app, move the cursor past the bottom of the screen and continue until you see the home screen.
- Open the App Switcher: Move the cursor past the bottom of the screen and continue until you see the App Switcher.
- Open the Control Center: Select the Status icons in the upper-right corner.
- Open the Dock: Move the cursor to the bottom of the screen.
- Open the Notification Center: Select the Date and time in the upper-left corner.
- Open the Search: Scroll down on the home screen.
Step 3: To use your Mac’s keyboard to type in an app like Messages, Notes, or Reminders, simply begin typing.
Step 4: To return to your iPad’s keyboard, select the Keyboard icon in the bottom-left corner and pick Show keyboard.

Drag and drop items between devices
You can drag and drop between two Macs or a Mac and iPad with Universal Control, making it a multitasker’s dream. You can use this action with the mouse or trackpad just like dragging and dropping items on the device itself.
Here are a few examples for using this feature:
- Drag a file from Finder on Mac to the Files app on iPad.
- Drag an image from Mail on iPad to your Mac desktop.
- Drag a photo from Mac to the Messages app on iPad.
- Drag a sketch from Notes on iPad to a document on Mac.
If you try to drag and drop an item but see a circle with a line through it, that means you cannot drop the item in that location. In this case, you might use copy and paste with the Universal Clipboard instead.

Disconnect your Mac or iPad
If you want to stop using Universal Control on one device, you can simply put that device to sleep. Alternatively, you can disconnect all devices using the Control + Option + Command + Delete keyboard shortcut.
To disconnect your iPad from your Mac specifically, follow these steps.
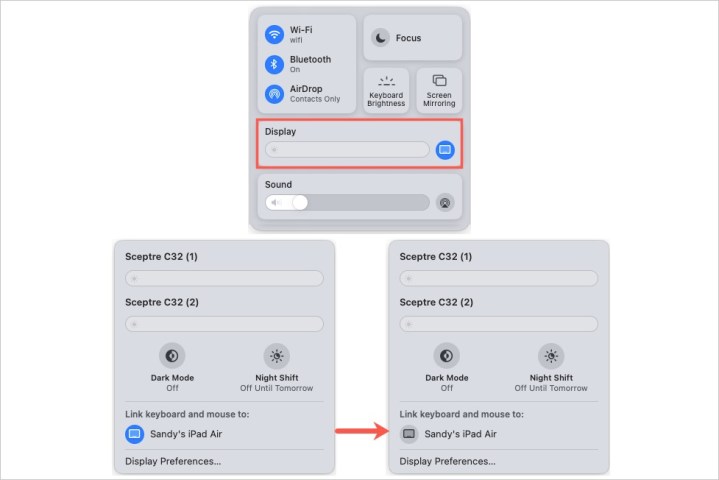
Step 1: Open your Mac’s Control Center.
Step 2: Select Display.
Step 3: Choose your iPad to deselect it.
If you enjoy Universal Control, you might also take advantage of using AirPlay to stream your screen or using AirDrop to easily share files with nearby Mac users.


