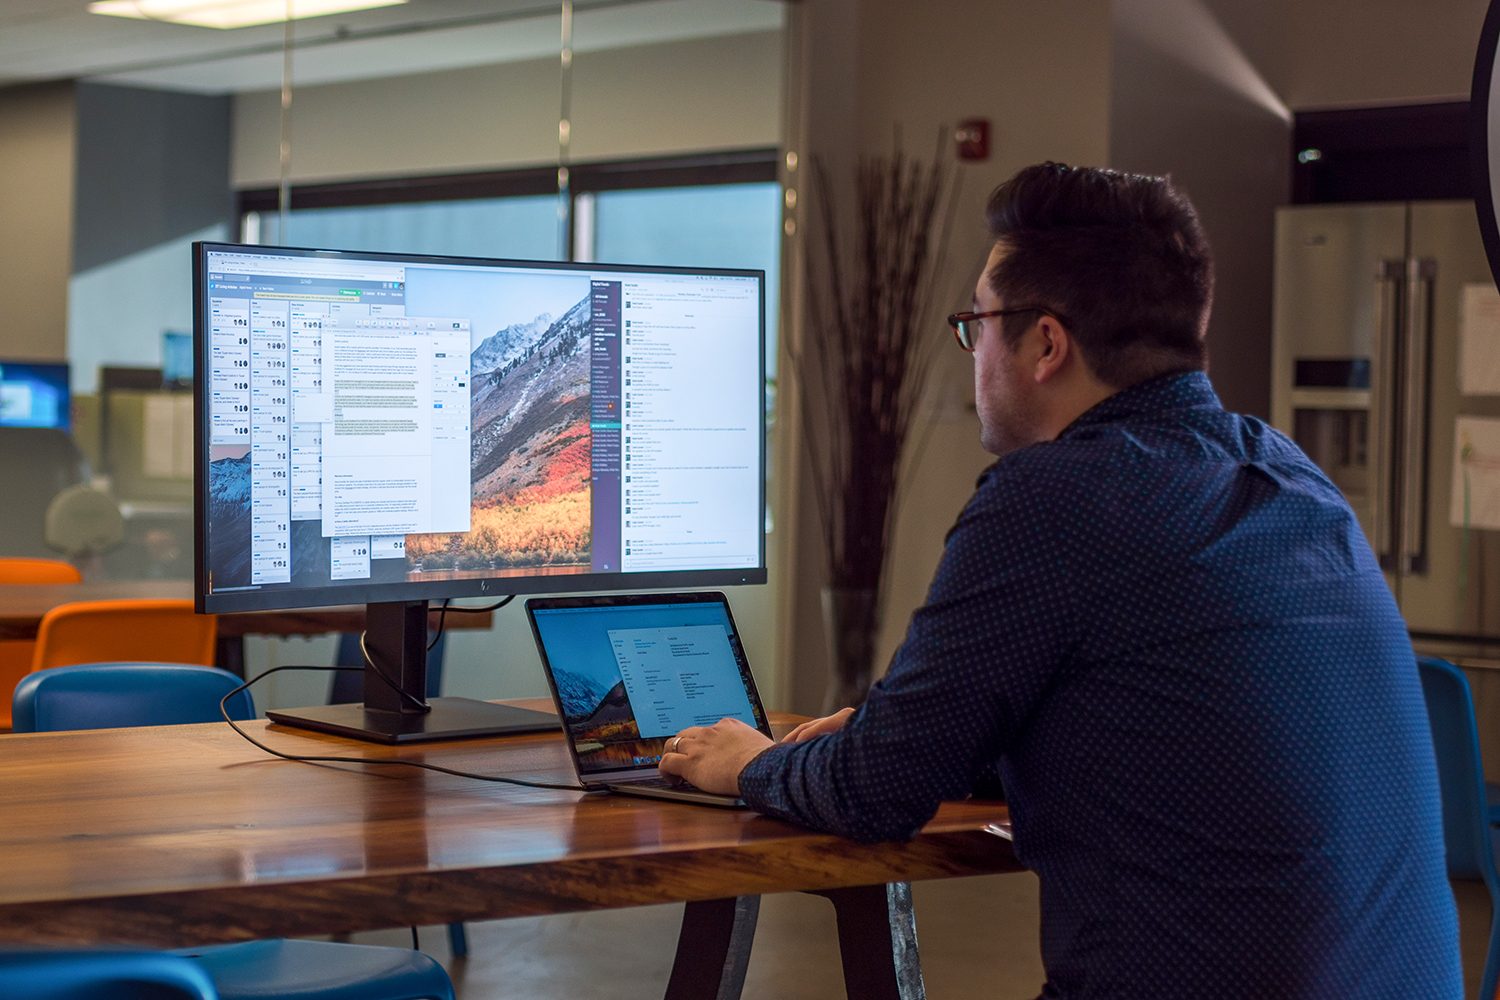
Does your desktop computer need a little extra space for a particular project, game, or presentation? Even if you already have one of the best monitors, you can turn a nearby laptop into a second monitor, providing more valuable display real estate for your content.
We’ll show you how to turn a Windows laptop and a MacBook into an extra monitor with just a few simple steps.
Steps for Windows 10 and 11
Windows 10 has a useful built-in option to use another Windows 10 laptop as a monitor screen. Have both your displays nearby and fully charged batteries before you begin!
Step 1: Start with the computer that you want to use as a second screen. Here, Search for Settings in the Menu search box, and select Settings to open the window. From Settings, Choose System. Once in System, look at the left-hand menu and select Projecting to this PC.
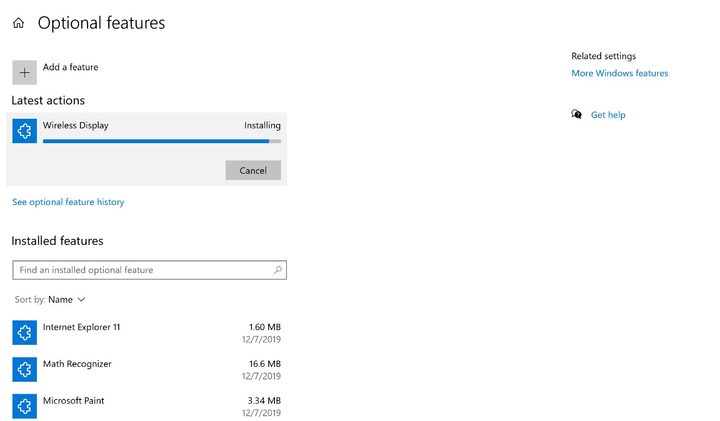
Note that you may have to enable Wireless Display as an optional feature if you haven’t done this before! Simply follow Windows look to optional features and type in Wireless Display when choosing to Add a Feature.
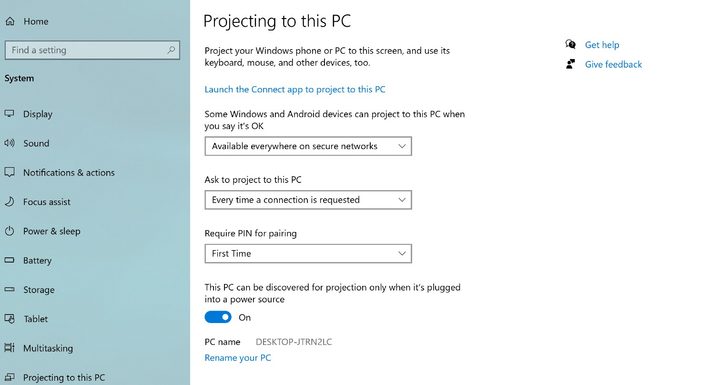
Step 2: Take a look at your options and adjust them as needed. For security, it’s a good idea to at least choose Every time a connection is requested under Ask to project to this PC. Asking for a PIN is a good idea too, especially if you’re going to be using this option in a public area. Only turning on projection when the laptop is plugged is a nice safety feature, but not required if you’re confident in your battery. When ready, launch the Connect app with the blue link Windows proves.
Step 3: Take particular note of this PC’s name, so you don’t hook up to the wrong laptop!
Step 4: Now switch to your main PC that you will be projecting from. From the menu screen, press the Windows Key + P shortcut key at the same time, as you would to link up to a traditional projector.
Step 5: You should see a few different options for connecting to a second screen at this point. The Extend option is popular if you need more display real estate, but all the options can work in different scenarios, including presentations, troubleshooting another computer, and so on. Once you have chosen the type of second screen that you need, select Connect to a wireless display.
Step 6: Check to make sure that you are connecting to the PC with the right name, and that your projection mode is the one that you intended. You can also choose to allow mouse, keyboard, and touchscreen input from the other display at this point. This isn’t usually necessary unless you will be bouncing back and forth between displays, but give it a little thought to make sure you won’t need it.
Step 7: Your two displays should now make a connection! Set the displays next to each other so you can check that everything is working properly.
Steps for MacBooks
You can also use a MacBook as an extra monitor with the screen extension ability and a compatible iMac or similar device to share the image from. Note that this doesn’t work between operating systems, so keep it within the Apple ecosystem.
Step 1: Connect your MacBook to your desktop computer or similar device. Depending on the models you are using, a Mini DisplayPort or Thunderbolt cable should work. Unfortunately, a wireless AirPlay connection doesn’t work for extending your screen, only for mirroring it, so you need a cable connection for this process to work properly.
Step 2: With both devices on and connected, head to System Preferences on the computer you are sharing from. Once Preferences has opened, navigate over to Displays.
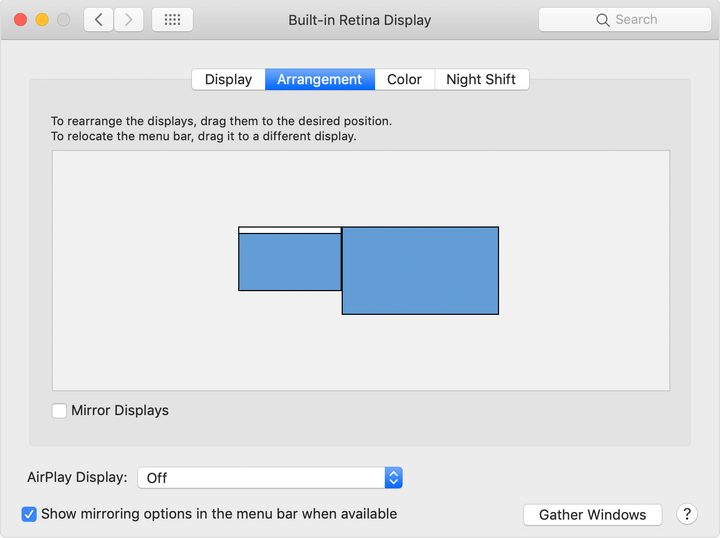
Step 3: In Displays, one of the central tabs should show Arrangement. Select this tab. If you don’t see the Arrangement tab, then check the connection between your Mac devices—it should appear when the computers are connected. In Arrangement, there are several features you can play with, but the most important step is to look for the Mirror Display option below the displays, and make sure it is not checked. This will allow you to extend your screen rather than mirror it.
Step 4: You can also rearrange which display is sharing by dragging the displays into a different position. You can use this same dragging capability to relocate the menu bar so that it is on the computer that you are controlling, rather than your laptop monitor. Make sure everything is set up correctly and check your MacBook to confirm that the extension has worked. You should now be able to move things freely between the displays, using your primary computer.