Whether you’re giving your console to a friend or troubleshooting a technical issue, sometimes you just need to give your Xbox One a fresh start. Fortunately, Microsoft makes this very easy to do for both those who want to keep their games and apps installed and those who prefer to start with a totally clean slate. This same process applies to all versions of the console, whether you have the original or the beefed-up Xbox One X, with one minor difference we’ll explain later.
- Performing a factory reset from the dashboard
- Performing a reset with the Xbox Startup Troubleshooter
- Performing an offline system update by USB
- Offline system update with Xbox One S and Xbox One X
- Offline system update with original Xbox One
- Why it's important to listen for power-up sounds
- Performing a factory reset via USB
Note that even if you opt to keep your games and apps installed, performing a factory reset will still remove all personal files and associations from the console, including saved games, achievements, settings, and accounts. All of that is stored in the cloud if your console is synced up with Xbox Live, which happens automatically when connected to the internet, so be sure to go online before initiating the reset.
When you’re ready, proceed with our guide on how to factory reset an Xbox One. If for technical reasons you are unable to see the screen or access the Settings menu in order to perform the following steps, then skip ahead and we’ll tell you the workaround to boot it up with an external USB drive. Note that you will need access to a Windows PC to do this, however.
Further reading
- The most common Xbox One problems, and how to fix them
- The most common Xbox One X problems, and how to fix them
- How to get the most out of your Xbox One
Performing a factory reset from the dashboard
Step 1: Sign in. Press the Xbox button (glowing in the center of the controller) to bring up the guide overlay.
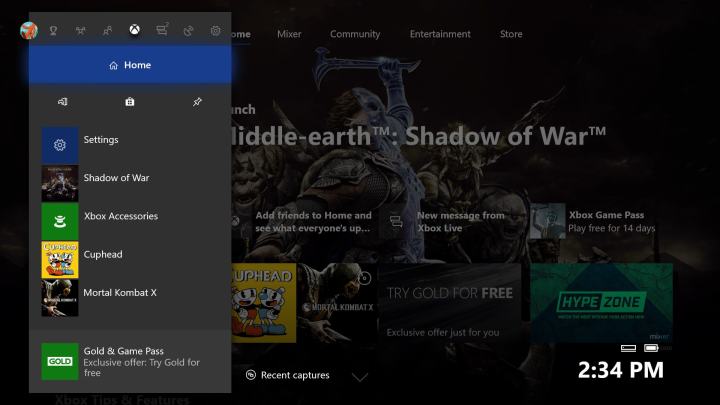
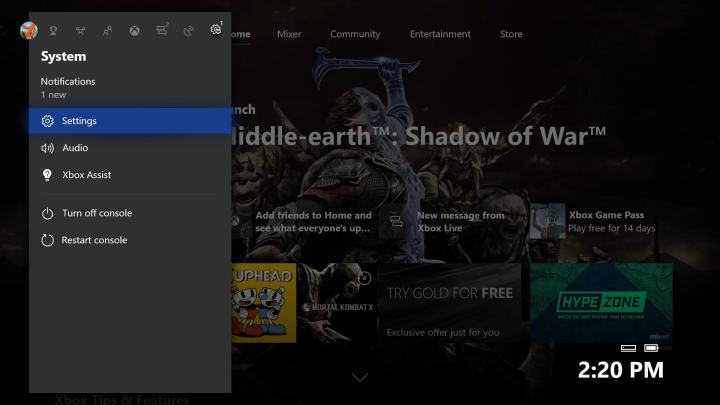
Step 2: Navigate to the System menu (the gear on the far right), and select Settings.
Step 3: Select System, then Console Info.

Step 4: Select Reset Console.

Step 5: At this point, you have the option to either Reset and Remove Everything or Reset and Keep My Games & Apps (or cancel and back out if you aren’t ready).
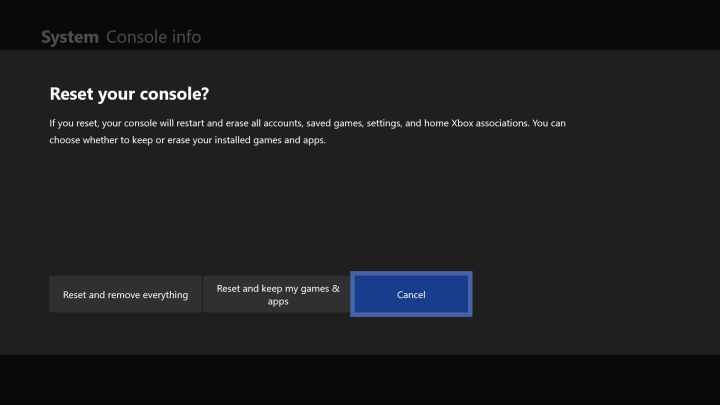
It's important to note again that even if you keep your games and apps, all of your personal data will still be wiped from the system, so be sure to sync up with Xbox Live or export your settings manually beforehand if you don’t want to lose them. Once you’ve selected your preferred way to reset, the console will proceed with erasing content, which could take several minutes.
Performing a reset with the Xbox Startup Troubleshooter
If you can’t boot your console, you can perform a factory reset using the Xbox Startup Troubleshooter. Certain original Xbox Ones don’t support the Xbox Startup Troubleshooter — see below for details — but it doesn’t hurt to check regardless.
Step 1: Power down your console fully and remove the power and network cables for at least 30 seconds.
Step 2: Plug the power cable back in and follow the rest of these steps.
Step 3: Hold down the Eject and Bind buttons on your console.
The Eject button is on the front of the original Xbox One console right next to the disk drive, while the Bind button is on the left side, directly adjacent to the disk drive, with a symbol that looks like “)))” on it. Note that on the Xbox One X and Xbox One S, both buttons are on the front of the console, with the Bind button sitting directly beneath the Xbox button on the right edge. The Xbox One S Digital doesn’t have an Eject button, so the Bind and Xbox buttons will do the trick.
Step 4: Once you are holding both buttons, press the Xbox (power) button on the front of the console.
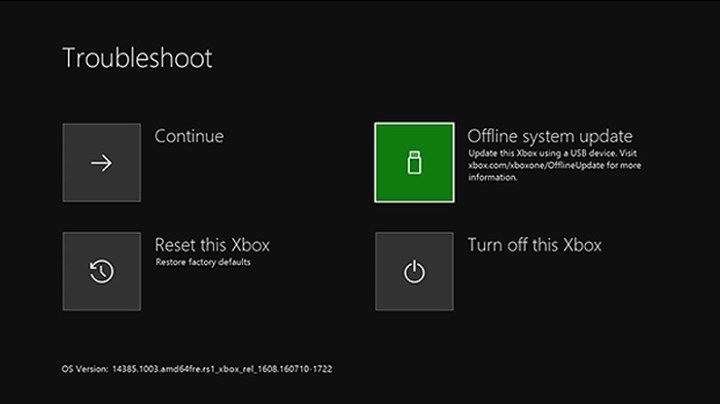
Step 5: Release the Xbox button, but continue holding the Eject and Bind buttons for 10 to 15 seconds. Listen for two tones before releasing these buttons. The Xbox Startup Troubleshooter will appear shortly after.
Step 6: Select Reset This Xbox from the settings and proceed with the factory reset.
Performing an offline system update by USB
If you’re experiencing issues and want to perform a factory reset to solve them, you may not need to go that far. You can perform an offline system update via USB, which can roll back any failed updates or other issues keeping your Xbox One from working properly. If you have an Xbox One S Digital, Xbox One S or Xbox One X, performing an offline system update is fairly straightforward. The original Xbox One requires a few more steps.
Offline system update with Xbox One S and Xbox One X
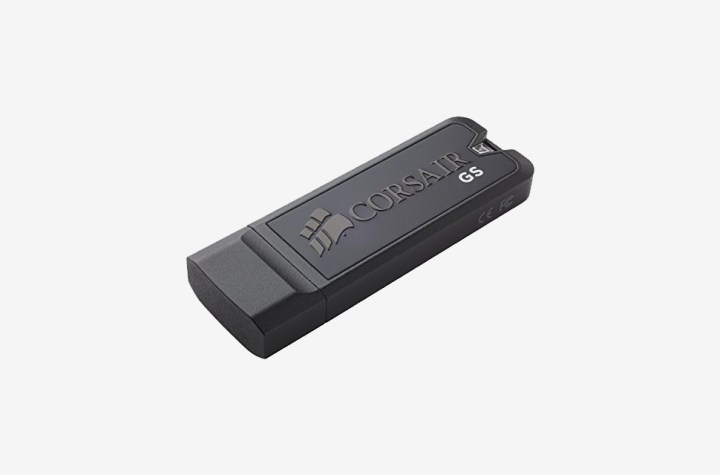
Step 1: Find a compatible USB flash drive. You will need a totally empty flash drive with at least 4GB of available space. It also has to be formatted for NTFS, which is the default Windows file system.
Step 2: Find your USB drive in the File Explorer, right-click it, and select Format.
Step 3: On the next screen, you can leave everything as is except for File System. Change that to NTFS if it isn’t already set that way.
Step 4: Download the update file to your computer and extract it into the USB flash drive. You'll then find the zipped update file from Microsoft. Extract the file and copy “$SystemUpdate” onto the root directory of the USB flash drive. It should be the only file there.
Step 5: Once the transfer is complete, eject and unplug the USB device and return to your console.
Step 6: Power down your Xbox One and remove both the power and network cables from the back. Wait 30 seconds once it is completely off.
Step 7: Plug in the power cable and insert the flash drive into the USB port.
Step 8: Press and hold the Bind and Eject buttons on the console, then press the Xbox button. Continue holding Bind and Eject for 10 to 15 seconds until the Xbox Startup Troubleshooter loads.
Step 9: Once it does, select Offline System Update. Wait while the system updates, and you’re good to go. If the update fails, you may need to restart your console and try again. If you’re still having issues, contact Microsoft for technical support.
Offline system update with original Xbox One
Step 1: Try to start the Xbox Startup Troubleshooter by completely powering down your console and removing the power cable for at least 30 seconds.
Step 2: After, plug the cable back in and press the Pair and Eject buttons, then the Xbox button.
Step 3: Release the Xbox button and hold the other two for 10 to 15 seconds. Once you hear two power-up tones, release the other two buttons. If you see the Xbox Startup Troubleshooter — labeled “troubleshoot” at the top — proceed with the steps above. If not, continue in this section.
Step 4: If you don’t see the Xbox Startup Troubleshooter, turn on your Xbox One and press the Xbox button on your controller.
Step 5: Select Profile & System, followed by Settings, then, System. Then select Console Info.
Step 6: Look for your OS version. If it’s one of the versions listed below, skip the next step. If not, go to the next step.
- 6.2.11791.0 (xb_rel_1411.141114-2300) fre
- 6.2.12521.0 (xb_rel_1503.150305-1449) fre
- 6.2.12998.0 (xb_rel_1506.150601-2200) fre
- 6.2.13326.0 (xb_rel_1508.150810-2029) fre
- 6.2.13332.0 (xb_rel_1508.150903-2141) fre
- 10.0.10586.1006 (th2_xbox_rel_1510.151107-2322) fre
- 10.0.10586.1016 (th2_xbox_rel_1510.151118-2147) fre
- 10.0.10586.1024 (th2_xbox_rel_1510.151203-1909) fre
- 10.0.10586.1026 (th2_xbox_rel_1510.151217-1035) fre
- 10.0.10586.1100 (th2_xbox_rel_1602.160210-2122) fre
- 10.0.10586.1194 (th2_xbox_rel_1603.160317-1900) fre
Step 7: If you have an OS version other than the ones listed above, you’ll need to perform two offline updates. As is the case with the Xbox One S and Xbox One X, you’ll need a USB drive with at least 4GB of space, formatted to NTFS (refer to the instructions on how to do that from the previous section ). If your OS version is 6.2.9781.0, download OSU3 from Microsoft. If it’s anything else, you’ll need OSU2.
Step 8: The following steps are the same regardless of your OS version. The only difference is that you’ll need to perform them twice if you don’t have one of the OS versions listed above, once with either OSU3 or OSU2, and another time with OSU1. If you do have one of the listed OS versions, just perform these steps with OSU1.
Download the proper update file and extract it. Move the “$SystemUpdate” file to your USB drive’s root directory (it should be the only thing on your USB drive).
Step 9: Turn off your console.
Step 10: After it’s completely powered off, plug in your USB device.
Step 11: Once you’ve done that, press and hold down both the Eject and Bind buttons, click the console’s Xbox button one time, and then release it (but keep the other two held down). Continue pressing the Eject and Bind buttons for at least 15 seconds, then take your finger off. Ensure that you wait the full 15 seconds; if you don’t, you’ll have to go through the entire process again from start to finish.
You’ll know that the process is complete when you hear two “power-up” sounds.
Why it's important to listen for power-up sounds
The two noises signal that the Xbox has successfully identified the USB drive-in. It is critical to listen for those two tones, as they tell your system to begin updating automatically. The lack of those sounds or the “power-down” ding means that a potential error has occurred or there was an unsuccessful attempt at an update. If this happens, it’s a good idea to go ahead and restart the process altogether. If you’ve tried it a few times without any luck, we suggest you contact Microsoft for technical support.
Performing a factory reset via USB
Another thing you can do is reset the console by using Microsoft’s reset system update file. If you want to do this, all you need to do is go back through the steps mentioned above, replacing this update file with the one we presented in the following step.
Editors' Recommendations
- Is Stardew Valley cross-platform?
- How to get a gun in Another Crab’s Treasure
- The best skills to buy first in Another Crab’s Treasure
- How to unlock the Invoker in Remnant 2
- How to start The Forgotten Kingdom DLC in Remnant 2
