Roku remains the undisputed leader in streaming devices, and from streaming USB sticks to set top boxes they still make some of the most reliable and user-friendly devices on the market. That's not to say that they are without fault however, as most tech is inevitably prone to glitches and hiccups. Maybe you've encountered a glitch or two yourself when using your favorite apps, or you're wondering if an issue you're having was caused by a bad setup. In this guide, we'll break down how to fix the majority of your Roku problems, as well as diagnose some quick fixes for other problems you're likely to encounter while using a Roku device.
Most problems on a Roku, especially those that involve freezing or operating glitches, can be solved through one of the following:
- Restarting your Roku
- Updating your Roku
- Factory resetting your Roku
If you already know how to do these operations, you can proceed with them, or check our more specific fixes further below. Otherwise, keep reading for a step-by-step method of completeing each one.

Restart your Roku device
Many Roku problems can be quickly solved by a restart. Here's how to get that done:
Step 1: Scroll up or down and select Settings.
Step 2: Select System and then Power.
Step 3: Depending on your device, you may not see a Power selection. If you instead see System restart, select that instead.
Step 4: Use the remote’s directional pad to highlight the Restart button and press OK. Your Roku device will now restart.
Restart your frozen Roku
Sometimes, your Roku streaming device will simply freeze up, and the remote appears to be completely unresponsive. When this happens, you can often restart the device without needing the on-screen menus. To do this, follow this button-press sequence on your Roku remote precisely:
Step 1: Press the Home button five times.
Step 2: Press the Up arrow one time.
Step 3: Press the Rewind button two times.
Step 4: Press the Fast Forward button two times.
Step 5: After a few seconds of completing this sequence, your Roku should restart.
And if your Roku won’t even respond to these commands, a third option would be to completely disconnect the device from power. Unplug, wait about 10 seconds, and then reconnect the power cable. Once your Roku restarts, grab your remote to check if your device is responding to button prompts again.

Update your Roku
If a restart doesn’t help, your software may be the problem. Roku software updates usually happen automatically in the background, without any need for you to take action. But now and then, this process doesn’t work and it’s a good idea to check and update your Roku OS manually. If you’re experiencing problems, it’s always a good idea to check the status of your Roku software before moving on.
Step 1: Press the Home button on your Roku remote.
Step 2: Scroll up or down and select Settings, then System, then System update.
Step 3: This screen will show you the current software and build version and the date and time it was added to your Roku. Select Check now to manually check for updates.
Step 4: If an update for your software or your installed channels is available, it will be downloaded and installed automatically and your Roku will reboot. It’s very important that this process is allowed to complete without interruption

Factory reset your Roku
A factory reset is a thermonuclear option for fixing problems. As the name suggests, it returns your Roku device to the same state it was in when you pulled it out of the box. This means that all of your settings including downloaded channels and network preferences will be wiped out. As such, we suggest keeping this one in your back pocket for when everything else fails.
Step 1: Press the Home button on your Roku remote.
Step 2: Scroll up or down and select Settings, then System, and Advanced system settings.
Step 3: Select Factory reset, Factory reset everything, and then follow the on-screen instructions.
The above steps assume your Roku is still responsive and gives you the option of using the on-screen menus. If it doesn’t, switch to plan B by using the physical reset button on your device (see below).

Use the physical buttons to factory reset
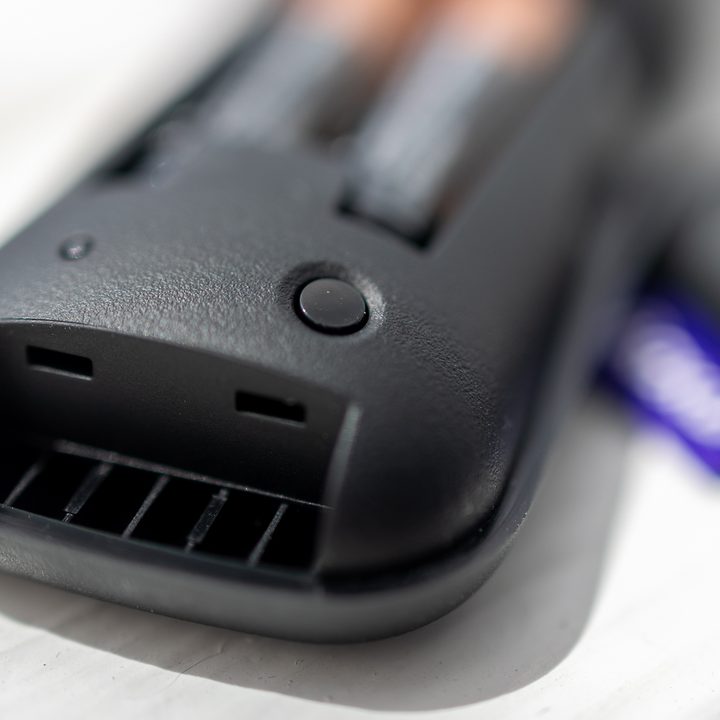
On some Roku products, like the Streaming Stick+ 4K, the reset button can be pushed with your finger. On set-top devices like the Roku Ultra, it’s usually a recessed button that requires a paperclip or other small, pointed object to press.
Once you’ve found it, make sure your Roku device is powered on, then press and hold the Reset button firmly for about 10 seconds. The indicator light will blink rapidly on most Roku devices when the factory reset is complete.

How to fix Roku remote control problems
Current Roku devices all ship with remotes that use wireless connectivity to deliver commands to their corresponding devices. If you own an older Roku model, it may have shipped with a "Roku simple remote" or a "Roku Players Remote"— these use an infrared (IR) light to send commands and it might have direct line-of-site to your Roku device.
The newer remotes are enhanced “point-anywhere” devices that use a wireless connection to send commands, and it doesn't need to be pointed at your Roku device at all. The Roku Voice Remote uses AA batteries, whereas the 1st and 2nd editions of the Roku Voice Remote Pro are rechargeable. Other than how they are powered they are functionally identical for the purposes of troubleshooting.
Before you try to fix problems with your Roku remote, you should figure out which one you have.
Alternatively, you can always try downloading the Roku Remote app from the iOS or Google Play store. The app allows your phone to function as a Roku remote and might provide a solution if your remote is damaged beyond repair.

How to solve issues with the Roku simple remote
IR remotes need to be able to “see” the Roku device they control. Almost all problems with IR remotes stem from the remote not having a direct line of sight to your Roku device. Most of the time, IR signals can bounce off walls and ceilings to reach their target, but even then, if your Roku device is stuck behind another object, those IR signals won’t make it.
Step 1: When seated wherever you normally watch TV, if you can see the entire front side of your Roku device, you should be fine. If you can’t, move the Roku until you can. Never place a Roku device that uses an IR remote behind your TV or inside a cabinet.
Step 2: The remote’s batteries also can be a problem. If the remote works well sometimes, but not all the time, try pulling the batteries out and replacing them. That might fix a problem with a poor connection.
Step 3: Weak IR signals can be another problem. Think of an IR remote as a flashlight that shines a light that you can’t see. If the batteries are old, that light will be too weak. If the batteries are really depleted, the remote might not respond to button presses at all. Try replacing the batteries with new ones.

How to solve issues with Roku voice remotes
These remotes are a bit more sophisticated, so there are several ways to troubleshoot their operation. The first step is to try the same battery tricks as above — remove and replace them, or simply install new ones. You may also wish to pair and reset your Roku remote.
However, the latest Rechargeable Voice Remote Pro that comes with the Roku Ultra and Streaming Stick 4K+ do not have removable batteries, for this one you should make sure it's fully charged and that your Roku is running the latest OS (see above).
For standard voice remotes with batteries, if removing or replacing them doesn’t help, the next step is to restart both the Roku device and the remote:
Step 1: Remove the power cable from the Roku device.
Step 2: Remove the batteries from the remote.
Step 3: Plug the Roku device back in, and wait for it to finish booting up — you should see the home screen.
Step 4: Reinsert the batteries into the remote and wait about 30 seconds. The remote should now respond to button presses.
How to re-pair your Roku voice remote
If the restart procedure above doesn’t fix your problem, you may need to pair the remote again to your Roku:
Step 1: Remove the power cable from the Roku device and remove the batteries from the remote. If you have a Roku Rechargeable Voice Remote Pro, read on.
Step 2: Plug the Roku device back in, and wait for it to finish booting up — you should see the home screen. Then, reinsert the batteries into the remote (rechargeable remotes excluded), but don’t replace the battery cover yet.
Step 3: Press and hold the pairing button inside the battery compartment (or in the case of the Rechargeable Voice Remote Pro, it can be found on the back at the bottom) for three seconds or until you see the pairing light on the remote begin to flash.
Depending on your remote, the pairing light might be beside the pairing button, or on the top surface of the remote, near the bottom end. If the light does not flash, try again.
If you have an older Roku remote without a pairing button, press and hold the Home button and Back button for 5 seconds instead, until you see the status light flash.
Step 4: Wait for 30 seconds while the remote establishes a connection with your Roku device. You should then see the remote pairing dialog on your TV screen.
In rare instances, wireless signal interference can cause problems with enhanced remotes. If you own a Roku Streaming Stick or Streaming Stick+ and they’re plugged into an HDMI port on the rear panel of your TV, an HDMI extender cable could help move the Stick away from the main body of the TV, thereby reducing any interference the TV could be causing. If you own a Roku Streaming Stick, Roku will send you one of these cables for free.
It’s also possible that there’s simply too much congestion on the 2.4GHz frequency used by the remote to communicate with the Roku. One way to solve that problem is to switch your Wi-Fi router to a different wireless channel. Another solution is to switch your Roku to your router’s 5GHz network if it has one.

How to fix Roku Wi-Fi problems
If you’re experiencing degraded video or audio quality, overall slowness of your Roku when responding to commands, or you see “not connected” in the top right corner of your home screen, you’re probably dealing with Wi-Fi issues. Checking Wi-Fi signal strength is the best place to start. Check the status of your Internet connection strength by going to Settings > Network. Assuming you’re actually connected to Wi-Fi, the signal strength will be listed as Excellent, Good, Fair, or Poor. If it’s Fair or Poor, you should try to improve it.
Obviously, relocating your TV won’t be an option very often, but you might still benefit from relocating the Roku itself. Try repositioning it and see if it helps. Roku Sticks are harder to reposition because they’re usually plugged right into the TV, but an HDMI extender cable can give you the extra play you need to reposition them.
If your Roku device has an Ethernet port and you’re able to connect it to an Ethernet cable, this is an easy way to test if it’s your Wi-Fi that’s at fault.
A “not connected” message on the home screen indicates that you’re either completely outside of your Wi-Fi network’s range, or you’ve entered the wrong Wi-Fi password for your router. If your phone, tablet, or laptop is connected via Wi-Fi — in the same general location as your Roku — that suggests a problem with the password. Check your Roku’s network settings and try again.
If you see Roku error code 009, it means that your Roku is successfully connected to your router, but it can’t reach the Internet. If your other Wi-Fi devices are operating normally, restart your Roku. If the other devices can’t connect either, try rebooting your modem and router, and then restart your devices. If this fails, you should contact your Internet service provider.
If moving your Roku is out of the question, consider moving your Wi-Fi router, or adjusting its external antennas if it has any. Even small changes to your router can have a big impact on how wireless signals move around your house. If you’ve noticed Wi-Fi troubles with one or more devices in your home (other than your Roku), it may be worth it to upgrade to a new router altogether.
If your home is on the bigger side, or there are many walls and floors between your entertainment devices and your router, a mesh system may be your best bet. With a mesh network, your main router will broadcast to a series of smaller “nodes” throughout your home. Instead of struggling to pair with the main router, a device like a Roku will have a much easier time connecting to one of your new network’s satellite nodes.

How to fix Roku audio problems
Audio problems on the Roku, like no audio, distorted audio, or audio dropouts, can be caused by software settings or problems with your hardware and/or cables depending on the complexity of your setup.
Before trying any of the following solutions, we suggest you first turn off your Roku and connected devices, unplug the power, wait 10 seconds and then plug it back in and power your gear on again. It sounds silly, but you’d be amazed how many problems — including audio troubles — this can fix.
No audio at all? Check your connections and selected inputs
If your Roku is a stick-style device connected directly to your TV, you can skip this section.
Step 1: Check to make sure your HDMI, optical, or component cables are securely inserted into your Roku on the one end, and your AV receiver, HDMI switcher, or soundbar, on the other end.
Step 2: Make sure all of your components are powered on.
Step 3: Check that you’ve selected the correct input on your AV receiver, HDMI switcher, or soundbar.
Step 4: Check to see if your audio component’s mute function is on (if it is, turn it off).
Still no audio? Check your Roku’s audio settings
If your Roku is connected to an AV receiver or soundbar using an optical (TOSLink) cable, try the following:
Step 1: Press the Home button on your Roku remote, then scroll up or down and select Settings.
Step 2: Select Audio and set HDMI and S/PDIF to Dolby D (Dolby Digital).
If your Roku is connected to an AV receiver, soundbar, or TV via HDMI, try the following:
Step 3: Press the Home button on your Roku remote and scroll up or down and select Settings.
Step 4: Select Audio and set Audio mode to Stereo and set HDMI to PCM-Stereo.
Still no audio? Swap your cables
It’s fairly rare, but on occasion, your HDMI, optical, or component cables can be faulty. If none of the steps so far have helped, try switching out your cable(s) with another set. This can be frustrating if you don’t have an extra set handy, but the good news is that all three types are inexpensive and you can find them at your local retailer or online.
How to fix selective audio
Sometimes, you’ll hear audio on some kinds of content but not others. This is usually a compatibility problem with the audio format(s) you’re trying to play and the audio format(s) your connected gear can support. If this happens, try the same procedure as above for HDMI devices and if you’re using an optical (TOSLink) cable, set HDMI and S/PDIF to PCM-Stereo.
You’re expecting surround sound but you’re only getting stereo
Normally your Roku can determine the capabilities of your TV, AV receiver, or soundbar automatically, but sometimes it needs help. If you’re watching surround sound content that’s presented in Dolby 5.1 or Dolby Atmos, but you can only hear stereo sound:
Step 1: Press Home on your remote control and scroll up or down to Settings.
Step 2: Select Audio. Your HDMI (or HDMI and S/PDIF on Roku players with an optical connector) will likely be set to Auto Detect. Choose the option that matches the capabilities of your TV, AV receiver, or soundbar.
Step 3: Channels can have their own discrete audio settings. For example, Netflix may require you to select English (5.1) under Audio and Subtitles.
How to fix garbled or distorted audio
We’ve seen reports, specifically related to the Roku Ultra, but possibly on other models as well, of garbled or distorted audio. A fix that seems to work in this instance is to begin playback of the desired video, then:
Step 1: Press the Star or Asterisk (*) button.
Step 2: Scroll to Volume Mode and select OFF by scrolling right.
How to fix audio and video that are out of sync
Some users have reported that their audio and video lose sync while playing content. Though somewhat counterintuitive, a fix that seems to work involves tweaking the video refresh properties:
Step 1: Press the Home button on your Roku remote and scroll up or down and select Settings.
Step 2: Select System, then Advanced system settings, and then select Advanced display settings.
Step 3: Select Auto-adjust display refresh rate and choose Disabled.
Keep in mind that while this has been known to fix audio sync issues, it can also introduce some unwanted video problems like image jerkiness. If this happens, switch Auto-adjust back to Enabled.

How to fix Roku video problems
Problems involving video quality like buffering, stuttering, or degraded detail can usually be traced back to your network connection. Before moving on, see our section on Wi-Fi problems. If your Wi-Fi connection is stable, it’s possible that your internet plan doesn’t provide sufficient bandwidth for the content you’re trying to stream.
Roku recommends a minimum download speed of 3.0 Mbps for standard definition and up to 9.0 Mbps for HD content. 4K HDR content may require up to 25 Mbps. You can check your actual download speed here.
If your plan provides the necessary speed for the content you’re trying to watch, check to see if anyone else in your home is using high bandwidth applications on your other devices. You may also want to check your router’s administration settings to see if there are any unknown devices using your connection.
How to manually adjust your video bit rate
If you’ve tried everything to solve your buffering problems and are ready to throw in the towel, here’s one more trick that might help.
Normally your Roku will choose the best bit rate to use automatically — one that matches your network connection speed — but on rare occasions, setting this manually needs to happen. You do this through a hidden settings screen:
Step 1: On your Roku remote, press Home five times.
Step 2: Press Reverse scan three times, and then press Forward scan twice.
Step 3: From the Bit Rate Override screen that is displayed, select Manual selection.
Step 4: Select a lower bit rate and see if that solves the problem. If not, repeat this sequence and choose a lower bit rate.

How to fix Roku HDMI problems
Another common Roku problem relates to the use of HDMI cables. When two or more devices connect via HDMI, they must establish a “handshake.” Generally speaking, once established, that handshake continues to govern the connection without issue. However, now and then the handshake doesn’t happen when the devices connect, or the handshake gets interrupted.
When this happens, it can cause a variety of problems from black screens to flashing video, to HDCP error messages. As with many problems, a reliable fix is to power everything down, remove and reinsert the HDMI cable ends into each device, and then restart.

How to fix Roku HDCP errors
HDCP errors that aren’t resolved this way may be a symptom of a different problem. HDCP stands for High-bandwidth Digital Content Protection, and it’s a way of preventing people from copying movies and shows that they stream on devices like a Roku. But unless each device in your HDMI chain supports the same level of HDCP, the video signal can’t get through and you’ll see an HDCP error.
For instance, if you’re using a Roku Streaming Stick+ or a Roku Ultra to stream 4K content from Netflix, all of your devices must support HDCP 2.2. But if you have any older AV receiver or soundbar between your Roku player and your 4K TV, it may not be HDCP 2.2 compatible.
To test to see if this is the problem, try connecting your Roku directly to your TV. If the problem goes away, that’s a good sign your middle device isn’t HDCP 2.2-compliant. Your choice at this point is to stick to non-4K content (only 4K requires HDCP 2.2), find a way to bypass your AV receiver or soundbar for video (perhaps by using the HDMI ARC connection on your TV), or upgrade that middle device.
Replace your cables
Though a rare Roku issue, occasionally the HDMI cables themselves are the problem. If you’re seeing flashing video, or no video at all — or perhaps video with “sparkles” — these can all indicate potentially faulty cables. Before buying new cables, try swapping your Roku’s HDMI cable with any other HDMI cable you have, as a test. It’s very unlikely that two of your cables have problems, so if one works, you know you should replace the one that doesn’t.
There is one situation where you may need to replace a perfectly good HDMI cable. 4K HDR signals use a lot of bandwidth — much more than HD. Older HDMI cables might lack the necessary bandwidth to carry all of that data reliably between devices, especially over longer distances like 10 feet or more.
If you suspect this applies to your situation, you probably need to buy a new Premium High-Speed HDMI cable. But don’t worry — they’re relatively inexpensive and you can buy them almost anywhere. Check out our full HDMI cable buying guide.

How to fix Roku hardware problems
Roku devices are usually highly dependable, but here are two situations where the hardware itself can experience problems.
Overheating
If your Roku device sits on top of other equipment or is located in a poorly ventilated space, it can overheat. If this happens, you’ll see an on-screen warning message appear in the top right corner of your screen. Some Roku devices like the Ultra and Roku Express also have a front LED that will turn solid red when they overheat.
If your device overheats, immediately turn it off, unplug the power, and disconnect all cables. Wait at least 10 minutes before reconnecting it and powering it back up. If you see the solid red light or warning message again, repeat this process. If it still happens, you should contact Roku Support, as it may indicate a more serious problem with your device.
Insufficient power
If your Roku device is powered by USB — e.g., Streaming Sticks and Roku Express — there’s a possibility it’s not getting enough power. This usually happens when people plug their USB power cable into an available USB port on their TV or their AV receiver. Unfortunately, not all USB ports deliver the same amount of power, and some aren’t intended to supply power at all.
The best way to solve the “insufficient power” on-screen warning (or flashing red LED on the front of Roku Express or Express+) is to plug the USB cable into the USB power adapter that shipped with your device. This adapter is designed to deliver the correct amount of power your Roku needs. If, after switching to the included adapter, you still get the insufficient power warning, you should try plugging the adapter into a different power outlet. If you’re using a power strip or an extension cord, try plugging the adapter straight into a wall socket.

How to fix Roku app problems
The Roku app for iOS and Android is a must-have add-on for your phone. It can act as a replacement remote control, plus you can add/remove channels, use the private listening function, and cast videos and photos from your phone to your TV.
But none of those things will work if the app can’t find your Roku device.
Your Wi-Fi network is likely at the heart of the problem, so before moving on, consult the Wi-Fi problems section. If that doesn’t help, here are a few things you can try.
Make sure your phone and Roku are on the same network
Some Wi-Fi routers let you create a guest network that is physically separated from your normal Wi-Fi network. It’s possible that your phone or your Roku are using these two different networks. If so, they won’t see each other. Make sure both devices are using the exact same Wi-Fi network.
Most Wi-Fi routers create two separate networks for each Wi-Fi frequency band (2.4GHz and 5GHz). Though technically it shouldn’t matter if your phone and Roku are using different frequencies (both bands share the same subnet on your router so devices can talk to one another), to be absolutely sure, place both your phone and your Roku on the same Wi-Fi frequency band.
Check your Roku’s network access
It’s possible that network access to your Roku has been disabled. Here’s how to check and correct:
Step 1: Press the Home button on your Roku remote, then select Settings then System followed by Advanced system settings.
Step 2: Select External Control and then Network Access.
Step 3: Make sure Default or Permissive is selected. “Default” should work, but if not, try “Permissive.”
Still can’t find your device? Try connecting manually
Step 1: Inside the Roku app, at the bottom of the device discovery screen (or within the three-dots menu), tap Connect Manually and enter the IP address of your Roku device. You can find the IP address by visiting Settings > Network > About on your Roku device.
Step 2: Restart your Roku device and ensure it is connected to the correct wireless network.
Step 3: Quit and then Restart the Roku mobile app on your device.
How to check if it's the Roku network, and not your device
There is always the off chance that streaming or buffering related issues you may be experiencing are due to either a particular streamers servers or Roku's service being down on a particular day. If you've already tried a bunch of hardware troubleshooting to no avail, then check out Downdetector to see if wider issues with the Roku service are being reported.
If all else fails, reach out to Roku
If you're having a problem that hasn't been addressed here, or you're just wanting to reach someone from Roku for help, you can use Roku's support site to create a ticket and reach out to an agent. A Roku account is required to do this, and as of this writing Roku does not have a support phone number.
Alternatives to Roku
If you’re still experiencing issues with your Roku and want to give other streaming devices a spin, here’s a shortlist of some competitive streaming devices, along with noted perks.
Apple TV 4K — With 4K streaming, Airplay mirroring, iCloud syncing between your iOS devices, and plenty of apps, the Apple TV is a solid bet for media streaming (especially for Apple fans).
Amazon Fire TV — Are you a fan of all things Alexa? The Amazon Fire TV offers Alexa-powered voice controls, along with plenty of apps and skills to make your smart TV experience smarter than ever before.
Chromecast with Google TV — There’s a lot to love about Google’s latest Chromecast. Enjoy app-casting from a phone or tablet, along with a customized home screen with movies, shows, and other content recommended just for you.