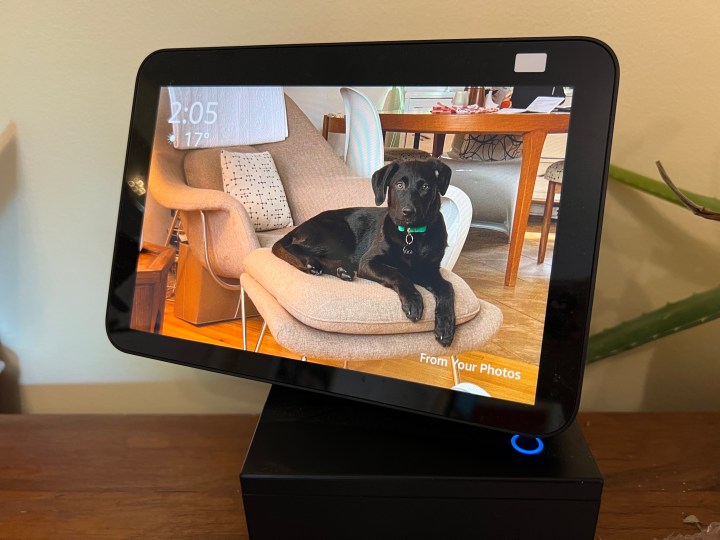
If you want to take advantage of the screen option of your Echo Show, why not have it display your own photos. Technology brought us the video picture frame long before we had smart homes or voice assistants; the problem was always that you’d have to connect a thumb drive or connect the frame to your computer to change or update the pictures the frame displayed.
These days, we can take things a step further and have a bit more say in what appears on these screens that now act as smart digital assistants and virtual concierges. Let’s dive into setting up your own photos on the Echo Show, like the Echo Show 10 or Echo Show 15.
Your choices might vary depending on which photos you’d like to show and which country you live in. While you can have your Echo choose pictures based on a specific day, photos it's used before, or photos you’ve manually added, odds are you’re going to want some control over which photos the Echo displays.

Set up and manage your Amazon account
The simplest way to manage the photos on an Amazon Echo is to create an Amazon Photos account. You can get access by downloading the Amazon Photos app from the app store on your phone or use the desktop/browser version.
Step 1: Create Amazon Photos Account
Open the app and sign in with your Amazon account. If you’re a Prime member you, get unlimited photo storage. If not, you get 5GB of photo space for free, which should be plenty for this task. Connect the Photos account to your phone and have it load everything or choose specific photos from your phone or computer.
Step 2: Create an Album
Once you have some photos in the Amazon Photos app, create an album specifically for the Echo Show (to avoid any weird or questionable photos popping up when the grandparents visit). Click Albums and +Create Album. Next, select photos and click the Create Album button. In the Amazon Photos app, select Albums and give the new album a name, like "Show Time!" Then, select photos and add them to that album.

Adjust your Echo Show settings
Once you've got a curated album, the next step is to get it to display on your Show.
Step 1: On the Echo Show, swipe down from the top of the screen and choose Settings or say, “Hey Alexa, go to Settings.”
Step 2: Choose Home & Clock, choose Clock & Photo Display, then Personal Photos.
Step 3: Choose Photo Display, and you’ll be offered a choice between Amazon Photos and Photo from your Phone. Choose Amazon Photos.
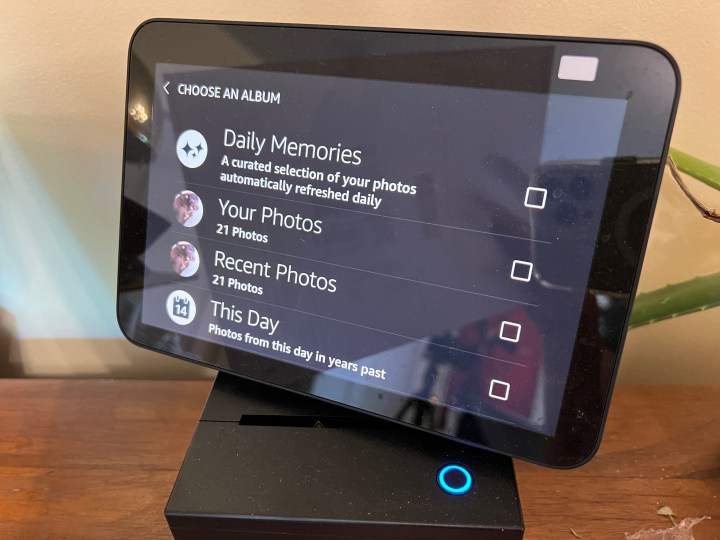
Step 4: You’ll be presented with a number of options, including Recent Photos, This Day, and the albums you’ve created in Amazon Photos. Choose your album and click Save. You’re all set, and your Echo Show will shuffle and through the photos in that library.
Update and change photos in Amazon photos app and on Echo Show
Use your Amazon photo album to add or remove any photos any time you want to curate your pics.
Step 1: Open the Amazon photo app, update and remove any unwanted photos in the album you're sharing on the Echo. If you have a family account, they can also add pictures to the folders.
Step 2: You can set the Echo Show to display Recent Photos, which will refresh and change as you take newer pictures. Select Recent Photos instead (when you go into the Echo Show's Settings menu, after you've clicked on Clock & Photo Display then Amazon Photos).
That's how to view your own photos on an Echo Show device. Whether you want to see family and friends or be reminded of a great trip, it's easy to enable this feature on any Amazon Echo Show device with the help of an Amazon Photo account.


