One of the benefits of owning multiple Apple-branded devices is the shared experience. Photos you take on an iPhone show up on a linked Mac or iPad. You can even send text messages without picking up your phone.
Sharing files between these devices is just as easy, and you don’t need the cloud or an external drive. This guide shows you how to AirDrop from your iPhone to a Mac.
If you’re new to the Apple ecosystem, AirDrop is the company’s proprietary ad-hoc platform for wirelessly transmitting data between supporting devices. You can send any file type at any size.
Here are the requirements:
- Wi-Fi or Bluetooth is enabled on both devices.
- Both devices must be within 30 feet of each other.
- The iPhone must be running iOS 7 or newer.
- The iPhone has Personal Hotspot switched off.
- The Mac (2012 or newer) must be running MacOS 10.10.5 Yosemite or newer (the 2012 Mac Pro excluded).
Enable AirDrop in MacOS
First, you need to make sure AirDrop is ready for business on the Mac. Since it’s on the receiving end, it must be discoverable.

Step 1: Open Finder and select AirDrop listed on the left.
Step 2: Click on the Allow me to be discovered by option located at the bottom in small text.
Step 3: Select One of two options on the drop-down menu: Contacts Only or Everyone.
Note: For the Contacts Only option, both devices must be signed in to iCloud. Also, the Mac must have the email address or phone number that’s associated with the sender’s iCloud account stored in the Contacts app.
Generally, if you’re sending files between your iPhone and your Mac, you won’t see a prompt to accept the incoming file(s). However, if friends and family are trying to AirDrop files, you’ll likely see a prompt to approve the transmission. The same goes for when you select Everyone in the AirDrop settings.
Now let’s make sure the Firewall isn’t blocking incoming connections.

Step 4: Open System Preferences.
Step 5: Select Security & Privacy.
Step 6: Click the Firewall tab.
If the Firewall is off, you can stop here. If it’s on, move to the next step.
Step 7: Click the Lock in the bottom left corner and enter your password to unlock the settings.
Step 8: Click the Firewall Options button.

Step 9: Deselect Block All Incoming Connections.
Step 10: Click OK to finish.
Enable AirDrop in iOS 14
If you want to send files from a Mac to your iPhone, the latter device must be discoverable.

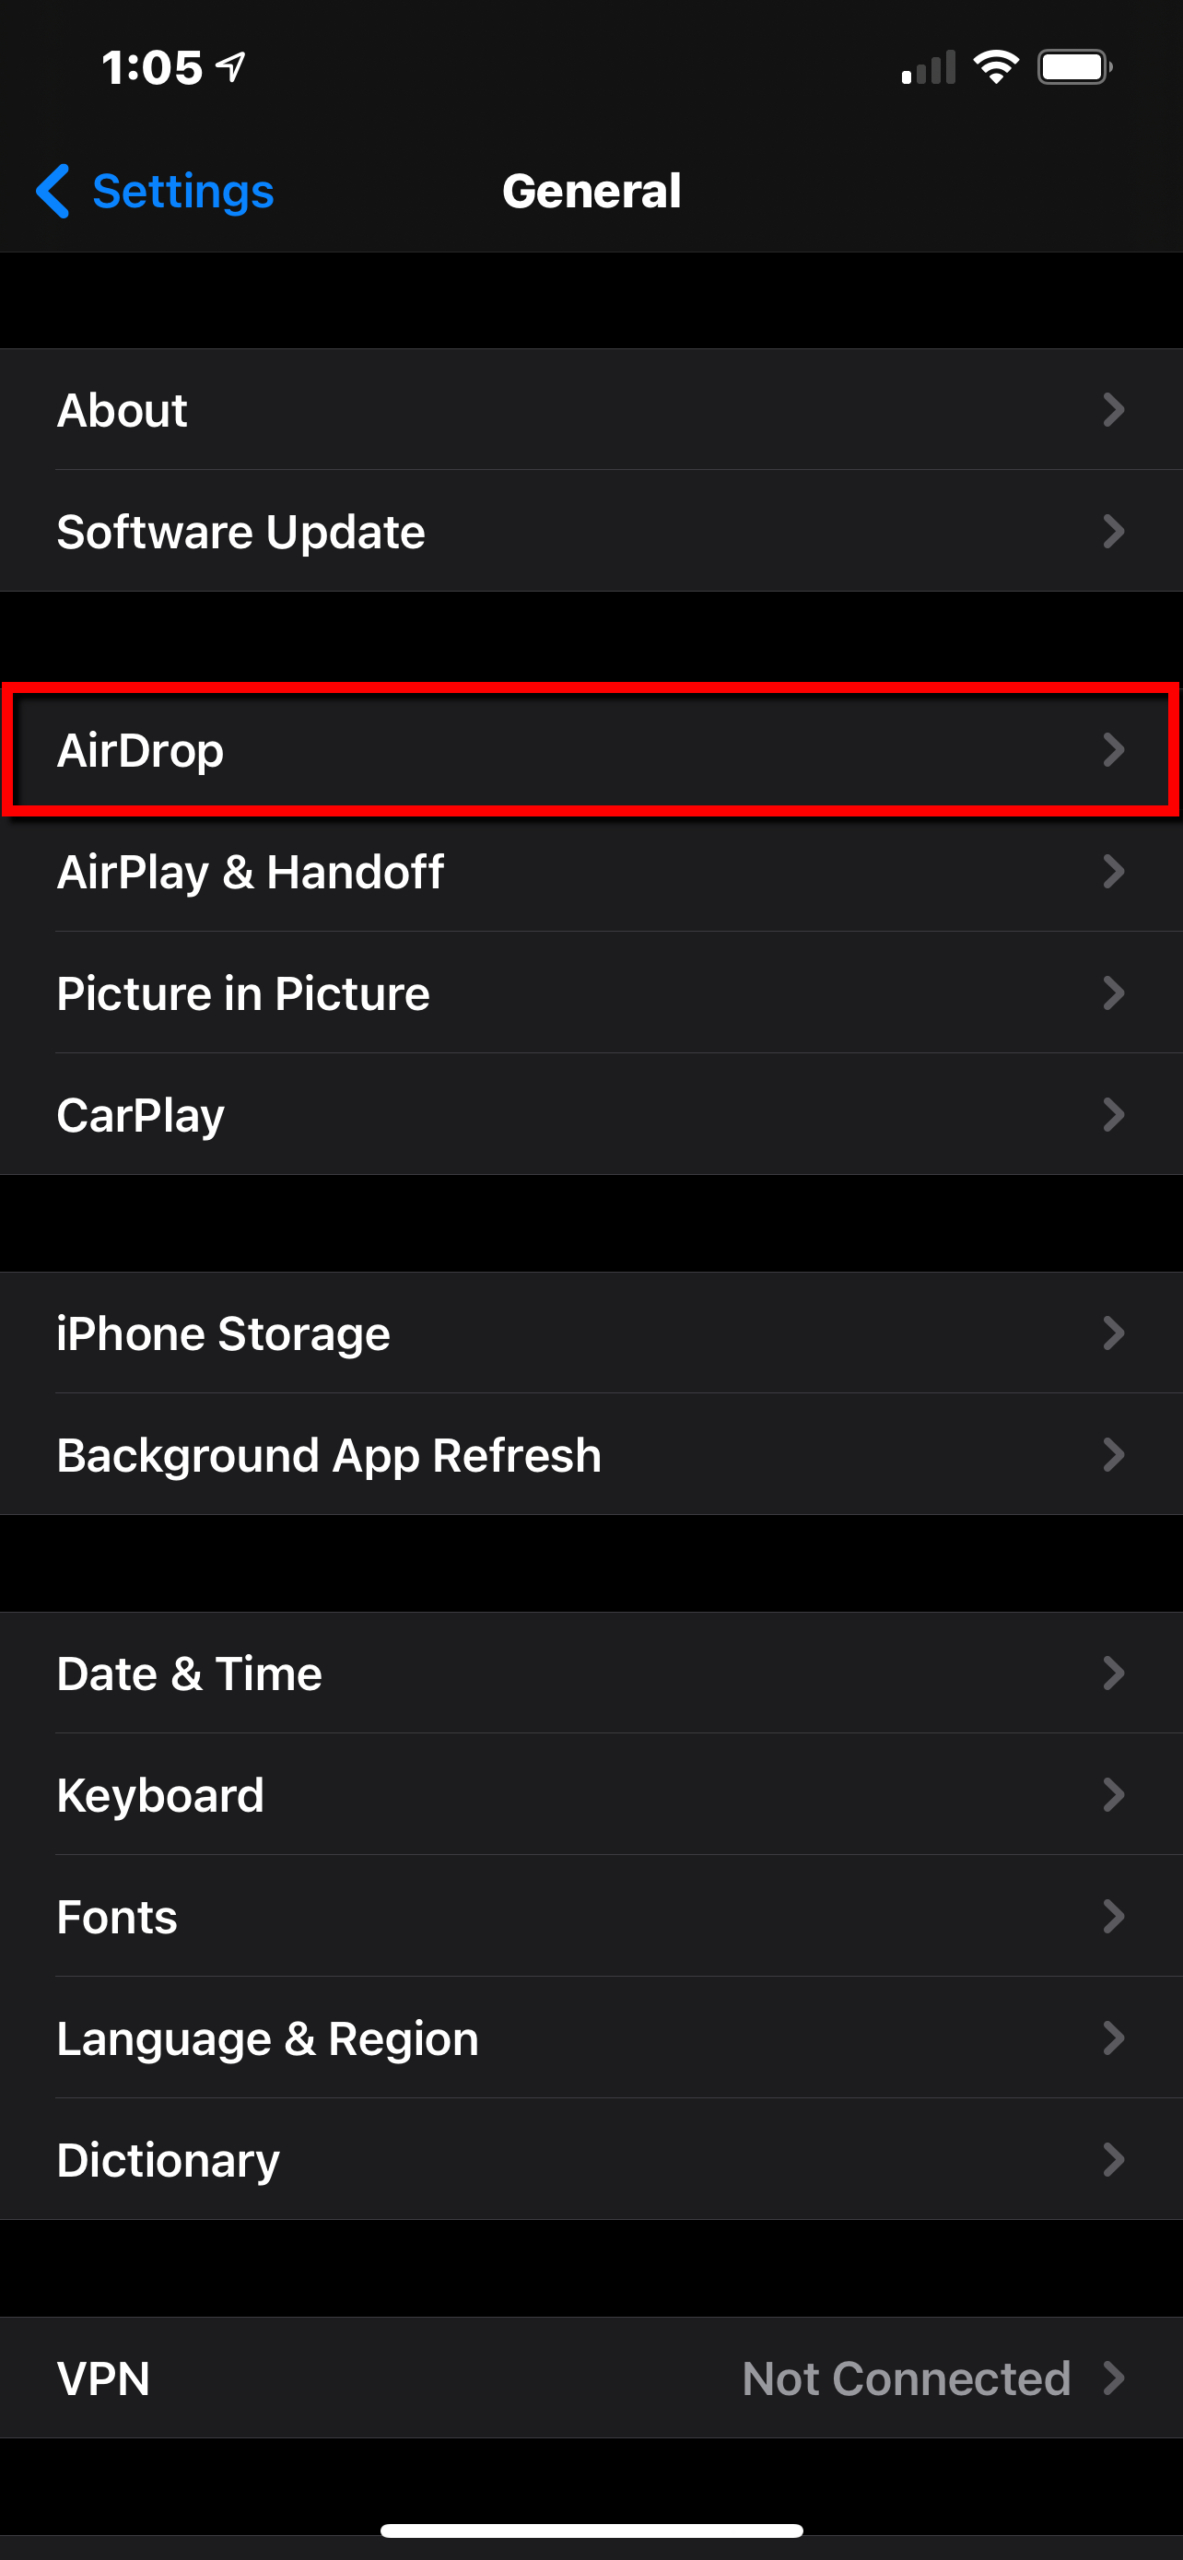

Step 1: Open Settings and tap General.
Step 2: Tap AirDrop.
Step 3: Tap one of two options: Contacts Only or Everyone.
Note: For the Contacts Only option, both devices must be signed in to iCloud. Also, the iPhone must have the email address or phone number that’s associated with the sender’s iCloud account stored in the Contacts app.
Generally, if you’re sending files between your iPhone and your Mac, you won’t see a prompt to accept the incoming file(s). However, if friends and family are trying to AirDrop files, you’ll likely see a prompt to approve the transmission. The same goes if you select Everyone in the AirDrop settings.
AirDrop from an iPhone to a Mac
With everything good to go, here’s how to send a file from your iPhone to a Mac.
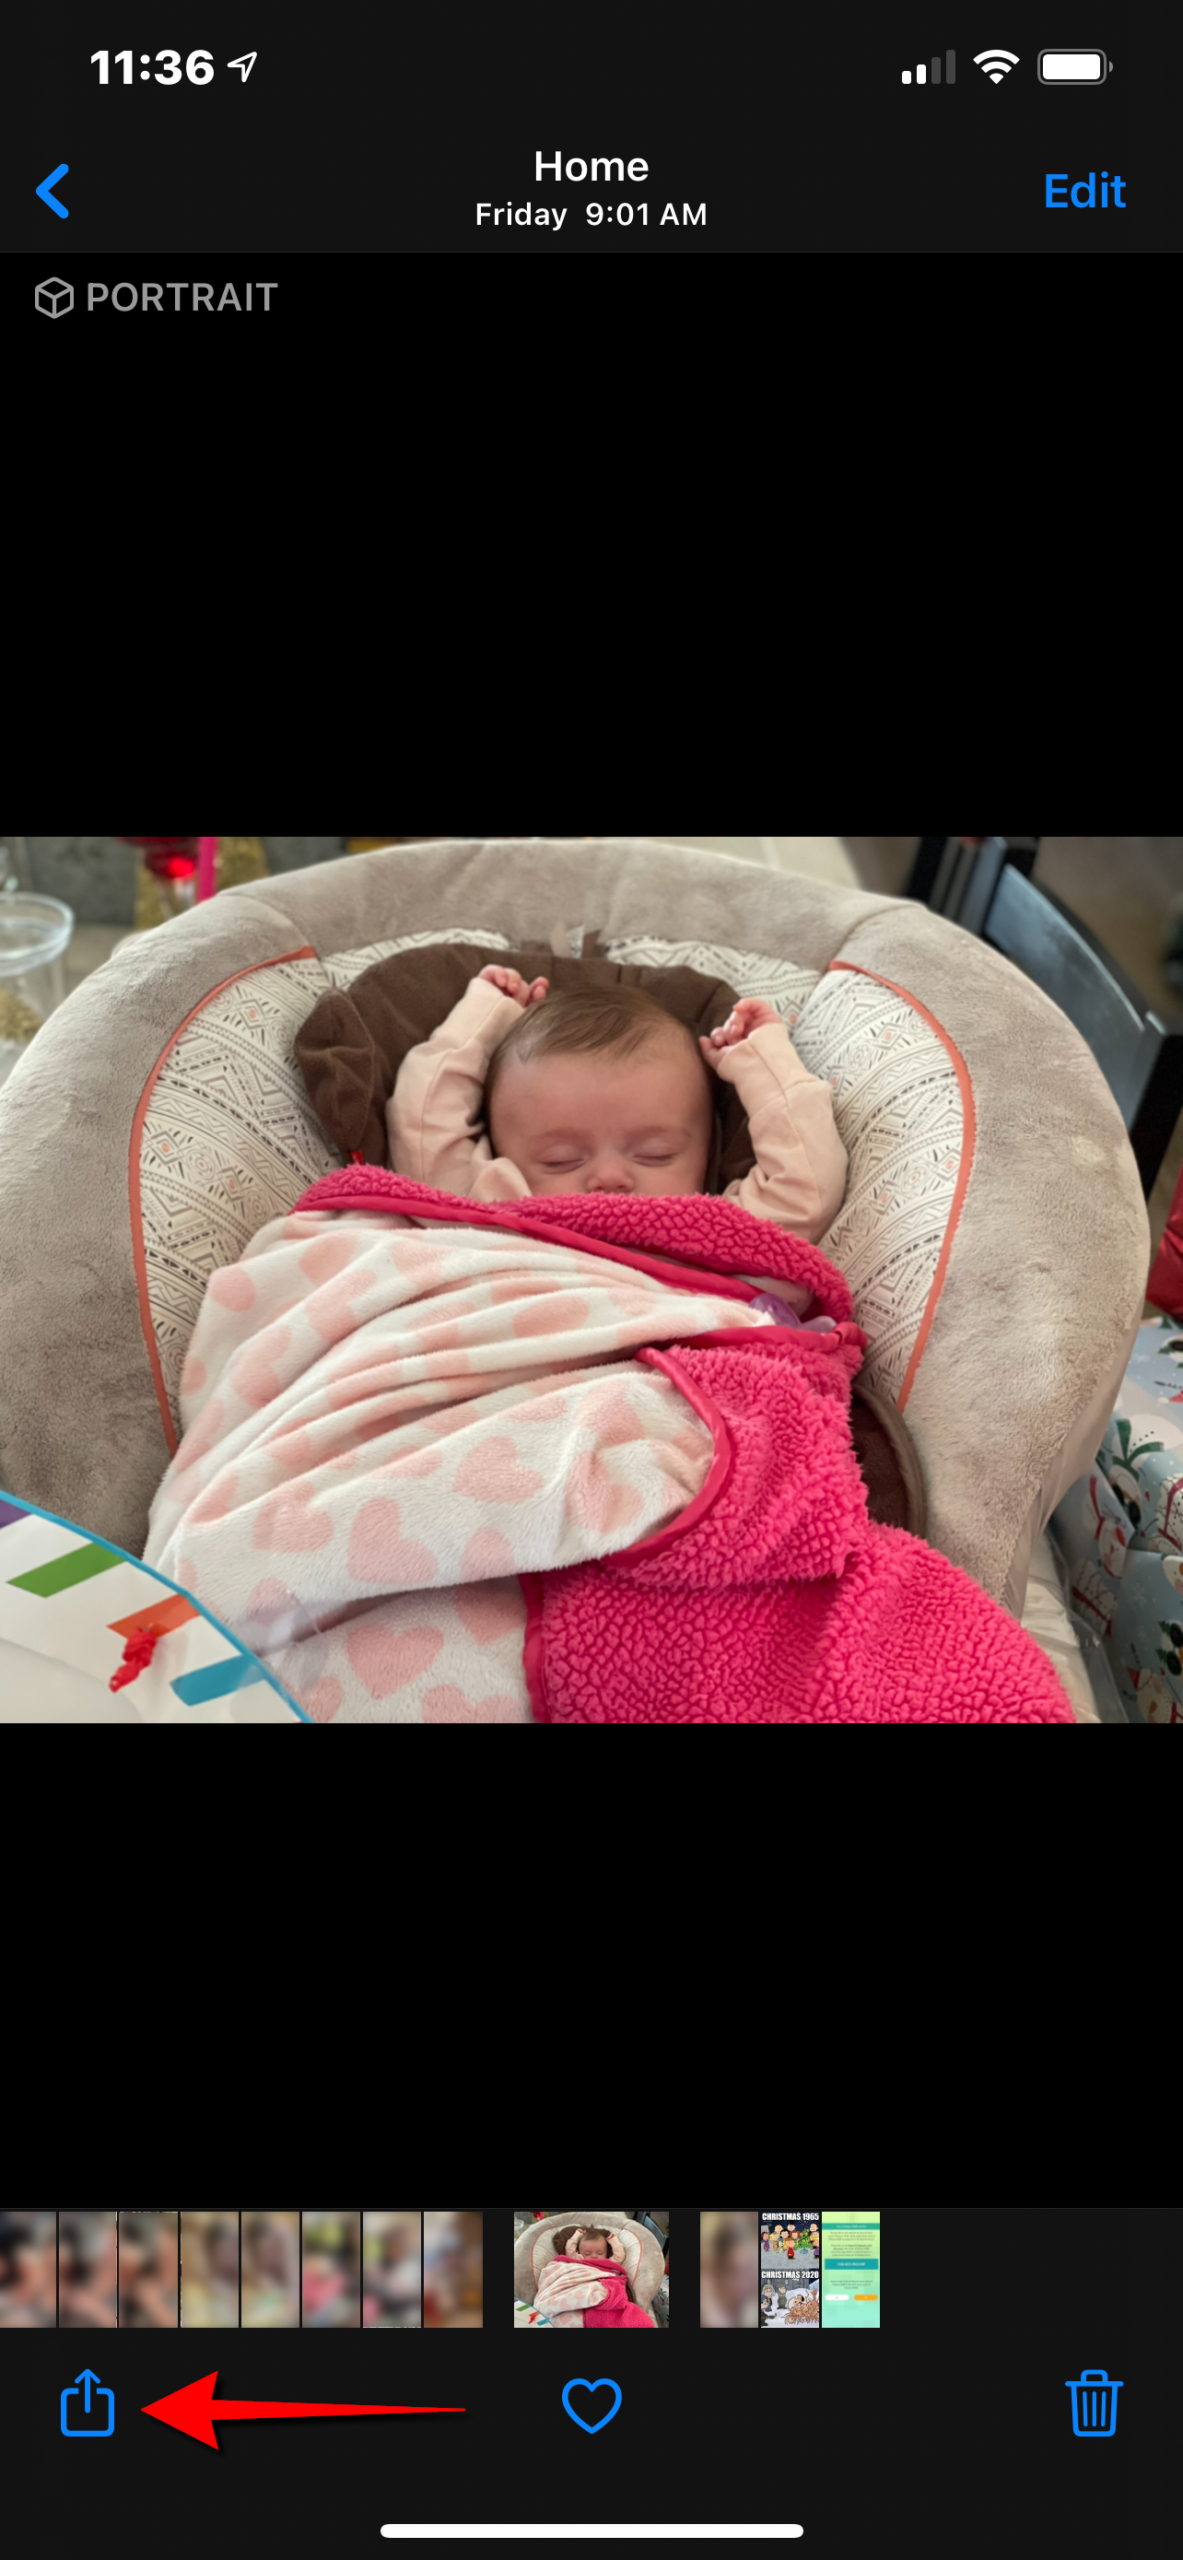
Step 1: Find the item that you want to send to a Mac.
Step 2: Tap the Share button. It resembles a box with an up arrow.
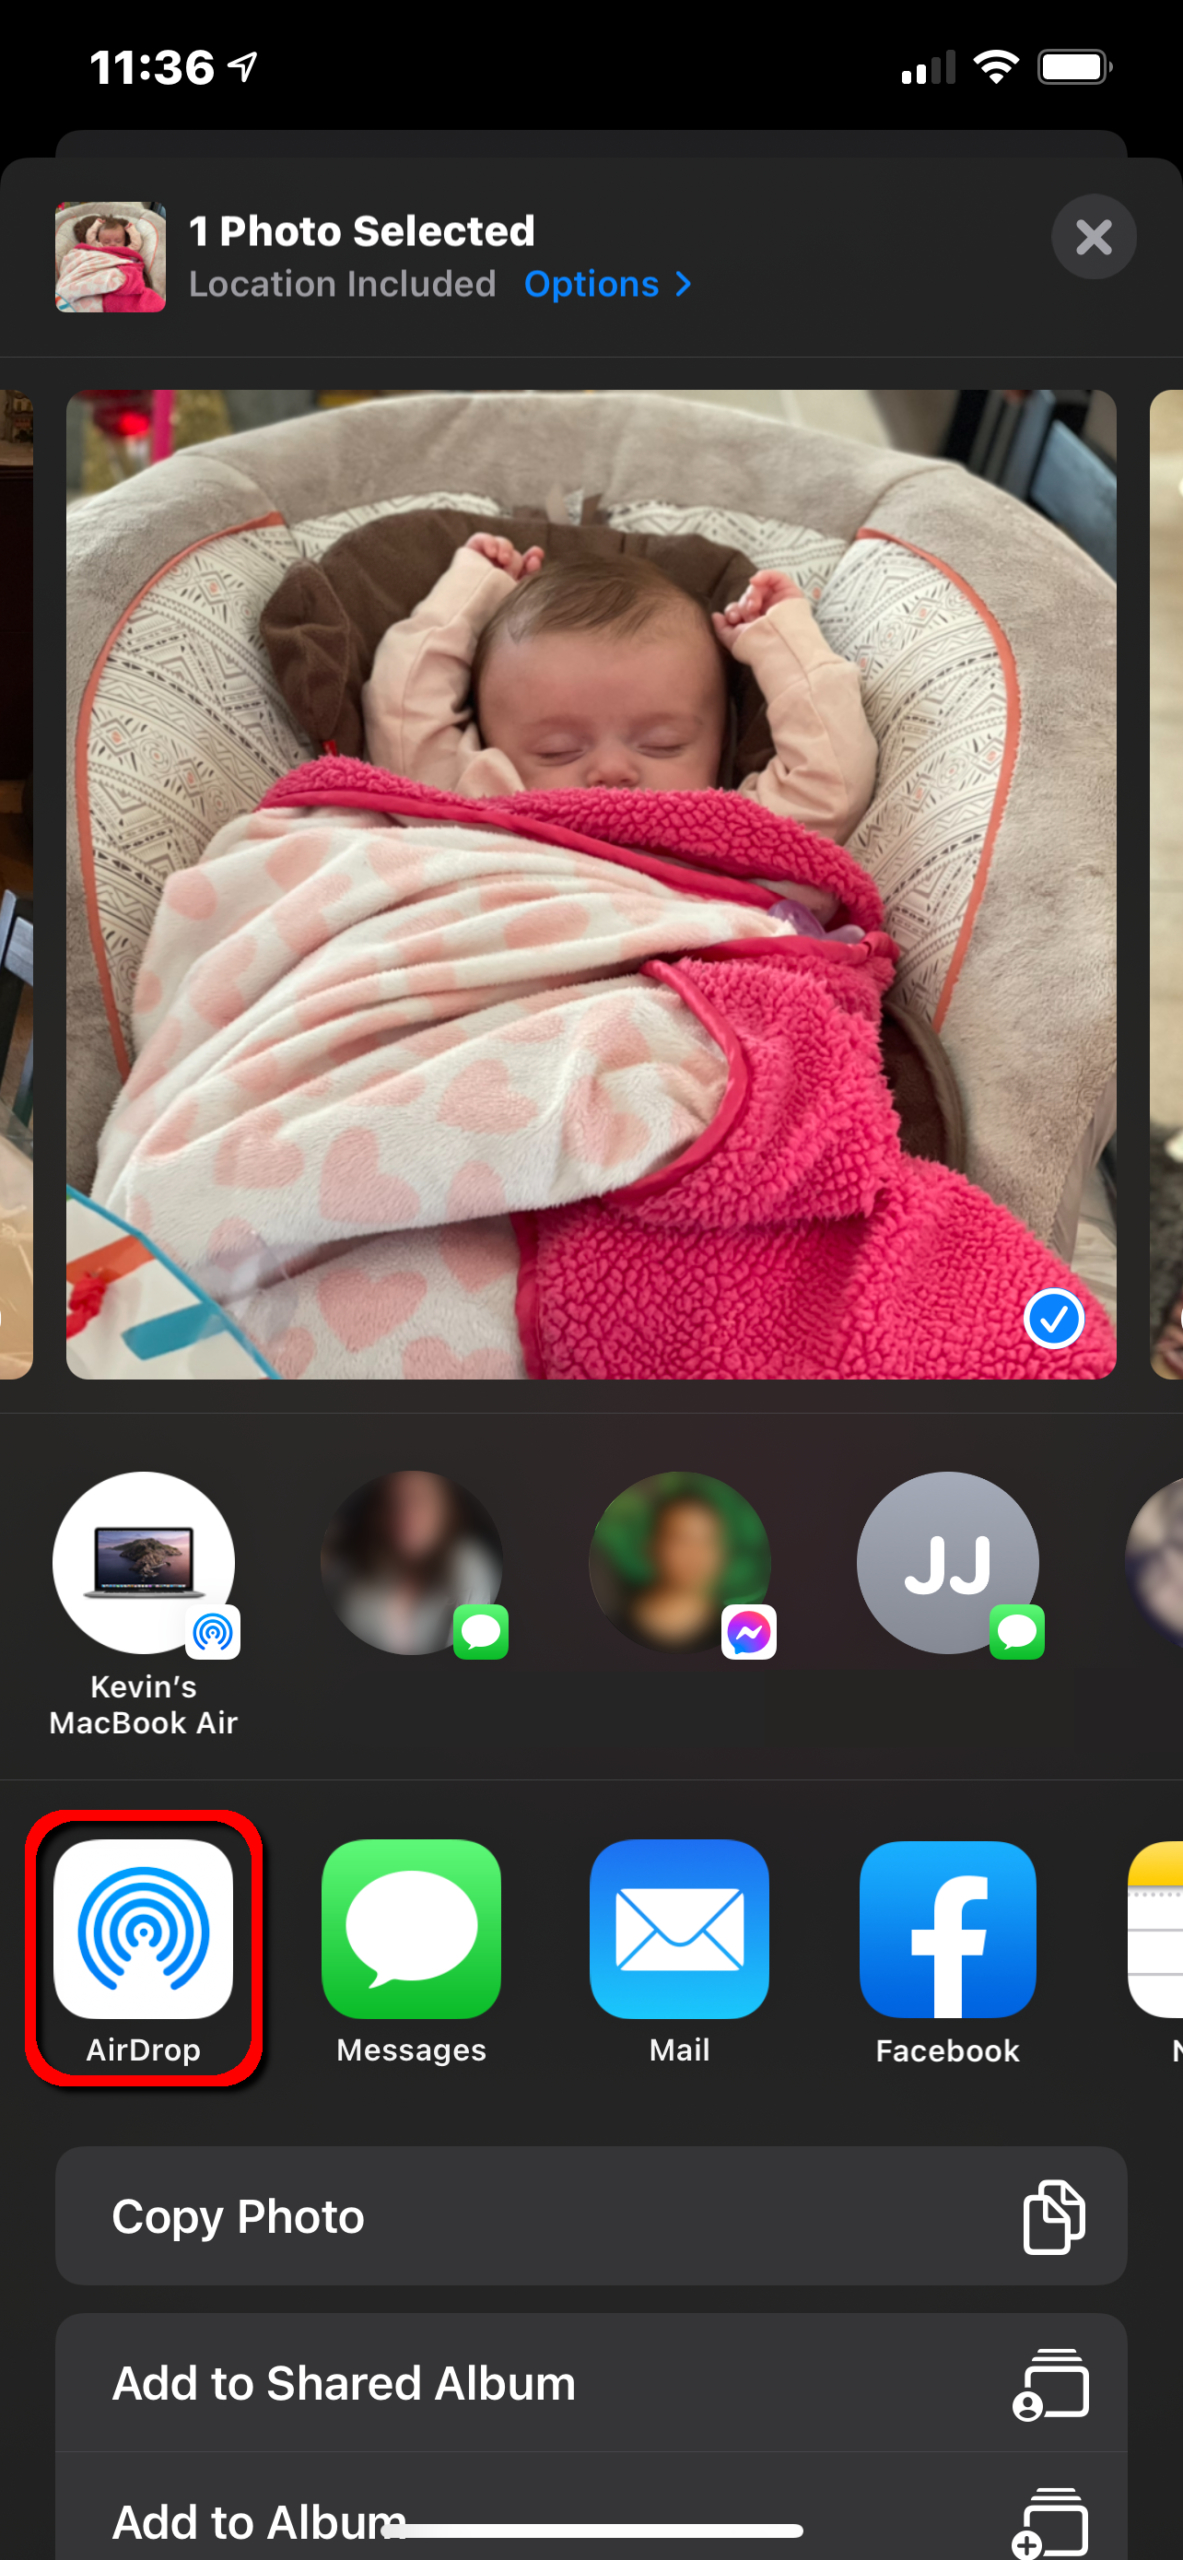
Step 3: Tap the AirDrop icon on the following screen. It’s a blue radar-like icon set against a white backdrop. Alternatively, you can just tap on the discovered Mac’s icon displayed on the first row, if available.
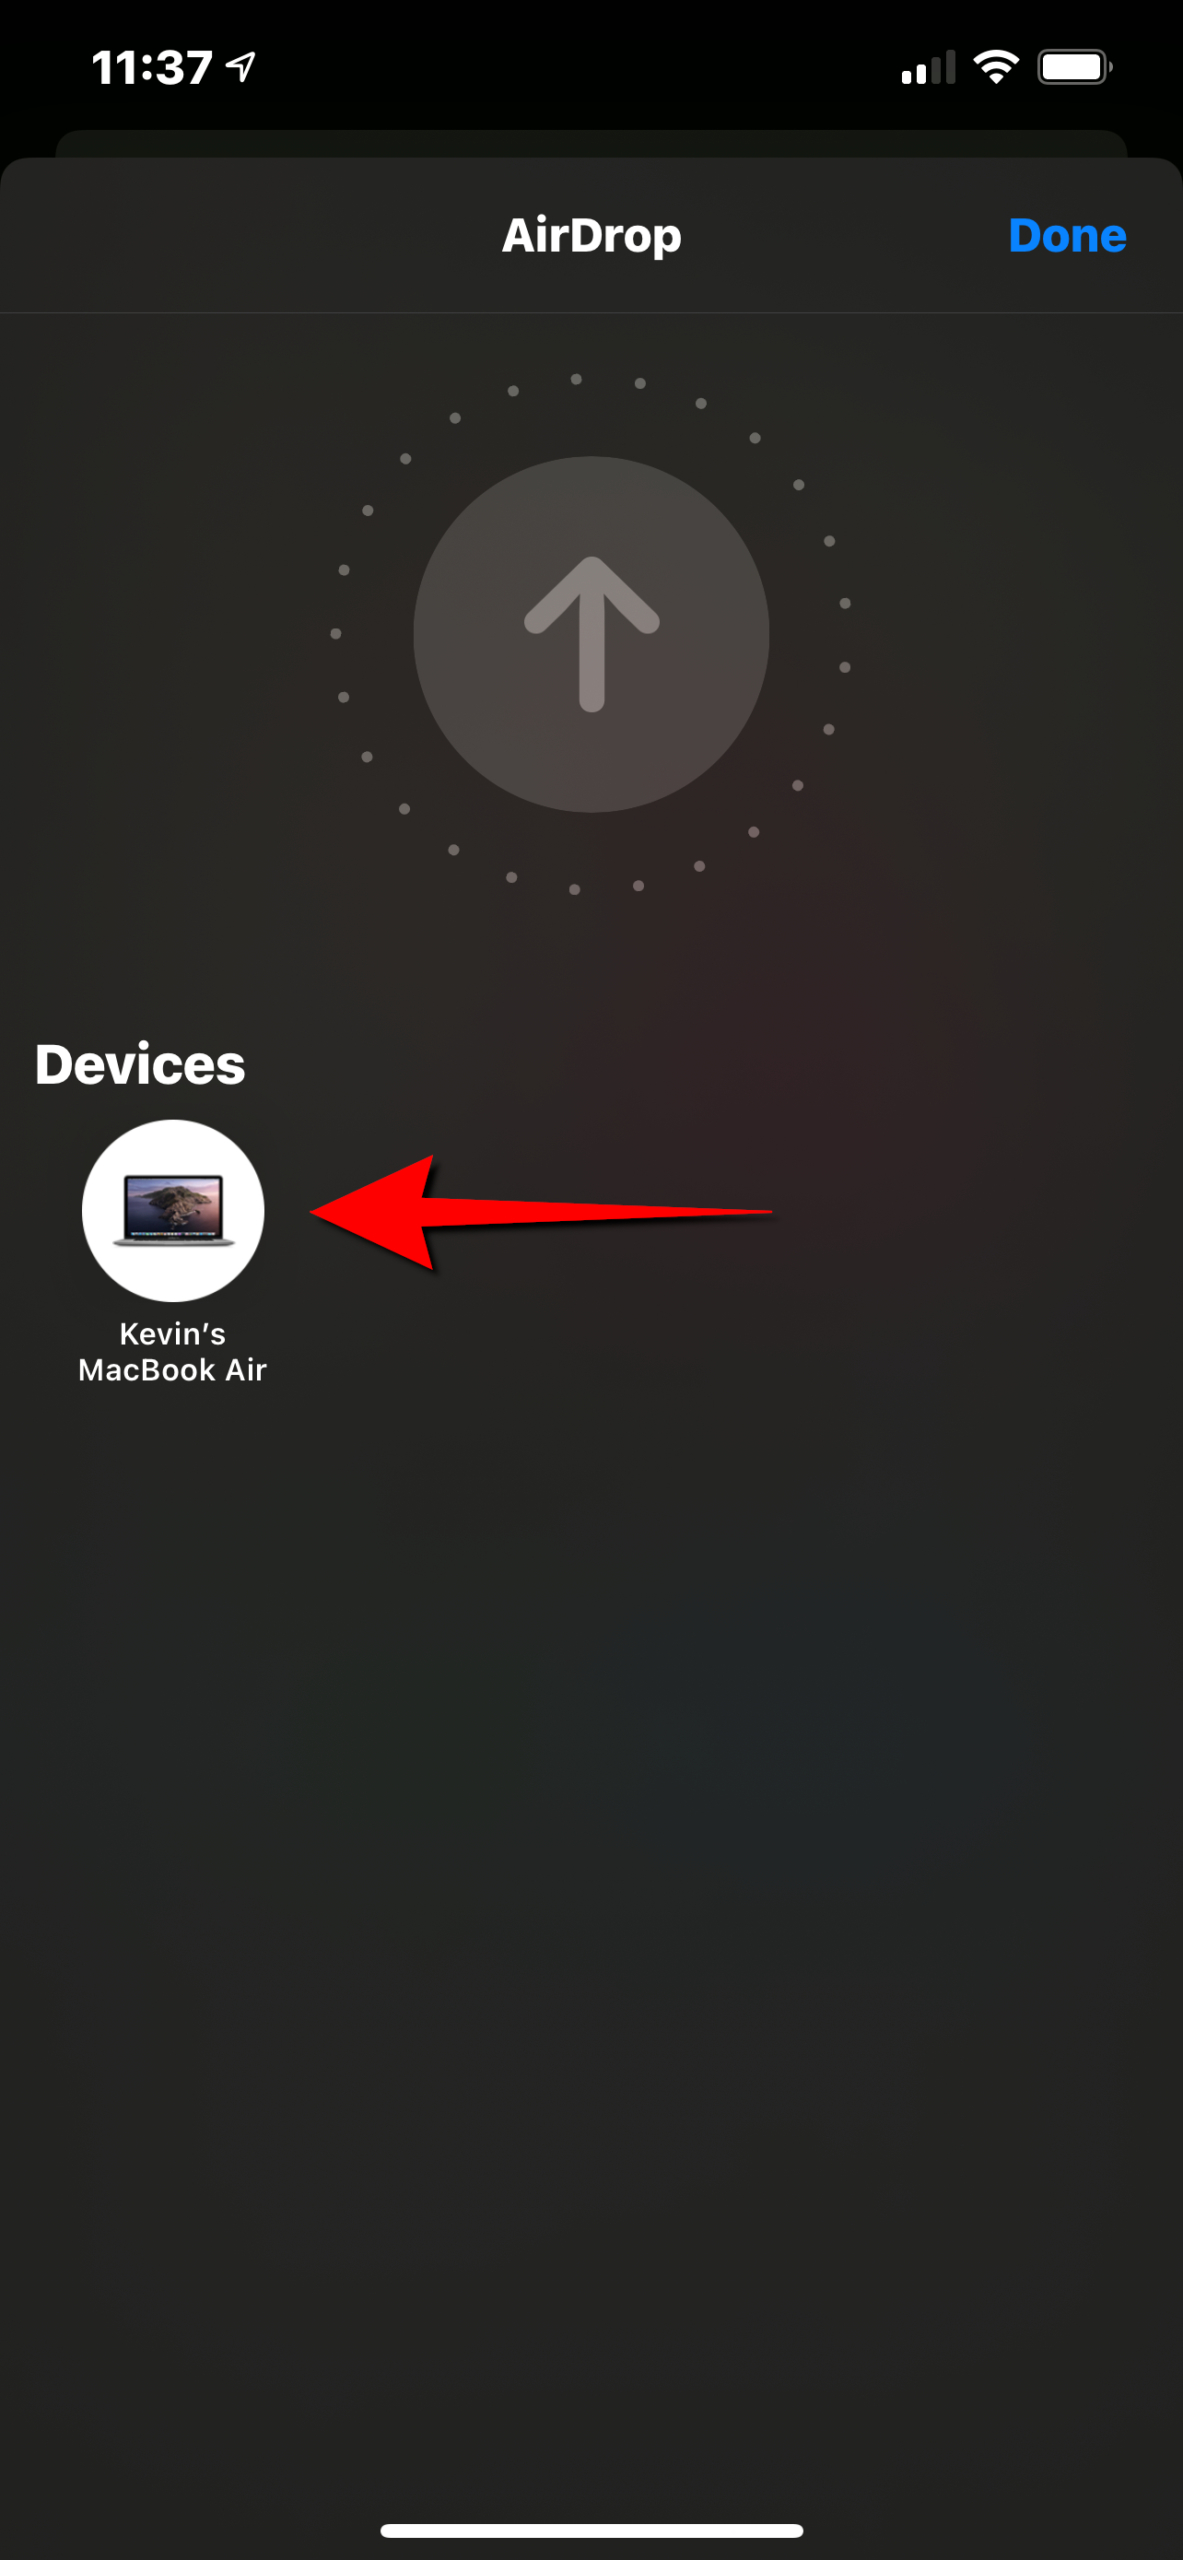
Step 4: On the following screen, tap on the Receiving device.
Step 5: Tap Done located in the top right corner to exit AirDrop.
By default, anything you AirDrop to a Mac goes to the Downloads folder.
AirDrop from a Mac to an iPhone Method 1
You can AirDrop files to any nearby iPhone. However, if you selected the Contacts Only option when setting up AirDrop, the recipient iPhone must be logged in to iCloud and its associated email address or phone number is stored in the Mac’s Contacts app. The Everyone option lets any Mac send a file to your iPhone. In both cases, the receiver typically must approve the transmission.

Step 1: Find the item that you want to send to an iPhone.
Step 2: Click on the Share icon. It resembles a square with an up arrow.
Step 3: Select AirDrop on the drop-down menu.

Step 4: Select the receiving device in the pop-up window.
AirDrop from a Mac to an iPhone Method 2
Step 1: Open Finder and select AirDrop listed on the left.
Step 2: The discovered iPhone should appear within the window. Drag and drop any file on the iPhone’s icon.