The cache on an iPad is essentially a portion of temporary storage that helps to speed up system tasks. When you visit websites and use apps, your iPad saves data from them to load faster and perform better when you come back. That data could range from design elements to snippets of video or music.
Over time, as you visit more webpages and download your favorite iPad apps, all that stored cache can actually start to slow down the tablet. No matter which iPad you own, clearing the cache could do well to boost your tablet’s performance. We’ll show you some ways to clean this up and how you can manage it better over time.
Clear the cache on your iPad
Apple doesn’t provide an explicit way to target and clear the system-wide cache. The good news is that an iPad already works to remove unneeded cached files. When the system needs more temporary storage, it automatically decides where to create space. Still, if you want to maximize the available cache to your iPad, there are a few methods.
Clear the cache on your internet browser
There’s a good chance your internet browser is generating a significant number of its own cache files. It makes sense when you consider the sheer number of unique webpages and images you encounter every day. Luckily, browser apps give you decent control over temporary files. We’ll go through the steps to delete them on two of the most popular iPad browsers, Safari and Chrome.
Clear Safari’s cache


Step 1: Go to Settings > Safari.
Step 2: Scroll down and select Clear History and Website Data. Tap Clear to confirm.
If you use third-party browsers like Google’s Chrome, you’ll need to navigate through their settings menus to manage the cache from within the apps themselves. These are the instructions for Chrome.
Clear Chrome’s cache


Step 1: Open Chrome. In the upper-right corner tap the three dots.
Step 2: Scroll through the dropdown menu and select Settings.
Step 3: Scroll down and go to Privacy > Clear Browsing Data.
Step 4: Select the time range for which you want to clear data and make sure Cached Images and Files is selected.
Step 5: Tap Clear Browsing Data. Tap Clear Browsing Data again to confirm.
The Chrome app gives you a solid amount of control in choosing exactly what you delete. You can choose to remove other temporary files like cookies and browsing history as well.
Clear the cache from third-party apps
For the most part, you’ll have to locate the app you want to clear data from and find a way to delete its individual cache files. One way to analyze apps for their usage is under Settings > General > iPad Storage. Unfortunately, this isn’t a surefire way to hone in on the biggest culprits. In fact, if you scroll all the way to the bottom of your app list, the actual system cache data is mostly grouped into the vague Other category.
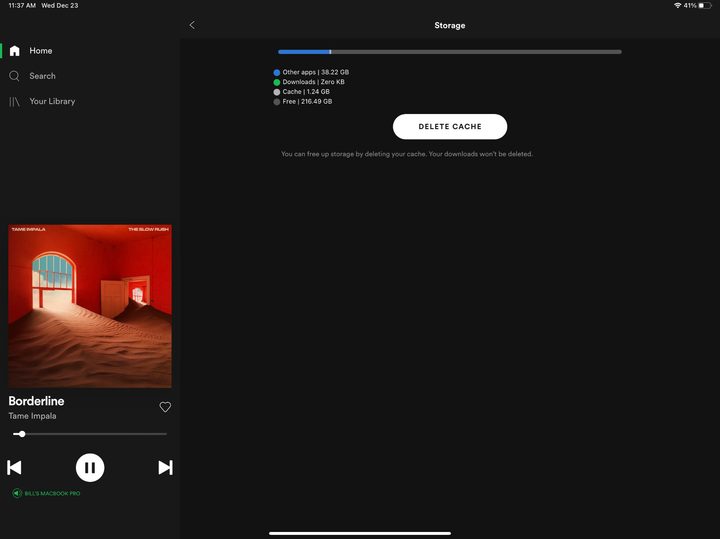
As an example, we noticed that a streaming service like Spotify stores over 1GB of cached files. That’s a big difference from the total size of 179MB listed under Settings > General > iPad Storage. Offloading an app, one of the options available in this section, does not appear to immediately clear its cache files from the iPad. Again, iOS will likely delete those files automatically once it realizes the system doesn’t need them.
We recommend going into an app’s settings or profile area to locate its storage preferences. Many apps that tend to take up a lot of cache will have an option to clear it. Some may even provide an option to reset the cache from the iOS settings menu under Settings > [App Name]. Your last choice is to delete the app altogether and download it again for a fresh start. There are two methods to accomplish this.
Delete an app: Method 1


Step 1: From the home screen, long-press an app icon.
Step 2: Tap Delete App on the popup menu that appears. Tap Delete to confirm.
Delete an app: Method 2


Step 1: Go to Settings > General > iPad Storage. Scroll down through the list of apps and tap on one that you want to delete.
Step 2: Tap Delete App. Tap Delete App again to confirm.
Download your apps from the App Store to get a fresh installation. You may notice that loading them up for the first time may take a bit longer than usual. You will also need to reconfigure any preferences you had before.