With Dark Mode, Swipe Type, Sign in with Apple, and more, iOS 13 has no shortage of headline features. But don’t let the new guys blind you to how much some old friends have improved. Apple’s Reminders app used to be something of a disappointment, as it was lacking some of the features you’d find in even the most basic of third-party to-do apps. It was probably only its inclusion in iOS by default that meant it had a user base at all.
But that time is at an end. In iOS 13 Apple has stripped out the tired old Reminders app, added a turbocharged engine, and added all the mod-cons you deserve. Finally, iOS has a Reminders app it can be proud of. Here’s how to use it.
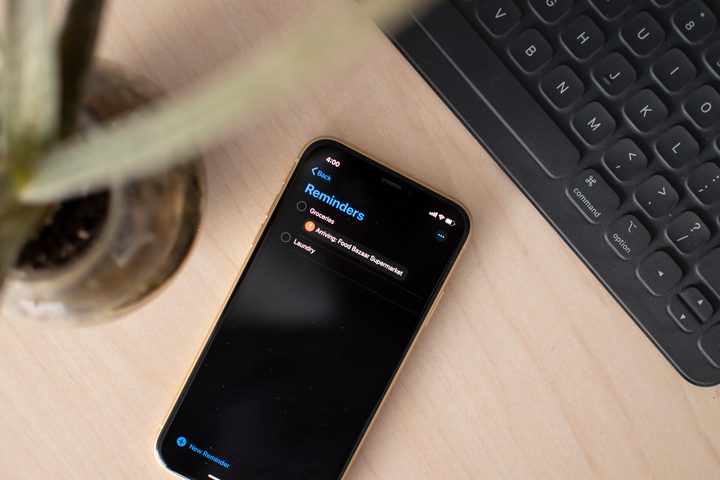
How to create a reminder


There’s a lot to unpack where iOS 13’s Reminders app is concerned, but none of it will benefit you if you don’t know how to create a reminder. To create a reminder, open your Reminders app, tap Reminders under the Lists heading, and then tap New Reminder in the bottom-left corner. Fill in the text entry with your reminder, tap Return on your keyboard, and that’s it — your first reminder has been created.
Adding a time, location, or connected person


Those are just the bare essentials of the task though, and adding a reminder to “buy some bread” or “pick up Gerald” only works if you remember to look at your to-do list. It’s much easier if your phone gives you a little prod at a certain time or place to remind you of what needs doing. To add a location or time to your reminder, tap on your task. Then tap the blue “i” to the right of your task to open the task’s options.
If you want to be reminded at a certain time, flip the switch for Remind me on a day and fill in the Alarm or Reminds me at a time options. If it’s a recurring task, you can even set it to repeat. To add a location, instead tap Remind me at a location and choose the location you’d like to be reminded at.
Finally, if your task relates to a specific person — for instance, asking someone if they’re having a birthday party — then Reminders can remind you about your task when you message them. Simply select the Remind me when messaging option and select a contact.
Siri can do that for you
But you don’t have to dive into the Reminders app every time you want to add a quick task. Instead, Siri can do your dirty work for you. Just say “Hey, Siri,” then ask Siri to “remind me to,” followed by the details of your reminder. You can even ask to be reminded at a specific time or place.
Adding subtasks


You can also add subtasks to more complex tasks or projects — or if you want to make a multi-entry shopping list. If one of your reminders would benefit from adding subtasks, head to your task and tap the blue “i” to open that task. Then scroll down the options until you find Subtasks. Tap on it and then hit Add Reminder to add a subtask. You can add as many subtasks as you want.
Once you’re done, you’ll be able to find your subtasks underneath the parent task or reminder. You’ll be able to complete them separately from the main task, and like other reminders, you can tap on the blue “i” to add separate locations, times, or contacts to each subtask.
Using the Today Notification feature


You’ve probably noticed there’s a new home page in Reminders, and it’s pretty self-explanatory. However, there’s an extremely useful feature that’s hidden from view.
By default, Reminders will give you a poke when you’ve got tasks due on that day. But you can change when that poke happens, or if it happens at all. To make changes, head to your Settings app and hit Reminders. From there you can change the timing of your Today Notification or turn it off entirely if you dislike the daily reminder. This is also where you can change the Default List for your tasks.
Creating a list


It’s easy to get carried away with Reminders, noting down every little thing. Before you know it you’ve filled your app with birthdays, reminders to save for holidays, tax notifications, and to grab milk at the end of the day. Don’t worry, you can organize all those tasks into lists so you’re not drowning in all your reminders.
To create a list, open your Reminders app and tap Add list at the bottom right. You can choose from a variety of colors and logos so you can differentiate your list at a glance. Once you’re happy with your list, hit Done in the top right.
You can either add tasks and reminders to the list by tapping the list under My Lists and creating them there, or by moving existing tasks to the list. To add an existing task, find the task, tap it, and then hit the blue “i” to open its options. If you’re having trouble finding a task, remember the Reminders home page has a search bar to help you find specific tasks. Once you’re in the task’s options, scroll down and tap List, then select your new list.
Adding a list to a group


But it doesn’t stop there, and for the ultimate in organization, you can add similar lists to an overall group. Why would you want to do this? Perhaps you want to create a list for birthdays, and another for anniversaries. Sling both of those into a group called “Important dates” and keep your home page looking nice and clean.
Creating a group is easy. From the Reminders home page, hit Edit in the top-right corner. Then tap Add Group in the bottom left. Name your group and select the lists you want to be grouped together. Then hit Done. To change which lists are in the group, tap Edit again, tap the blue “i” next to the group, and then add or remove lists from the Include option.