Defeating a monster in Monster Hunter Rise can be a tricky task, especially for newcomers. Depending on your gear and whether you have a skilled squad of hunters can determine the outcome of the battle. Eliminating creatures is a common practice, but did you know you can actually capture the monsters instead? That’s right, you can win the fight without killing the enemy, and in many cases, it’s recommended to take them alive.
Though, as with many of the game’s intricate systems and mechanics, capturing a monster in Monster Hunter Rise is no easy feat. You’ll need a plan, the right gear, and some knowledge of the monster’s behavior to trap it. In this guide, we’ll break down everything you should know about capturing a monster, including tips on how to make traps, and a detailed explanation of the benefits of trapping over killing.
Here’s how to capture a monster in Monster Hunter Rise.
Recommended reading:
- How to defeat the Great Izuchi in Monster Hunter Rise
- How to upgrade your armor in Monster Hunter Rise
- Monster Hunter Rise: How to farm honey and other essential items
What supplies are needed to trap a monster?
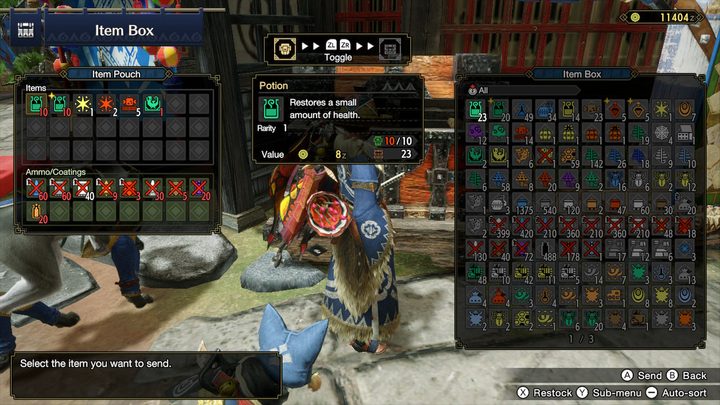
Before even attempting to capture a creature, you’ll want to come prepared with a couple of items. In short, you’ll need one of two traps, along with a Tranq bomb (or Tranq ammo if you use a Bowgun). When you first start the game, you’ll probably have some trouble getting these items, but as you play and collect resources, you’ll find it easier to keep them in your inventory. Below, we’ll list the resources you’ll need to make each item needed for capturing a monster.
Traps
Pitfall trap
The Pitfall trap can be placed next to a monster and, if done correctly, the creature will fall into it, leaving them immobile. To make one, you’ll need:
- Trap tool x 1
- Net x 1
You can purchase a trap tool from one of the many vendors in the village. Check the vendor known as Kagero the Merchant, found across from Hinoa the Quest Maiden. As for nets, these must be crafted by using materials found around the world. Nets are created with these items:
- Ivy x 1
- Spider web x 1
Both of the items needed to craft a net are found in the first area of the game called Shrine Ruins. You’ll often find spider webs on the ground in various areas in Shrine Ruins, including the main camp, area 3, and area 8. They spawn in the same locations each time, so keep visiting these spots each time you load up a hunt on this map. Also note that these items spawn on other maps, as well.
Ivy is even more common and can also be obtained from Shrine Ruins. Look for green plants in area 1, area 6, area 7, and in between areas 11 and 12. If you’ve been semi thorough with gathering materials, you should have lots of ivy in your inventory after a couple hours of play. Also, keep in mind you can earn many of these items as rewards at the end of a quest.
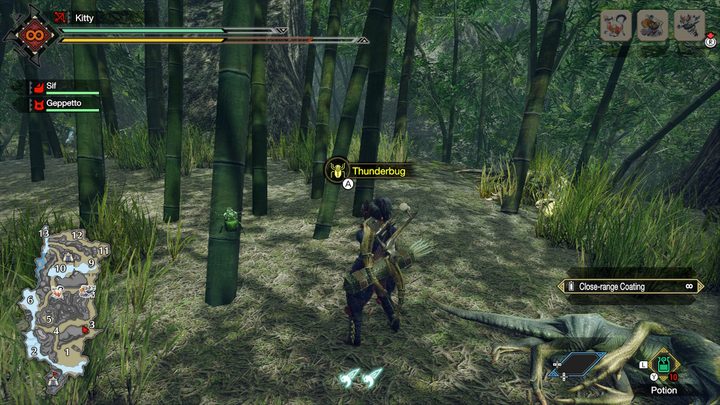
Shock trap
The other trap you can use is the Shock trap. This works similarly to the Pitfall trap, but instead, it shocks the monster into being unable to move. The recipe is as follows:
- Trap tool x 1
- Thunderbug x 1
Again, you can buy trap tools from the vendors in the village. The Thunderbugs are quite plentiful and are found in Shrine Ruins (as well as other stages). These are creatures that hang out on walls or trees and are indicated by a sparkly glow. You’ll find them in the camp area, area 3, area 6, area 7, and area 9. Typically, they spawn on the sides of tree trunks on elevated areas.
Tranq bomb
The second piece of the puzzle is the Tranq bomb. You’ll need to use this item after you’ve trapped the monster. We’ll explain more about how that works further down, but just be aware that you need to bring two with you. Here’s how to make one:
- Sleep herb x 1
- Parashroom x 1
Once again, the materials you’ll need are all located in Shrine Ruins. The sleep herb can be found on the ground in area 2 and area 13. As for the parashroom, they are located in the rocky spot between area 1 and 4, as well as area 10.
However, after you’ve finished the first few large monster quests, you’ll actually be able to buy the Tranq bombs from the vendors, so you won’t need to farm them.
How to trap a monster
Now that you have the materials, you’ll be well-equipped to attempt capturing a monster. Remember, you’ll need one trap and two Tranq bombs. Though, when you try it for the first time, we recommend to bring one of each trap, along with five or so Tranq bombs, (just in case you mess up).
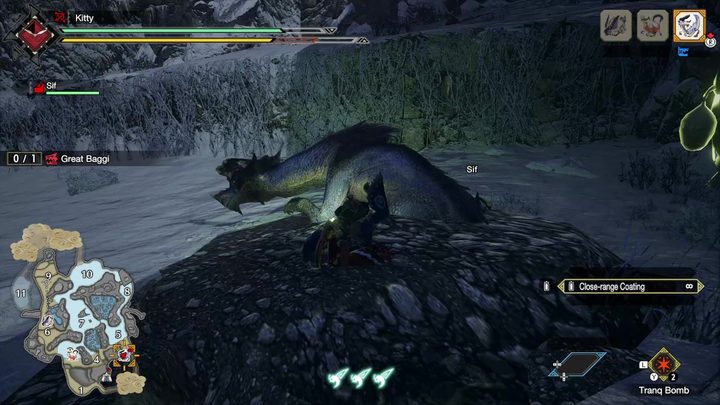
As you fight the beast, you’ll notice it will eventually try to flee. When it’s close to death, it will limp away and this is your cue that it’s ready to trap. If you try to trap the monster before enough damage is dealt, it won’t work. So keep your eyes peeled for a limp so you know when it’s time to trap.
What you need to do is lay down one of the traps you have and lure the monster into it. It’s a good idea to let your team know you want to capture so they can all stand on the other side of the trap to lure the monster in. Press the – button to bring up the chat menu and select the 011 option, “Let’s capture this thing!” That way, your team knows what you’re doing.
Once the monster falls into the trap, run up to it and throw two Tranq bombs at it. As long as it’s weak enough and both Tranq bombs connect, you’ll capture it and the quest will end. Keep in mind, you only have a few seconds to throw the Tranq bombs at the monster before it frees itself from the trap, so make sure you’re quick.
Benefits of trapping over killing
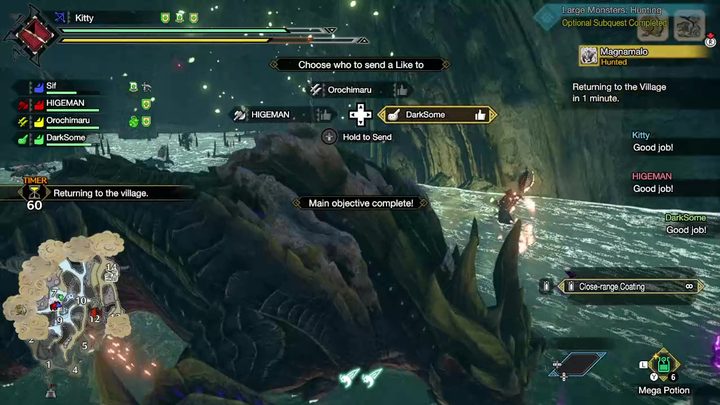
Finally, let’s cover a highly debated topic in the Monster Hunter community: Trapping versus killing. Each method has its own pros and cons, and here, we’ll go through both. In short, trapping a creature will grant you with more rewards. This doesn’t necessarily mean the rewards are always better, but you’ll have a higher chance of getting better materials since the amount is more plentiful. Another benefit to trapping is that it ends the fight sooner. As you might be aware, certain fights can last nearly an hour depending on your gear, so the quicker you can end a fight, the better (in many cases).
Though, that doesn’t mean you should only trap monsters in Monster Hunter Rise. For starters, certain materials only spawn if you break specific parts of a monster’s body. Because of this, you’ll need to utilize as much time as you can to attempt to break the creature. In addition, some resources are only available from carving a creature, which you’ll want to keep in mind when going for higher level gear.
The other reason killing can be preferable is that it’s easier and takes no preparation or resources. While trapping isn’t too complicated, it does require effort and materials, so some players will simply opt to kill the monsters because of its simplicity. Ultimately, you’ll want to utilize both methods when gathering materials, and we recommend to base your decision on what resources you’re looking for. During the early stages, you likely won’t need materials that only drop from carving, so until then, you can get away with trapping.