
To say the Monster Hunter series has a steep learning curve is an understatement. The franchise is notorious for its many complicated systems that can be overwhelming to new players. Even experienced hunters might have some trouble adjusting to new features introduced with each entry. While the same can be said about the newest installment for Nintendo Switch, Monster Hunter Rise, the game does a much better job of teaching you how to hunt than older entries — while integrating streamlined quality of life improvements to make it easier.
That doesn’t mean Monster Hunter Rise is easy to get into — and if you want to take down the toughest monsters, you’ll need all the help you can get. Since there’s so much to learn about Monster Hunter Rise, we’ve decided to compile a list of tips and tricks that are sure to help you when first starting. Whether you’re a newcomer or an experienced hunter, you’ll likely find this list useful. Here are 15 essential tips for starting out in Monster Hunter Rise for Nintendo Switch.
Recommended reading:
- How to defeat the Great Izuchi in Monster Hunter Rise
- How to upgrade your armor in Monster Hunter Rise
- Monster Hunter Rise: How to farm honey and other essential items
Learn the ins and outs of the hub world
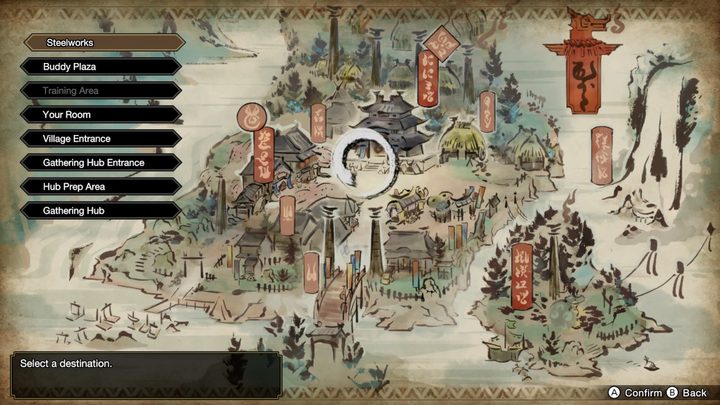
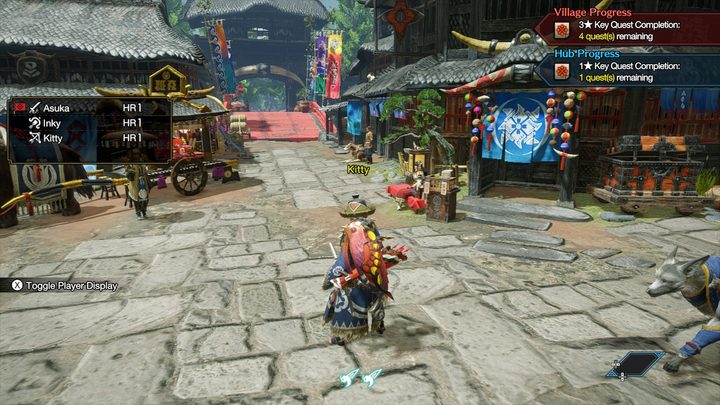
As soon as you start the game, you’re introduced to the hub world known as Kumura Village. It’s a densely populated area with lots of vendors and points of interest such as armor merchants and quest-givers. Try not to get too overwhelmed and instead make your way around the entire area, stopping at each vendor to see what they sell or offer. Once you make a mental note of who does what, it’ll be easier to keep track of the vendors you’ll need to visit often and which ones you can skip.
The main ones you’ll need to be aware of are Hinoa the Quest Maiden (she gives you single-player quests), Hamon the Blacksmith (he upgrades your weapons and armor), and the Gathering Hub (which is where you’ll go to participate in multiplayer quests). There are lots of other places to visit, but as long as you remember these three, you’ll be in good shape at the start. Keep in mind, you can fast-travel around the hub by pressing + > L > Move Around Village.
Spend some time exploring during Expedition Tours
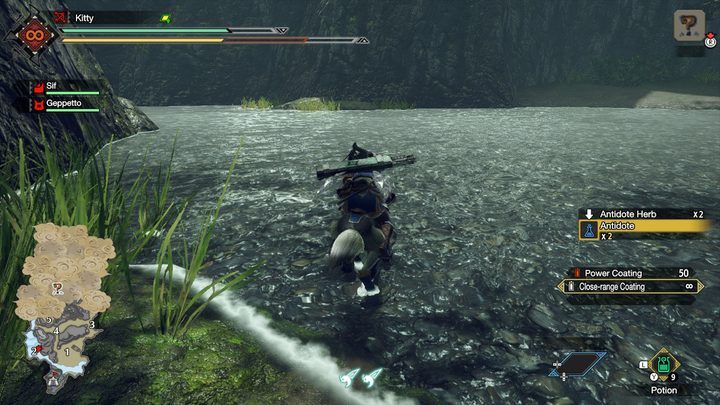
Once you’ve explored the hub world for a while, you’ll likely be ready to start your first quest! Granted, you won’t be ready to begin slaying any large monsters just yet, so instead, take this time to explore the game’s many locales. Head to Hinoa the Quest Maiden in the center of the hub and select Village Quests. Then, navigate to Expedition Tour. Here, you’ll find multiple “maps” to simply explore — without a time limit or specific goal.
This is great for learning how the game controls, while being able to gather materials. And trust us, you’ll need plenty of resources, so use this as an opportunity to collect as much as you can (more on that below). You can also test out a new weapon during an expedition, so you can make sure it’s something that suits your play style. The idea is to partake in an expedition to practice, explore, and stock up on resources — all of which will come in handy.
Try to grab everything you see
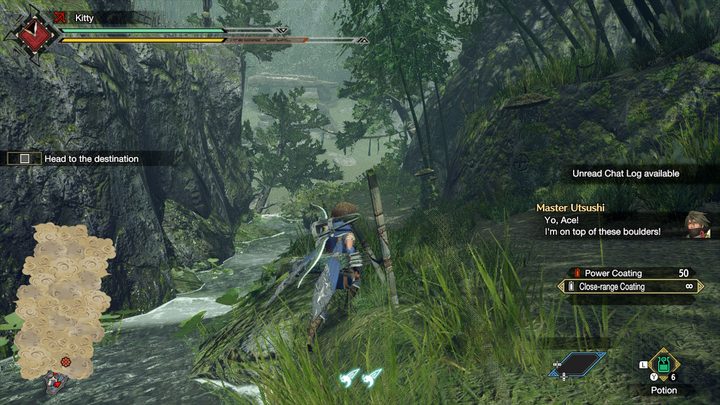
While making your way through an area, be sure to pick up everything you see. There isn’t much of a penalty for doing so (aside from running out of inventory space, but you likely won’t have that problem when you start). In Monster Hunter Rise, there’s a robust crafting system that allows you to create useful items — some of which are only available by crafting.
You’ll find various plants, rocks, and monster parts around the world, so do yourself a favor and collect whatever you see. Even if you do run out of room in your pouch, you can run back to the camp at the start of the level to drop off any materials you might not need right now. Once you get into the crafting side of things, you’ll be glad you stocked up on as many materials as possible.
Come prepared
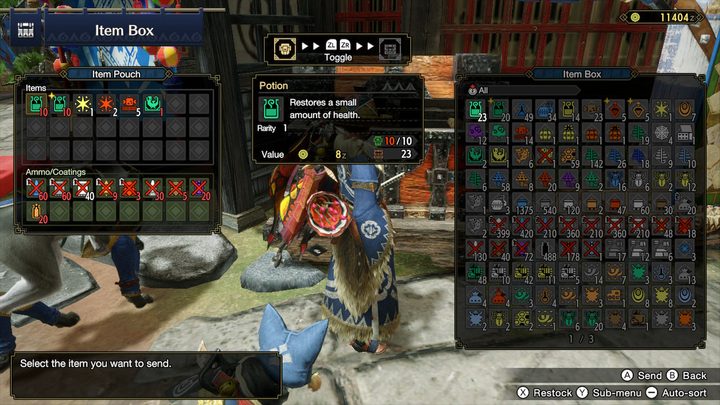
Speaking of useful items, you’ll want to make sure you’re prepared for each hunt you encounter. There’s a lot that goes into this, but the main things you want to bring are healing items such as potions and first-aid meds; stamina items like steaks, energy drinks, or rations; and traps to capture large monsters. There are a ton of other items you might need depending on your playstyle or the monster, but the point is that you should always take a look at your item box before you depart on your hunt.
Likewise, you’ll want to make sure you don’t have any unnecessary items in your item pouch. The item pouch is the inventory you have on your character at all times, while the item box is your permanent, all-encompassing stash. Make it a habit of transferring unwanted items from your pouch to your item box after each hunt so you don’t forget.
The upgrade system isn’t as daunting as it seems
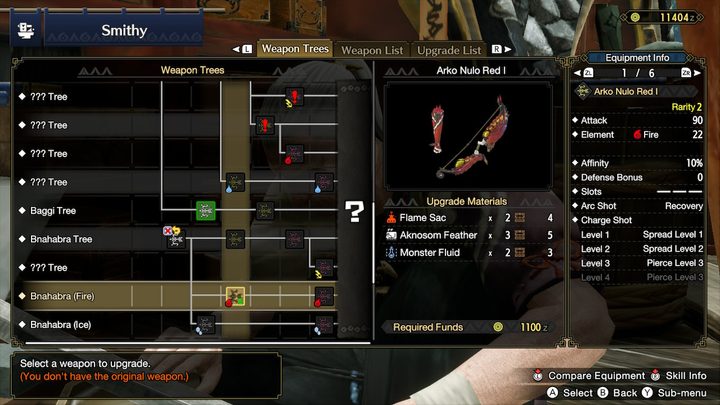
The primary gameplay loop in the Monster Hunter games is this: Gather parts by defeating a monster, use those parts to craft better gear, and use that gear to defeat tougher monsters. So, it’s no surprise Monster Hunter Rise features the same robust crafting system the series is known for. When you visit Hamon the Blacksmith in the village, you’ll find multiple options including Forge/Upgrade Weapon and Forge/Upgrade Armor. These two will be your bread and butter throughout the game, so you’ll want to be familiar with how they work.
You can create a specific weapon that falls into one of the skill trees and then upgrade that weapon within a particular tree. The various trees correspond to different monsters and as you defeat more, you’ll unlock additional trees. For example, after you’ve taken out the Bnahabra, you’ll unlock the Bnahabra skill tree, along with multiple elemental variants. To craft pieces of gear, you’ll need to have certain items — most of which are gathered from the monster that corresponds to that set.
Armor works similarly, but is simpler. As you defeat monsters, more armor sets will be available and you’ll need items that correlate to that monster’s set to craft a piece of gear. To upgrade, you’ll need armor materials such as Armor Spheres, which are rewarded upon defeating a monster. The higher the level of the gear, the more of these armor items you’ll need. The menus make the upgrade system seem more complicated than it actually is, so try not to get too overwhelmed.
Check out the Hunter’s Notes to learn about a monster
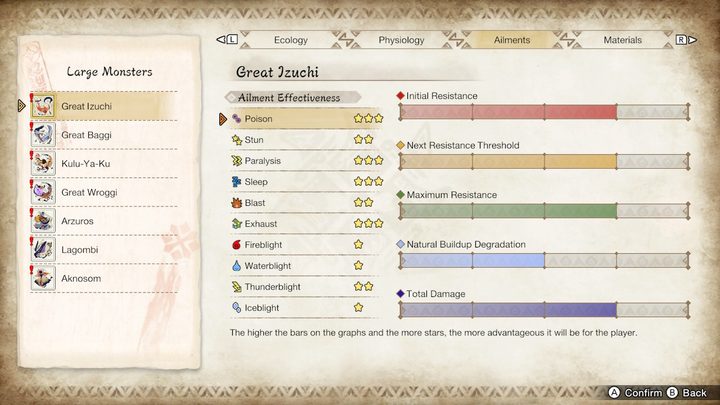
Monster Hunter Rise is full of…well…monsters, and they all have strengths and weaknesses. Since there are so many, you probably can’t keep track of all of their attributes, but the good news is that you don’t have to. By looking at the Hunter’s Notes, you get a breakdown of all the monsters’ weaknesses, abilities, and their overall threat level. To view this menu, press + > Info > Hunter’s Notes > Large Monsters. You can also look at a small monsters’ stats, but typically you won’t need to do that.
Once you’re on the Large Monsters page, you can tab through to view their Ecology, Physiology, Ailments, and the materials they drop. Use this menu when grinding for a particular monster set, as it’ll help you be more prepared. You’ll want to bring a weapon and armor set that works well against that monster.
The Hunter’s Info menu houses all the tutorials, so come back to them as needed
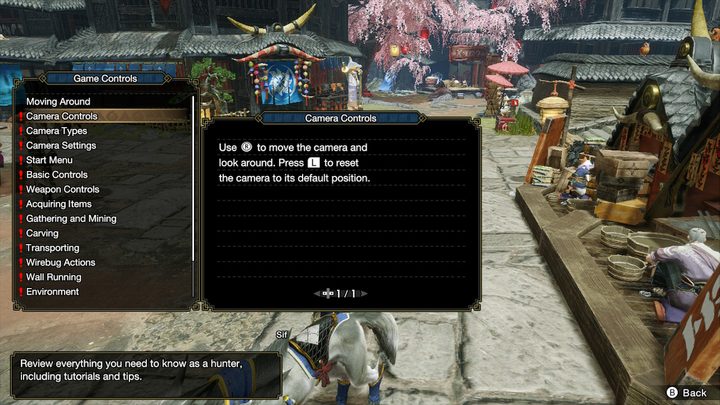
Any time you encounter a mechanic in Monster Hunter Rise, the game throws a tutorial at you in the form of a wall of text. For some, this might be ideal, but sometimes it can be a lot to take in. The great thing is that you can always revisit these tutorials by visiting the Hunter Info menu. To do so, press +>Info>Hunter Info. Here, you’ll find every tutorial in the game, so if you forgot how a certain mechanic works, head to this menu for a refresher.
Always eat before a hunt
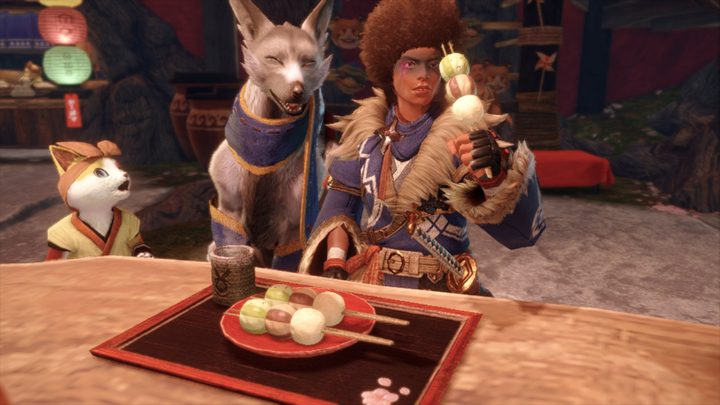
Before a hunt, you should always stop at one of the canteens in the village to get something to eat. You can combine various materials for a chance at getting an effect that will carry over into a hunt. These effects are tremendously useful and effective, such as a boost to your overall health and stamina, or other perks such as more health when consuming healing items. There are lots of different options, so you should combine materials based on your playstyle or the monster you’re facing.
The other thing to keep in mind is that each material has a chance of activating a particular perk. You can see the percentage beneath the item’s name on the left side of the screen next to “Activation Chance.” Some materials have perks with high activation percentages, while others do not, so consider this when selecting your meal. Make sure you Register to Set after you’ve made your selection so you can simply Order the Usual next time.
You can also utilize the Motley Mix option to simply cook whichever items you have in your inventory, which can be highly effective. Whichever option you choose, make sure you always eat before a hunt!
Grab items from the supply box before proceeding
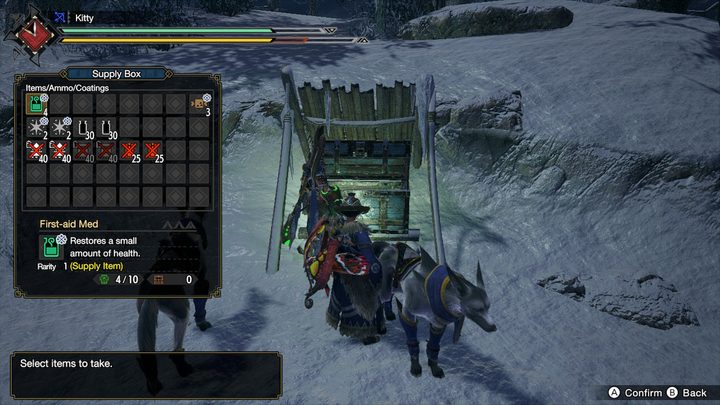
After you’ve started a hunt or quest, you’ll spawn right at the beginning, next to a camp. Here, you’ll find a supply box full of items that are given to you for free, which remain in your pouch for the duration of the quest. Do not forget to grab some of these items, as the game often gives you enough materials to save you from having to use your own. As you progress through the game, the items given to you in the supply box become less effective, but when you first start, they can be lifesavers. At the very least, make sure you grab the first-aid meds and the rations to restore your health and stamina, respectively. That way, you won’t have to dip into your personal stash.
Study the monsters’ movements
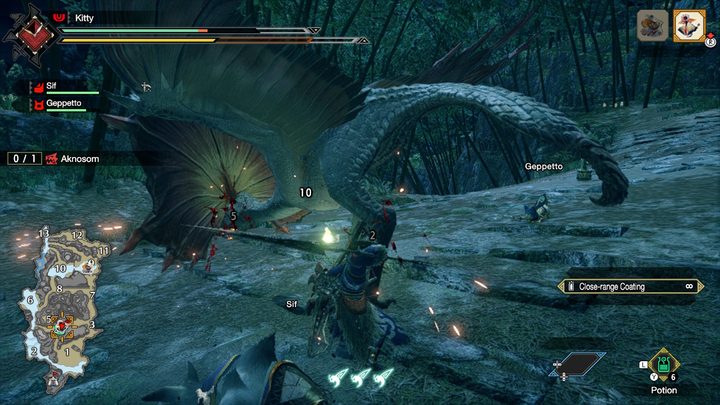
We’re finally moving onto some combat tips! Before running up to a creature and going buck wild on it, we recommend taking a moment to study its movement patterns. Put your weapon away and just run around the monster while dodging its moves and make note of any prominent attack patterns. More often than not, a monster will telegraph its moves, making it easy to dodge out of the way.
As with most action RPGs, you always want to bait an enemy into attacking, then back away, and strike as soon as the creature finishes its move. Doing this will prepare you for the fight and will hopefully prevent any careless mistakes from happening. Knowing that an enemy strikes three times instead of two can save you the headache of taking unnecessary damage.
Use the new Wirebug technique to get around quickly
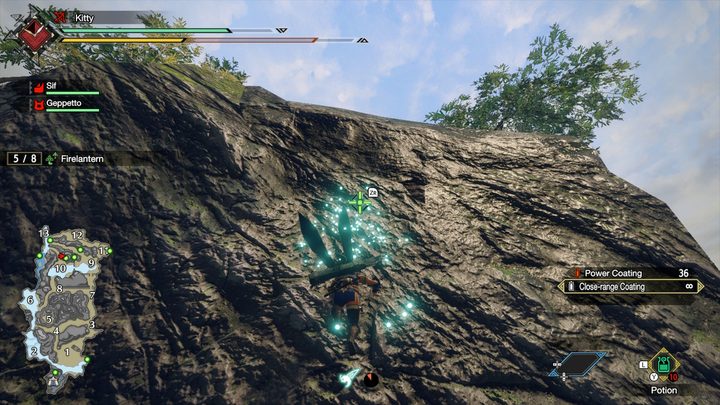
One of the new mechanics in Monster Hunter Rise is the Wirebug, which functions as a grappling hook of sorts. Use LZ to aim it and RZ to shoot the wire to a nearby surface and it’ll send you flying up into the air. By default, you can do this twice before the cooldown kicks in, but you can actually collect more Wirebugs that will temporarily stay on you during a fight, expanding the number of uses before a cooldown.
This mechanic can be used to zip around during the heat of battle, or can function to help you reach tall hills or other previously inaccessible pieces of terrain. Most importantly, you should get in the habit of using your Wirebug to dodge quick attacks when fighting monsters. Sometimes, the monsters’ attacks are so fast, simply rolling isn’t enough, so try the Wirebug instead.
All weapons are good, so spend some time with each to find ones you like
Monster Hunter Rise is comprised of 14 different weapons, all of which have their own strengths and weaknesses. You’ll find traditional weapons like a Great Sword, Lance, and Hammer, as well as support weapons like the Hunting Horn or Bow. At the start, you’ll likely want to try out lots of different weapons, and we encourage lots of experimentation. Once you start tackling harder monsters, you’ll want to familiarize yourself with your weapons’ strengths and make sure the one you choose aligns with your playstyle.
For instance, if you like to be in the monster’s face and want a fast-paced attack scheme, you probably shouldn’t pick the Hunting Horn, as it’s heavy and slow. On the flip side, if you prefer more deliberate attacks, you should steer away from the Dual Blades. In addition to how a weapon feels, each one has a perk or unique trait. For example, the Bow can be used to rain healing essence on your teammates, while the Hunting Horn can temporarily boost the attack of your entire squad. Each weapon has a different trait, so pay attention to this when upgrading or crafting a new piece of gear. Try each weapon out first and see which one feels best, then you can dive into learning their unique traits.
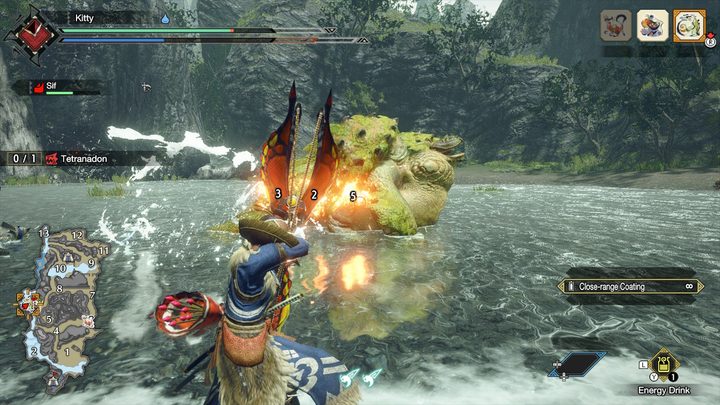
Break parts of the monster by hitting weak points
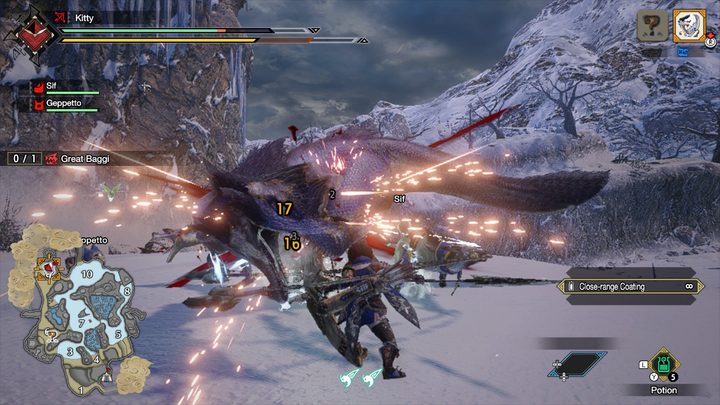
The driving force behind Monster Hunter is the quest for better gear. To acquire the next best set, you need certain materials, some of which are only obtainable by breaking parts of the monster’s body. Typically, the face is a weak point, so try to aim your attacks here for a chance at “breaking” it. If done correctly, the monster will drop an item which is denoted by a shiny orb, indicating you can pick it up.
The tail is also a great appendage to aim for, as this is usually a weak point, too. Not only does this guarantee you’re dealing more damage, but it also gives you a chance to gather rare materials needed for high-level gear. The nice thing is that you don’t need to be the player who “breaks” the monster to collect the material — if a teammate lands a deadly blow, the monster can drop an item and you can still collect it.
Consider capturing instead of killing
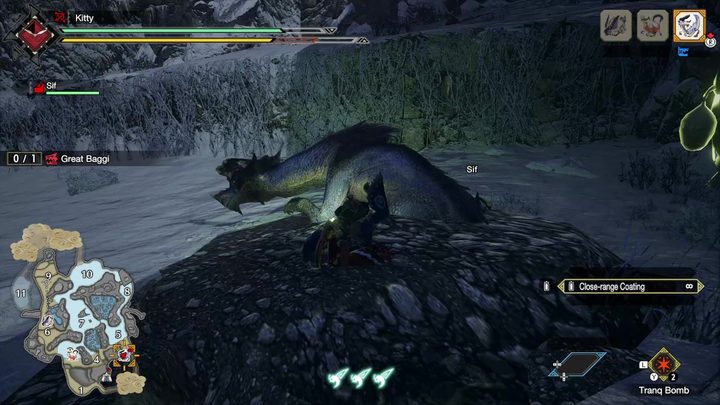
Most new players start off killing their targets and while that’s a perfectly acceptable way to play, it’s often more effective to capture the monsters instead. The strategy for doing so is a bit more complicated, but experienced players will actually tell you they prefer capturing instead of killing. There are a few reasons for this. For starters, capturing the monster will end the fight faster, as you don’t need to deplete an enemy’s health to zero to trap them. Secondly, and most importantly, capturing a monster nets you more loot. It doesn’t necessarily give you better loot, since the rewards are mostly random, but you get more if you capture.
Now, certain resources have a better chance of dropping if you carve a monster, which can only be done if you kill it — so there are times when capturing isn’t the best choice. But in general, we’d recommend trying catching if you can, as its benefits outweigh the negatives, at least at first.
There are a couple of ways to capture a monster, but the main idea is that you need a trap and a Tranq Bomb. Once the creature is weakened, you’ll notice it will start to limp away. This is your cue that it’s time to capture. Lay down either a Shock Trap or Pitfall Trap and bait the monster into it. Then, throw two Tranq Bombs at it to secure it and the quest will end. Boom — the monster is trapped.
When in doubt, play online with friends
Finally, let’s discuss multiplayer in Monster Hunter Rise because it’s a major component of the game. There are two quest categories: Village Quests and Hub Quests. The Village Quests are single-player only, meaning you’re on your own with those. These are intended to be played offline and the difficulty is geared towards one player.
The Hub Quests, however, are separate multiplayer quests that are intended for online play. These are found in the Hub area and mirror the Village Quests, but are often more difficult since they’re meant to be tackled by up to four players. You can certainly complete these quests solo, but if you’re stuck, you’ll want to attempt them with other players. We go more into detail about how to play online here, so check out that guide for more tips on playing with friends.
You’ll likely find that playing online with friends is much more fun and rewarding. Just be careful because you only have three shared lives between the entire squad. Once your team accumulates three knockouts, the quest will end and you’ll fail the mission. You also split the money earned from each quest, so it does pay to do things solo. But the tougher monsters will often give you a hard time, which is when you’ll want to call in for backup.
Ideally, your squad will all have gear and weapons that complement one another. For instance, having a player with a heavy piece of gear works well when paired with someone who has a faster weapon. Likewise, you’ll want someone on your team who can provide buffs, and attack from afar. Of course, this isn’t totally necessary, especially when starting, but the harder monsters will require much more coordinating and planning to take down.


