Beating Resident Evil 7 on any difficulty is a big enough challenge for many players, especially those who find the prospect of being hounded by an unkillable murderer for several hours unappealing to begin with. But for players who conquer RE7 on normal and find themselves wanting more, the developers were generous(?) enough to include a third difficulty, aptly titled “Madhouse” mode.
Resident Evil 7’s Madhouse difficulty doesn’t just add more and tougher enemies, though it has those, too. In many ways, it changes the very fabric of the game, altering item locations and enemy behavior to throw off whatever knowledge you may have built up playing through the game’s easier difficulties. Even a hardened, impervious veteran of normal mode might need some help getting through it.
If you’re having trouble on any difficulty, read these general tips for surviving Resident Evil 7. But those looking to get through Madhouse difficulty will want to use the tips below for more in-depth help. Here’s how to survive Madhouse mode in Resident Evil 7.
Recommended reading:
- The best Capcom games of all time
- Everything we know about Resident Evil Village
- The best Resident Evil games, ranked from best to worst
Madhouse difficulty differences

Before getting into specific tips, let’s talk about the changes added to Resident Evil 7’s Madhouse difficulty.
Your saves are limited
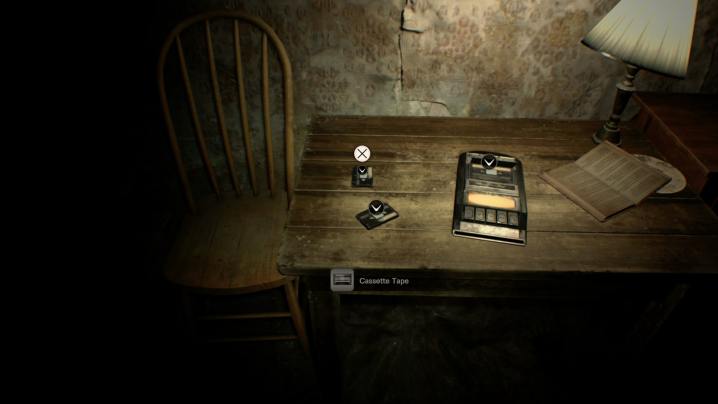
Definitely the biggest of all the changes on Madhouse is the new blank tape; a consumable item that, like the ink ribbon in early Resident Evil games, is used to save your game. The game gives you just enough that you can save when you have to — before and after bosses, for example — but few enough tapes that you occasionally worry about running out. It’s classic Resident Evil. Luckily, there are around 30 cassette tapes scattered around the game — which is more than enough to get by. They spawn in the same spots each game, so make a point to have a guide handy with their locations to plan things out.
Checkpoints are extremely limited

The generous checkpoints RE7 hands out on Easy and Normal do not apply when playing on Madhouse difficulty. The game will provide a checkpoint at the beginning of some sections, but that hardly ever happens, and if you aren’t careful with your limited saves you might find yourself losing hours of progress.
Item placement varies
If you’ve played through RE7 already once or twice on Normal before starting Madhouse, you may be surprised at the location of certain items. This sometimes makes the game slightly easier by giving you items such as the grenade launcher and backpack upgrades earlier than normal. However, when you plan your route from memory, finding that an important key suddenly isn’t where you thought it would be can make things complicated.
There are more antique coins
This is another Madhouse change that can be both good and bad. On one hand, having more antique coins to find — 33 versus the 18 found in Normal mode — means you’ll run across them more frequently. But there are also more to buy with antique coins, including new items that increase your attack/defense, and a key that was once more accessible.
The Bakers are more dangerous
Getting spotted by Jack Baker during Resident Evil 7’s first few hours on Normal or Easy mode isn’t a big deal, as you usually can run away and hide to avoid him. But on Madhouse, Jack actually runs faster than you can, which is terrifying. Good luck getting to a safe room if Jack surprises you from around a corner.
There are more enemies in different places

Again, you may already have a pretty good idea of when and where enemies will spawn if you’ve already played the game once through on an easier difficulty. Throw that idea out the window, on Madhouse the enemies are more numerous, and pop up in some surprising places designed to take advantage of your expectations.
Normal foes are more dangerous, too
Not only that, but the fungus monsters you encounter during Normal gameplay have far more health, cause way more damage, and, worst of all, move more aggressively and erratically on Madhouse, making each encounter a life-or-death situation.
Ammo is scarce
On top of everything else, the game dishes out far less ammo, forcing you to make every shot count.
Tips for playing on Madhouse

Given all the changes and how much more difficult it is to play RE7 on Madhouse, it can be pretty intimidating even to players who’ve already beaten the game on lower settings. Thankfully, the tips below should help.
Get the dirty coin from the Beginning Hour demo
You can start Resident Evil 7 with an extra antique coin if you complete a highly specific sequence of events in the game’s free downloadable demo, Beginning Hour. Follow these instructions on Reddit to the letter and you should have no issues. The one confusing part is Step 8 — when the instructions say to point the finger “at the pile of rubble at the foot of the stairs” they mean the debris directly under the clock on the wall.
Use a guide to find more antique coins
Madhouse difficulty is not messing around, so there’s no shame in using a guide like this one to find more antique coins, especially if you’ve already beat the game once without a guide. Take all the help you can get.
Play the game on Normal first
Play it twice, even, and the second time use a guide to find collectibles like the files and Mr. Everywhere bobbleheads. Doing so will unlock all kinds of extras that are designed to ease some of Madhouse’s pain, including shoes that let you walk more quickly and the powerful Albert-01R handgun, a crucial item that increase your defense while guarding.
Block often

Block often, especially if you have the items “Essence of Defense” or “Secrets of Defense.” Keeping these in your inventory will negate almost all, if not all, the damage you take while blocking. This is crucial — especially during moments like the Marguerite boss fight — and even against normal enemies on Madhouse.
Do practice runs
Given how infrequently you’ll be able to save on Madhouse, one thing you might find helpful is doing practice runs. There’s a powerful feeling of relief when you do finally save your progress, especially given there are basically no checkpoints. Take the opportunity to go explore what’s coming next without the pressure of losing progress if you die. You can get surprised by enemies or use up all your ammo and then reload your most recent save.
Get headshots

Don’t waste ammo shooting enemies anywhere but their weak points, which for normal enemies is in their big, dumb, gnarly heads. Ammo is too scarce to do otherwise. Keep practicing until you rarely miss. And it helps if you’ve already beat the game once and have access to the Albert-01R handgun.
Seriously, conserve ammo
Marguerite is not going to die from your pitiful knife swipes. Use weaker ammo, like regular handguns bullets, before expending the more powerful stuff, such as enhanced bullets and shotgun shells, except in emergencies when that’s not possible. And the only thing that qualifies as an emergency on Madhouse is when a crawler blasts out of the wall directly in front of you and you haven’t saved in two hours.
Never feel safe because you are never safe
Except in safe rooms, you’re never safe in Resident Evil 7, especially on Madhouse. Were you expecting an enemy to pop out where none did? Well, that’s probably because the game is trying to lull you into a false sense of security so it can throw two enemies at you in the next room instead and cause you to panic and waste all your ammo.
Stop hoarding lockpicks
You might have a habit of saving lockpicks for a time when you “need” them on earlier difficulties. Stop doing that. Madhouse is stingy enough with ammo and chem fluids for crafting that you should use all the resources available to you whenever you can.
Save some of that chem fluid for the Old House
Seriously, you don’t want to take on Marge’s bugs without burner fuel. Given that the items scattered around the environment are somewhat randomized, you might find yourself picking up lots of handgun and shotgun ammo and running low on sweet, sweet flames. Save some chem fluid and solid fuel for these moments.
Hold out for the better shotgun

The M21 shotgun is far better than the M37, but you’ll need the repair kit to get your hands on it. You can get the first repair kit as soon as you escape the main house; it’s in a slightly different spot on Madhouse than on Normal mode, but it’s still in the yard. Use it to fix the broken shotgun, which is also in a different spot. Until you do that, don’t waste precious shotgun shells using the less powerful M37.
Just get past the first boss

Possibly the most difficult part of Resident Evil 7’s Madhouse difficulty is the first boss fight in the attic of the Guest House. Your health is low, you have hardly any supplies, and even if you scrounge up every bullet and get 95 percent headshots, this boss seemingly won’t die. There are some tricks that make it easier, however. If you head back into the room where you found the handgun, for example, she’ll knock out a wall and make a loop you can run around. And when you run out of ammo (and you surely will), try to whack her in the head with your axe and guard when she swings at you.
If you prevail, you’ll have just won one of the hardest fights you’ll encounter on the Madhouse difficulty. While it may be frustrating to some gamers, making it past this milepost should make the thought of completing the game less intimidating.
Reload a save if you wasted too many resources
At some point, you’ll encounter difficult situations, and you’ll barely make it out alive. It’s important to note that even if survival and success keep you in the game, you still may not want to continue playing. If you’re running low on health or ammunition, you’d probably benefit from reloading to a previous point to boost your performance level. We usually suggest doing this if you’re seconds away from battling with a challenger and will only have a few opportunities to resupply.
Every single one of us has wasted special ammunition, instantly regretting it when an unprecedented battle or obstacle arises. If you happen to use up your ammo and you proceeded past your last save point, go ahead and restore it. Rehash that specific section of the game and remind yourself to save whatever exclusive ammunition you’ll need in the future. We promise you’ll thank us later.
Keep your eye on the prize
It’s challenging to finish RE7 when you’re actively in Madhouse mode. However, it goes beyond just showcasing how awesome you are. It even goes further than showing your courage when you’re facing evil fungus monsters and vindictive bog people. There is a method to the madness of this mode. With it, you can acquire an unlimited supply of ammo for future gameplay, setting you up for success later on. You may wonder if it’s worth the hassle to use the Magnum. When it comes down to it, only you can decide.


