iOS 17 is full of cutting-edge iPhone features and optimizations, and we’ve been singing the latest firmware’s praises for a while now. Beyond the typical bug repairs and standard improvements, Apple’s most recent iOS level-up includes a convenient iPhone exclusive called NameDrop. In just seconds, this iPhone-to-iPhone wireless tech lets iPhone A receive a full contact card from iPhone B, simply by placing the two phones next to each other.
You’ll also be able to perform this trick by swapping one (or both) of those iPhones for the Apple Watch Series 7 or newer running watchOS 10.1. It’s not a difficult process, but it involves a little iOS know-how, which is where we come in. We’ve put together this step-by-step explainer for using the NameDrop feature, covering both the iPhone and Apple Watch connectivity methods.

How to share contacts from an iPhone with iOS 17's NameDrop feature
NameDrop is one of those features that seems so obvious in retrospect that it makes us wonder what took Apple so long to come up with it. After all, AirDrop has been around since iOS 7 was released 10 years ago, and it’s long been possible to use that to share contact information manually. NameDrop is simply an extension of AirDrop that automates the process.
With NameDrop, you can initiate an AirDrop session to share your personal contact card simply by holding your iPhone near somebody else’s; as long as they’re both running iOS 17.1 or later, they’ll recognize each other and offer to swap contact info. This also works with an Apple Watch running watchOS 10.1 or later, although in this case, it’s limited to Apple Watch models released in the last two years — that’s the Apple Watch Series 7, second-generation Apple Watch SE, and Apple Watch Ultra and newer models in each of those lineups. Also note that NameDrop can only be used to share new contact information; it won’t update an existing contact card.
NameDrop is very simple to use, but contrary to a bit of fearmongering that’s been going around since iOS 17.1 was released, it’s also very secure. You can only start a NameDrop session when your iPhone is unlocked, which means you’ll have to authenticate with Face ID or Touch ID (or enter your passcode) before anything happens, and then you still need to confirm that you actually want to share your contact information. Nothing is ever sent without your express authorization. Here’s how it works:
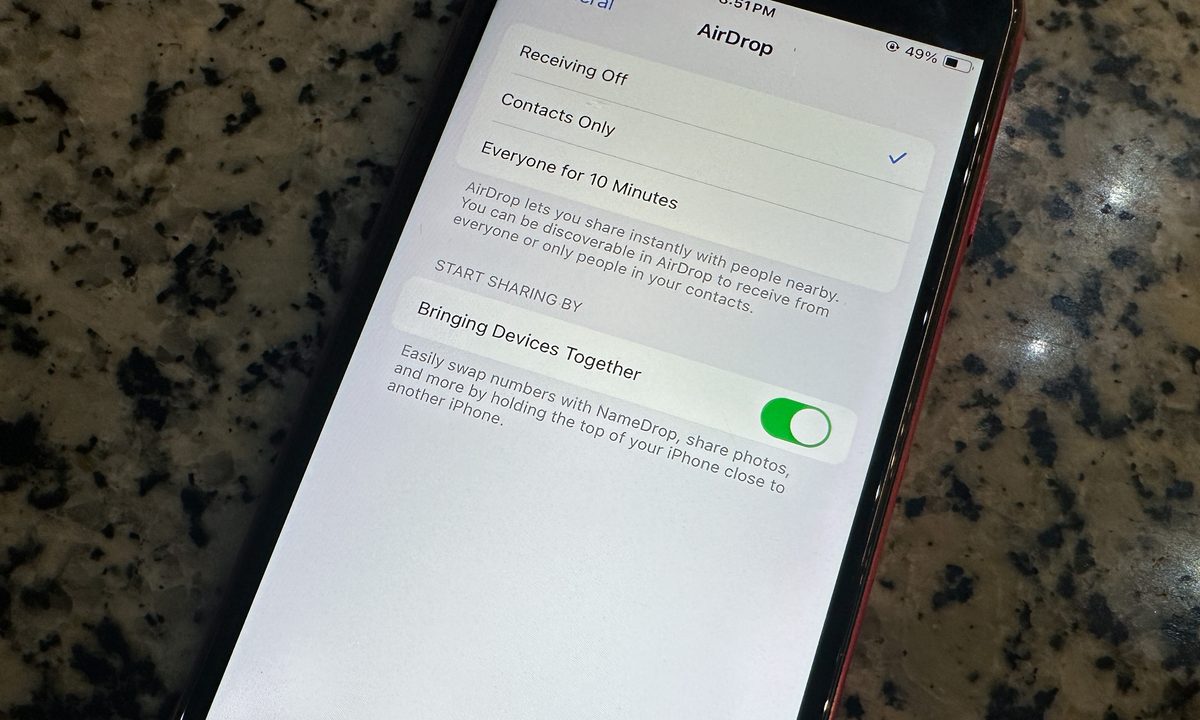
Step 1: First, make sure that NameDrop and AirDrop proximity sharing are enabled by opening the Settings app, selecting General > AirDrop, and checking that Bringing Devices Together is toggled on. This should be on by default.

Step 2: Hold your iPhone within a few centimeters of someone else’s iPhone or Apple Watch. After a few seconds, each person's contact card should appear in a full-screen view on both devices. If this doesn’t happen, confirm the other person also has the Bringing Devices Together setting enabled.

Step 3: Below your name, you'll see a summary of what information will be shared. By default, this is just your phone number, but you can choose to share additional fields from your contact record — such as your email or physical address — by selecting the fields you want to include. When you're done, tap Done.

Step 4: When you're ready, choose Share to share your contact information with the other person. Alternatively, you can choose Receive Only if you only want to receive the other person's contact card without sharing your own.
Step 5: If you change your mind at any time and decide you don’t want to share contact info, move your iPhone away from the other person’s iPhone or Apple Watch, swipe up to return to the home screen, or simply press the side button to lock your device. Doing any of these things will cancel the NameDrop session.

How to share contacts from an Apple Watch with NameDrop
You can also start a NameDrop session from an Apple Watch Series 7 or later (including the second-generation Apple Watch SE and Apple Watch Ultra and Ultra 2) as long as you have at least watchOS 10.1 installed. However, since your Apple Watch is always unlocked whenever you’re wearing it, using NameDrop from an Apple Watch requires an extra step to prevent it from being triggered accidentally. Here’s how to start a NameDrop session from your wearable:
Step 1: Open the Contacts app on your Apple Watch.

Step 2: Select your picture in the top-right corner.
Step 3: Choose Share.

Step 4: Place your Apple Watch near another compatible Apple Watch or iPhone, as shown in the on-screen illustration.
Step 5: Wait for NameDrop to appear on both devices.
Step 6: Choose Share to share your contact information with the other person or Receive Only if you only want to receive the other person's contact card without sharing your own.

How to share contacts in iOS 17 the old-fashioned way
As cool as NameDrop is, it’s not the only way to share contact information. You can still initiate an AirDrop session manually, which can be handy if you don’t want to hold your iPhones near each other or the other person is using an older iPhone that hasn’t been (or can’t be) updated to iOS 17.
While NameDrop is designed to share your own contact information — the card you’ve designated as the “Me” card in the Contacts app — you can manually share any contact in your address book, and choose what fields you want to share when doing so. For example, you might want to share only a business phone number and email address without including other information like a street address or personal contact info.
You can also share contact information via other channels, such as Messages or Mail. This attaches a vCard that can be opened directly in the Contacts app on the other person’s iPhone or imported into third-party contact apps like Microsoft Outlook.
Step 1: Open the Contacts app on your iPhone. You can also open the Phone app and select the Contacts button at the bottom.
Step 2: Your My Card contact information should be shown at the top. Select this to share your own details or locate another contact that you want to share.
Step 3: Scroll down to the bottom of the contact screen and choose Share Contact.
Step 4: Select the fields you would like to include. By default, this includes first and last name and job title, plus all phone numbers, email addresses, and social media handles. Deselect any items you don’t want to share and choose any additional fields you’d like to include. You can also choose Select All Fields at the bottom if you want to share the entire card.

Step 5: When you’ve made your selections, choose Done in the top-right corner.

Step 6: The standard iOS share sheet should appear. Choose a method for sharing, such as AirDrop, Messages, Mail or a third-party app and follow the instructions to send out the contact info.
How to export contacts on an iPhone
Maybe you’d like to store phone numbers and email addresses on a flash drive, external HDD, or another phone altogether. Fortunately, you can easily export your iOS contacts, so you’ll be able to access them on other devices. Here’s how to do so.
Step 1: Launch the Contacts app.
Step 2: Select Lists in the top-left corner.
Step 3: Find the list you’d like to export, then press and hold. You can also tap Add List.
Step 4: Select Export, choose the fields you want to include, then tap Done.
Step 5: Now you just need to choose how you send or save the contact cards. iOS methods include the Messages and Mail apps.