The iPhone XR brings the best of iOS and all-day battery life to the affordable smartphone market. It’s no surprise that the handheld set records as Apple’s bestseller in 2019. If you’re one of the many who snagged an iPhone XR, there’s a slew of useful features that you may not be using. Screenshotting, in particular, can be done in multiple ways. The process has also changed if you’re coming from an iPhone 8 or older. We break it down step-by-step so you can capture your next screenshot with physical buttons and AssistiveTouch.
Taking screenshots with physical buttons
Step 1: Locate the correct buttons — Gone are the days of physical home buttons, so you’re going to look for the Lock and Volume up buttons instead to screenshot. The Volume up button is situated on the upper left side of the phone, underneath the mute switch. The Lock button is located on the right side. Placing your fingers on the two buttons should feel natural, as if you were holding the iPhone like normal.
Step 2: Capture the screenshot — When you’re on the desired page, press the two buttons simultaneously to screenshot. You’ll see a flashing animation, followed by a thumbnail on the bottom left corner if done successfully. For those who have silent mode turned off, you will also hear a shutter sound.

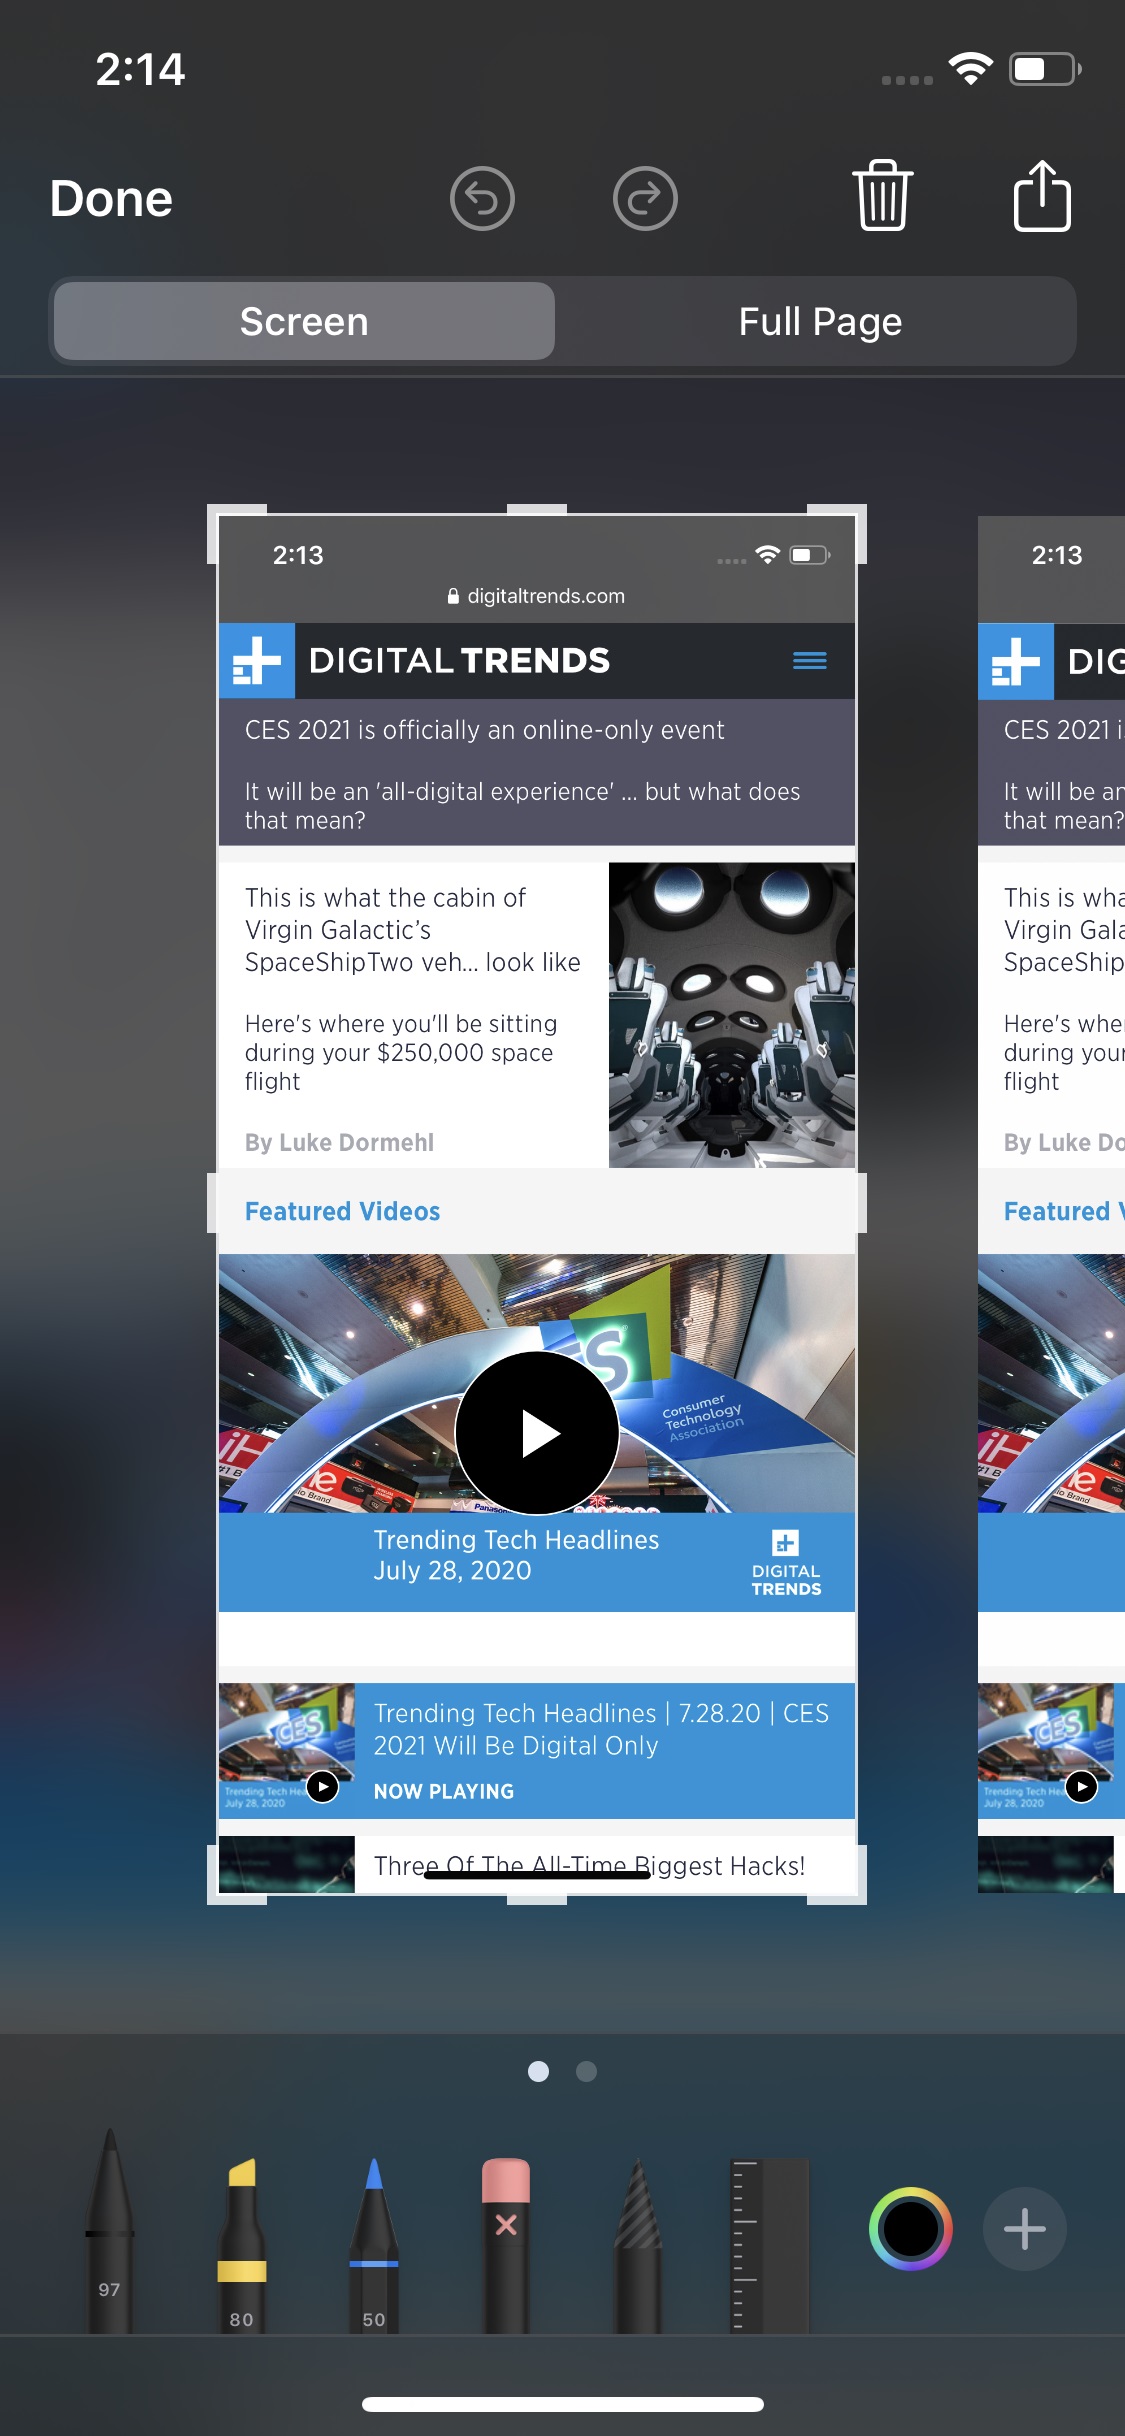
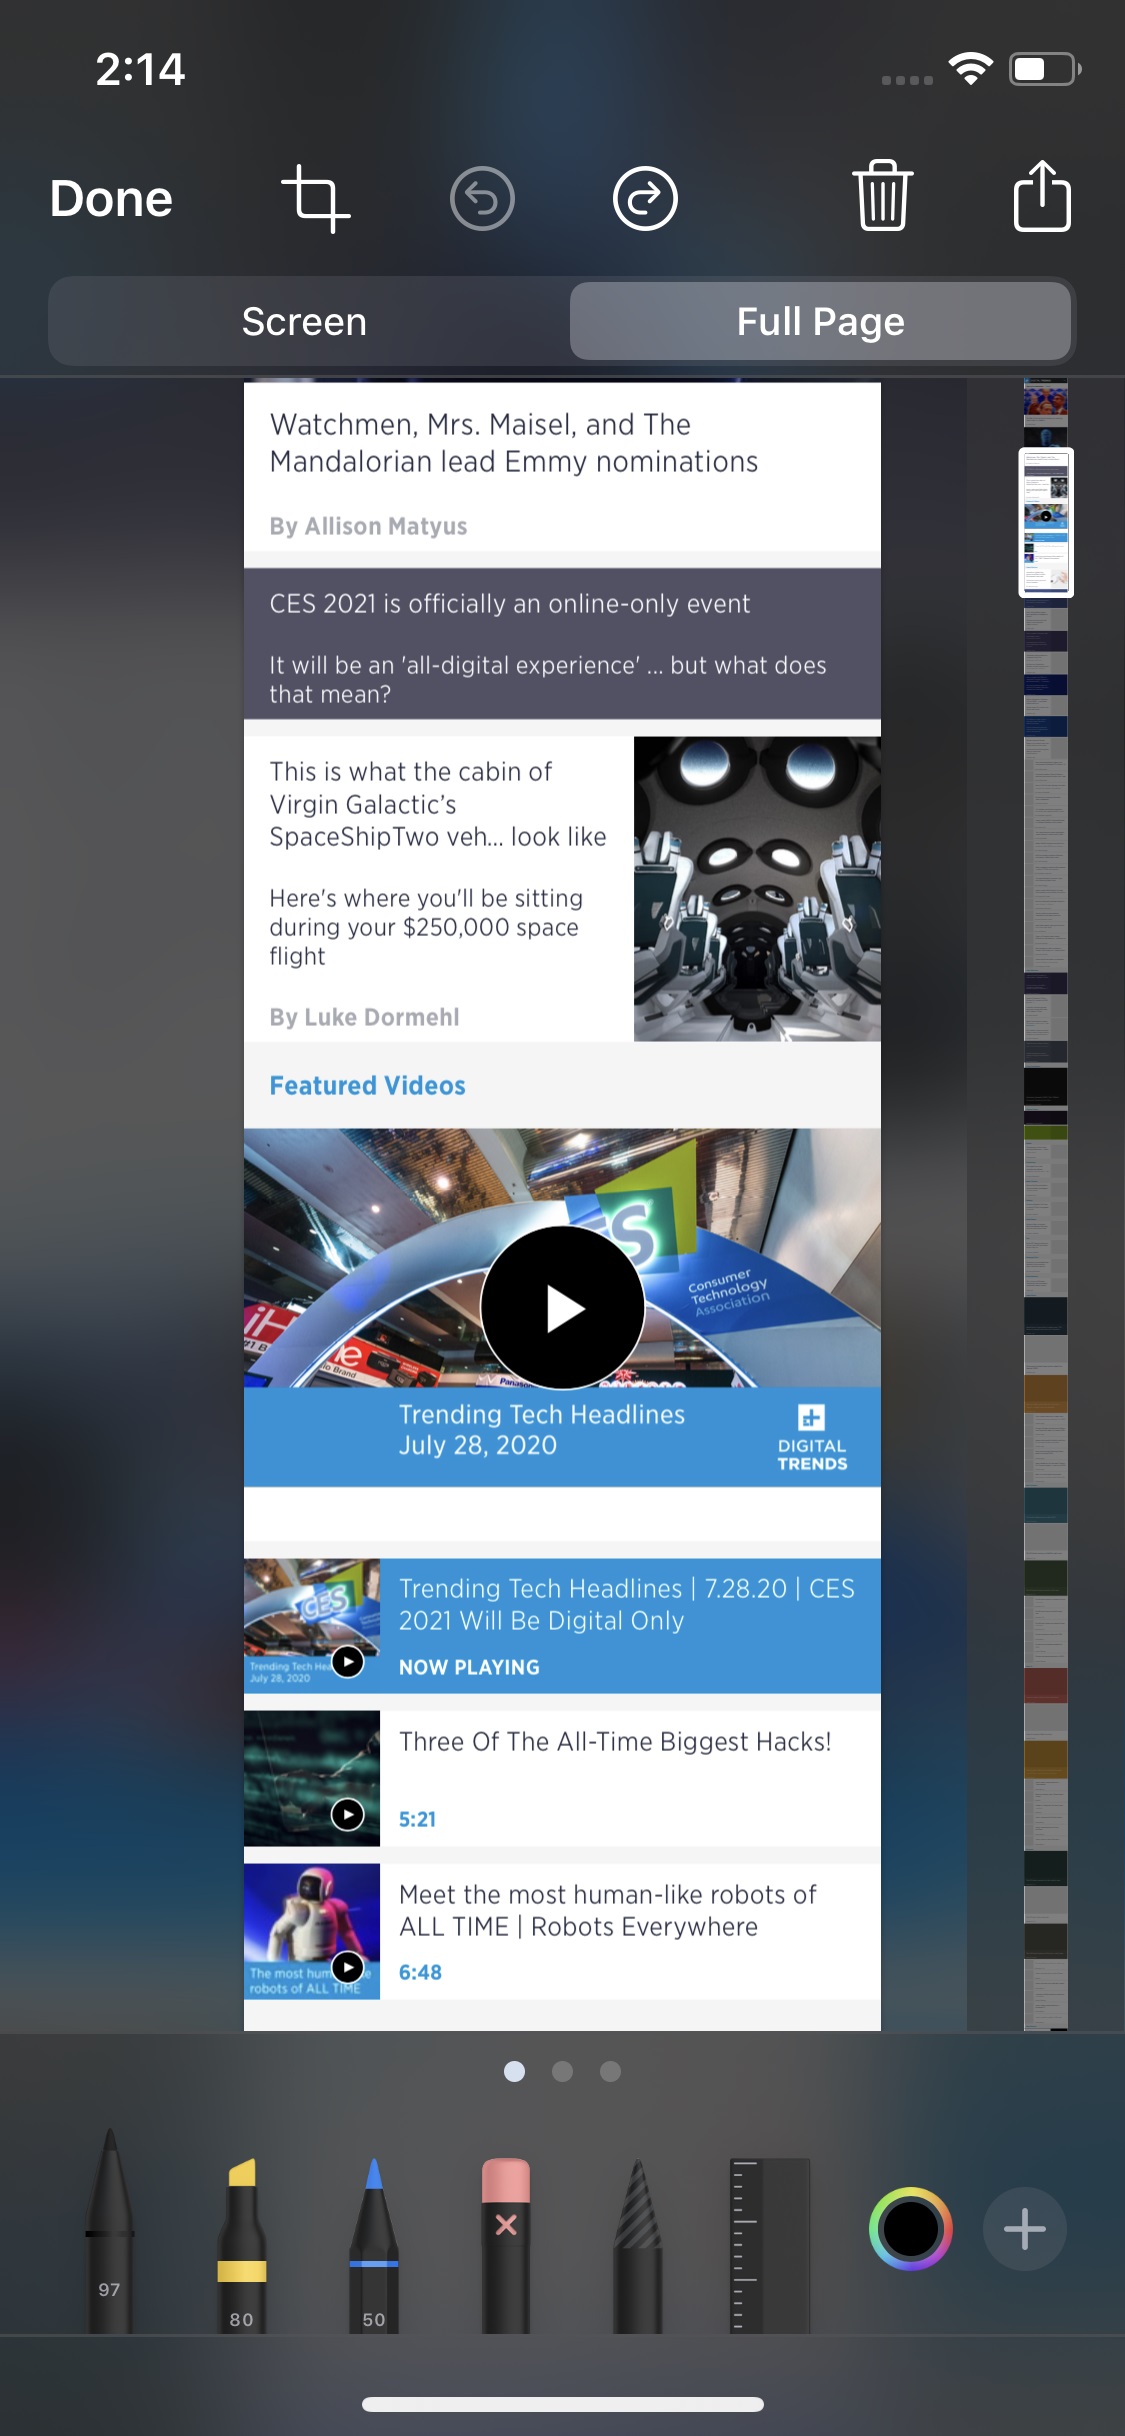
Step 3: Edit the screenshot — The thumbnail on the bottom can be ignored if you want to keep your screenshot the way it is. You can swipe it away or let it dismiss itself after a few seconds. But if you want to doodle, add notes, or crop the image, tap the thumbnail to bring up the editor tool. Here you’ll find an array of brushes and tools to fluff up your screenshot. By default, the editor tool will display what was captured on your screen. Switch to Full Page to edit webpages or longer images.
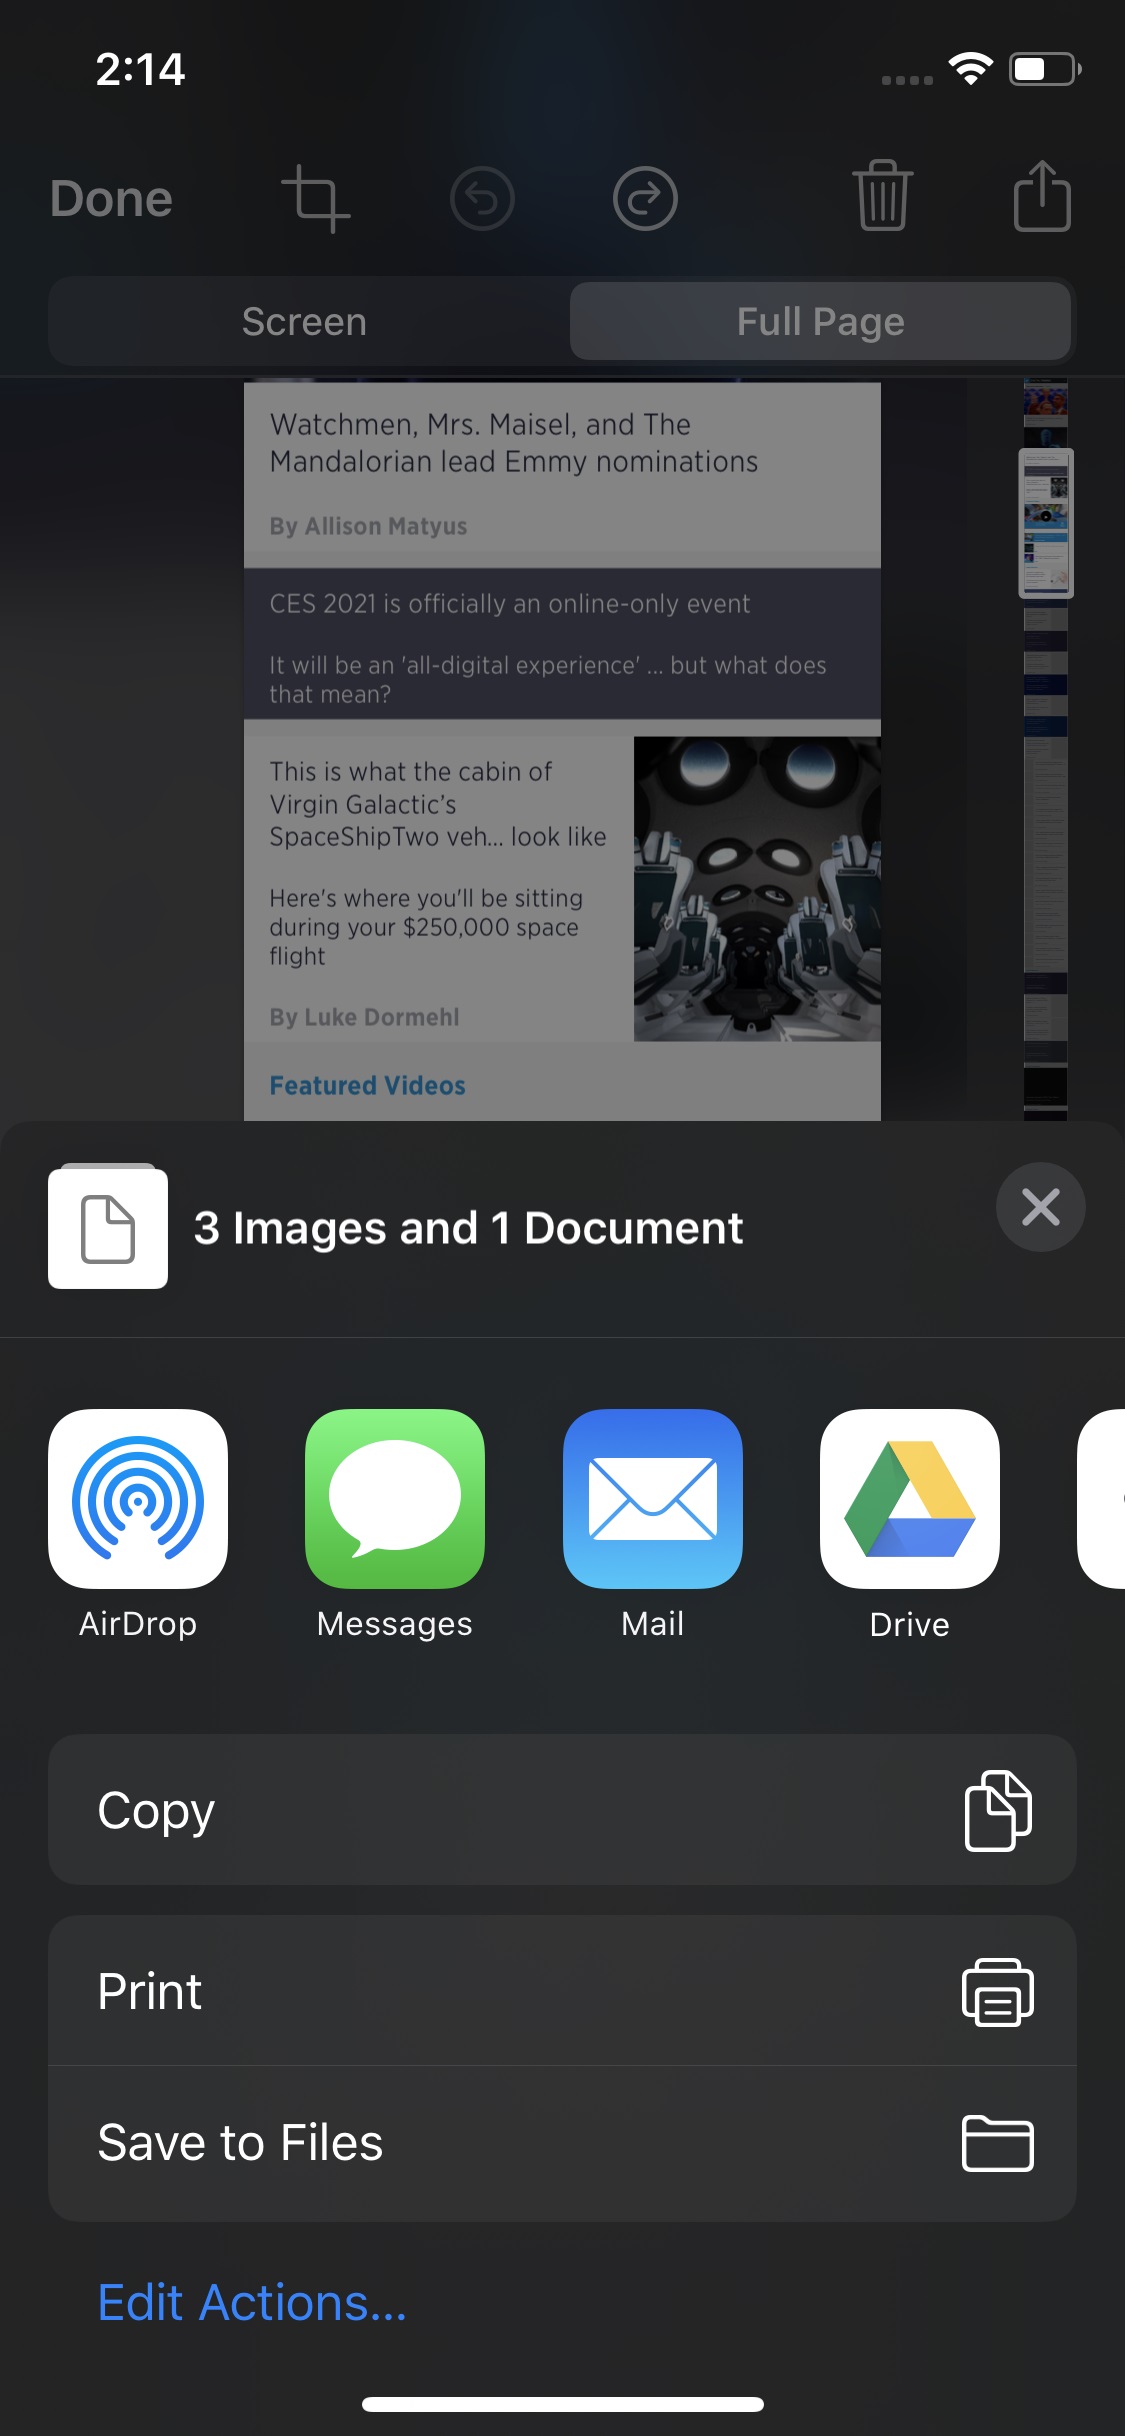
Step 4: Save and share screenshots — Once you’re satisfied with the screenshot, tap Done to save it. To share the image, tap on the Share button in the upper right corner of the editor tool. If you never opened the editor tool, the screenshot will save itself automatically and can be shared through your photos app.
Fewer accidental screenshots — Taking screenshots with hardware buttons raises one concern: Accidentally pressing them when the iPhone is not in use. Since iOS 12, Apple has released a fix that prevents unintentional screenshots for this scenario in particular. When the iPhone display is turned off, screenshotting is automatically disabled.
Taking screenshots with AssistiveTouch
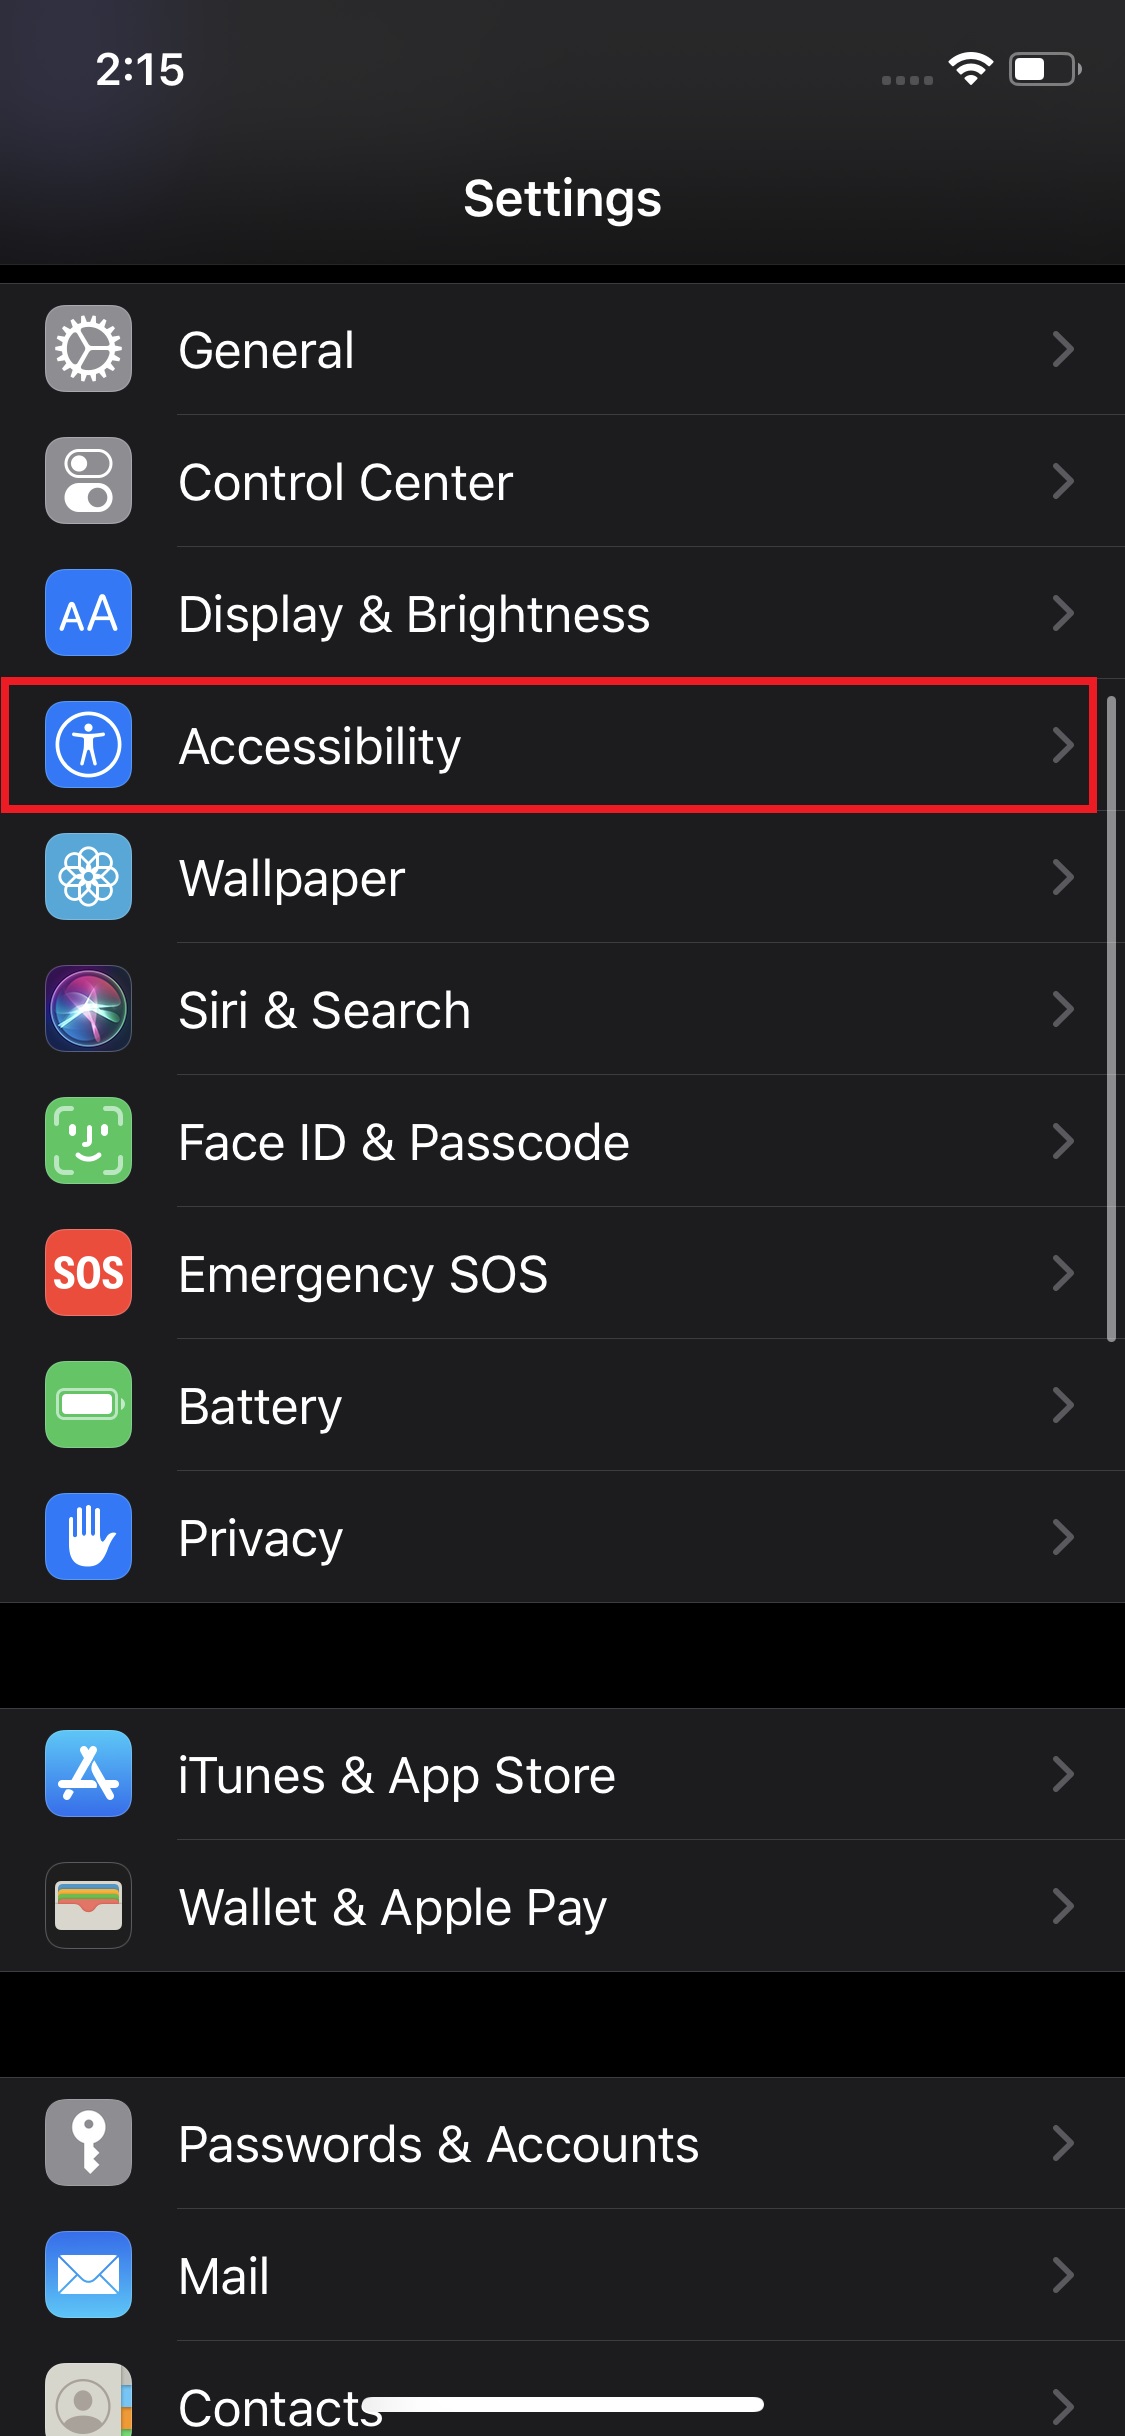
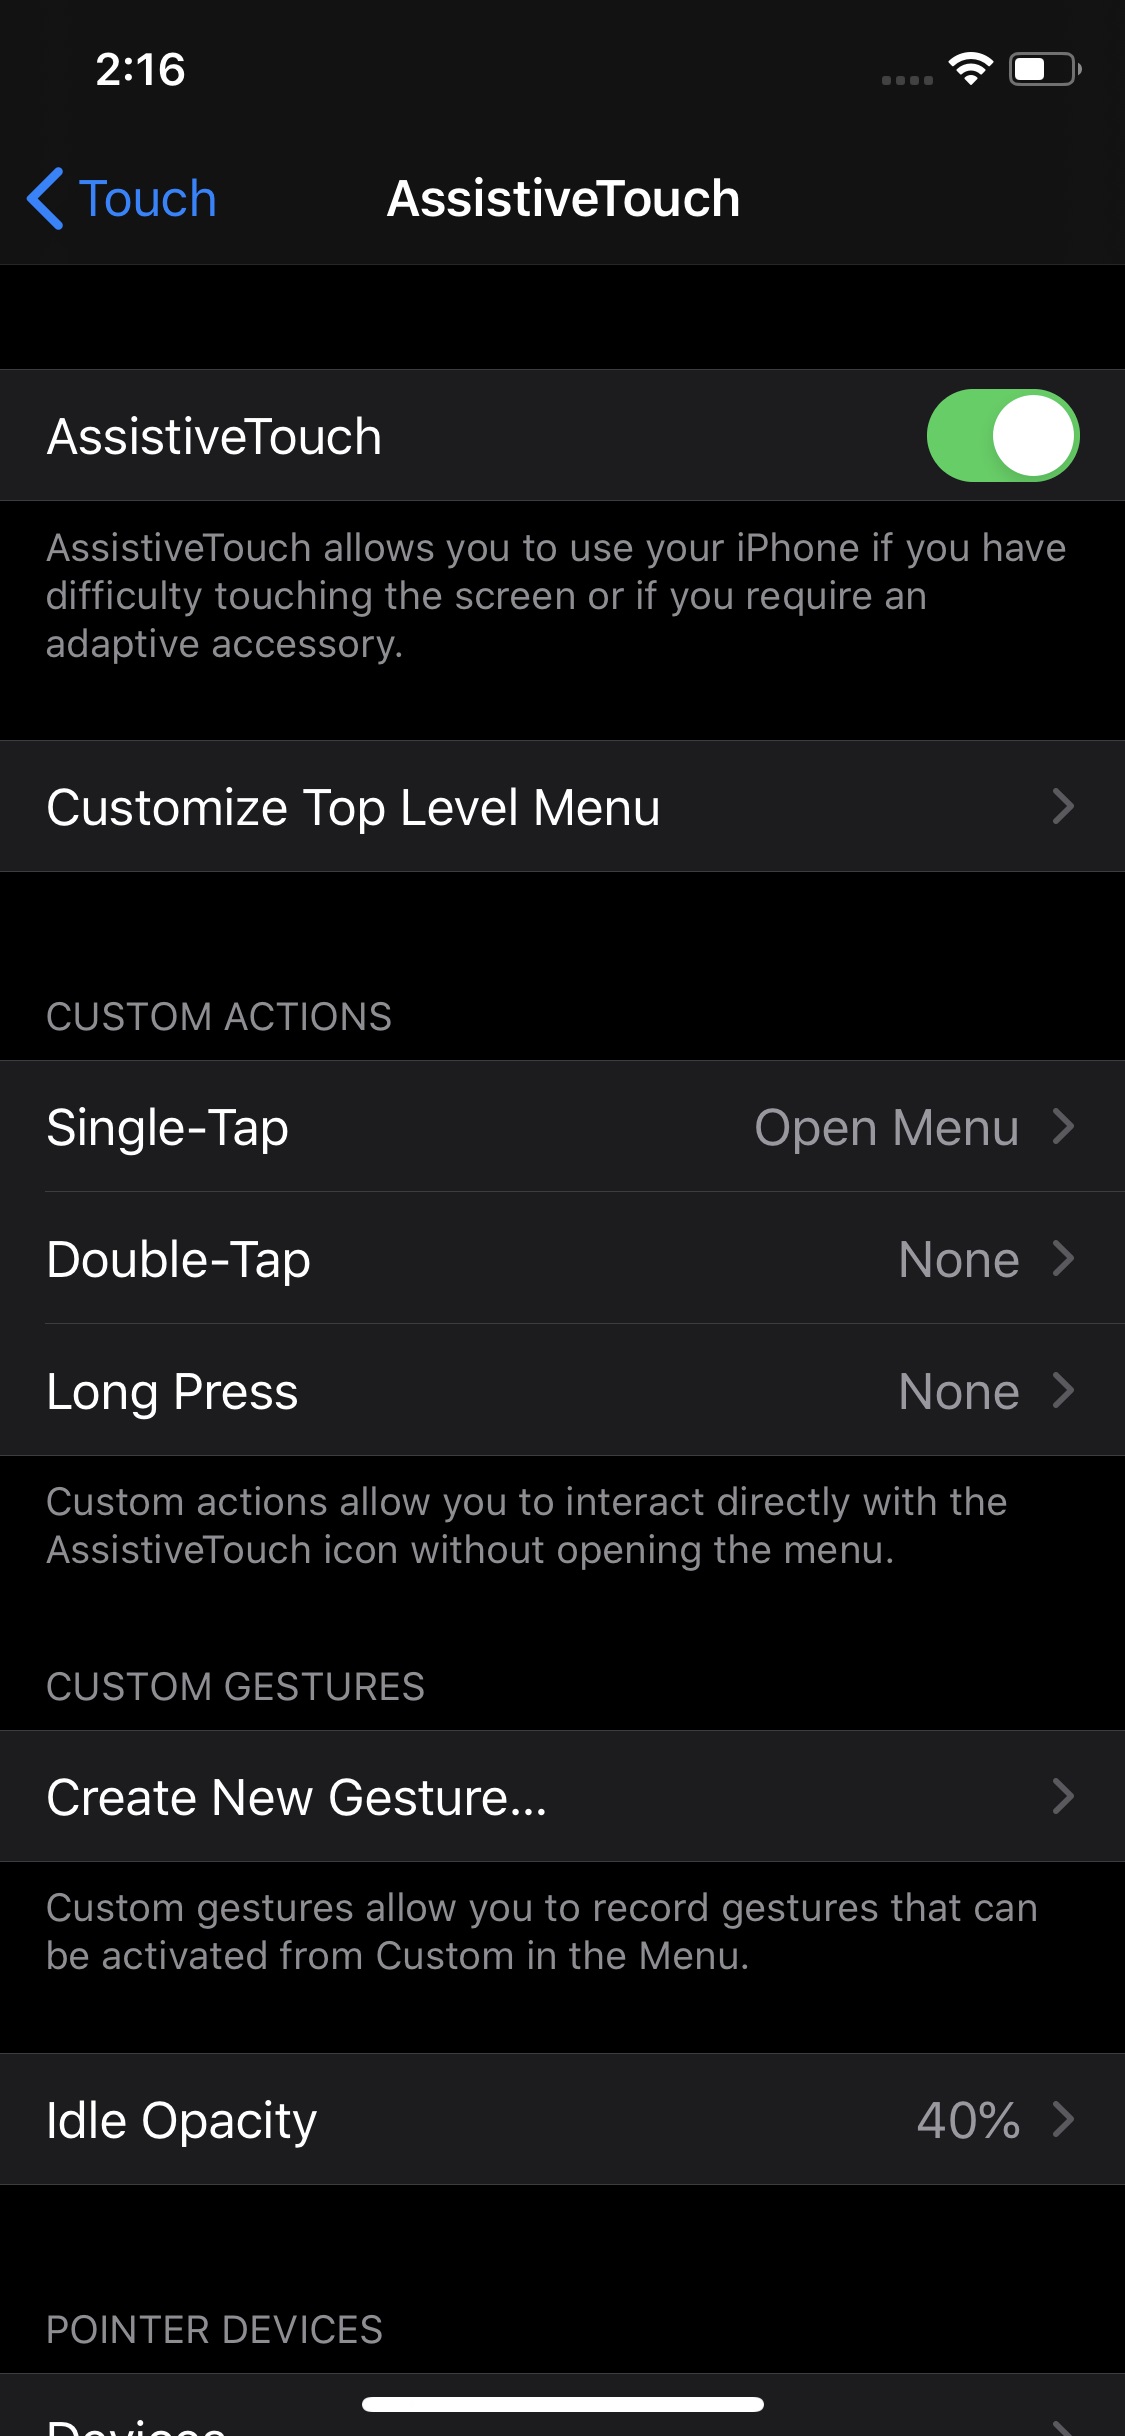
Step 1: Turn on AssistiveTouch — AssitiveTouch has been the go-to for ease and accessibility on iOS. It’s a floating button that hangs around your screen as you meander through your usual apps and games. Tap on it and you’ll be presented with shortcuts like opening Siri, pulling down your notification panel, and screenshotting. By default, this feature will be turned off. To turn it on, go to Settings > Accessibility > Touch > AssistiveTouch and toggle AsssitiveTouch. Note that if you want to use the button for screenshotting, you’ll need to add the shortcut to the menu first.
Step 2: Adding screenshot function to AssistiveTouch — The arrangement of functions in the Top Level Menu — which opens when you tap on the AssistiveTouch button — is easily customizable. To do it, go to Settings > Accessibility > Touch > AssistiveTouch and tap Customize Top Level Menu. There, you can tap an existing icon to change it or add more by tapping on the plus symbol in the bottom right corner. Among the list of functions that you can add is screenshotting. You can also set custom actions when interacting with the AssistiveTouch button like single-tap, double-tap, or long-press. A neat trick is to assign one of the actions to screenshot, especially if you plan to use AssistiveTouch to do just that.
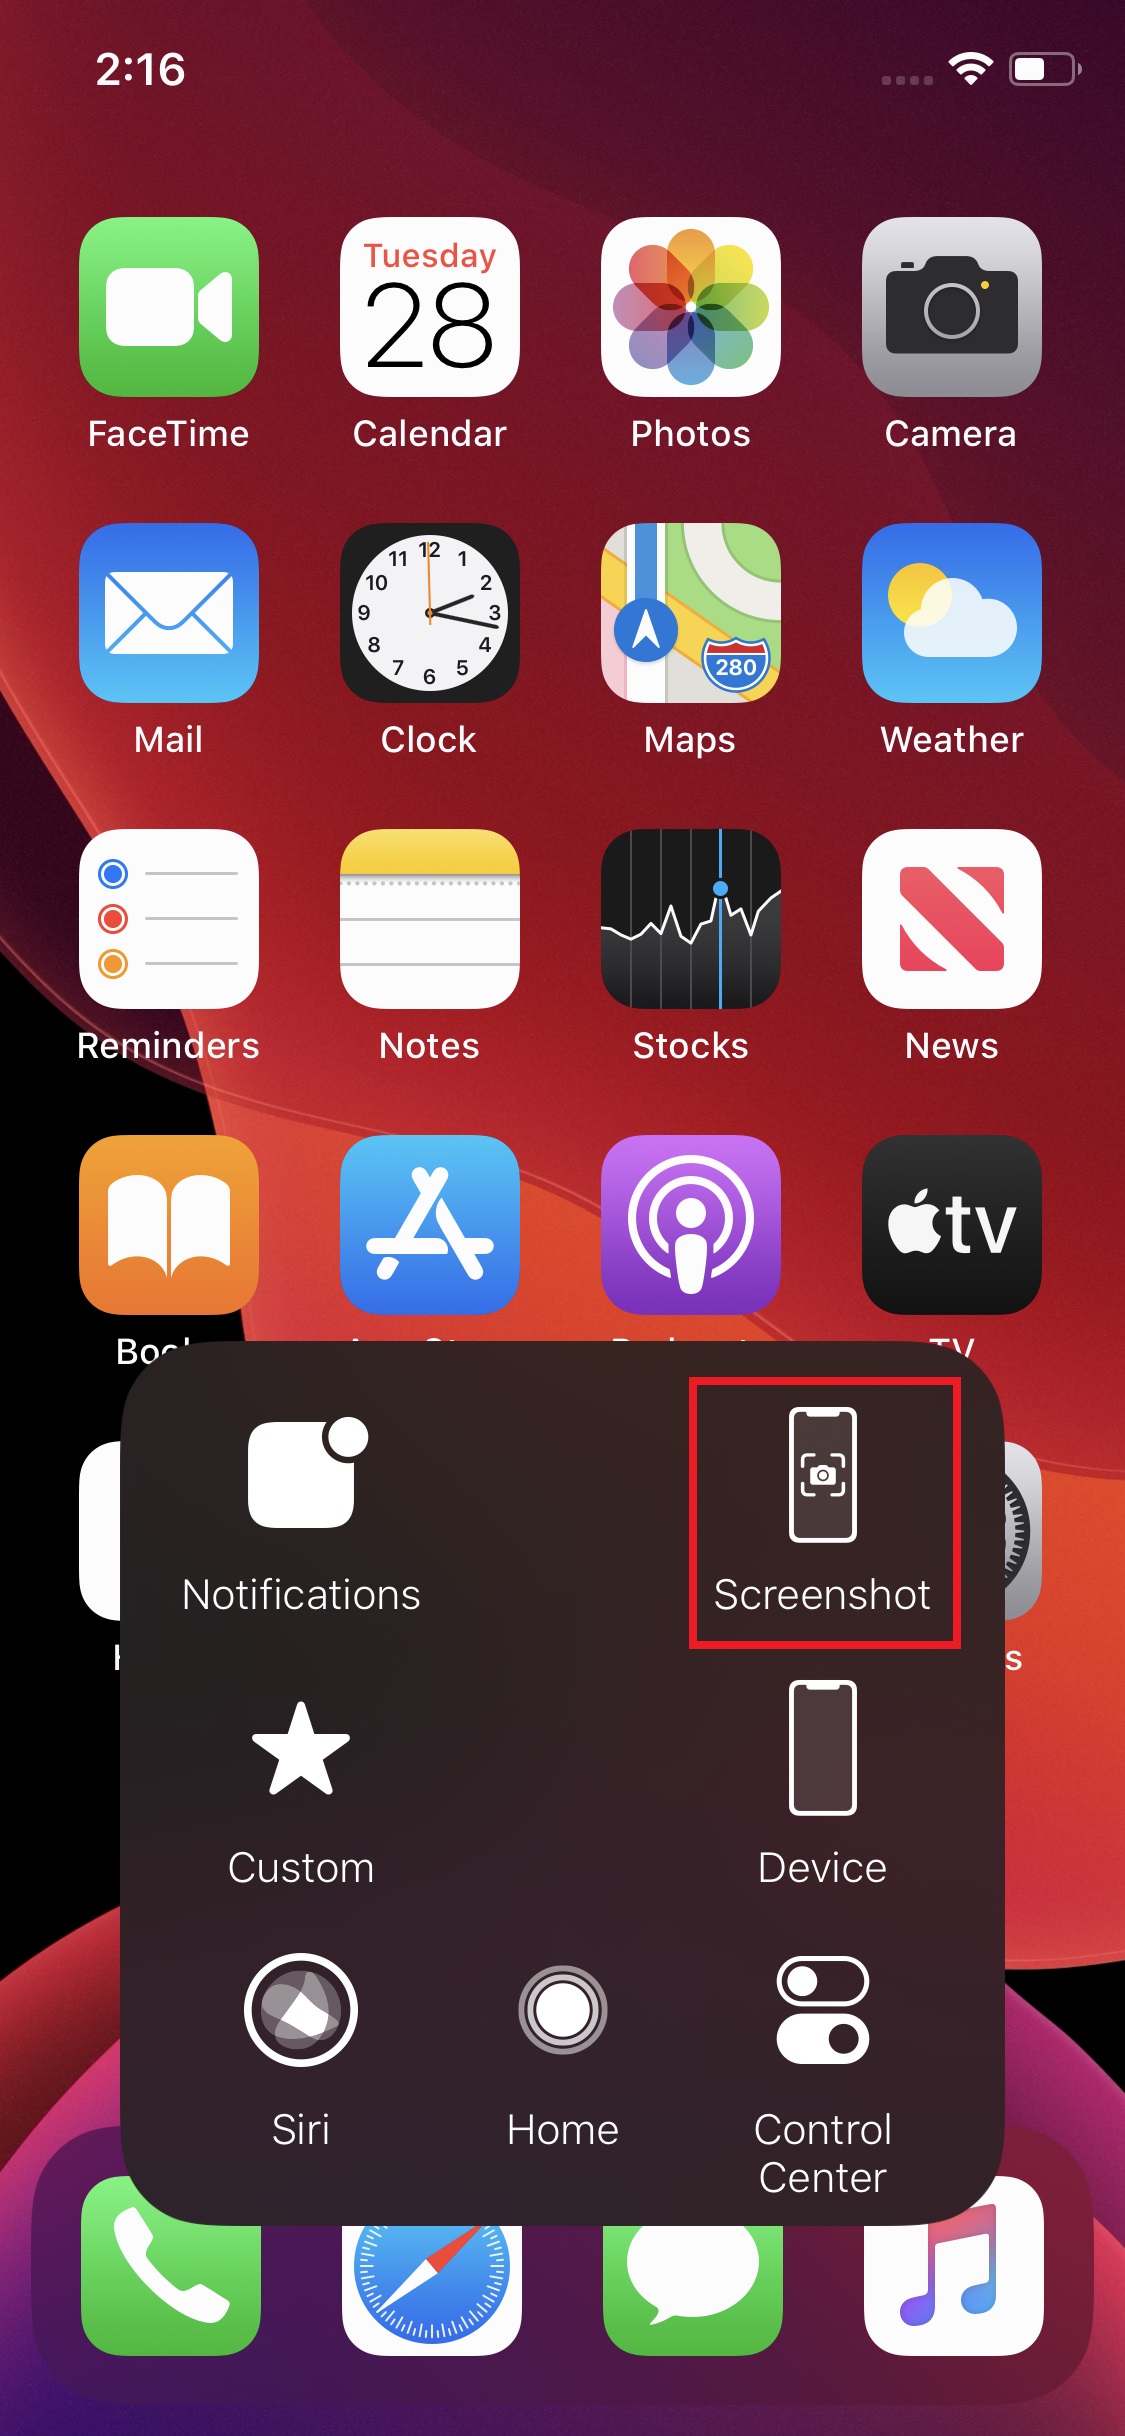
Step 3: Capture the screenshot — To take a screenshot, go to the desired page and access your Top Level Menu by tapping on the AssistiveTouch button or by using the assigned custom action to screenshot. Like the side-button method, your screen should flash briefly and the captured image will appear as a thumbnail on the bottom corner.
Step 4: View, edit, and share the screenshots — Viewing and editing screenshots remain the same using the AssistiveTouch method. You can tap on the thumbnail to pull up the editor tool and tweak the image from there. To share, tap on the icon at the upper right corner. If you dismissed the thumbnail — either by swiping it away or letting it vanish — the screenshot will automatically store itself in your photo gallery.
Looking for ways to get the most out of your iPhone XR? To master your new device, check out our iPhone XR tips and tricks. If you’re sporting the latest model, check out some tips for enhancing the experience on your iPhone 11 or 11 Pro.


