When it comes to getting devices online, Wi-Fi is the gold standard. Millions of people use their laptops, TVs, gaming consoles, and smartphones with the wireless technology – and routers are the magical devices that make this possible. Setting a password on your Wi-Fi router is crucial to keeping it safe and secure, as an unprotected router can easily be targeted by hackers or bogged down by neighbors who take advantage of the free access.
Because of this, it’s important to change the default password for your router. A good Wi-Fi password consists of a long alphanumeric string that can’t be easily guessed. Changing your router’s Wi-Fi password is a pretty easy process, though it might be a bit confusing if you’re new to the concept.
With that in mind, here’s how to change your router’s Wi-Fi password from start to finish, including how to sign in to your router app, update your password, and manage settings for products that don’t have an accompanying application.
Step 1: Find and sign in to your router app

Routers today typically offer management options through an app that can be used to control settings and change your Wi-Fi password. Make sure you have the correct router app downloaded on your device, and sign in to it using your administrative password if necessary.
Router apps will naturally differ when it comes to user interfaces, so your individual steps may vary slightly from what we will go over here. In this case, we are using Netgear’s Nighthawk app as an example of what to do. If you are using a different app, look for similar language and options and it should be clear what to do.
Step 2: Select Wi-Fi Settings
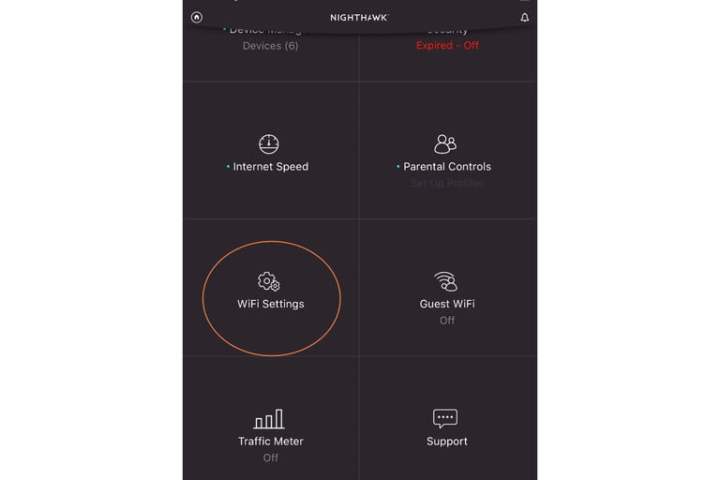
After you have signed in, the app will detect your router and connected devices, which may take a minute. It will then take you to the home screen, where you will see a variety of categories. Scroll down here until you see Wi-Fi Settings. Select this.
Step 3: Choose your Wi-Fi network

Now you will choose the Wi-Fi network that you want to change. The Nighthawk app, for example, allows you to choose between different Wi-Fi bands if you want. Unless you are setting up more complex access options, you probably want to set the same password for every Wi-Fi band, so you should change each in turn if necessary. Select your standard 2.4Ghz band to begin.
Important note: If you are using Netgear’s Nighthawk app, you will see an option to enable Smart Connect, which is automation software for your Wi-Fi network. If Smart Connect is enabled, you must disable it to access your Wi-Fi bands and make changes. This process will take several minutes.
Step 4: Select your Wi-Fi password and change it
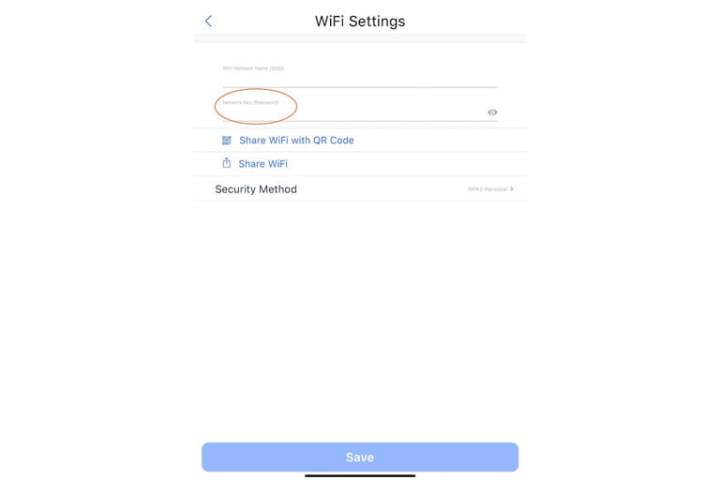
You will now see the name of this specific Wi-Fi band and its current password below. Simply select the password and type in a new one to make the change. In the Nighthawk app, you’ll notice a small eye-shaped icon to the right, something most apps should offer. Selecting this will allow you to see the characters of your Wi-Fi password, which is very useful when you are typing a new one.
When finished, select Save to complete the change. Now that you have a new Wi-Fi password, you’ll want to do two important things: First, make a note of it in your password manager or a similar safe space. Second, make sure you update all your smart devices, smart TVs, mobile devices, game consoles, and anything else on your Wi-Fi network with the new password.
Don’t have a router app?

Older routers may not support access to an app for quick management. In this case, you can log into your router settings webpage to make changes. You can usually find this page by inputting the default local IP address for the router, which may be printed on the router — although we have a guide to help you find it no matter what. You will also need to log in with your administrative password to change settings.
Once logged in, look for options like Wireless Settings or Wireless Security. Here you will find options to adjust your encryption (WPA3 or WPA2 are recommended here) and change your password. Type in the new password and save your changes to make it go into effect.
Setting up your Wi-Fi for the first time?
Your default wireless password should also be printed on the back of the router for easy access. If you are using an app to set up, you may not need to worry about logging in at all, just recognizing the default name of your Wi-Fi network so the app can connect to it during setup, which will prompt you to change both the Wi-Fi name and the password to something personalized.