Microsoft’s restore point feature is a great safety net if something goes wrong with your PC. It allows you to revert your system back to a previous state, immediately providing a solution to any trouble you may be experiencing on your Windows device.
Creating system restore points in Windows 10 is a utility that should not be used sparingly. Having one to refer back to when it’s required will save you a ton of headaches in the future.
Let’s take a look at how to create a system restore point in Windows 10.
Using Windows 10’s System Protection
While there is a way to enable automatic system restore points, it's a good idea to create a manual one on a semi-regular basis for good measure.
Step 1: Within Settings, select System and then About. In the Related settings section, hit the System info option. Finally, select System protection.

Step 2: Before you can create a system restore point, you may want to configure the settings associated with it. But more on that after. Below the Configure button, select the Create button.
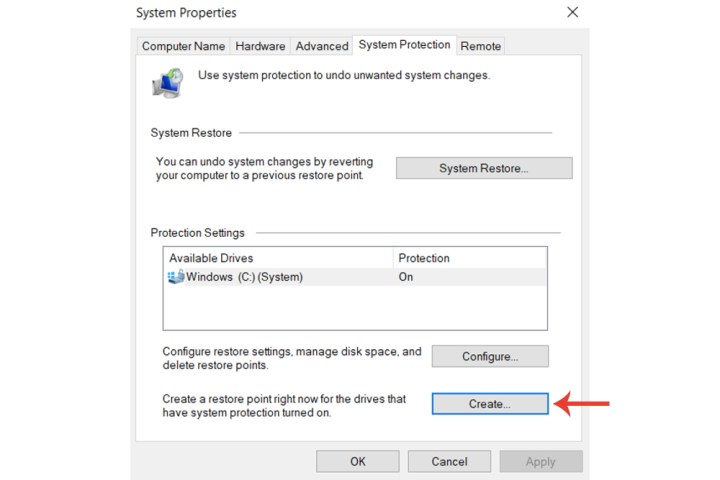
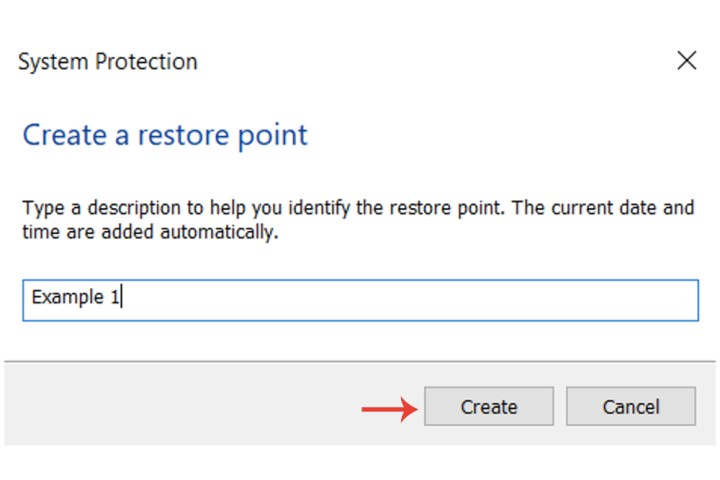
Step 3: Enter a description that will describe the restore point. It won’t need a date and time, as those aspects are attached automatically.
Step 4: Select the Create button.
Configure system restore settings
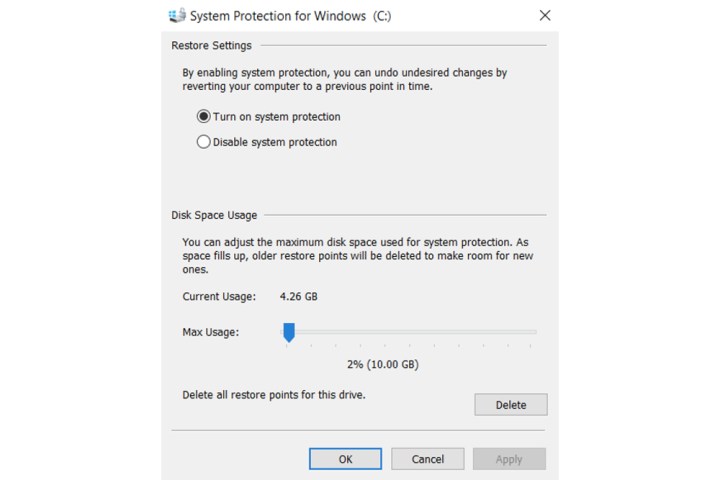
Step 1: Select the Configure button. Here, if the Turn on system protection button is enabled, then you should already have several restore points saved by Windows automatically.

Step 2: Within the Disk space usage section, you can set the maximum amount of disk space used by a system restore point. Current usage shows you how much space is already taken from existing restore points, while the Delete button will remove all those points for the chosen drive (usually the C drive).
Use a system restore point
Now that you’ve created a system restore point, let's take a look at using it.
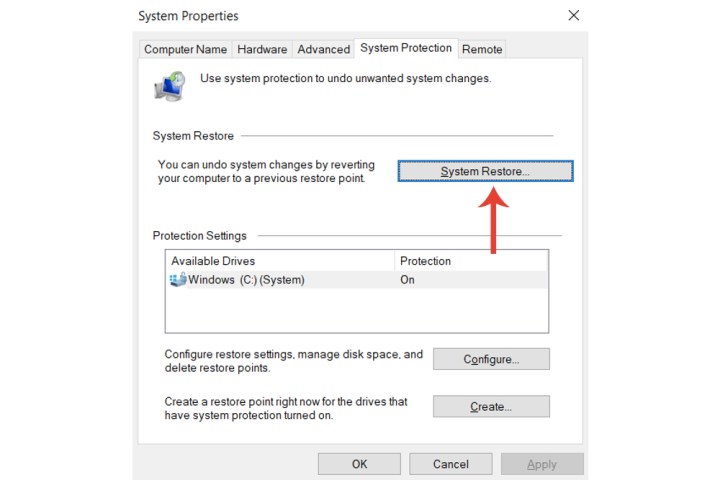
Step 1: Select the System restore button from the System properties window.
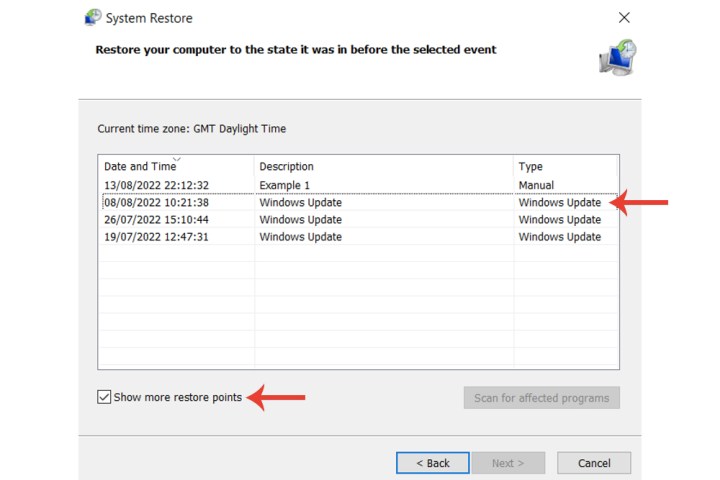
Step 2: The restore point you created from the previous section should now show up alongside the description you entered, the time, and the date.
Furthermore, within the System restore menu, select the Show more restore points option to see the ones saved automatically. You can also scan them for affected programs.
Step 3: After selecting that restore point and the Next button, select the Finish button to complete the process.

If you don’t have any available system restore points to choose from, then it may be time to perform a reinstall. We have a full guide on how to reinstall Windows 10.