Back at the release of iOS 10, Apple completely revamped iMessage, transforming the platform from a simple SMS replacement to a feature-packed messaging experience. Now we’re into iOS 14.1, and we love how iMessages has matured over the last few years. But do you know how to access all the cool features?
We bet not — for example, did you know you can now pin up to nine conversations at the top of the screen by swiping left to right on the conversation, complete with amusing animations when you get a text? How about all-new threaded replies, mentions, and muting in group conversations so you can communicate effectively without getting overwhelmed by messages, plus new custom group names and images? If you think Mac users got left out of this update, think again; in addition to every feature mentioned above through an app designed around Catalyst, iMac 14.1 also provides PC owners with Memoji and other message effects.
Although Apple typically makes its software rather easy to use, iMessage isn’t your typical SMS platform. You can now add stickers and special effects, share GIFs, send money, share music, play games, send sketches, and more. It even has a dedicated space in the App Store just for building your iMessage arsenal.
Whether you’re an iOS newbie or a seasoned veteran, here’s how to get the most from iMessage.
Getting started with iMessage
Does it work on my phone?

To use the new iMessage platform, you need to have iOS 10 at the very least installed on your default texting device. To get the full experience, both you and the recipient need iMessage. However, your Android friends aren’t completely locked out of the fun.
To use iMessage as your default texting platform, you must have a device with a SIM card. Typically that’s an iPhone, but you could use an iPad with a dedicated mobile number and texting service. Everything else connected to your iMessage account — a MacBook, iPod Touch, Apple Watch, etc. — works through that base mobile number.
That’s what makes Apple’s iMessage platform so great: You can text from any synchronized iOS, iPadOS, and MacOS device while keeping your iPhone in your pocket. There are a few settings to enable on each device to make this happen, however.
Enabling iMessage on iOS and iPadOS devices
Ensure iMessage is activated by following these instructions:
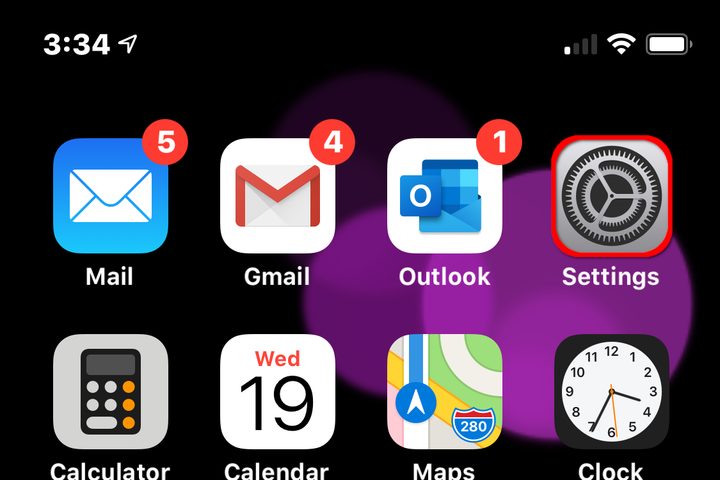
Step 1: Tap the gear icon on your home screen to open the Settings app.
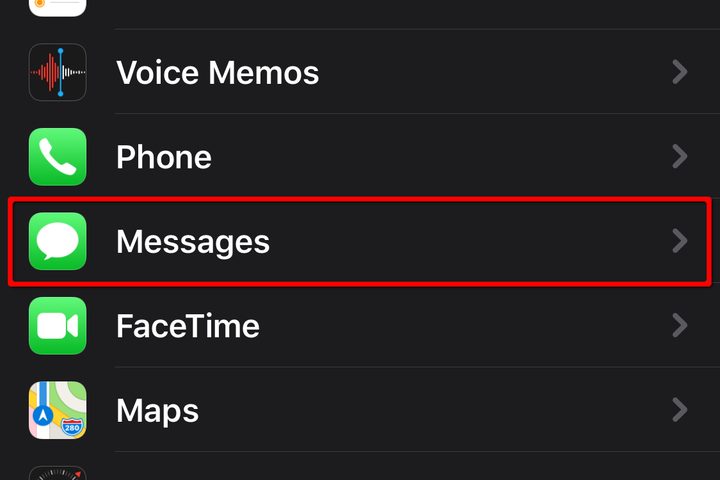
Step 2: With the Settings app now open, scroll down and tap the Messages option.
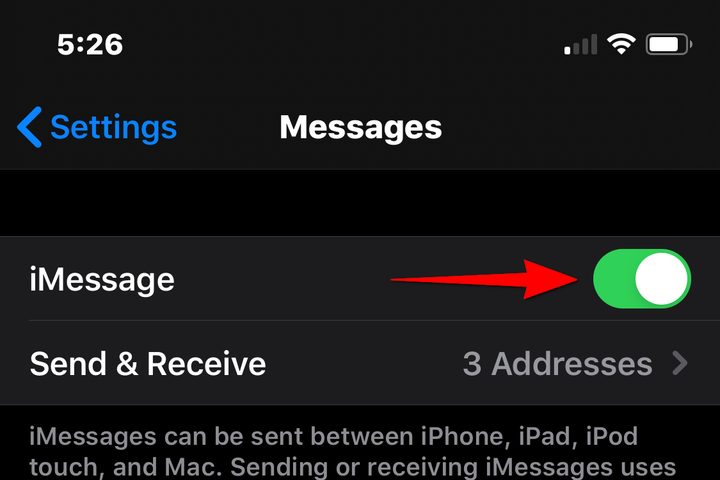
Step 3: On iOS, the iMessage option appears at the top of the following screen. For iPadOS, it headlines the panel on the right. In both cases, tap the setting to switch the toggle on (green) if it’s not already.
Step 4: Wait for the activation.
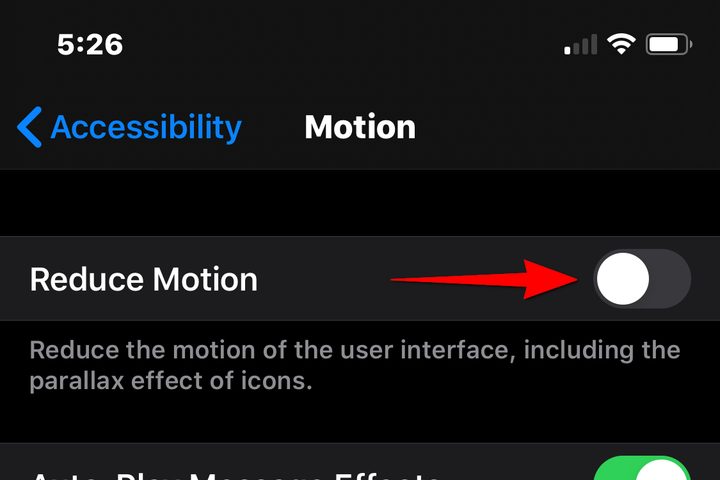
One other important thing to note is that animations won’t work if you have Reduce Motion turned on. Go to Settings > Accessibility > Motion to turn the feature off if they’re not working.
Enabling iMessage on On your MacOS device
Ensure iMessage is activated by following these instructions:
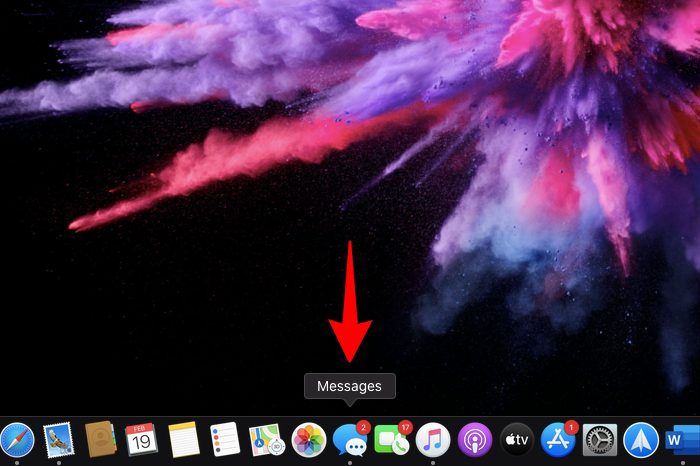
Step 1: Click the Messages app located on the Dock.
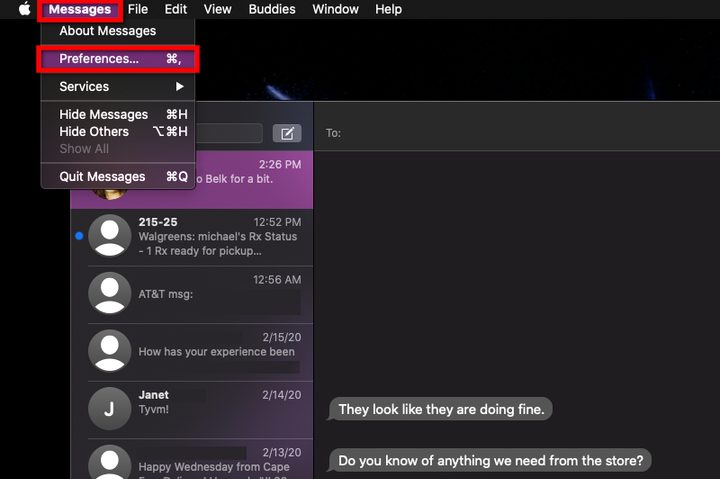
Step 2: With the Messages app now open, click Messages located in the top left corner.
Step 3: Click the Preferences option in the drop-down menu.
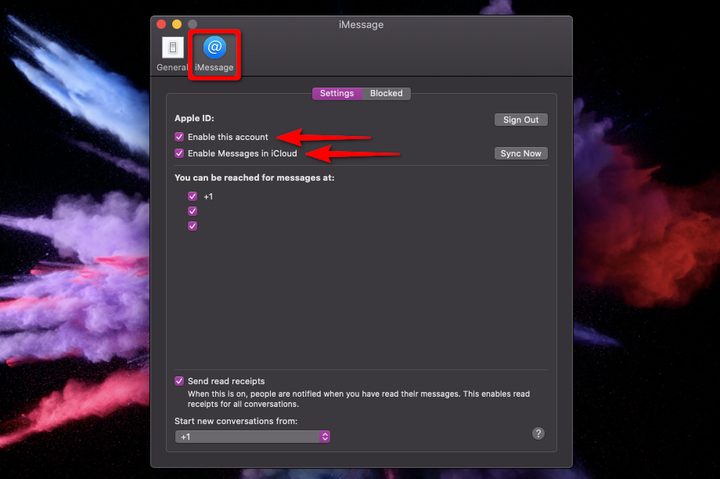
Step 4: In the following pop-up window, click the iMessage tab if it’s not active by default.
Step 5: Check the boxes next to Enable This Account and Enable Messages in iCloud.
Now that you have activated iMessage on all three platforms, you can move to our guide’s next section.
How to use iMessage on your iPhone
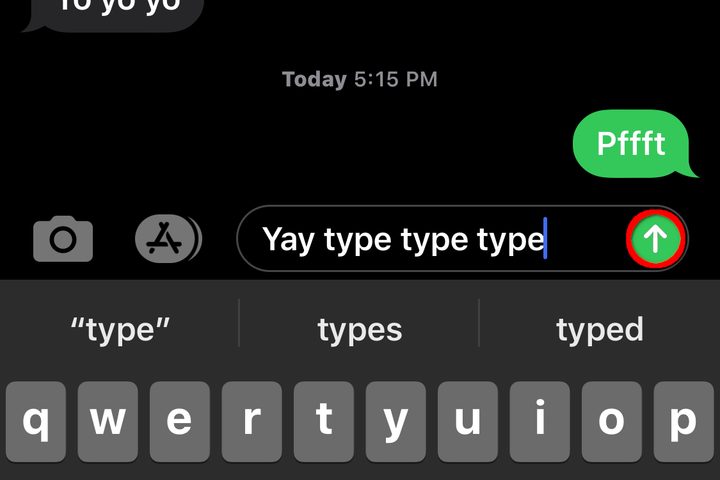
Sending and receiving iMessages is no different than sending and receiving an SMS message, and it’s all done through the default Messages app. To send a message, enter what you want to say into the text field and tap the green arrow to send. That’s it! If the keyboard ever disappears, tap the text field and it reappears.
When you send a message to a recipient using an Apple device, your chat balloons are blue. If you’re texting someone with an Android or some other non-Apple device, your chat balloons are green.
You can use audio too, but the instructions depend on the iOS version running on your phone. You may see a microphone (or small vertical audio bars) within the text field to send voice messages rather than text. The microphone icon planted next to the virtual spacebar allows you to dictate your message and send it as text. On iOS 13, that dictate button moved to the bottom right of your screen under the keyboard.
Note that you will not see the audio message button when sending texts to Android-based or other devices — audio messages are only for Apple devices. You can still use dictation to send a text message, however.
You can do more than send mere words and sentences too. Apple’s iMessage platform offers a plethora of features like adding effects, GIFs, static images, reactions, Animoji, and more. Read on to discover how you can spice up your messages whether the recipient is on an iPhone or Android device.
Text effects
If you want to add effects to your message, perform a Force Touch gesture on the green arrow before sending your message. Do this by firmly pressing down on the green arrow to bring up the Send With Effect menu. You’ll then see two categories: Bubble and Screen.
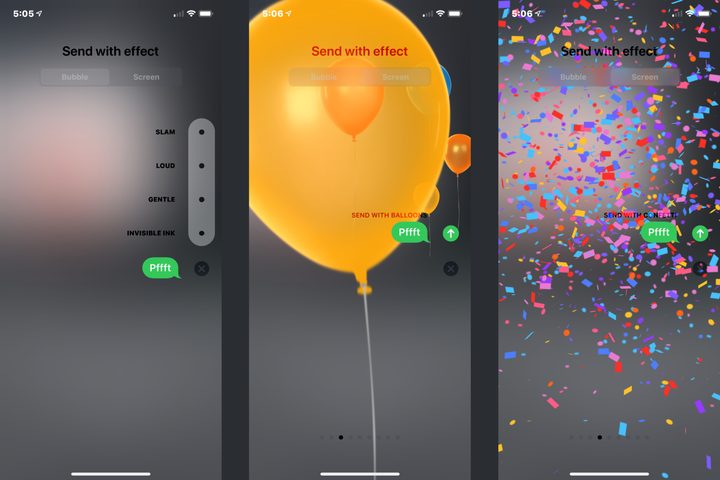
The Bubble effects appear by default. Slam, Loud, Gentle, and Invisible Ink all see your words accompanied by the corresponding effect, which gives them more impact and allows you to convey an emotion. Just tap which one you want to apply the effect and send your message.
Tap the Screen tab and you have access to more dramatic, fully-animated effects than mere bubbles. These include Echo, Spotlight, Balloons, Confetti, Love (a big reflective heart), Lasers, Fireworks, Shooting Star, and Celebration. If none of these are suitable, tap “X” to return to the standard message view.
If the recipient uses iMessage, then your effects appear within the opened message automatically. If the recipient uses a non-Apple device (Android, etc.), the effect won’t appear. Instead, the message will say “sent with Fireworks” or something similar along with the intended text.
Reactions
Rather than add an emoji once a message arrives, why not add your reaction to the message itself?
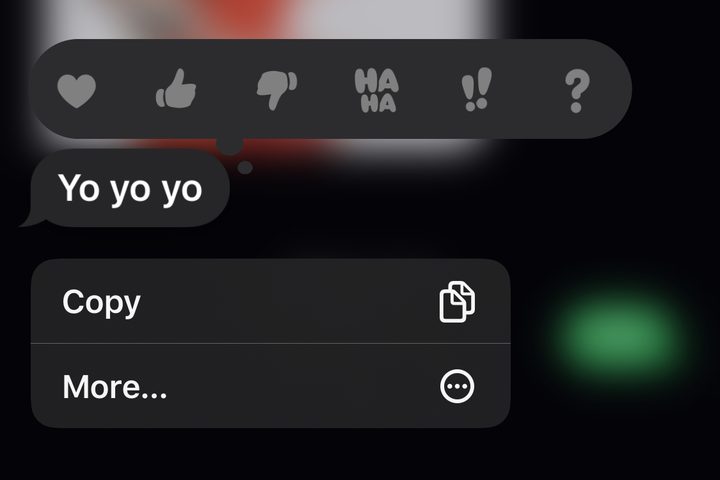
For instance, you agree with a message and you want to give it the thumbs up. Long-press the message and the screen blurs save for the message balloon and a toolbar. Here you’ll see icons for love, thumbs up, thumbs down, and so on. Tap the appropriate reaction to affix it to the message balloon.
Handy iMessage tips
Stickers, emoji, and apps
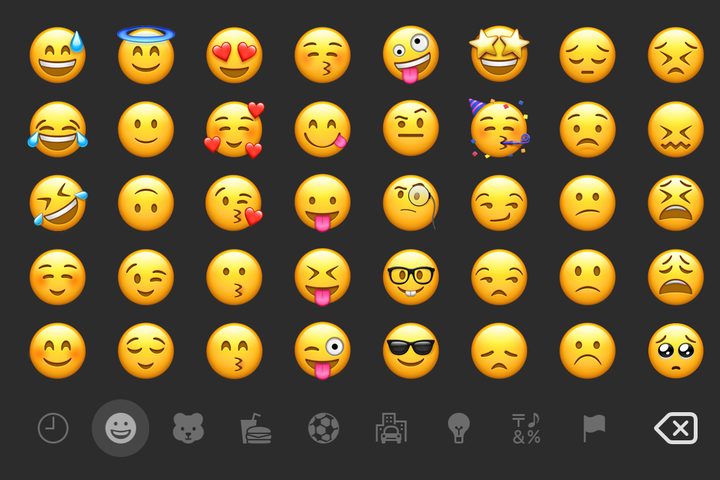
All the usual emoji are available in iMessage through your keyboard of choice, whether it’s Apple’s proprietary offering or an alternative. However, iMessage offers a wealth of additional stickers and emoji, all of which are available through a dedicated portal on the App Store.
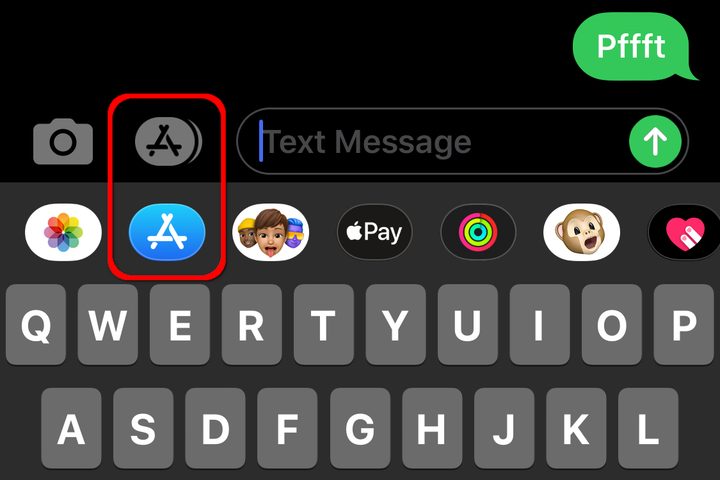
Your message includes an app drawer (or bar) that resides above the keyboard. By default, it includes Store, Photos, Music, Digital Touch, #images, Apply Pay, Animoji, and Memoji. It also includes icons for all compatible apps already installed on your device. If you don’t see this drawer (bar), tap the gray Store icon parked next to the text entry field and it appears. Next, tap the blue Store icon on the app drawer.
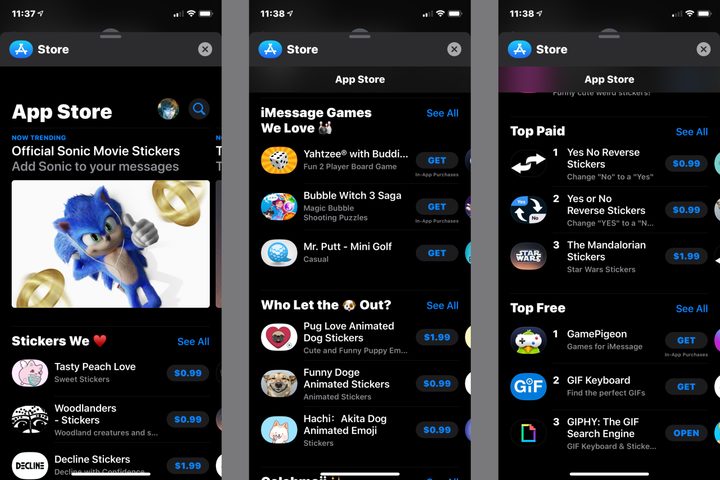
The App Store slides up and mostly fills your screen. Here you’ll find free and paid stickers, games, emoji, and more to spice up your messages. Just select and install your iMessage app of choice the same way you would any other app from the App Store. If you don’t know where to start, check out our list of the best iMessage apps, games, and stickers.
You can manage these apps at any time by following these instructions:
Step 1: Scroll left on the app drawer and tap the three-dot More icon located on the far right.

Step 2: A list of your compatible apps appears. Tap Edit located in the upper right corner.
Step 3: Tap the app’s toggle located to the right to turn it on (green) or off (gray) within iMessages. Tap the green “+” icon to add it to your favorites, or the red “-” icon to remove it from your favorites.

Step 4: Tap the Done button located in the top right corner when complete.
Step 5: Tap another Done button located in the top left corner of your app list.
GIFs and pictures
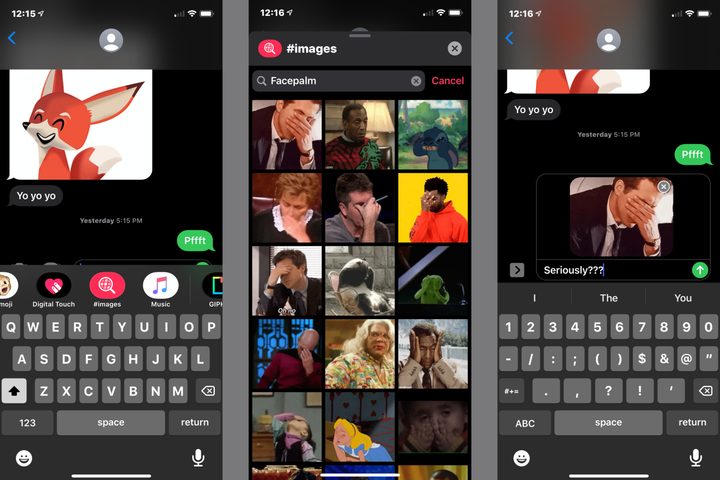
In addition to the emoji and stickers, you can also add images and GIFs to your iMessage conversation. Just tap the Store icon next to the text field if the app drawer isn’t already open. Scroll left on the bar and tap the #images icon and enter the subject in the resulting search field. Tap the image you want, and it’s inserted into the text entry field. Enter a text message if you want and then tap the green arrow to send.
Alternatively, if you installed Giphy, it has an extension for iMessage. Provided the extension is activated under the management section, select that instead of #images on the main screen to see a host of other choices.
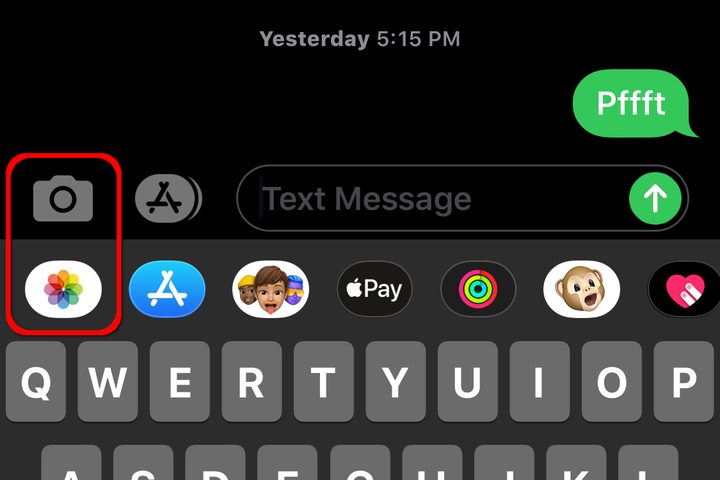
Sharing your pictures, either live or from your Camera Roll, is easy too. From the main message screen, tap the gray camera icon to the left of the text entry field to send a live snapshot using the phone’s cameras. Tap the Photos app on the app drawer to send a picture stored in your Camera Roll.
Play Apple Music
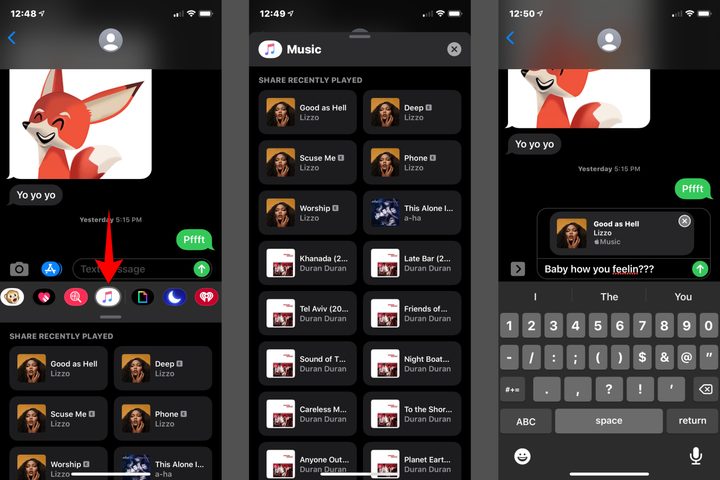
This one is primarily for Apple Music subscribers. In the app drawer, the Music option lets you share recently-played songs with someone else. If you don’t subscribe to Apple Music, however, you can only hear a preview of the song in question.
As shown above, tap on a recently-played song and it automatically loads into the text message field. Add a custom message if you want and tap the green arrow button to send. Easy peasy.
Digital Touch
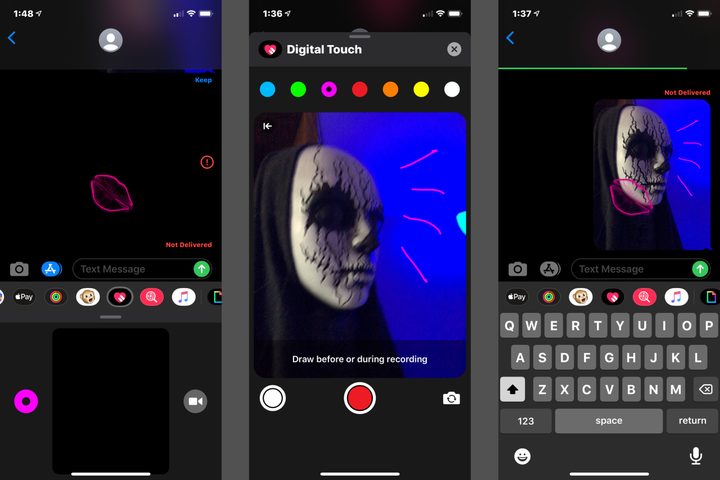
Access Digital Touch by scrolling left on the app drawer and tapping the heart icon. This presents a small black box in the bottom half of the screen, complemented by a circular color option on one side and a camera icon on the other. Here you can doodle with a finger using seven different colors, send cool effects, or use the front-facing camera to capture video or a picture.
Here are seven ways to send a sketch or effect:
- Broken Heart – Touch and drag two fingers down the screen
- Fireball – Touch and hold the screen with one finger
- Heartbeat – Touch and hold the screen with two fingers
- Kiss – Tap the screen with two fingers
- Sketch – Draw with a finger using a choice of seven colors
- Tap – Tap a finger to send a cool ring effect
To send a picture or video, complete with sketches, tap the camera icon to the black box (sketchpad). A live feed from your front-facing camera appears on the screen along with color swatches lined along the top. Along the bottom, you’ll see buttons to take a picture (white), capture video (red), and a camera icon for switching to the rear-facing camera.
Videos last for 10 seconds. While you shoot, you can draw and add effects until your 10-second duration ends. When you’re done, tap the blue arrow icon to add the clip to your message. Adding sketches and effects to pictures captured with the camera work the same way.
Finally, sketching within Digital Touch’s little black box is — challenging. For a wider workspace, locate the little line between the app drawer bar and the sketchpad. Hold your finger on that line and swipe up to enter full-screen mode. This makes creating your masterpiece so much easier.
Animoji
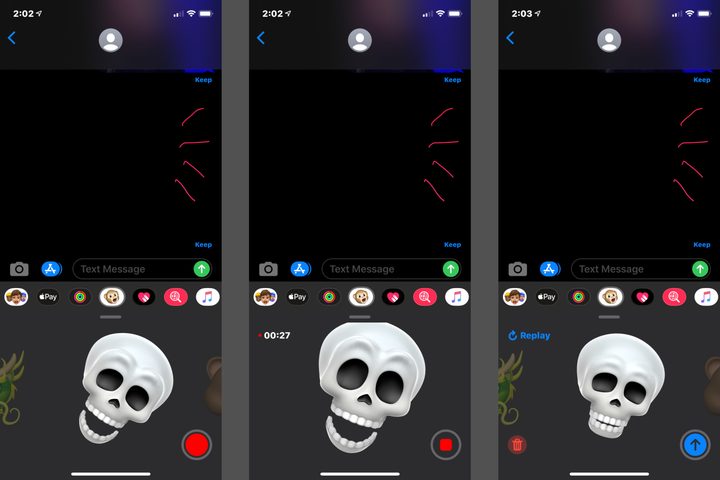
For this effect, you’ll need a device that supports Face ID. Animoji requires a TrueDepth camera to capture your face data so it can properly animate the face of a monkey, robot, skull, alien, poop, and loads more.
Scroll left on the app drawer and tap the monkey-faced Animoji button. The lower portion of the screen provides a lineup of faces you can scroll through by swiping left or right. Select the icon you want to animate and then bring the device close to your face until the real-time animation preview begins.
If you want to record a video, press and briefly hold the big red button. You can take up to 30 seconds of audio or video recording this way. Tapping the red button a second time will stop recording. The animation will instantly play as a preview, but you can see the preview again by tapping the blue Replay link. You can change between faces if you swipe sideways during the preview.
Once you feel satisfied with your creation, tap the blue button to send it immediately. If you aren’t, you can discard it by clicking on the red trashcan icon and begin again.
A final note

Your phone is programmed to save storage space by eliminating or condensing unnecessary content automatically. You’ll notice that media files like stickers, pictures, or videos will disappear from your message history over time. You should get two options: Download and Keep. All the attached media resides in the iCloud, so you can tap Download to see what you originally sent. If you tap the Keep option on any attachment, you can save it to your phone.