
Call of Duty: Warzone launched in March 2020 and has seen more than 100 million players since then, making it one of the most successful battle royale games to date. Since launch, it has gotten multiple seasons of content, bringing its community new weapons, contracts, and things to do around the large open world of Verdansk and now, the WWII-themed Caldera. Even Godzilla and King Kong made an appearance earlier in Season 3 2022.
The most recent Call of Duty games, including Modern Warfare, Black Ops Cold War, and Vanguard, have all been integrated into Warzone, unifying the progression systems of all three games. That means all of your weapons in Modern Warfare, Cold War, and Vanguard are usable in Warzone, giving you more options at your disposal.
Once you’re in, there’s quite a bit to learn. Warzone includes the best aspects of other popular battle royale games, but with some unique twists and a Call of Duty spin on the genre. In this guide, we’ll walk you through some essential tips and tricks to ensure you hit the battlefield running and can keep up with the competition.
Recommended reading
- How to track your stats in Call of Duty: Warzone
- Fortnite vs. Warzone: Which battle royale should you play?
- The best weapons in Call of Duty: Warzone
What is Call of Duty: Warzone?
Warzone is a stand-alone Call of Duty game that borrows heavily from 2019’s Modern Warfare, along with Black Ops Cold War and Vanguard. It consists of multiple semi-open-world modes — Battle Royale, Rebirth Resurgence, and Plunder — that are all available for free, without having to buy the most recent mainline COD games. It runs on the same engine as Modern Warfare, features the same controls, and even gives you the option to use your precious loadouts from recent mainline games.
Battle Royale
Call of Duty’s take on the rapidly successful battle royale genre isn’t all that different from something like PlayerUnknown’s Battlegrounds. It’s a some-versus-many scenario, but it’s ever so slightly less realistic. Players can be brought back from the dead, and you can buy ammo and other helpful tools from Buy Stations scattered across the land, taking popular elements from Fortnite and Apex Legends. In this mode, all weapons from the three recent COD games can be used.
A new map called Caldera was added, replacing Verdansk, which was in the game since the start. It’s unclear if Verdansk will return, but odds are we haven’t seen the last of it. It’s possible Verdansk will be implemented in Warzone 2.0, a sequel due out in 2022.
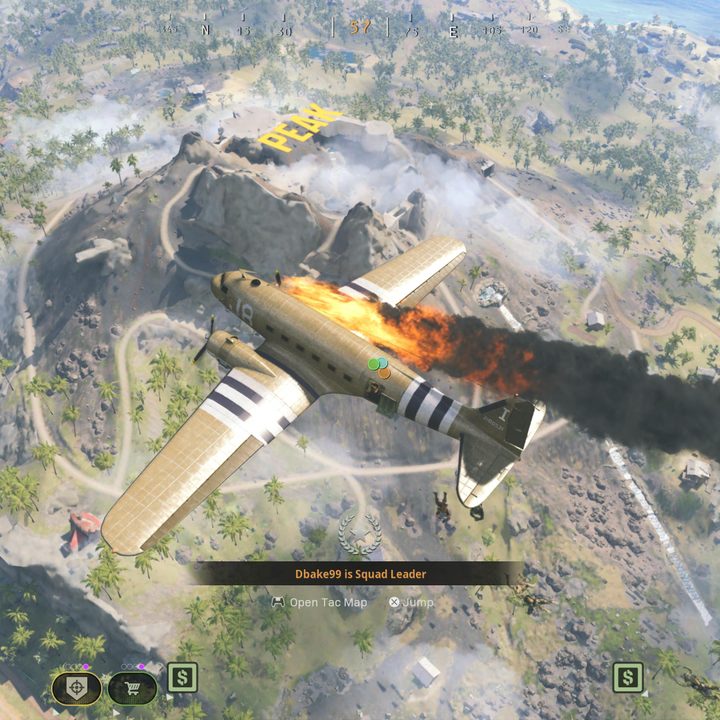
In Warzone, multiple squads of up to four players drop into a massive map stitched together with varied locales, from jungles to more urban areas. Once you and your squad mark a position on the map, it’s time to vault out of the damaged plane and do your best to parachute down and land somewhere safe. You load up on random equipment littered on the floor and get to hunting down your opponents. As the match goes on, a deadly gas closes in on you, pushing players together until there’s only one team left. Where the gas ends up is random each match, which definitely gives it some flavor even if you’ve played numerous times before. The aim is simple: Be the last squad — or person — standing.
Vanguard Royale
As part of the 2021 Vanguard integration, a new spin on the Battle Royale mode was added. Vanguard Royale sent players to Caldera, but only allowed the use of Vanguard weapons, Operators, and vehicles, offering a more unified meta. At the time, developer Raven Software was still working on balancing and improving the Vanguard weapon lineup, giving much more direct feedback since that’s all players had access to.
In spring 2022, Vanguard Royale was removed — seemingly for good. Now, only Battle Royale is available, per the community’s request.
Rebirth Island Resurgence

The Resurgence mode was introduced alongside the Cold War integration in 2020. It takes place on a smaller map called Rebirth Island, though the same rules apply as Caldera. Since it’s a smaller map, the mode features fewer players, capped at 40, and is often more hectic than what you’d experience in one of the modes on Caldera. The catch with this mode — aside from the new map — is that players can respawn infinitely, as long as at least one player on the squad remains alive. There are many variations of this mode, from Solos, to Duos, Trios, and Quads, but the rules are typically the same. Be the last team (or person) standing.
Another minor but noteworthy addition is the radar system. On Rebirth Island, an entire enemy squad will show up on the radar for a total of one pulse after you eliminate one member. This gives you a general indication of a squad’s location while keeping the pacing high. Typically, players will act more aggressively on Rebirth Island since respawns are enabled.
Interestingly, Rebirth Island will be going away temporarily during Season 4, and will be replaced by Fortune’s Keep. This new map will be over twice as large and will offer the same Resurgence mode, likely with a few minor differences throughout.
Plunder
Plunder takes place on Caldera, but is often more focused on fast-paced action, rather than survival. Less tense and more casual in nature, the race is on to bank the most amount of cash before the lengthy timer runs dry. Money is earned through missions and drops, and defeated players pony up their hard-earned dough to drop back in after a defeat. Top earners are marked on the map, and the massive bank chopper gives other players the opportunity to intercept and steal cash drops. It’s a riot and a good training ground for the more deadly battle royale chase. Play this mode to get acquainted with the mechanics, weapons, and overall flow of a match.
Essential tips
Now that the basics are out of the way, it’s time to dive into the less obvious methods of being crowned the victor. There’s no sure-fire way to guarantee victory, but if you follow these tips, you should be better off. Warzone does factor in skill, but there’s a lot of luck involved, and even the best players get caught in sticky situations. Nonetheless, here are some essential tips for coming out on top in Warzone.
Familiarize yourself with the weapons
This one might sound glaringly obvious, but it’s something that needs to be said. Familiarizing yourself with the weapons in Warzone is one of the most important aspects of the whole operation. Not knowing the difference between a G-43 and a Type 100 can easily cost you a fight — and one fight is all that separates you from getting booted back to the main menu.
Currently, there are over 160 weapons in Warzone, including assault rifles, SMGs, LMGs, shotguns, snipers, and secondaries like handguns or launchers. Find which weapon best suits your style and learn how each handles and operates. Though, with an ever-expanding assortment of weapons, you’ll need to keep up with them frequently to stay ahead. Getting the drop on another player is no good if you pull the trigger expecting a barrage of bullets only to take one potshot and get blasted down. Don’t go thinking a semi-auto assault rifle is a full-auto, or that a bolt-action sniper is a semi. Trust us, it doesn’t feel good to lose a fight because you didn’t understand your weapon.
You can absolutely pick this all up as you go. After all, it’s a matter of learning from your own mistakes. But those mistakes will cost your whole squad a match, so do them a preemptive favor and spend a bit of time learning how each gun operates before a match. You can read menu descriptions, play each respective game’s multiplayer modes, or watch YouTube videos.
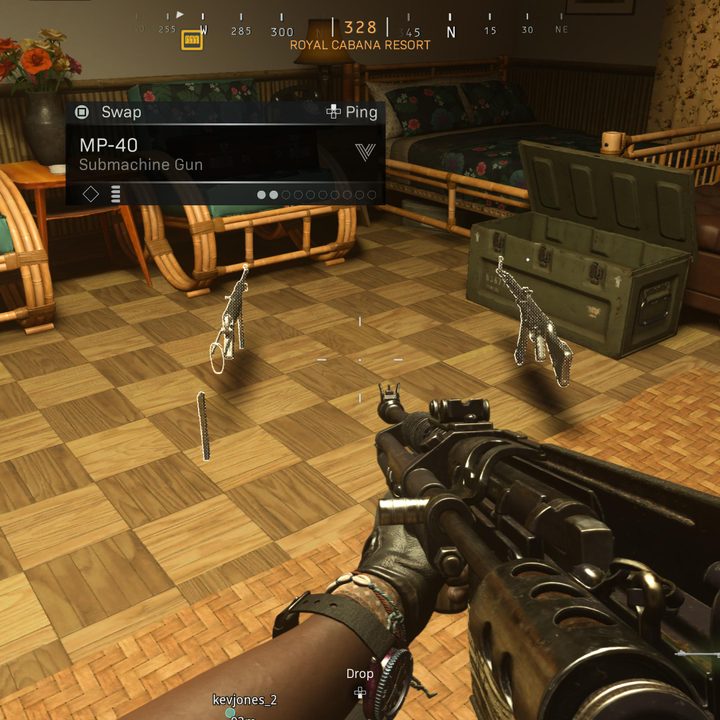
Which are the best Warzone guns, you ask? It’s down to personal preference for the most part, but some do stand out. Ideally, you’ll want to be equipped with a weapon for mid to long range, and one for close quarters. This way, most of your bases are covered. Assault rifles like the NZ-41 (VG) are excellent for longer-range battles, along with the likes of the STG44, while SMGs such as the MP-40 are best suited for close range. For a current list of best weapons, check out our dedicated meta breakdown for season 3. Keep in mind, developer Raven Software constantly updates and rebalances weapons, so the list changes frequently.
Get those loadouts sorted

Warzone doesn’t start everyone off on the same foot. All Warzone modes allow players to bring their typical multiplayer loadouts from Modern Warfare, Black Ops Cold War, and now Vanguard into the fray. In Battle Royale, and Rebirth Resurgence, you can pick one of these up by coming across a Loadout Drop, while in Plunder, you start with your preferred loadout each and every time you drop in.
So what’s the big deal? Well, the guns, perks, and attachments from your Loadout are locked behind level gates. You don’t have access to everything right off the bat. But those of us who’ve been grinding away since Modern Warfare launched in 2019 have some fancy weapons and powerful attachments. Are newcomers at a disadvantage? Sort of. These weapons are still “Player” ranked as opposed to the rare, epic, or legendary equipment anyone can pull out of a cache in the field, but starting out with a scope or optical sight is better than staring down iron.
We highly recommend you come packing with silenced weapons, Heartbeat Sensors, and perks to keep the enemy from spotting you. Perks like Ghost and Cold-Blooded are great depending on your playstyle. In addition, having some sort of weapon that includes large magazine sizes (like a 60-round assault rifle or light machine gun) will ensure you don’t run out of ammo as often. Though, it also pays to have a sniper on hand to pull off those long-range shots. For the most part, there are no “bad” weapons, but you should choose ones you’re experienced with — and the more versatile, the better.
We go into greater detail about the best loadouts here, but suffice it to say you will do better with a loadout that is great in all situations — not just one. Keep in mind, much of the floor loot is actually highly effective, meaning you can bring one weapon type — such as long-range or short-range — and then pick up the opposite from the ground, which will give you a versatile loadout.
Check your sound settings
Since the days of the original Modern Warfare in 2007, the idea of using sounds to our advantage has been a big selling point for companies trying to peddle “gaming” headphones onto people who don’t know any better. Of course, using aural cues to track just about anything is a very real and basic practice that has been a thing in gaming far longer than the previous console generation. Still, it’s a massive part of the game, and one you can tweak in the sound settings.
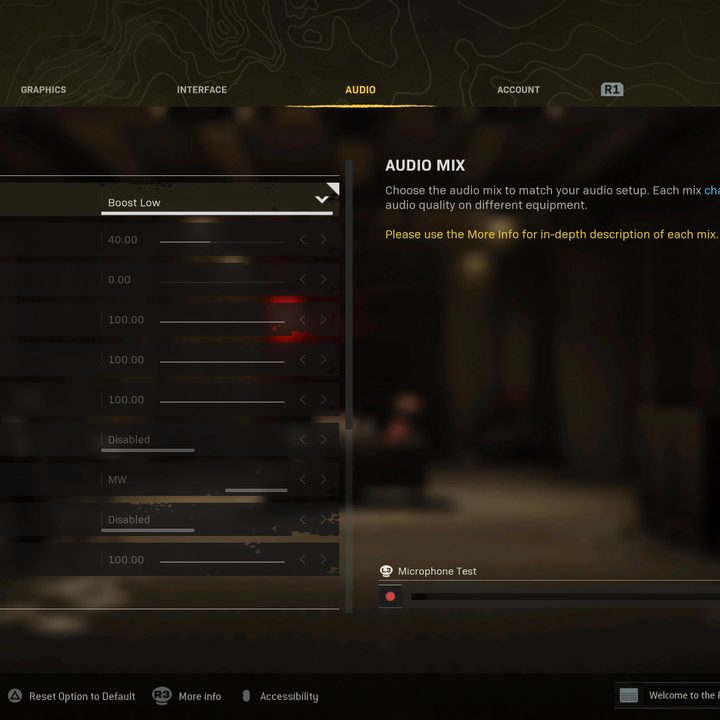
Sitting right at the top of the sound settings menu is a drop-down box. Here, you can quickly switch between sound mix presets to fine-tune the game’s audio to your own listening preference and equipment. Expand the option and you’ll see a more detailed look at the frequencies you’re working with.
If you’re using something like the Home Theater option on your $20 cans, you’re probably botching your ability to pinpoint precious enemy movements. Listen to the music change as you flick between settings, and find the one that has a good mix of highs and lows. You want clear highs to hear bullets fly by your head and lows to hear footsteps and engine roars. On our end, we actually turned the game’s music off completely, because it gets really distracting when trying to listen for other players.
With that in mind, general good practice is to always listen to footsteps around you. If your teammate is to your left but you hear footsteps to the right, it’s likely you aren’t alone. Always make sure to check your minimap when you hear footsteps, because it might just be a teammate. Other times, you won’t be so lucky.
And update your other settings while you’re at it
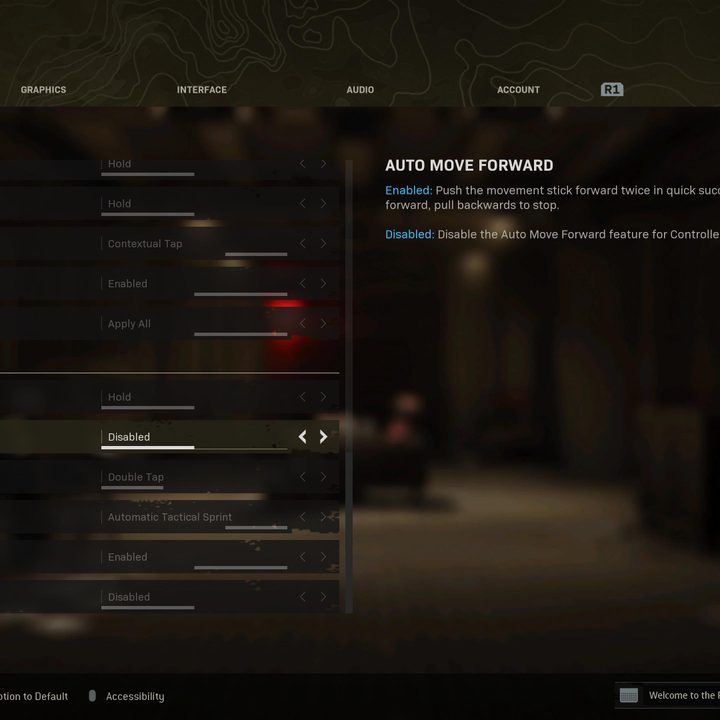
While adjusting your audio settings is important, it’s equally as crucial to ensure the rest of your settings are to your liking. You’ll want to adjust your sensitivity, the button layout, as well as Armor Plate behavior, and others.
There are a ton to mess with, but the main ones are as follows:
- BR Button Layout: Again, personal preference, but we like Tactical
- Sensitivity: Personal preference, so experiment with a setting that feels right
- Armor Plate Behavior: Apply All
- Slide Behavior: Tap
- Automatic Sprint: Automatic Tactical Sprint
- Parachute Auto-Deploy: Disabled
- Mini Map Shape: Square
There are lots of other settings you can alter, but these are the main ones you should change. For a full list of recommended Warzone settings, check out our breakdown. Remember, PC players have access to far more options than those on console.
Bring the rocket launchers
There’s a lot to cover when it comes to the weapons you’ll use in Battle Royale. After all, what are you going to do without them? This one can be a bit controversial, but it’s a tactic we’ve personally had a lot of success with — and that is to bring a rocket launcher with you.
Warzone has several different launchers to choose from — the PILA, Strela-P, JOKR, and RPG-7. Most of us are familiar with the RPG-7: It’s long and looks funny but packs a serious punch. It’s not the one we’re recommending here, though. The Battle Royale map is huge, and when you’re on the run from the enclosing circle of deadly gas, a vehicle can sometimes be your only option. The thing is, people are either very lazy or incredibly impatient. They want to get out of the field and into combat as quickly as possible.
You’ll see people driving vehicles at all times in a match, so if you’ve foregone a secondary weapon in favor of a launcher like the PILA, you can do the whole “fire and forget” job to almost always wipe out an entire team in a flat second. The payload pays off.
Take note of bullet trails
Here’s another that might sound patronizingly obvious, but it’s a minor detail that can sometimes skip the mind when there are a dozen or so other things to focus on in a match. While audio cues can alert us to nearby threats, visual cues can fill in the blanks.
Bullets travel a good distance, and they’re not small enough to be completely invisible to the naked eye. You can use the bullet trails to get a good idea of your enemy’s position. Not only that, but you can also gauge the whereabouts of their target, making it easier to third-party them.
Before you go running in, note that if you’re seeing a bullet fly from one side of your vision to the other, running right in will put you between the enemy and their enemy — who is also your enemy. That’s two enemies. Wait for a victor to emerge, and use their greed to knock them down.
Learn where to drop
Things can go wrong in a Battle Royale match almost immediately — even before you hit the ground, in fact. The announcer scans the skies, warning you of anyone about to parachute into your area. That means anyone who lands fast will absolutely grab a gun and attempt to shoot you out of the sky, and there is absolutely nothing you can do to stop it. Though, with so many players thinking the same thing, it’s not always in your best interest to drop alongside 20 other enemies, so instead, you’ll want to know how to decide where to land.
Warzone gives you manual control over your parachute. You can open it as close or far away from the ground as you want, cut it halfway, and redeploy it again as you please. Heck, you can vault off a building whenever you want, as well. It makes sense to dive toward the ground and play chicken with the terrain, opening the parachute at the very last second to cushion the blow.
One thing you can do is to glide down in third-person mode while positioning yourself to the side instead of directly head-on. For whatever reason, this keeps you in the air longer, allowing you to get farther before hitting the ground. Other times, you’ll want to skydive close to the starting point so you can land quickly.
But again, landing fast isn’t always the best option. Sometimes, you’ll want to land at a specific hub or close to a contract so you can start earning cash, loot, and XP right away. The key is to look at how the gas is forming in conjunction with the plane’s path. You might find it useful to drop straight away, while others might have a longer tail plan. Either way, landing in the right spot can set the groundwork for a possible victory.
For more on the best landing spots across Caldera and Rebirth Island, check out our dedicated guide.
Close the doors!
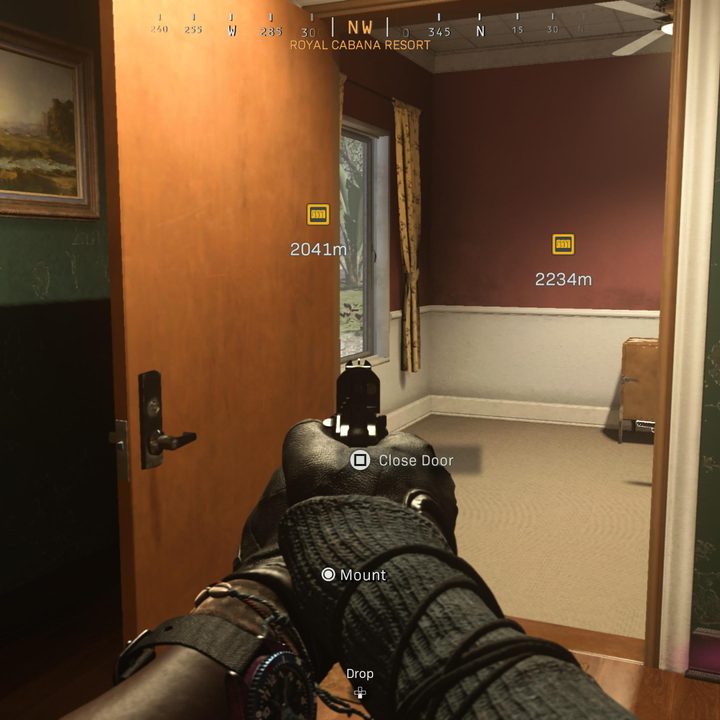
Another visual (or audio) cue is an open door. There’s a reason you can tag an open cache to scream “someone’s been through here.” They might still be around or they may be long gone, and you can use that simple mind game to your advantage.
If you don’t want to alert encroaching enemies of your rough whereabouts, close doors as you walk through them. It’ll give approaching opponents the thought that they’re the first to pass through the area, lowering their guard. Hold still, listen to them charge through the building, and blast them down as they get too close and overconfident. Or, you can slowly open a door yourself without making much noise.
Be aware that it’s not always a good plan. Open doors can provide cover in a pinch, and a shut door is a closed escape route. If you’re not all too confident yourself, it might be best to leave your doors ajar. If you know you can finish the job, however, set the trap and reel in the serotonin.
When in doubt, stop and listen
Things can get hectic very quickly in Battle Royale — particularly from an auditory point of view. You’ll hear gunfire, the announcer, explosions, and, loudest of all, your own footsteps. If you’re overwhelmed, especially toward the later portion of a match, just stop and listen. You might hear some nearby gunfire or even someone running close by. The key is to make sure you aren’t being so loud that it overpowers the sounds of other players.
That’s why we typically crouch-walk when possible, so we can pick up on the footsteps of enemies. You’d be amazed how careless other players are as they sprint, jump, and bash open doors. If you know someone is nearby, crouch and wait for them to get close so you can surprise them. Players who run around like that are likely not expecting someone to be listening in, which serves as a perfect time to strike. They won’t know what hit them.
Always be aware of the nearest piece of cover
When navigating around Rebirth Island or Caldera, it’s common for enemy players to get the jump on you, attacking without you even knowing where they are. This happens all too often, but if you always make a mental note of where your nearest piece of cover is, you’ll be in a slightly better position if you do get ambushed. Don’t run out in an open area with no cover, if possible, because you’ll likely be spotted and eliminated.
Complete contracts
There are lots of strategies and things to do while in Verdansk, but a surefire way to ensure you’re keeping up with the competition is to complete contracts. Currently, there are TK contracts to choose from:
- Bounty (crosshairs icon): This contract will pick a nearby enemy for you to take out and will reward you with cash for doing so. It doesn’t pinpoint the enemy’s exact location, but a large yellow circle will highlight their general position. Keep in mind that the bounty will be alerted when you’re nearby, so be careful when rushing in.
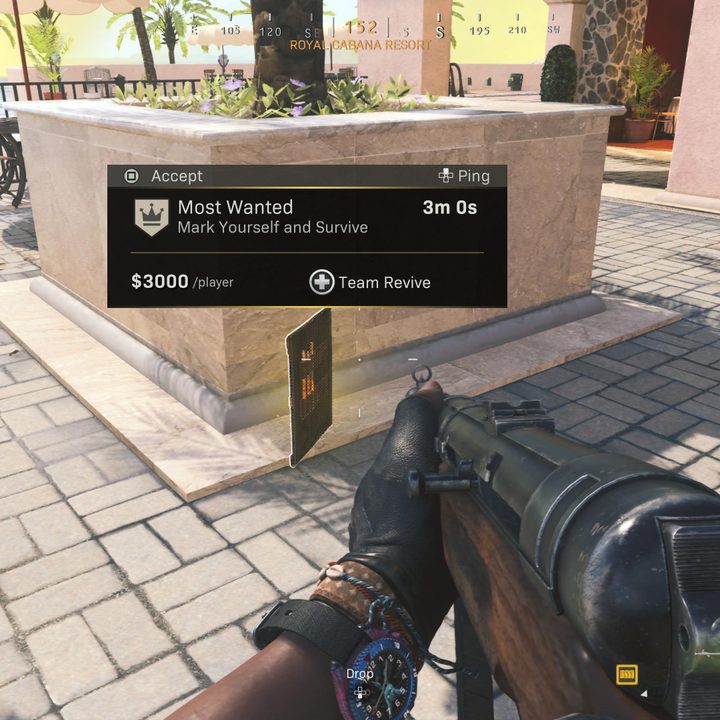
- Most Wanted (crown icon): The Most Wanted contract goes hand in hand with Bounties. Instead, this one places a bounty on your head, and everyone in the game will be notified of your general location. If you survive within the time limit, you get rewarded with cash and any of your dead teammates will be instantly revived, free of charge.
- Scavenger (magnifying glass icon): Upon initiating a Scavenger contract, you’ll have three supply boxes to open, which generally include useful loot. Nothing too complicated with this one, but we highly recommend you complete them if you need loot.
- Recon (flag icon): Recon contracts are unique in that completing them will reveal the next layer of the gas before it’s shown to the rest of the game. That makes them incredibly valuable. To complete them, you’ll need to visit a nearby location and capture a point, similar to Domination in the base multiplayer mode. You’ll also get some loot for capturing the point, though it’s usually not as good as what you’d find when finishing a Scavenger contract.
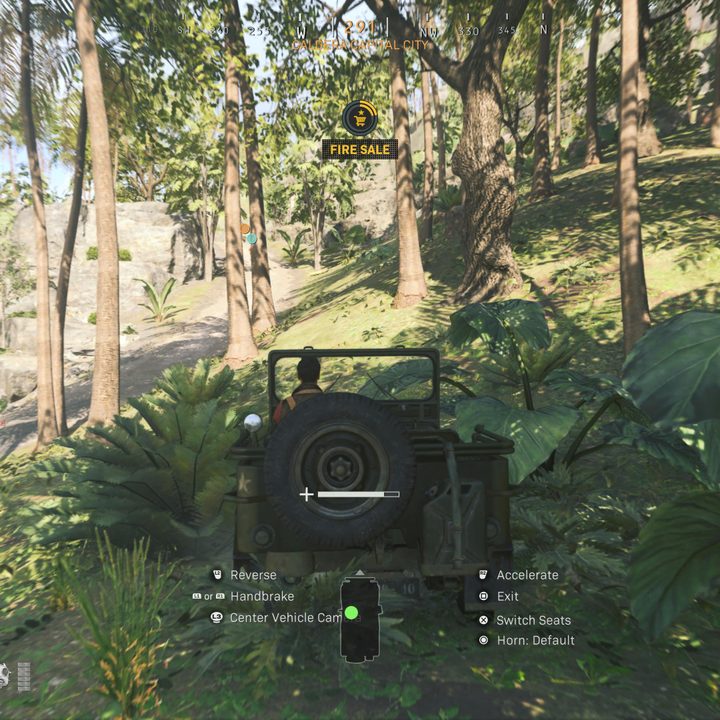
- Supply Run (stopwatch icon): You’ll want to make sure you try out the Supply Run contracts because they can come in handy, especially if you’re low on cash. What it does is give you a time limit to reach a nearby Buy Station that features hefty discounts on most items in the store. We see people ignore these for some reason, but they’re easy to do and will reward you handsomely for it.
- Big Game Bounty (fancier crown icon): This works like the regular Bounty, but it specifically targets the player with the most kills in the match. Defeating the player within the allotted time grants you a hefty amount of cash and XP.
- Supply Drop (crate icon): To complete this contract, you’ll need to open up a crate that drops from the sky at a random location. Supply Drops reward you with cash and loot, but are sometimes difficult to open depending on where they land. The other catch is that enemy players can also open the Supply Drop before you, so make sure to keep your eyes peeled.
- Sabotage (explosion icon): Sabotage is the newest contract type, requiring you to destroy a specific vehicle marked on the map in exchange fro XP and cash.
It’s highly recommended to go for contracts, because they net you useful rewards such as cash, XP, and weapon XP. And, depending on the contract you complete, they have various effects in-game such as Bounties, which reveal the location of a nearby player, or Recons, allowing you to see the next circle within the zone.
The other thing to consider is that you gain a multiplier with each contract you complete. The more contracts you finish, the higher the multiplier — so it pays to keep going for contracts throughout your session. Eventually, after your multiplier is high enough, you can get tens of thousands of dollars from just one contract.
Pay attention to the flares in the sky
This is sort of a nuanced little mechanic that you might not have noticed, but it’s important. Pay attention to the various flares in the sky. A yellow flare indicates a Recon contract is in the process of being completed, giving you the exact location of an enemy.
Likewise, a red flare signifies that an enemy team has just bought back a downed comrade, so keep your eyes peeled for these flares to get a sense of who’s around you. It works both ways — remember that when you trigger a Recon capture point or buy a teammate back, other enemies can see your flares as well.
Don’t shoot unless you’re confident you’ll secure the elimination
This is an important tip — and one that requires some restraint. In any shooter — whether it’s Call of Duty or something else — it’s tempting to shoot at anyone you see right away. In a Team Deathmatch or other fast-paced mode, this is generally okay, but in Warzone, you should never shoot unless you’re 100% certain you’ll secure the elimination. That means if you see an enemy off in the distance that is a bit out of range — even if you have a long-range sniper — you should hold your fire unless you truly think you can pull off the shot.
The reason being is that all you’ll do is alert the enemy of your position if you can’t take them out completely. In Warzone, especially toward the end of a match, your positioning is key. So you’ll want to make sure you don’t give it away. Now, as you play more and become more comfortable, you’ll be able to take those long-range shots from hundreds of meters away. But as a general rule, let far away enemies pass by so you can live to fight another day. Though, we highly advise you to at least mark them on the map by pressing up on the D-pad. This way, your teammates are aware of their position.
Learn the ins and outs of the Gulag
The Gulag has gone through major changes since Warzone launched — following the Cold War and Vanguard integrations — but its main mechanics remain the same: Take out the other enemy (or capture the flag in the middle), so you can return to the fight with your squad. The Gulag typically updates each season, often being modeled after a famous locale from a mainline COD game.
Aside from that, the main thing that seems to change periodically is the set of guns you have at your disposal. When Warzone first came out, the weapons you’d get were pretty barebones — things like handguns or knives. Now, the selection is much more varied, but you’ll want to make sure you’re at least familiar with all of them. A new change with the Vanguard integration is the ability to keep the weapons and equipment you had in the Gulag when you return back to Caldera. This means you’ll be at less of a disadvantage since you’ll have at least some equipment.
A general tip is to make good use of your equipment. You shouldn’t use it as a crutch, but your stuns, flashes, or grenades can be extremely useful when you’re in a bind. Also, try to take things slowly. No sense in rushing out to the middle where your opponent is waiting for you. With that in mind, try to use sound to your advantage. We covered that topic above, and the same rules apply here. Crouch, stay quiet, and listen for your enemy.
The other thing to consider is that you can actually regain all of your health if you touch the flag in the center of the arena. So, if you’re getting shot and can safely make it to the flag, do it and come back out swinging. This is a lesser-known feature that will likely surprise the enemy when you come back with full health.
Finally, if you’ve got a teammate spectating, make sure they give you callouts as to where the enemy is. This can come in handy and possibly give you the edge you need to take them out.
Communicate effectively with your team
If you’re playing Warzone as part of a team, you have to make sure you can communicate with them to optimize their cooperation. Being able to describe or name nearby buildings is critical because it saves time and gets your point across to others. If you take too much time to explain, that could end up costing your team a kill, so learn specific callouts to gain the advantage.
Typically, refrain from using long phrases like, “There is a person right in front of you.” Referring to “you” is bad because if you’re part of a team, it’s unclear who “you” is. Call your teammates by their names (or colors) and be concise with your directions. For example, say “in front of Blue,” so everyone knows to look to the player in trouble and jump in to help to the best of their abilities. The more you can distinguish your callouts, the better.
You might feel like you’re talking too much during the game, but it’s always better to alert your team to any potential problem you see instead of staying silent, thinking they noticed it for themselves. Constant updates of the danger’s location in question will allow your squad to engineer an escape plan to ensure a win, and it’s best to have the information before the danger becomes an imminent threat.
In addition to alerting your team to possible issues, check in to see what supplies or upgrades they might need. Since Warzone allows you to drop items, including cash, you can pool together money to buy upgrades like a UAV or a Loadout Drop. If everyone contributes a small amount of money, such as $2,500 from each player, it’s a much easier pill to swallow. A recent update actually streamlined this,
Get used to pinging important points of interest

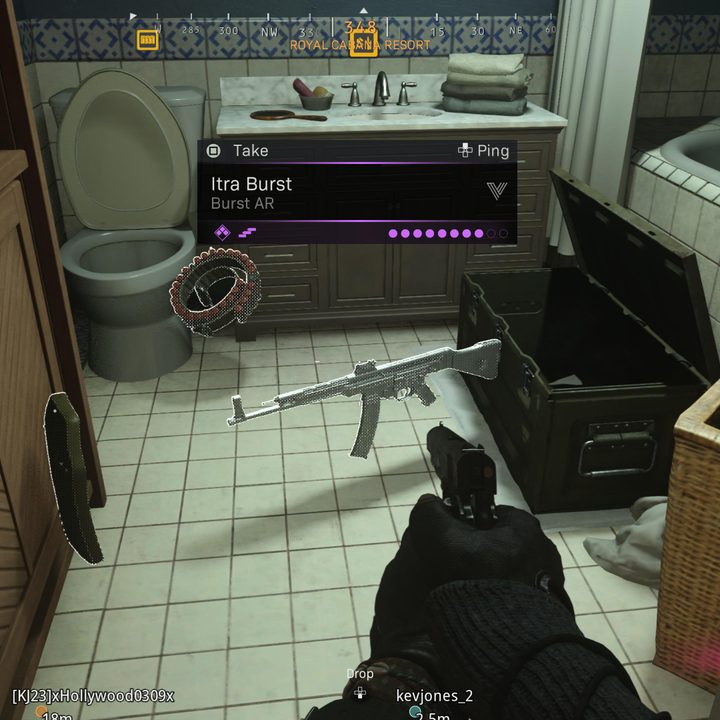
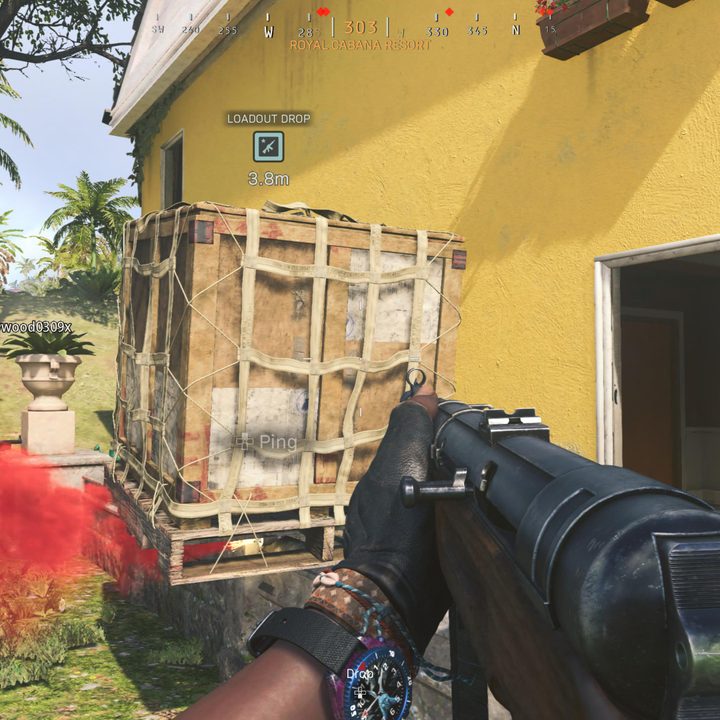
Pinging is not unique to Warzone, but that doesn’t make it any less important. You should get used to pinging — or marking — specific points of interest within each match. To do so, press up on the D-pad. Your ping color is dictated by the color of your player name in the bottom left. Use this to differentiate between pings. Throughout each match, you should ping enemy locations, specific pieces of loot, money, the next building you’d like to enter, and even where you think a special item, or opponent might be.
There are two main types of pings you’ll be using: A regular colored ping (shown in the image above), and a live ping. Regular pings are the ones that correspond to your specific color and remain in their place until you remove them. When using a regular ping, make sure your callout has a specific color if you’re playing Trios or Squads. For example, say “it’s on Blue ping,” instead of “it’s on the ping.”
Live pings are actual markers above enemy players’ heads. These are red marks and move with the enemy for a second, giving you and your team an indication of their location in real-time. Always try to utilize a live ping when possible, as it will reveal the location of an enemy player, even if just for a second. You can only use a live ping if an enemy is on-screen.
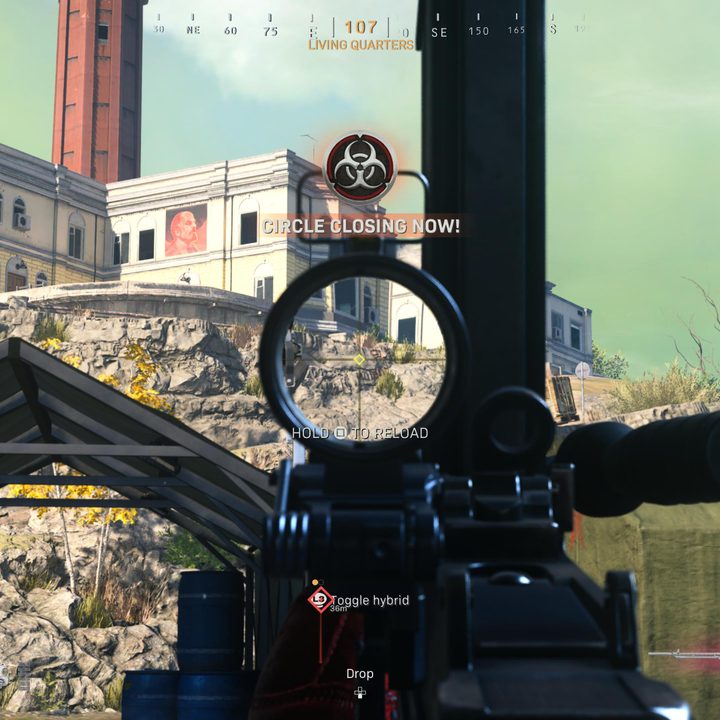
You can also use a third type of ping, which is sort of a hybrid of the two. By double-tapping up on the D-pad, a red marker will appear — which is useful for indicating that danger may be close. For example, if you know an enemy is in a building, but don’t see them and aren’t 100% where they are, double-tap up on the D-pad to signal a red marker ahead. Though, a regular marker works just as well (the third option is nice because it specifically denotes danger, though). However you use them, make sure you ping frequently and communicate effectively for heightened awareness.
Familiarize yourself with these items
Scattered throughout Caldera and Rebirth Island are numerous tools for you to use — all of which are there to help you achieve victory. Below, we’ll highlight the items you should be aware of, along with their icons that appear on the map.
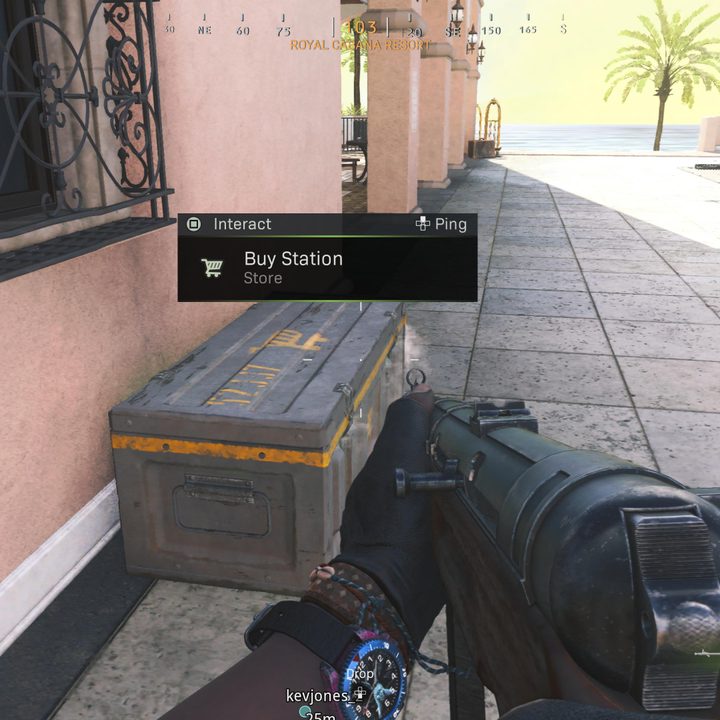
- Buy Station (shopping cart icon) — These appear in random locations around the map and are vital to your success. You’ll likely want to make frequent visits to get stocked up on armor plates, a Loadout Drop, Self-Revive Kits, and more. Make sure you pick up as much cash as you can while exploring so you can spend it at Buy Stations.
- Gas mask — Sometimes it’s unavoidable; you’re going to have to run through the gas at times. Ideally, you should avoid this at all costs, but sometimes — especially at the end of a match when the zone is very small — running through the gas can help you succeed. A gas mask can be purchased or found around the map. It gives you temporary immunity while in the gas, but it only lasts for 10 seconds or so. A Durable Gas Mask can also be acquired, though they’re harder to find, but last 15 seconds.
- Self-Revive Kit (medical icon) — A Self-Revive Kit is invaluable while on the battlefield. As its name suggests, it allows you to revive yourself, potentially freeing you up from danger. Always make sure you have one of these on hand, as it can lead you on the path to victory.
- Field Upgrades — Many of the Field Upgrades from Modern Warfare make their return in Warzone. These are temporary items that can be used at any time and include:
-
- Munitions Box — A deployable box of supplies that restores ammo, lethal equipment, and tactical equipment.
- Armor Box — A deployable box that grants five armor plates.
- Recon Drone — A controllable drone that is used to spot nearby enemies.
- Dead Silence — Grants you a temporary speed boost and makes your footsteps silent.
- Trophy System — A deployable item that sucks up any and all projectiles, from stuns, to grenades, and rockets. (Throw one on the hood of your car to make you immune to explosives while driving.)
- Deployable Cover — As its name suggests, a piece of cover you can place right in front of you.
- Nebula V Rounds — Gives your weapon one full clip of Nebula V Rounds, which give the same effect as tear gas.
- Radar Jammer — Blurs all opponents’ minimap nearby for 45 seconds. This also negates the use of offensive killstreaks.
- Killstreaks — Much like Call of Duty games in the past, killstreaks can be used in Warzone. You can find them as floor loot or purchase them from a Buy Station.
- UAV — Temporarily reveal anyone on the map within a certain radius (as long as they aren’t using the Ghost perk). Call in three UAVs at once to reveal all players, regardless of whether they’re Ghosted, along with the direction they’re facing.
- Cluster Strike — Call in multiple airborne mortars that rain down on a specific location.
- Precision Airstrike — Similar to the Cluster Strike, but much faster and comes in three waves. Best used after you down an enemy from afar. Call in the Airstrike to finish them (and their team) off.
Keep up with Warzone by following content creators
If you want to simply play Warzone casually, you can skip this step, but those looking to spend more time with it should absolutely follow certain YouTubers and content creators who cover the game. Doing so can be invaluable, as it’ll help you keep up to date with any forthcoming updates, meta changes, and general tips that will help you improve.
There are nearly an endless number of YouTubers who cover Warzone out there, but we’ve gravitated toward JGOD, TrueGameData, and IceManIsaac since they tend to break down the nitty-gritty aspects of gameplay and weapons. We don’t want to overwhelm you too much, but there’s a great deal of depth that goes into the weapons, their stats, and how they relate to one another, so following the aforementioned content creators will help.
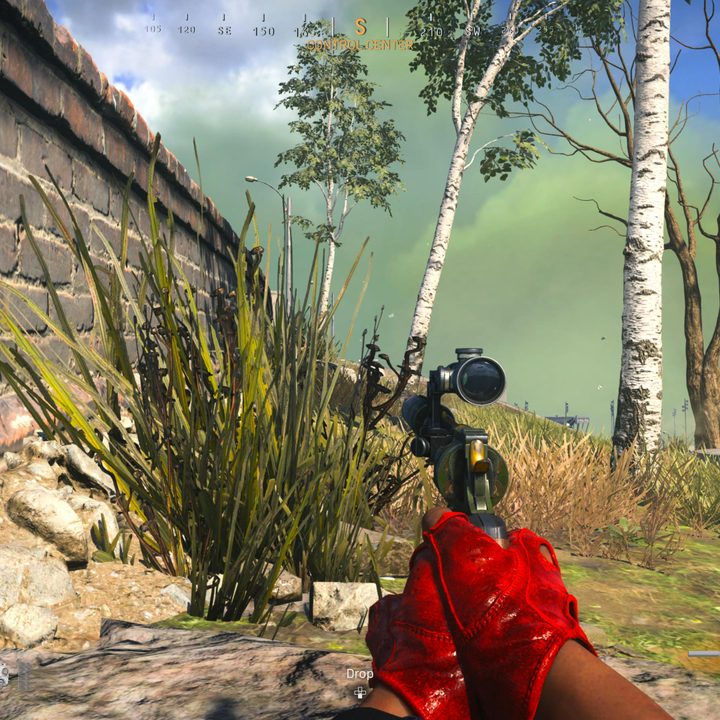
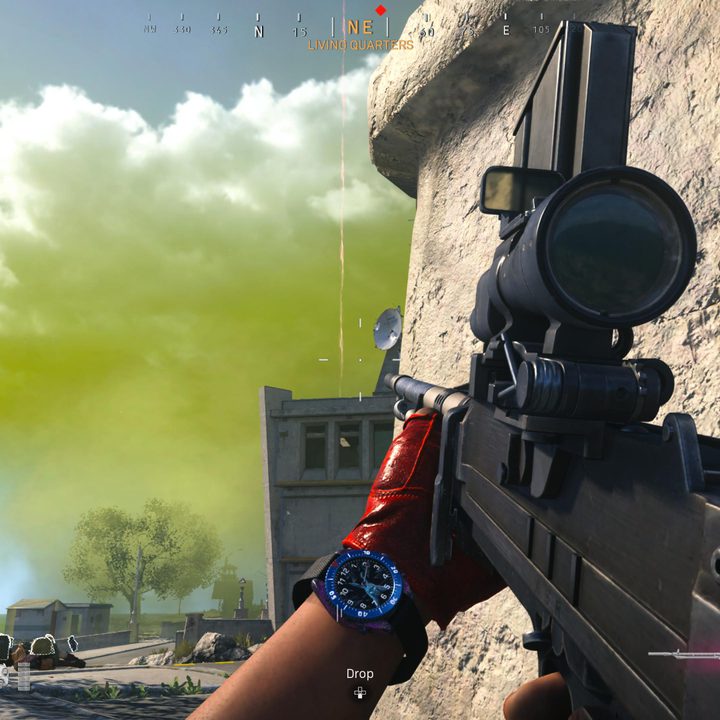
Use the gas to your advantage
This one is a lot more situational since the formation of the gas is random, but you can still do your part to make sure things go as smoothly as possible. Try and position yourself in such a way that your opponents have to come to you, allowing you to aim down sights and be ready. In the clip above, you can see what we mean. We got lucky in that the gas ended up pulling back toward us, but even if it hadn’t, we would have rotated to the opposite side to try to pick off enemies who were simply running to safety. If you’re waiting for them, they’ll be at a disadvantage since they’ll have to stop running and aim down sights before firing a shot. In short, be patient and let the gas bring the final enemies to you.
The flow of each match
When starting out in Warzone, it can be very overwhelming. There are tons of icons on-screen, a massive map to explore, 120 players to deal with, a slew of weapons with various attachments, and a deadly gas that inches ever closer to you as you play. While no two matches ever play out the same, there is a flow and rhythm you should be aware of — consisting of several phases that usually remain the same every game.
Having a set of goals to go toward can help you know what to do and if you achieve them — it can lead you to victory. With so many other players against you, anything can go wrong at any moment, but if you keep practicing, you’ll get better at executing the phases listed below.
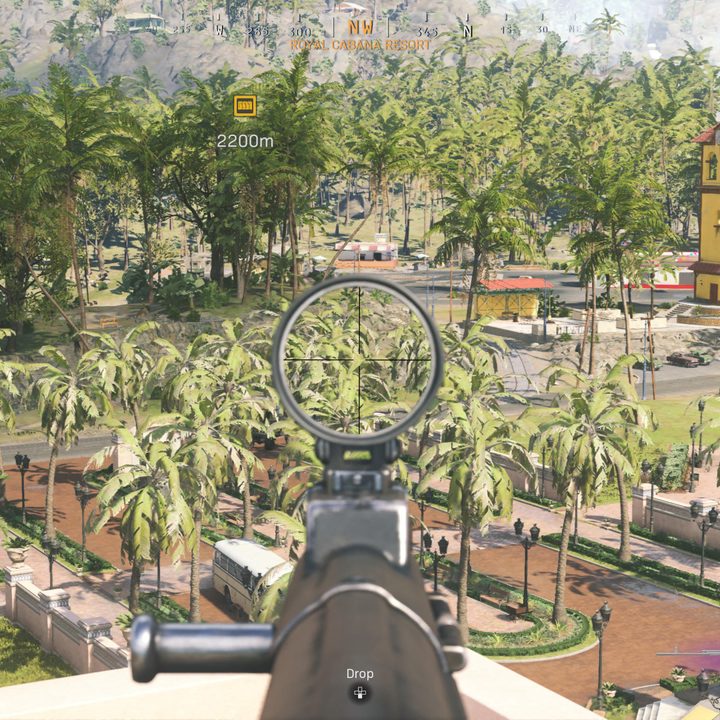
Phase one: Pick a good landing spot
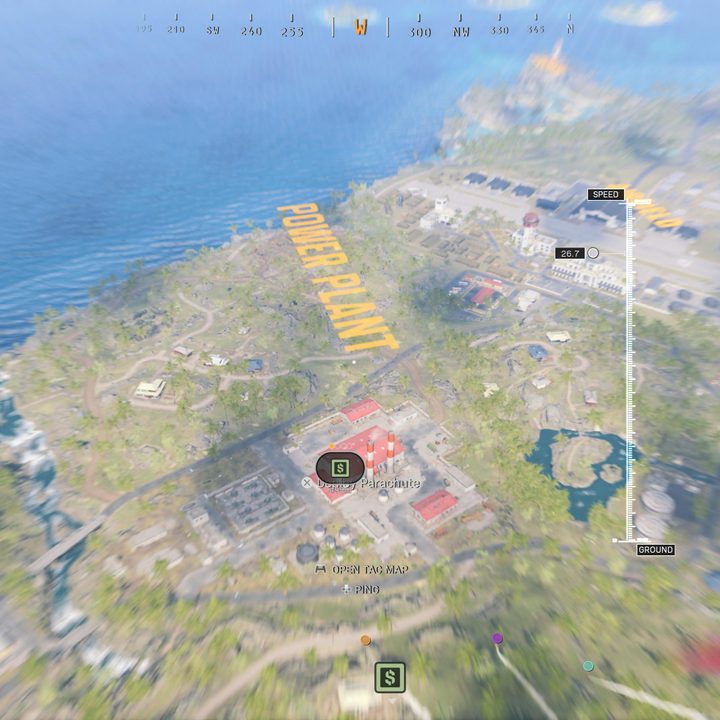
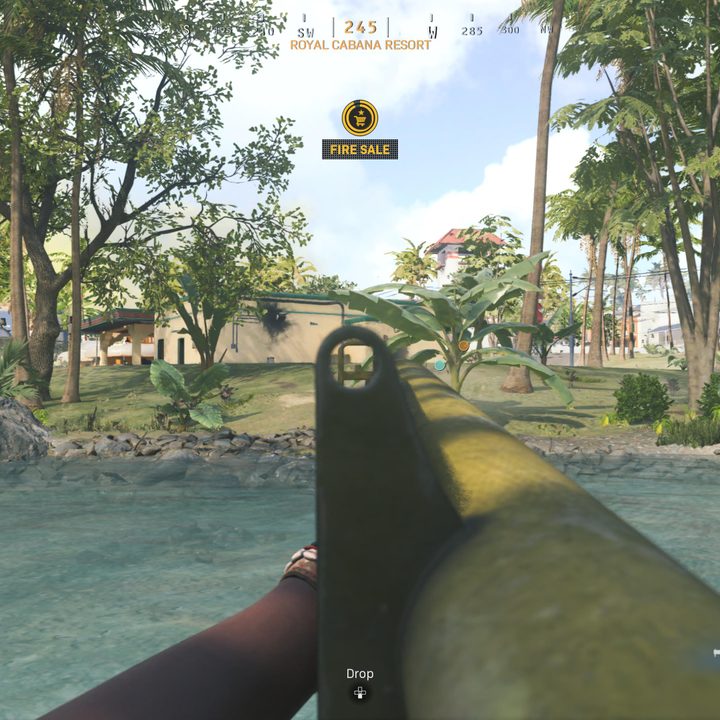
The very first thing you should do as soon as a match starts is to survey the map in relation to the plane’s path, along with the position of the first circle. There is no right or wrong place to land, but certain areas are better than others depending on your skill and play style. Some players tend to go for contracts (as shown above), while others might opt to prioritize areas with many buildings nearby. If you go for contracts, be aware that you have a much higher chance of encountering players — especially near Scavengers and Cash Drops.
It’s also a good idea to land close to a Buy Station. That way, when your team gets enough money, you can purchase things like a Loadout Drop, a gas mask, and killstreaks to help give you the upper hand. This isn’t as essential as it was before since you now have a chance of finding portable Buy Stations which can be placed anywhere but you aren’t guaranteed to find one.
You’ll want to land in a spot you’re comfortable with — preferably an area with lots of loot. But you also want to make sure you aren’t too far away from the inner circle. It’s often okay to land outside of the first ring, but just make sure if you’re really far from it, that you have a vehicle you can use to get to safety. While you’re skydiving to your position, try to pay attention to where other players are landing so you have a better sense of where your competition might be. You can even shoot them out of the sky with your handgun if you’re skilled.
Phase two: Loot and gather cash
Wherever you land, your goal should be to hit the ground running, gathering loot, opening chests, and collecting as much money as you can. Keep an ear out for the humming sound of chests and try your best to loot as much as possible. Hopefully, you’ll encounter a gas mask, armor satchel, and Self-Revive Kit, along with lots of money. The main reason you want as much money as possible is to acquire a Loadout Drop, which costs $10,000. Previously, it was recommended to prioritize getting $10K so you could get your Loadout quickly, but it doesn’t work that way anymore, sadly.
There are a few different ways you can come across money — one of which is to simply open boxes and explore every nook and cranny. You can find thousands of dollars on the ground or in chests, but typically, it’s tough to guarantee a large sum of money from just looting. The best way to get money is to complete contracts — specifically Bounties. Though, it’s high risk/high reward since you’re forcing yourself to push toward an enemy team that might be more skilled than yours. For best results, a combination of looting and working toward one contract will typically do the trick — even more so with a team of players since you can put your money together to grab your loadout.
As you loot and/or complete contracts, try not to get tunnel vision. It’s easy to stop focusing on your surroundings as you hunt for cash, but it’s important to still be aware of possible enemies who may be near. Loot as fast as you can and once you and your team have at least a combined $10K, head to the closest (or safest) Buy Station to secure your Loadout Drop.
Try and drop it in a location that is not out in the open. Some players opt to drop it on the roof of a building so they can secure it through the ceiling (an unintentional feature) while remaining hidden from nearby enemies. There are lots of techniques for calling in your Loadout Drop that are completely situational. If you know for a fact no one is nearby, it’s okay to throw your loadout in an open spot. But if you know a team will see you if you call it in the middle of a street, head to a building and trigger the Loadout Drop on the opposite side, so the red smoke that emits from the package is not visible.
At this point, it’s important to communicate with your team so you’re aware of who needs what. Make sure everyone has a gas mask, ammo, a Self-Revive Kit, and — if possible — a UAV or other killstreak. If someone is missing one of those things, get enough money so they can afford it and distribute your cash accordingly. If you have to prioritize certain items, we recommend going for a Self-Revive Kit first since a gas mask isn’t as useful during the early stages of the match (though, you will want to grab one soon).
Phase three: Start planning your route in relation to the gas/continue gathering loot and cash
So, you’ve gathered your Loadout, a Self-Revive, gas mask, and have a killstreak. Now what? Well, there are a few things you can do at this point, but the first thing you should determine is where the next zone will be. Pull up your map so you can get a sense of where to go next. Depending on your skill level and confidence, you can take this opportunity to start eliminating other players — but be aware that if you have your Loadout, other teams will, too.
Some players opt to complete Recon contracts at this point, to reveal the position of the next zone(s). Other players might camp in a safe space to avoid being killed. It’s up to you and your team, but regardless of what you do, you should have a plan. Make sure you don’t leave yourself stranded away from the next zone because you’ll get swept up by the gas. This stage should be used to gather as much money as possible so you’re stocked up on everything you need for the final stages.
Phase four: Get into position in preparation for the final circle
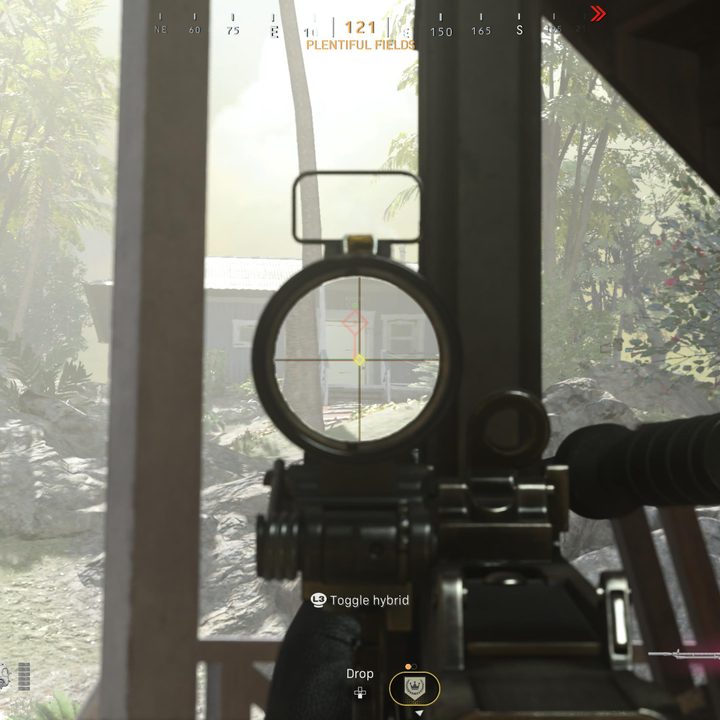
The second to last stage should be used to get into position so you can have the best vantage point of your enemies. Depending on the path you used to get to your current position, it may not always be possible to get the high ground. As you move from one zone to the next, you should rotate in a spiral or pinwheel motion instead of just moving in a linear fashion. This way, you can always use the gas as cover since you know no one will be coming from the side the gas is on.
At this point, you need to take note of how many players there are and try to get a sense of where they might be. In the image above, you can see that even though we were within the zone, there was still plenty of space behind us for enemies to come up, so it wasn’t the best position to be in. Though, based on a series of circumstances, that’s where we ended up. In the example above, an enemy actually did come up from behind, but luckily we were able to fend them off.
Once you get a sense of where your foes could be, you need to pay attention to the next zone and watch those potential problem areas as you move to safety. Try not to maneuver in a way that will leave you exposed and if you need to, run through the gas (this is why a gas mask is so important) to get to safety.
Phase five: Survive against the final batch of players
You’ve finally reached the final set of players. At this point in the game, you should understand where they’re located, whether by keeping tabs or the process of elimination. If you aren’t mindful of their location, you’ll be at a significant disadvantage. This is common, but we suggest doing your absolute best in the preceding level to determine where your adversaries will be later. Now, you should be observing their general area with laser focus.
If you’re fortunate enough to have surviving teammates, make sure you all understand where your enemies are hiding. Put on your full plates and grab enough ammo so you can go to battle with the last gang of evildoers. The best and safest thing to do is fire your shots as your foes are fighting each other. This is called “third-partying.” However, if it’s just your team against another, you’ll want to outmatch them to win the battle. Take a look around and observe how many players are still standing on your opponent’s team(s). It’s always best to be cautious no matter what, but the amount of caution depends heavily on your given situation.
We recommend positioning yourself behind cover to ensure that your enemies will run toward you. This will lead them out into the open, giving you the upper hand. With a little luck and skill, you’ll secure the right position to wipe out your enemy and snag the win.


