The Galaxy Note 8, the newest smartphone in Samsung’s Note series, is the stylus-touting phablet to beat. It sports a beautiful 6.3-inch curved screen, a powerful Qualcomm processor, and plenty of memory and storage to boot. It’s also the first of Samsung’s flagships to feature a dual camera.
But there’s a lot about the Galaxy Note 8 that isn’t immediately obvious. Don’t know where to start? Check out our Galaxy Note 8 tips and tricks guide to help get the most out of the phone, including camera tutorials and nifty S Pen tricks. For more information about Bixby, the AI-powered assistant that ships on the Galaxy Note 8, check out our in-depth guide.
How to get free books and more with Made for Samsung apps

It’s easy to write off the “Galaxy Apps” app as a Google Play Store wannabe, since it carries most of the same apps as Android’s standard marketplace. However, it’s worth checking from time to time, as Samsung’s own app market often carries specialist versions of apps, either modified to work better with Samsung’s devices or provide special offers for Galaxy owners. We’ve collected some of our favorites in our Best Made for Samsung apps list.
Some of the most notable examples include a free ebook each month on the Kindle for Samsung app, special S Pen support in CNN’s app, and free trials of workout services from Workout Trainer. Also, if you’re an avid Dex Station user, then you will find apps specially tweaked to work with the Note 8’s desktop mode.
How to get more from your USB-C to USB-A OTG adapter
You might have noticed a funny little adapter when you opened up your Note 8 for the first time — that’s the USB-C to USB-A OTG adapter, and Samsung intended it for use with Smart Switch, which is designed to help you transfer data from your old phone to your new Note 8. But that isn’t all this thumb-sized wonder can accomplish.
Using this little adapter, you can transfer files to USB thumb drives, game with wired gaming controllers, or attach external accessories — like microphones, keyboards, or mice — to your Note 8. We’ve published a list of the coolest uses for the OTG adapter, and it’s definitely worth checking them out in your daily life.
How to use Bixby
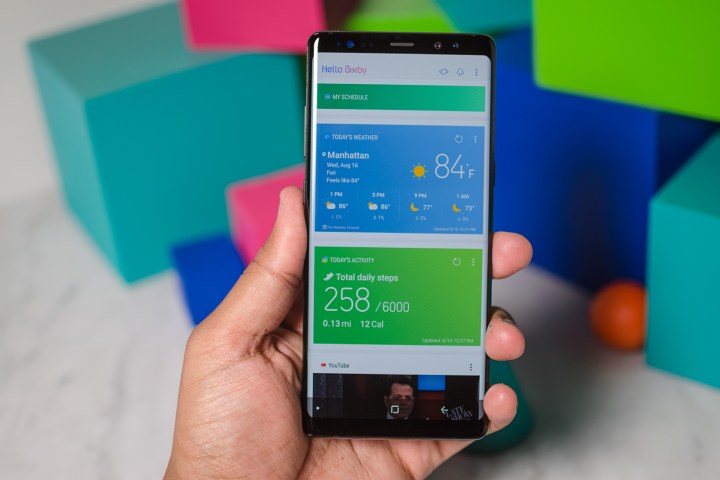
Love it or hate it, it seems like Bixby is here to stay. With a dedicated button on the side of every Note 8, Samsung’s artificial intelligence assistant is a click away at every moment, ready to cast content, set reminders, and a plethora of other voice-activated commands that could only be used with an assistant so tied into your phone — for instance, Bixby can be asked to scroll down a webpage, or set your display off time to 10 minutes. To activate Bixby, hold the Bixby button, or just say, “Hi Bixby”.
But there is more to Bixby than voice commands — you can also have access to Bixby Home, a collection of flash cards with local weather, news, and other content that Samsung’s butler thinks you will find interesting. It will learn your schedule too, so if you call the same person every day at the same time, it will try to give you their contact information just before you need it. Samsung has also loaded Bixby with the ability to see, thanks to Bixby Vision. Just point it at a product or barcode, and it will give you relevant links and stores to buy from.
But Bixby can be as overwhelming as it is useful and being sent to the Bixby Home screen every time you accidentally tap the button can get annoying. Thankfully, Samsung has included the ability to shut off the Bixby button’s function. Just access your Bixby Home (on purpose this time), hit the Settings cogwheel in the top-right corner, then untick the checkbox that pops open. You will still be able to hold the button to talk to Bixby — you can’t turn that off yet — but it will be much harder to accidentally trigger it.
We have written loads more on Samsung’s A.I. assistant, so check out our detailed guide to Bixby if you would like to know more.
How to keep an eye on your health with S Health

S Health is a pretty good fitness tracker — but it’s also so much more. Thanks to integration with WebMD and AMWell, S Health can help you to keep an eye on symptoms, find local doctors and pharmacies, and even book an appointment. Following your appointment, you can even keep track of your prescriptions, upcoming appointments, and insurance details — and get quick access to emergency services if needed.
How to customize Do Not Disturb mode
Do Not Disturb mode is great for times when you absolutely don’t want to be disturbed, but it’s something of a blanket option. If you need to be a bit more selective with your Do Not Disturb mode, then the Note 8 has the tools to help.
To allow selected contacts and apps to break through the Do Not Disturb barrier, head to Settings > Sound and Vibration > Do not disturb > Allow exceptions, and select which contacts, apps, or alarms you want to be able to disturb you.
How to set up Edge Panel
You can use the curved edges of the Galaxy Note 8’s screen, which Samsung refers to as the Edge panel, to free up space for notifications, shortcuts, and more. Here’s how.
Head to the Galaxy Note 8’s Settings menu and tap Display. It’s here you’ll find Edge panels, which puts useful tools and shortcuts on the Note 8’s sides, and Edge lighting, which alerts you to notifications with a glowing strip around the Note 8’s screen.
The Edge lighting sub-menu offers greater customization. Don’t want Edge lighting to appear when the screen’s on? No problem. Want to change the Edge lighting’s width and transparency, or adjust its color? You can do that too.
Dive into the Edge panel menu and you’ll find a wealth of shortcuts, apps, and third-party utilities to fill the screen’s sides. Apps edge puts a list of app shortcuts at your fingertips. People edge gives you one-tap access to important contacts. Clipboard edge shows a list of items you’ve recently copied. That’s just the tip of the iceberg — there’s plenty more to download from Samsung’s Galaxy Apps store, including third-party panels from Yelp and CNN.
How to set up an App Pair
One of the Note 8’s most useful new features is App Pair, which lets you launch two apps in split-screen mode. But it requires a bit of setup.
Open the Edge panel by swiping from the left or right edge of the Note 8. Tap the gear icon at the bottom, and find Apps edge. At the top, you’ll see a Create app pair option. Tap it, and you’ll be presented with a list of apps. Pick any two split-screen compatible apps from the list, and check the Apps Edge panel again — you’ll see a new menu item created from the two shortcuts you just paired.
How to use the Dual Camera features
- 1. Live Focus Mode
- 2. Normal Mode
The Galaxy Note 8’s rear camera has twin 12-megapixel sensors, which are the world’s first with dual optical image stabilization (OIS). Thanks to this feature, the Note 8’s camera app is incredibly versatile.
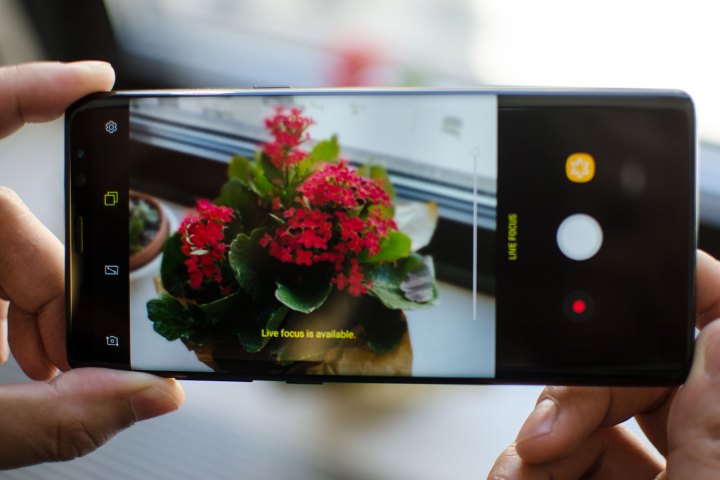
Take Live Focus for instance. A tap of the Live Focus button switches the rear camera to the telephoto lens and adds bokeh, the iPhone 7 Portrait Mode-like effect that blurs the background while sharpening the foreground. You can adjust the intensity by moving the slider to the right or left, and get handy messages when the subject’s too far away (“Live Focus is not available due to shooting conditions”) or the lighting’s less than ideal (“Can’t use Live Focus. Not enough light”). You can also edit the strength of the blur after you take a photo.
The Note 8 camera’s other cool trick is Dual Capture, which works in tandem with Live Focus. While the Live Focus effect relies on the telephoto lens, Dual Capture automatically takes a photo with the wide-angle lens, ensuring you don’t miss anything in the frame. It’s two shots at once with the press of a shutter button. That way, you have the wide angle shot to fall back on if the bokeh effect doesn’t come out well.
To use it, tap the Live Focus button, then tap the Dual Capture button — the one that looks like two sheets of paper stacked on top of each other. Next time you take a Live Focus shot, check the Note 8’s Gallery app to view all versions of it. The Live Focus picture will have two options: Adjust Blur, and Normal Picture. The latter will let you see the wide-angle version of the photo.
There’s more to the Galaxy Note 8’s camera app than Live Focus and Dual Capture. Tap on the gear -shaped Settings button to change the Note 8’s picture and video resolution, toggle on/off high-dynamic range (HDR), record a short video clip before each picture (Motion photo), take a photo with voice controls, and more. Or tap on Stickers for Snapchat Lens-like rabbit ears, hats, text, and other fun augmented reality effects that automatically follow your face.
How to use the S Pen and its features
The Galaxy Note 8 wouldn’t be a Note without an S Pen, and Samsung’s newest stylus can do more than ever before.
One of the newest features is Live message, which lets you sketch or write handwritten messages on photos (or plain backgrounds) and send them to anyone in your contact list as a GIF. To use it, grab the S Pen, which will automatically launch the Air command menu, and tap the Live message icon. You can adjust the stroke style, color, and thickness using the controls on the left-hand side, or add a backdrop from your photo gallery by tapping the Background button. Sketch to your heart’s content, and press done. It will convert to a GIF, animating what you sketched, and you can share it to any social media app or messaging app that accepts GIFs.
Screen-off Memo, which lets you scribble down out notes on the Galaxy Note’s always-on screen without unlocking it, is improved on the Galaxy Note 8: Samsung’s bumped up the maximum number of pages to 100. Try it yourself by opening the Galaxy Note 8’s Settings menu, tapping Advanced Features > S Pen, and toggling on Screen-off memo. To trigger it, take out the S Pen when the Note 8’s screen is off. You can now write on the screen. When you run out of space on a page, tap the downward-facing arrow button in the bottom-right corner to pull up a new blank page.
The best part is you can pin these notes to your always-on screen for easy access. To do this, find the pin icon at the top of the screen and tap it. You’ll just need to confirm it once more, and you’ll now see the note you wrote on your always-on screen.
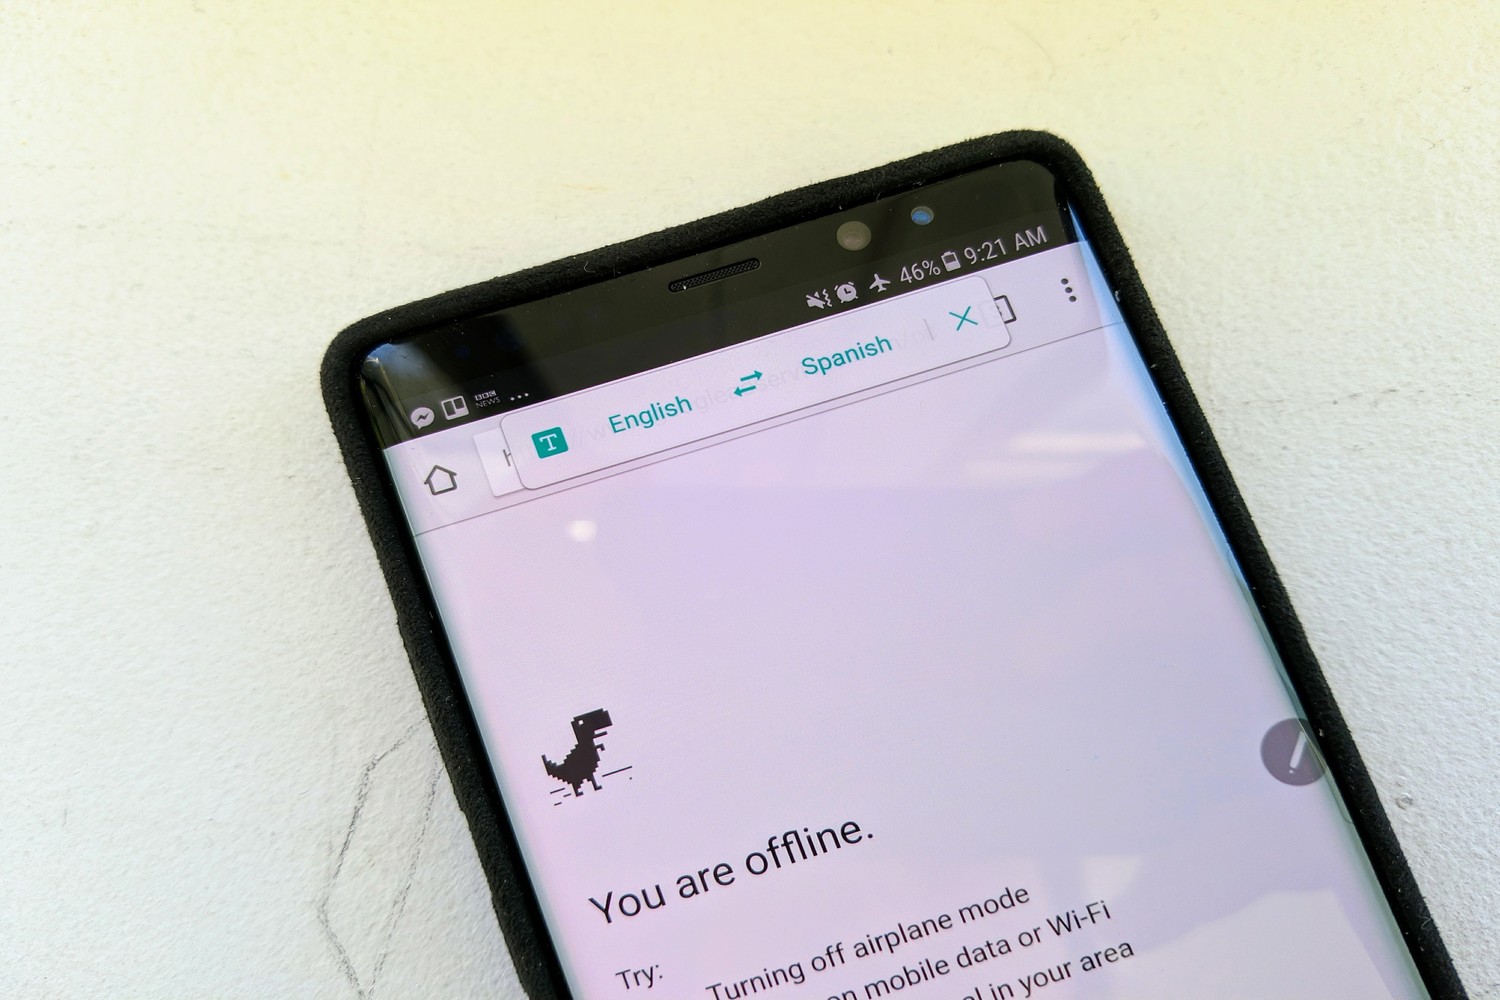
The Galaxy Note 8’s Translate feature, which debuted on the Note 7, automatically translates words, phrases, or entire paragraphs to the language of your choice. Activate it by pulling out the S Pen and tapping the Translate button from the Air command menu, and use the floating Translate menu to change the target language. Hover the S Pen over text, and a pop up will show the translation.
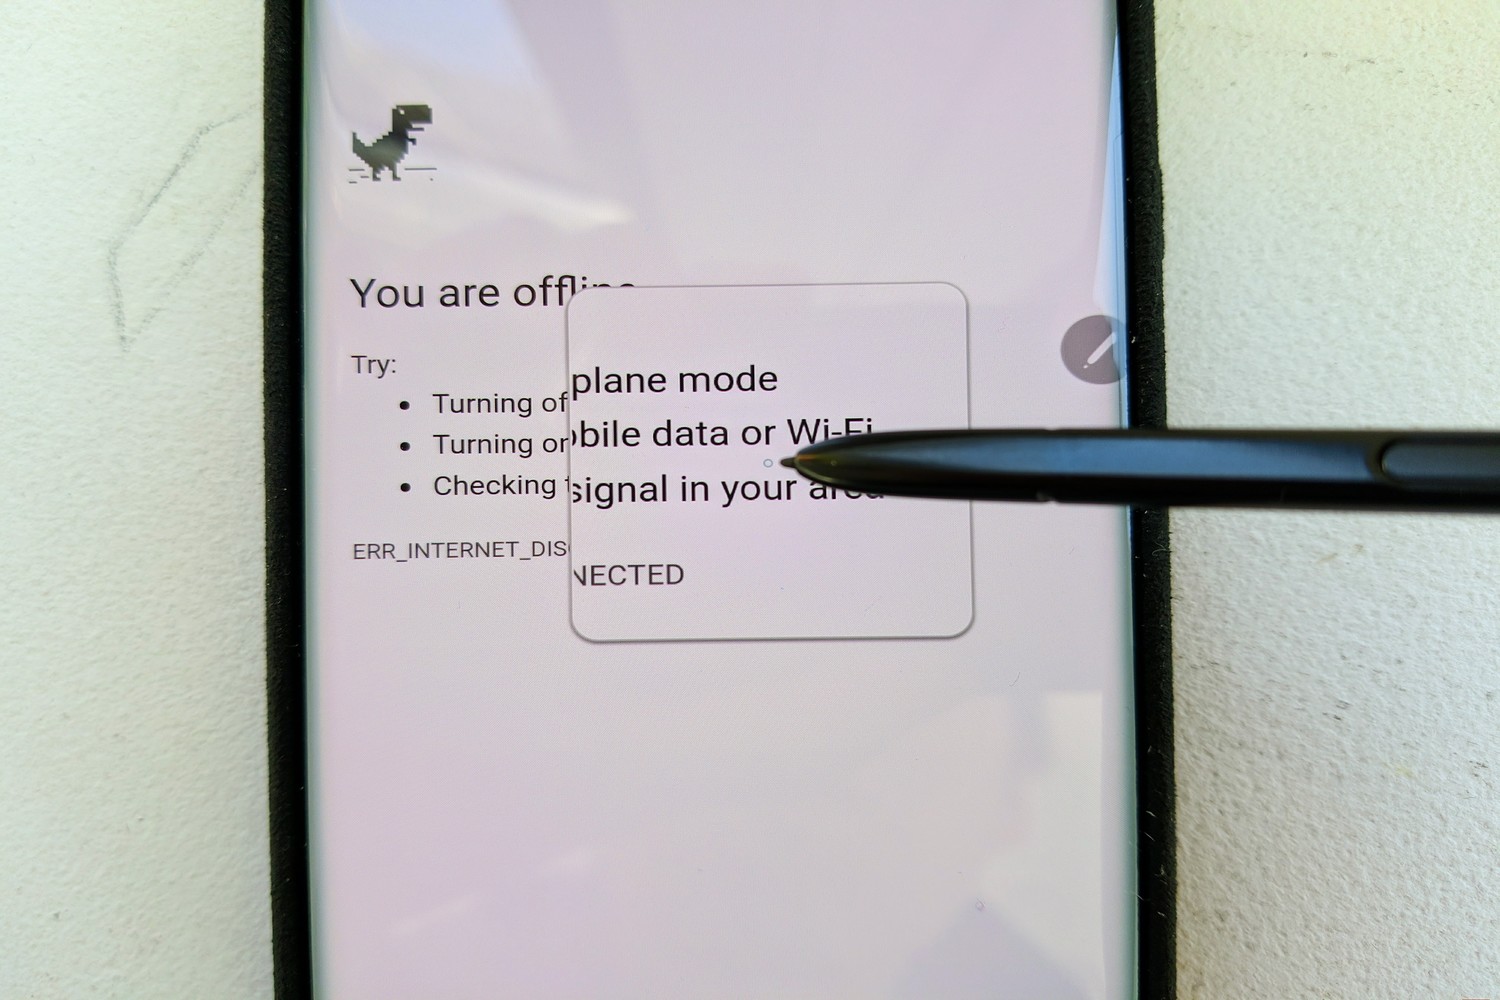
If you’re having a tough time making out text on the Galaxy Note 8’s ultra-detailed screen, you might want to give the Magnify tool a try. It’s a digital, square-shaped magnifying glass that enlarges parts of the screen. Activate it by opening the Air command menu and tapping the Magnify button. (If you don’t see the Mangify button, tap on the plus (+) icon in the Air command menu and add the Magnify button from the list of shortcuts.) If the magnified area isn’t big enough for you, try messing with the zoom percentage in the Magnify control bar.
Take a lot of screenshots? Give Smart Select a go, which lets you snapshot, save, and send any portion of the Galaxy Note 8’s screen. Activate it by pulling out the S Pen and tapping the Smart Select button from the Air Command menu, and then tap and drag around the area of the screen you’d like to “cut.” You’ll get the option to doodle on top of what you’ve copied, share it to another app, set it as a wallpaper, save it to your gallery, or automatically extract any text from it.
How to make apps use the full screen
The Galaxy Note 8’s curved AMOLED Infinity Display is colorful, vibrant, and all-around gorgeous, but it’s also slightly taller than average. The result is an unusual 18.5:9 aspect ratio that poses a challenge for apps, games, and videos, most of which were designed for a standard 16:9 ratio.
Normally, the Note 8 simply pads the top and bottom of the screen with black bars. But if you’d rather force apps to conform to the Note 8’s dimensions, good news: There’s a setting for that.
Head to Galaxy Note 8’s Settings menu, and then tap Display. Scroll down until you find Full Screen Apps, and tap the toggle next to the apps you’d like stretched to full screen.
If scrolling through a long list of apps doesn’t sound appealing, there’s another way. Periodically, when you open an app or video that supports the Note 8’s ratio, you’ll see a button that expands it with a single tap. (Look for “Tap here to fill the screen.”) If that doesn’t happen, open any app, tap the Recent apps button in the navigation bar, and look for the enlarge app icon (a green icon with two arrows) in list of recent apps. Tap it to force the app to open in full screen view.
How to set up face, iris, and fingerprint scanners
The Galaxy Note 8’s biometric sensors offer a quick, convenient alternative to passwords and PIN codes. Here’s how to set them up.
Face Recognition uses the Note 8’s front-facing camera to lock your phone to your facial features.
Head to the Galaxy Note 8’s Settings page and tap Lock Screen and Security, then Face Recognition. You’ll be prompted to set up a PIN, passcode, or password if you haven’t already, and you’ll get the option to enable “faster” (but less secure) facial recognition if you choose. Finally, you’ll be asked whether you want the Note 8 to hide or show content on-screen when the phone’s locked.
Face Recognition may be convenient, but it isn’t particularly secure. For a safer hands-free solution, try the Note 8’s iris scanner by opening the Settings menu, heading to Lock Screen and Security, and tapping on Iris Scanner. Once you’ve registered your irises, you can use them to login to websites and apps that support Samsung Pass, or to authenticate payments with Samsung Pay. Keep in mind that iris scanning might not work consistently if you wear glasses or contacts, and that it sometimes has trouble in direct sunlight.
Don’t trust iris scanning or facial unlocking? There’s a third solution: Fingerprint scanning. Open the Note 8’s Settings menu, look for Lock Screen and Security, and follow the steps to add your fingerprint (or multiple fingerprints, if you like). Once you’ve done that, you’re free to set up fingerprint authentication for Samsung Pass and Samsung Pay, or to use it in conjunction with face recognition or iris scanner.
